During COVID I have heard a lot of buzz. Buzz about tire shortages. Buzz about complete bike shortages. Buzz about SRAM and Shimano drivetrain part shortages. But through it all, the buzz that perked my ear was the buzz around Microshift’s Advent X. Cheap and quality drivetrain parts that were actually available during the pandemic!
Perfect timing too because my SRAM GX 10 speed stuff had seen better days. The derailleur has met the ground a few too many times (as did my body) over the 2+ years that I had been riding it. The shifter for some reason seemed to lose tension in the clock spring inside making the chain ghost shift on me when in the smallest 2 cogs.
I was interested in the Box 9 Prime group but began hearing the Advent X name comparing the two in YouTube videos.
A wide range (11-48) 10 speed group for ~$170!Shit, even if it doesn’t last, why not!?!? So I took my time ordering each part when it was in stock and a month later I was all set to do the swap!
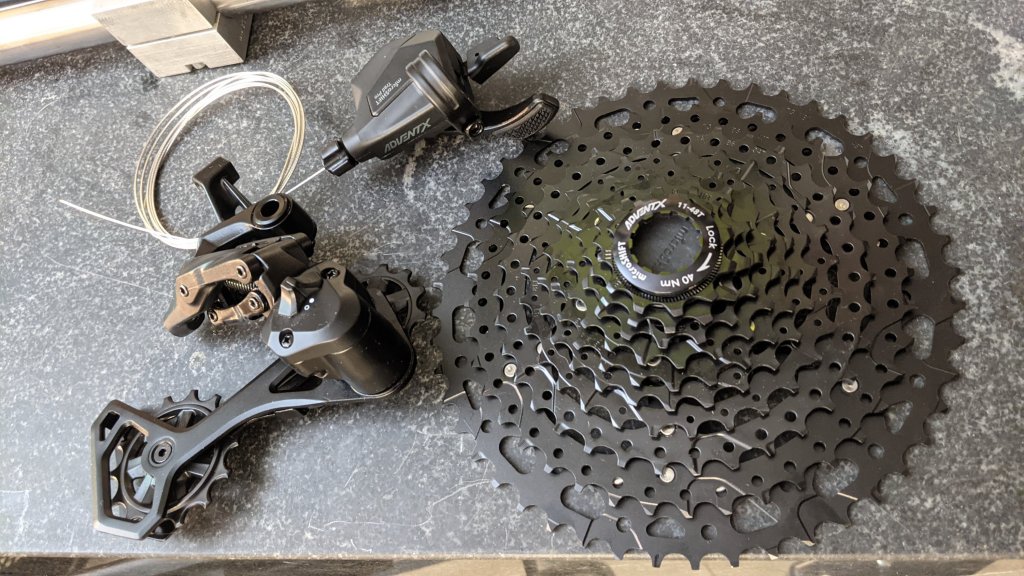
First thing to note is the minimalist packaging! Simply an unbleached cardboard box! I just wish they didn’t put the parts in a plastic bag! But anyways, hats off to reducing packaging in the bike world Microshift!
In just playing with the parts the first thing to note is the ratcheting clutch. The clutch is nice and firm. I don’t get why the ratchet is necessary but there’s a lot of things in life I just accept and move on. Haha!
The shifter has a great feel to it. Thumb that grippy pad and go up 4 gears in a full stroke! I tend to use that often when on unfamiliar trails. The lever isn’t as long or close to my hand as the old SRAM GX shifter was and I kinda like that. I do have larger hands and like my levers 1.20″ inboard from my grips so if you have smaller hands you probably don’t set your controls up like I do and you’ll be fine.
The 11-48 cassette is pretty rad! 10 speeds are naturally lighter than 12 so there’s some weight savings there and the alloy spider pinned to the 3 largest steel cogs also helps. The price is what blows me away! 65 frikin’ dollars!!!!
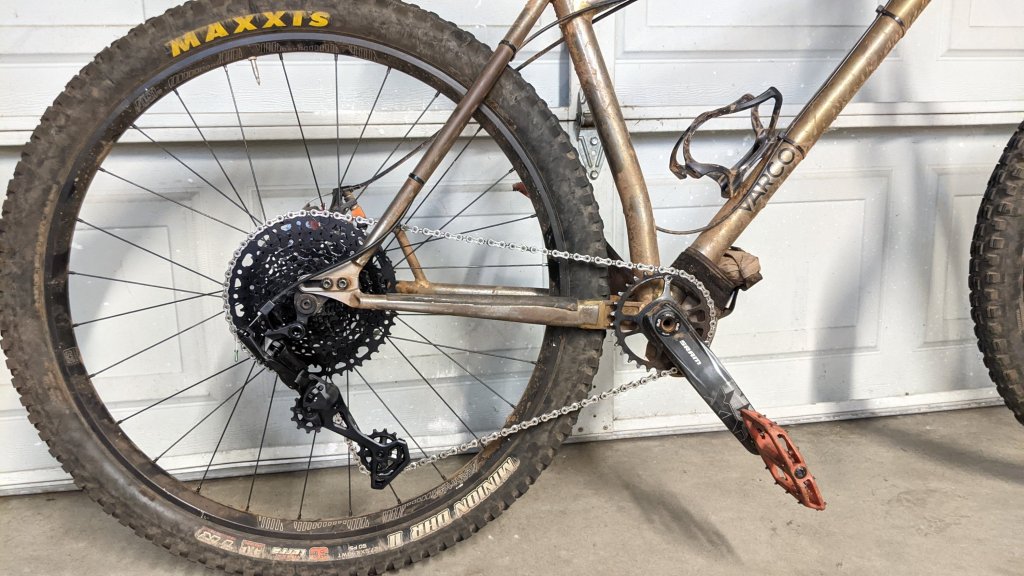
Assembly was as expected, blah blah blah… but what got me was that I torqued the cable in the derailleur and after setting the limits it shifted up and down the cassette perfectly. Luck? I think so!
Next day I took it up a longer (by my standards) climb and it needed the slightest tension adjustment which was done while on the bike. That’s it since then. Shifting is firm and positive. You know you shifted based on the firm click in the shift lever.
The range is great! My old GX derailleur was only able to handle a 36t cog according to SRAM but it is regularly used with up to a 42t. I was running the Sunrace 11-40 cassette. Wow, 8 extra teeth are really appreciated!
I haven’t heard the chain slapping the chain stay at all so that ratchet clutch must be doing it’s thing.
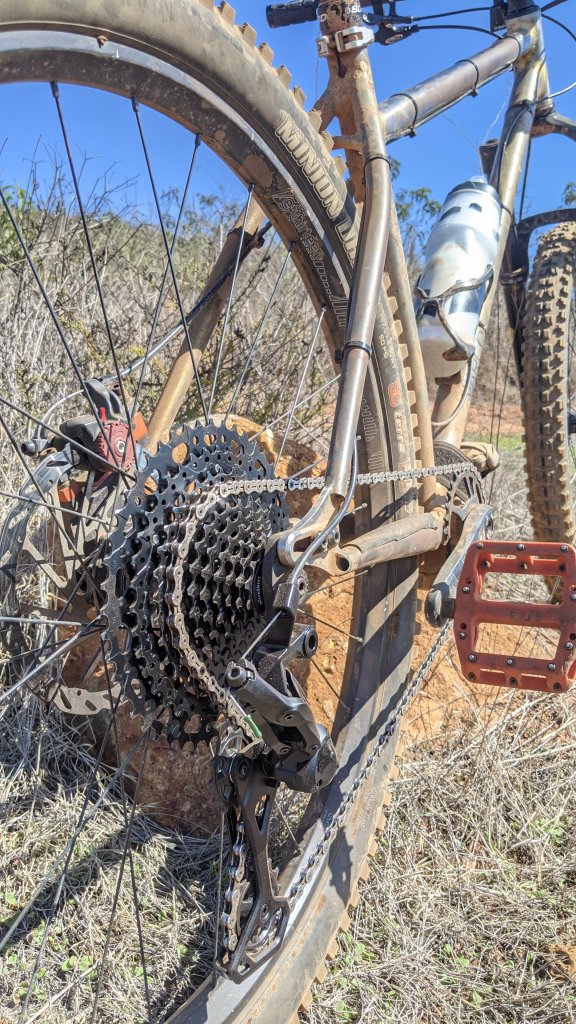
So far the group has done about 4500 feet of climbing with ZERO issues! I’ll update this in a few months (Say February 2022-ish?) and we’ll see if I still feel the same. I hope I do because what a great initial impression! I mean, if this budget group lasts as long as the big boys, what a great thing for consumers!
Till then, stay safe, believe in science, love your neighbor, try black coffee if you don’t already do that, hug your friends, donate your old clothes, recycle shit, tell your significant other they’re hot more often, listen to other points of view, eat your veggies, pet your dog, jump on a trampoline, actively try to use less plastic, hold the door and wave at people when you ride by even if they don’t wave back because fuck it! Why not!
Growing up on BMX bikes, I always loved a bike that was responsive, accurate, quick and maybe even a little twitchy. Somehow I went from BMX bikes straight into road bikes, completely skipping mountain bikes, the next logical step. But in the past few years I’d kinda been missing the more “sendy” ride of a BMX bike.
But before this, MTB’s just didn’t seem that interesting to me. I tooled around on a couple at bike shops and demos years ago but they never really sparked my interest. They were heavy and the suspension just seemed to suck the energy out of every move you made.
I had written MTB’s off. Well, fast forward, like forever, I own a fat bike. Not only do I own one but I really like it!
Then my eye catches a few hardtail’s on Instagram, YouTube and Facebook! Myth, Meriweather, Cobra, Cromag, BTR, Orange, Fuck Yeah Hardtail on IG, Hardtail Party on Youtube and others… Simple and nimble looking. The 27.5’ers in particular.
Fast forward to August 2020, I already have the frame planned out, we live back in San Diego and I’m riding beautiful trails on the fat bike. Time to get going on this hardtail!
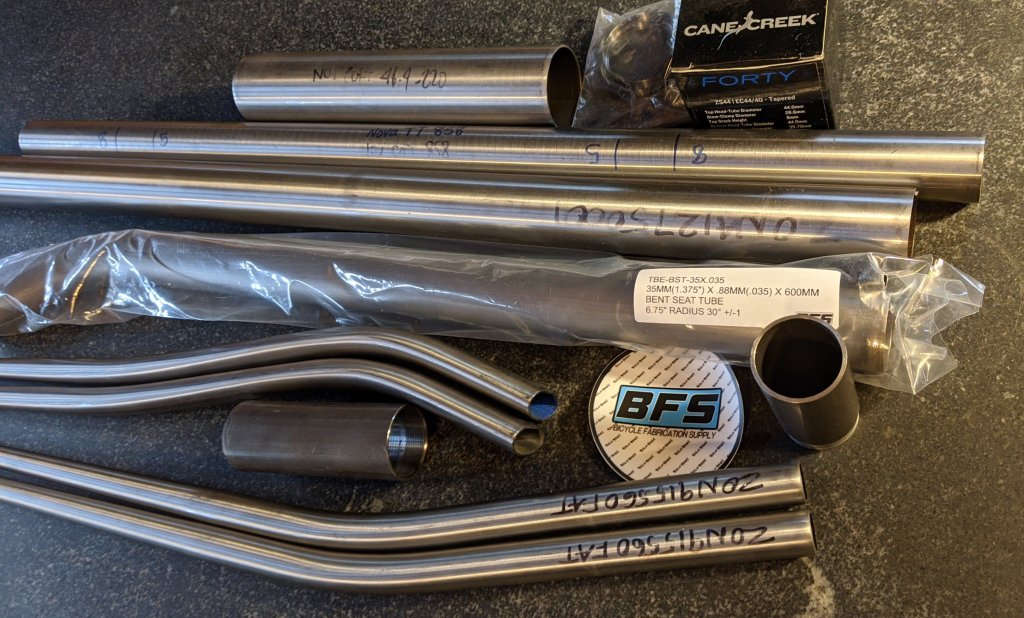
I began to use a new tube supplier! Bike Fab Supply! Andrew has been so great with communication and quick shipping.
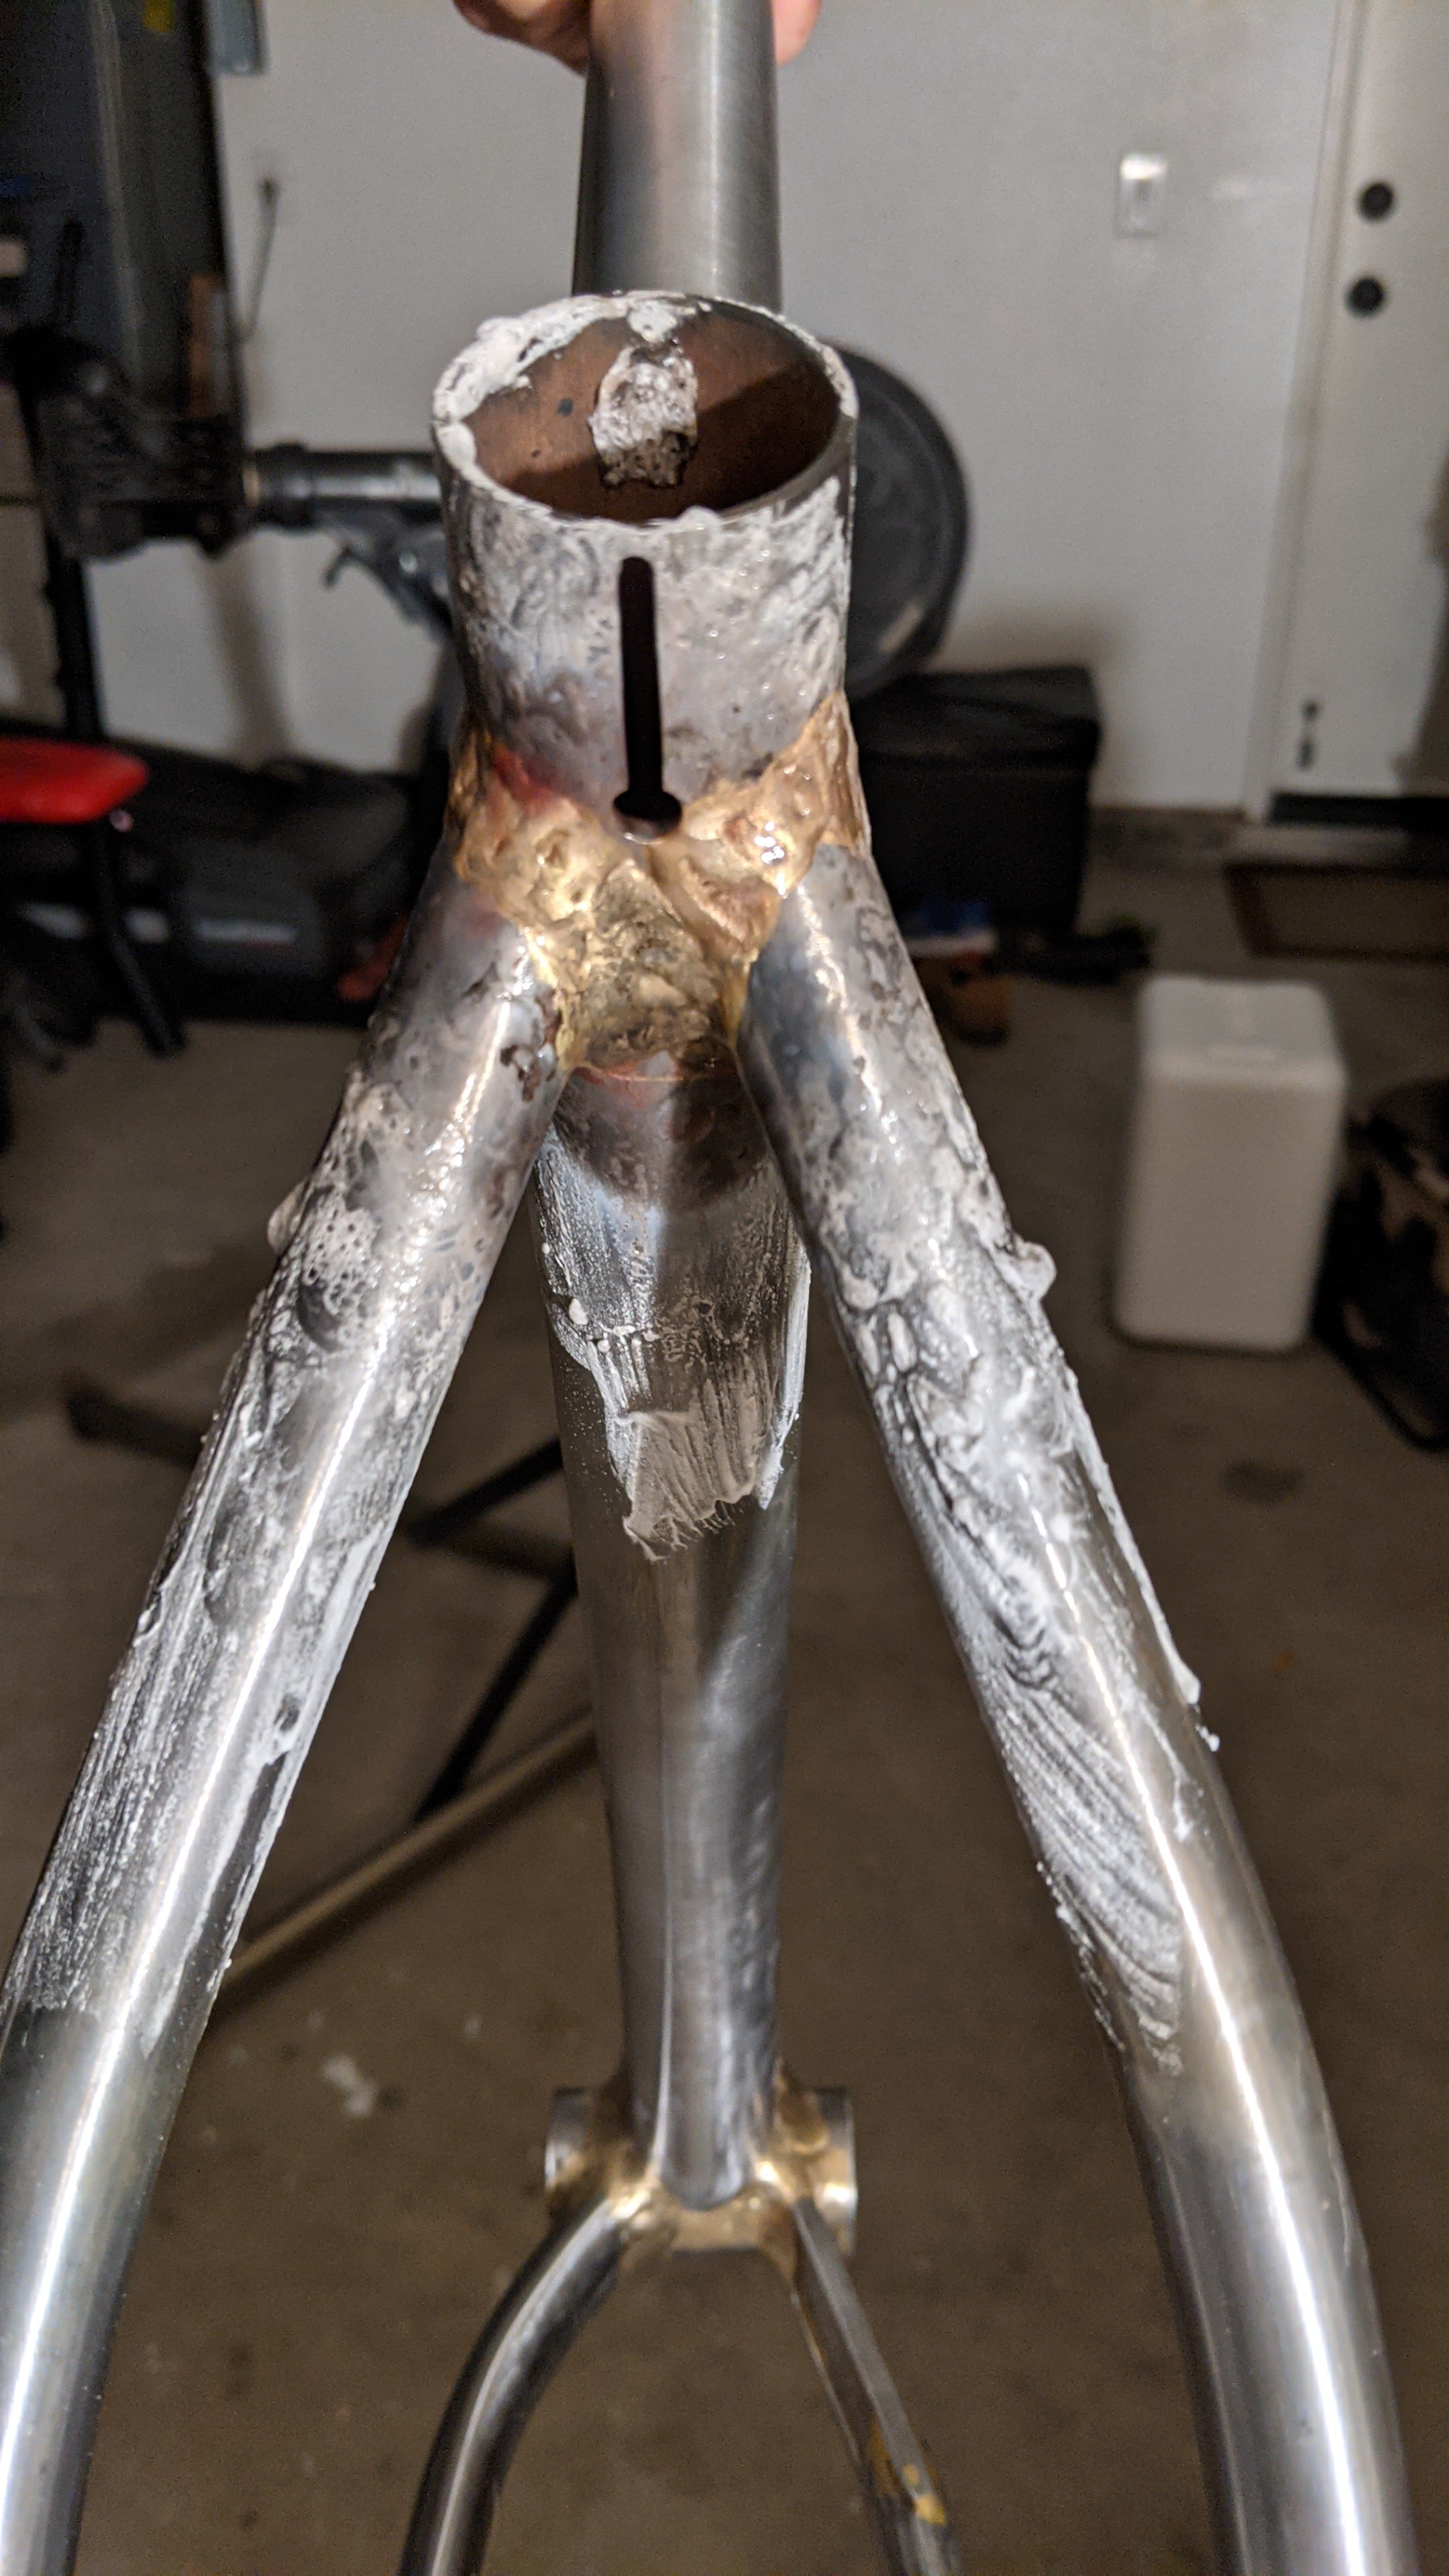
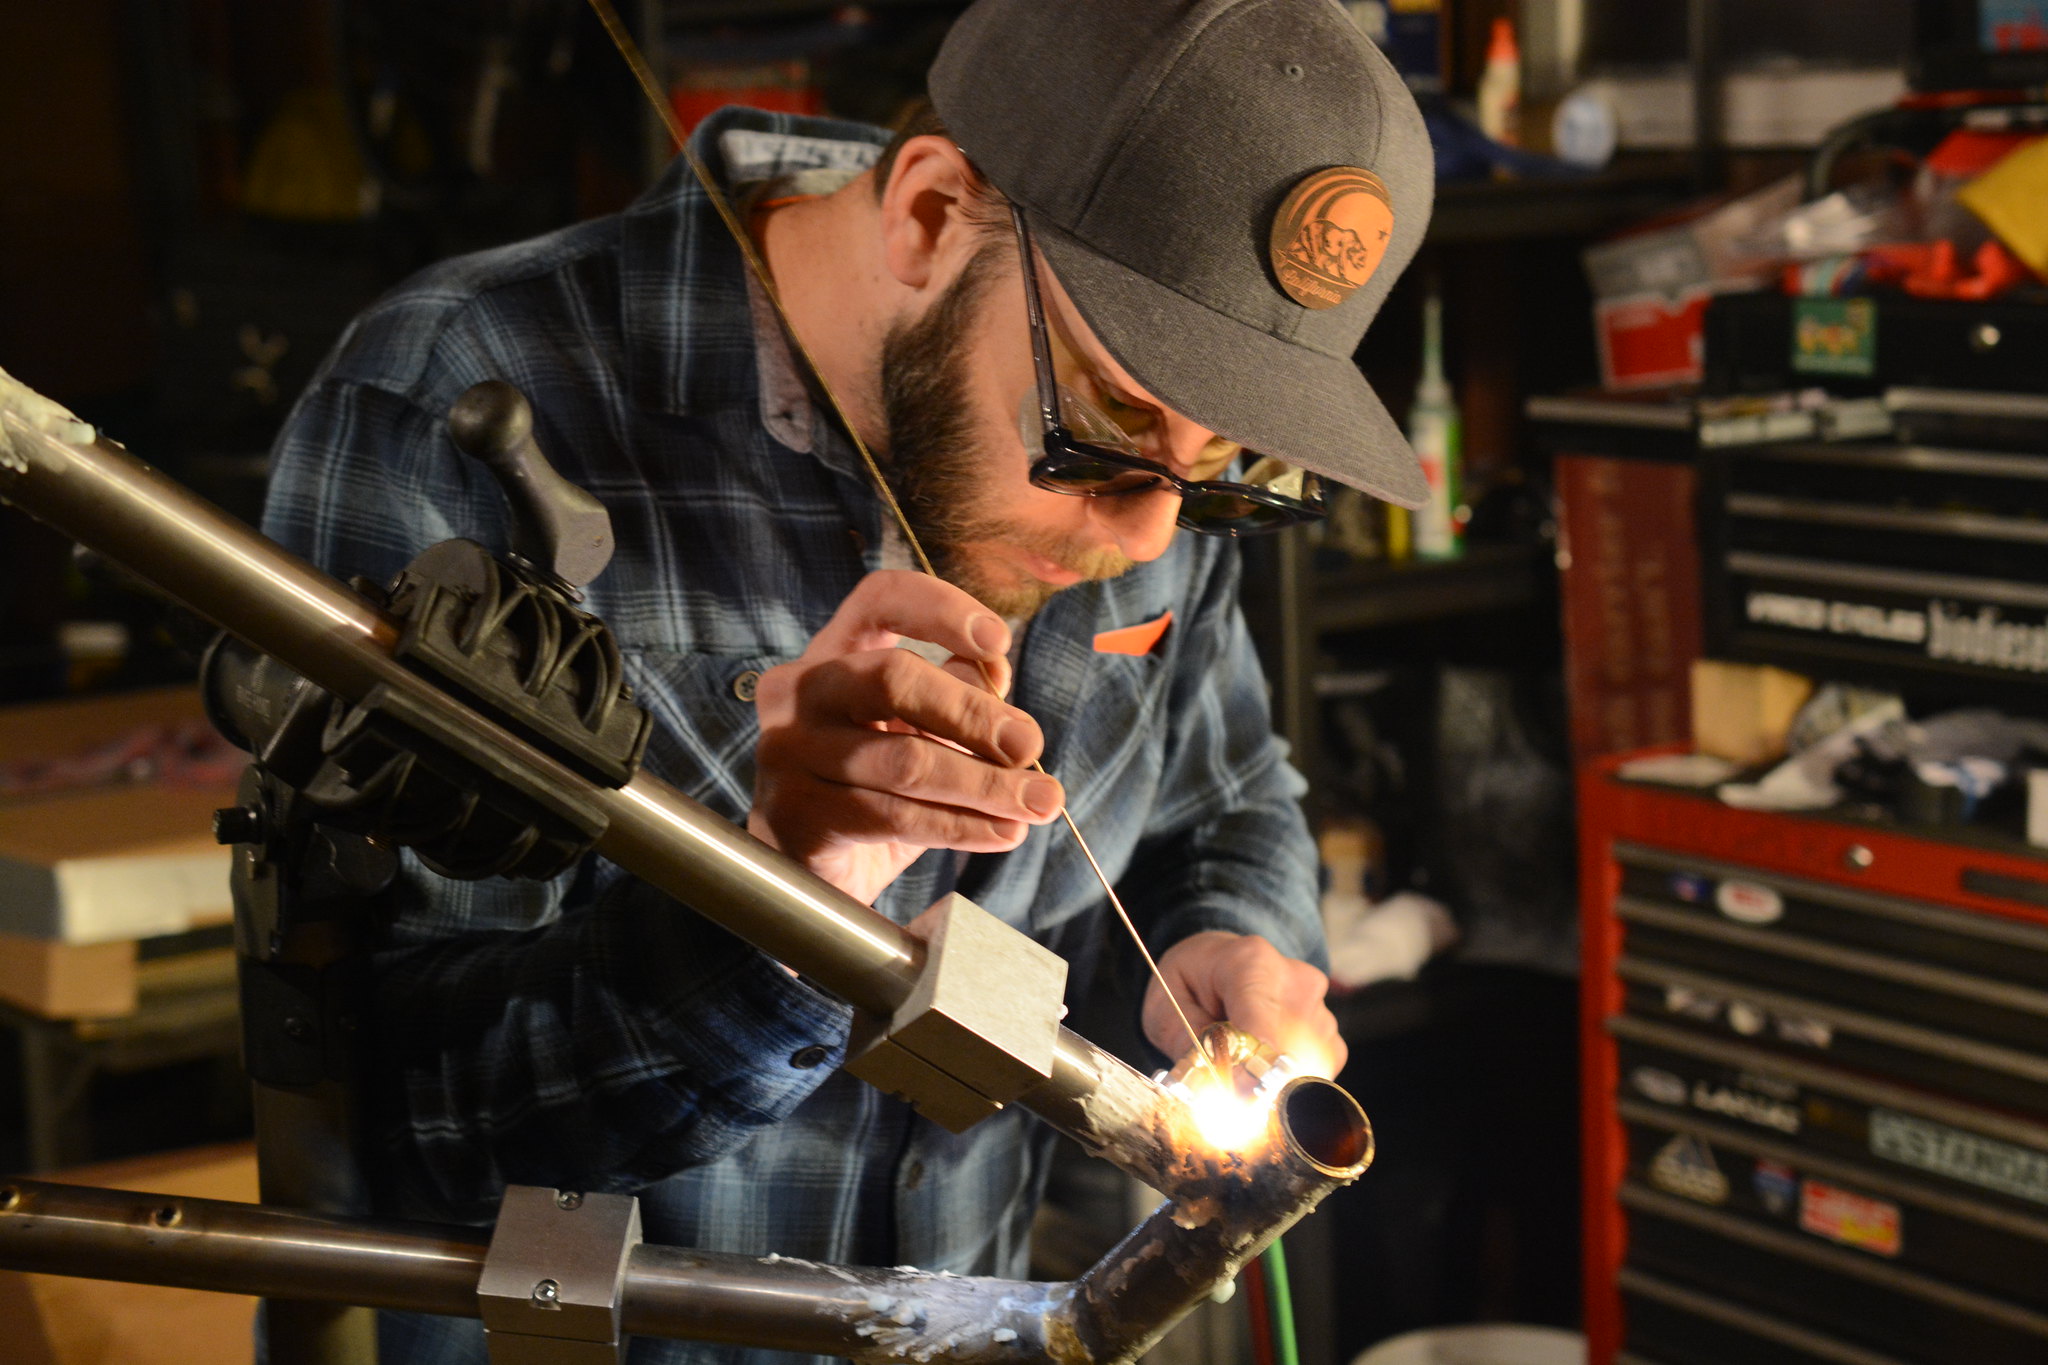
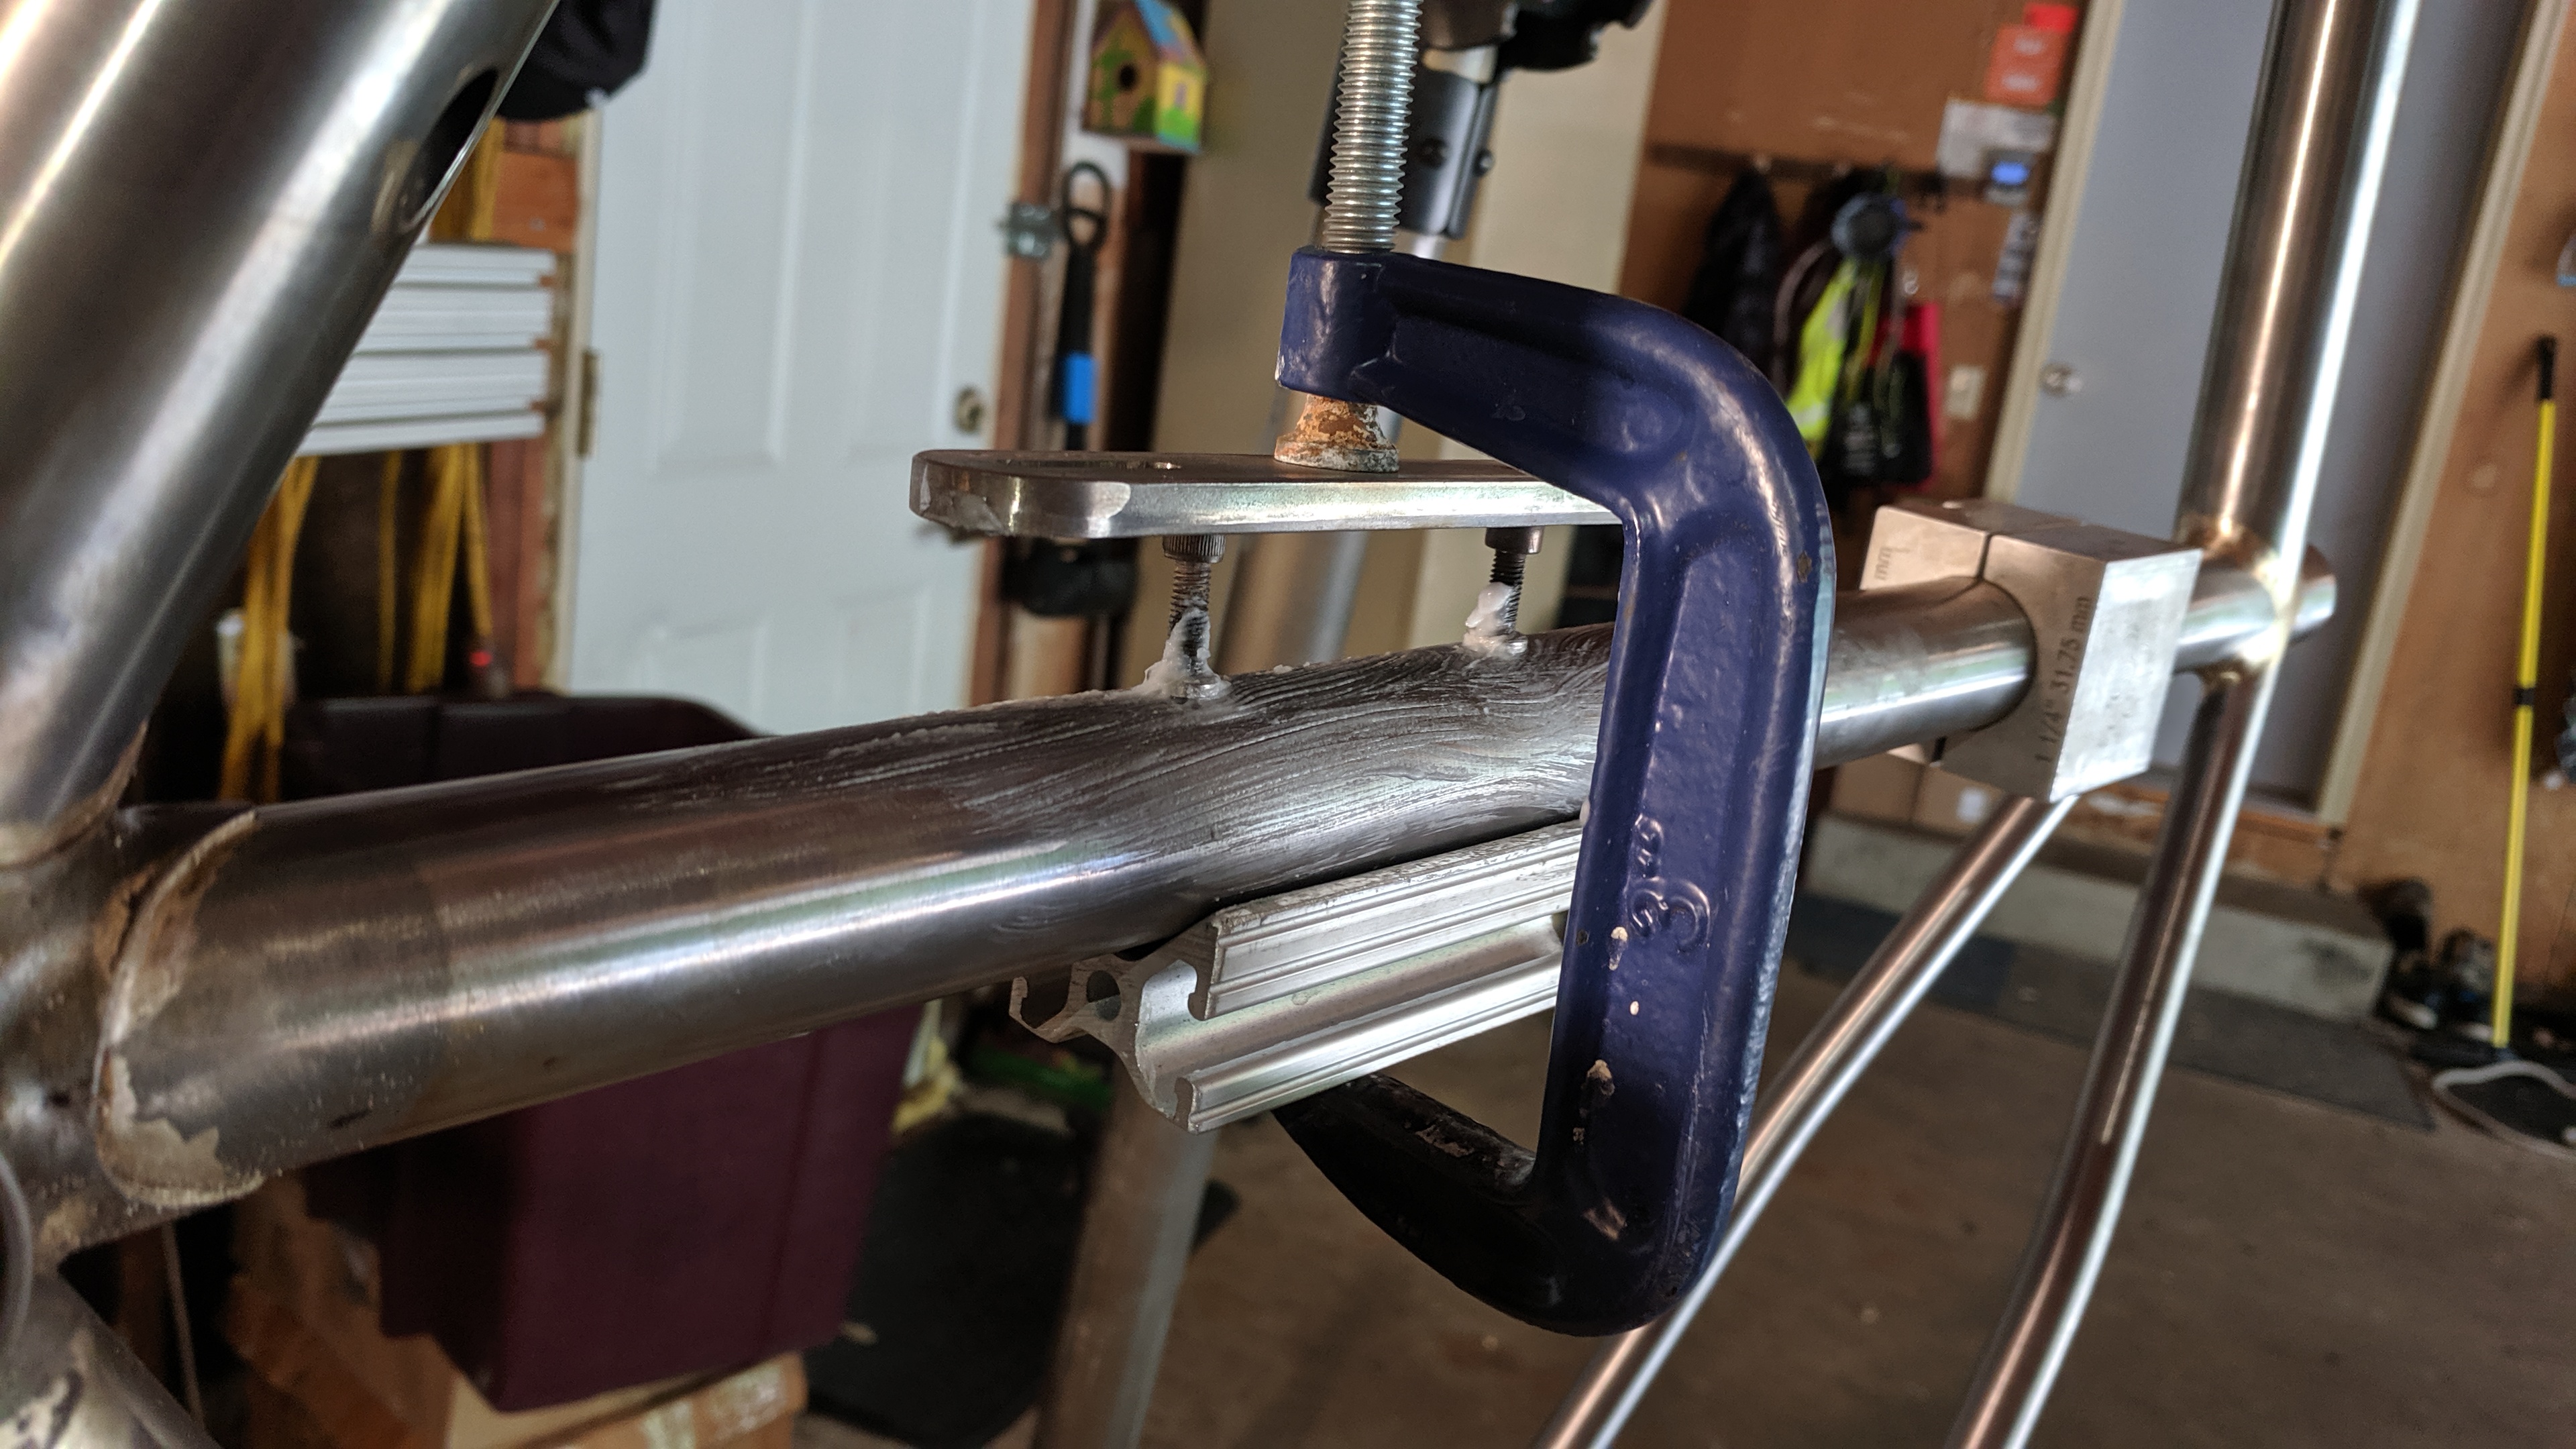
These head tubes have some serious meat to them! Now they’re internally and externally butted but the ID of this one is just straight thru. It took a fair amount more heat than the downtube here.
The easy half!
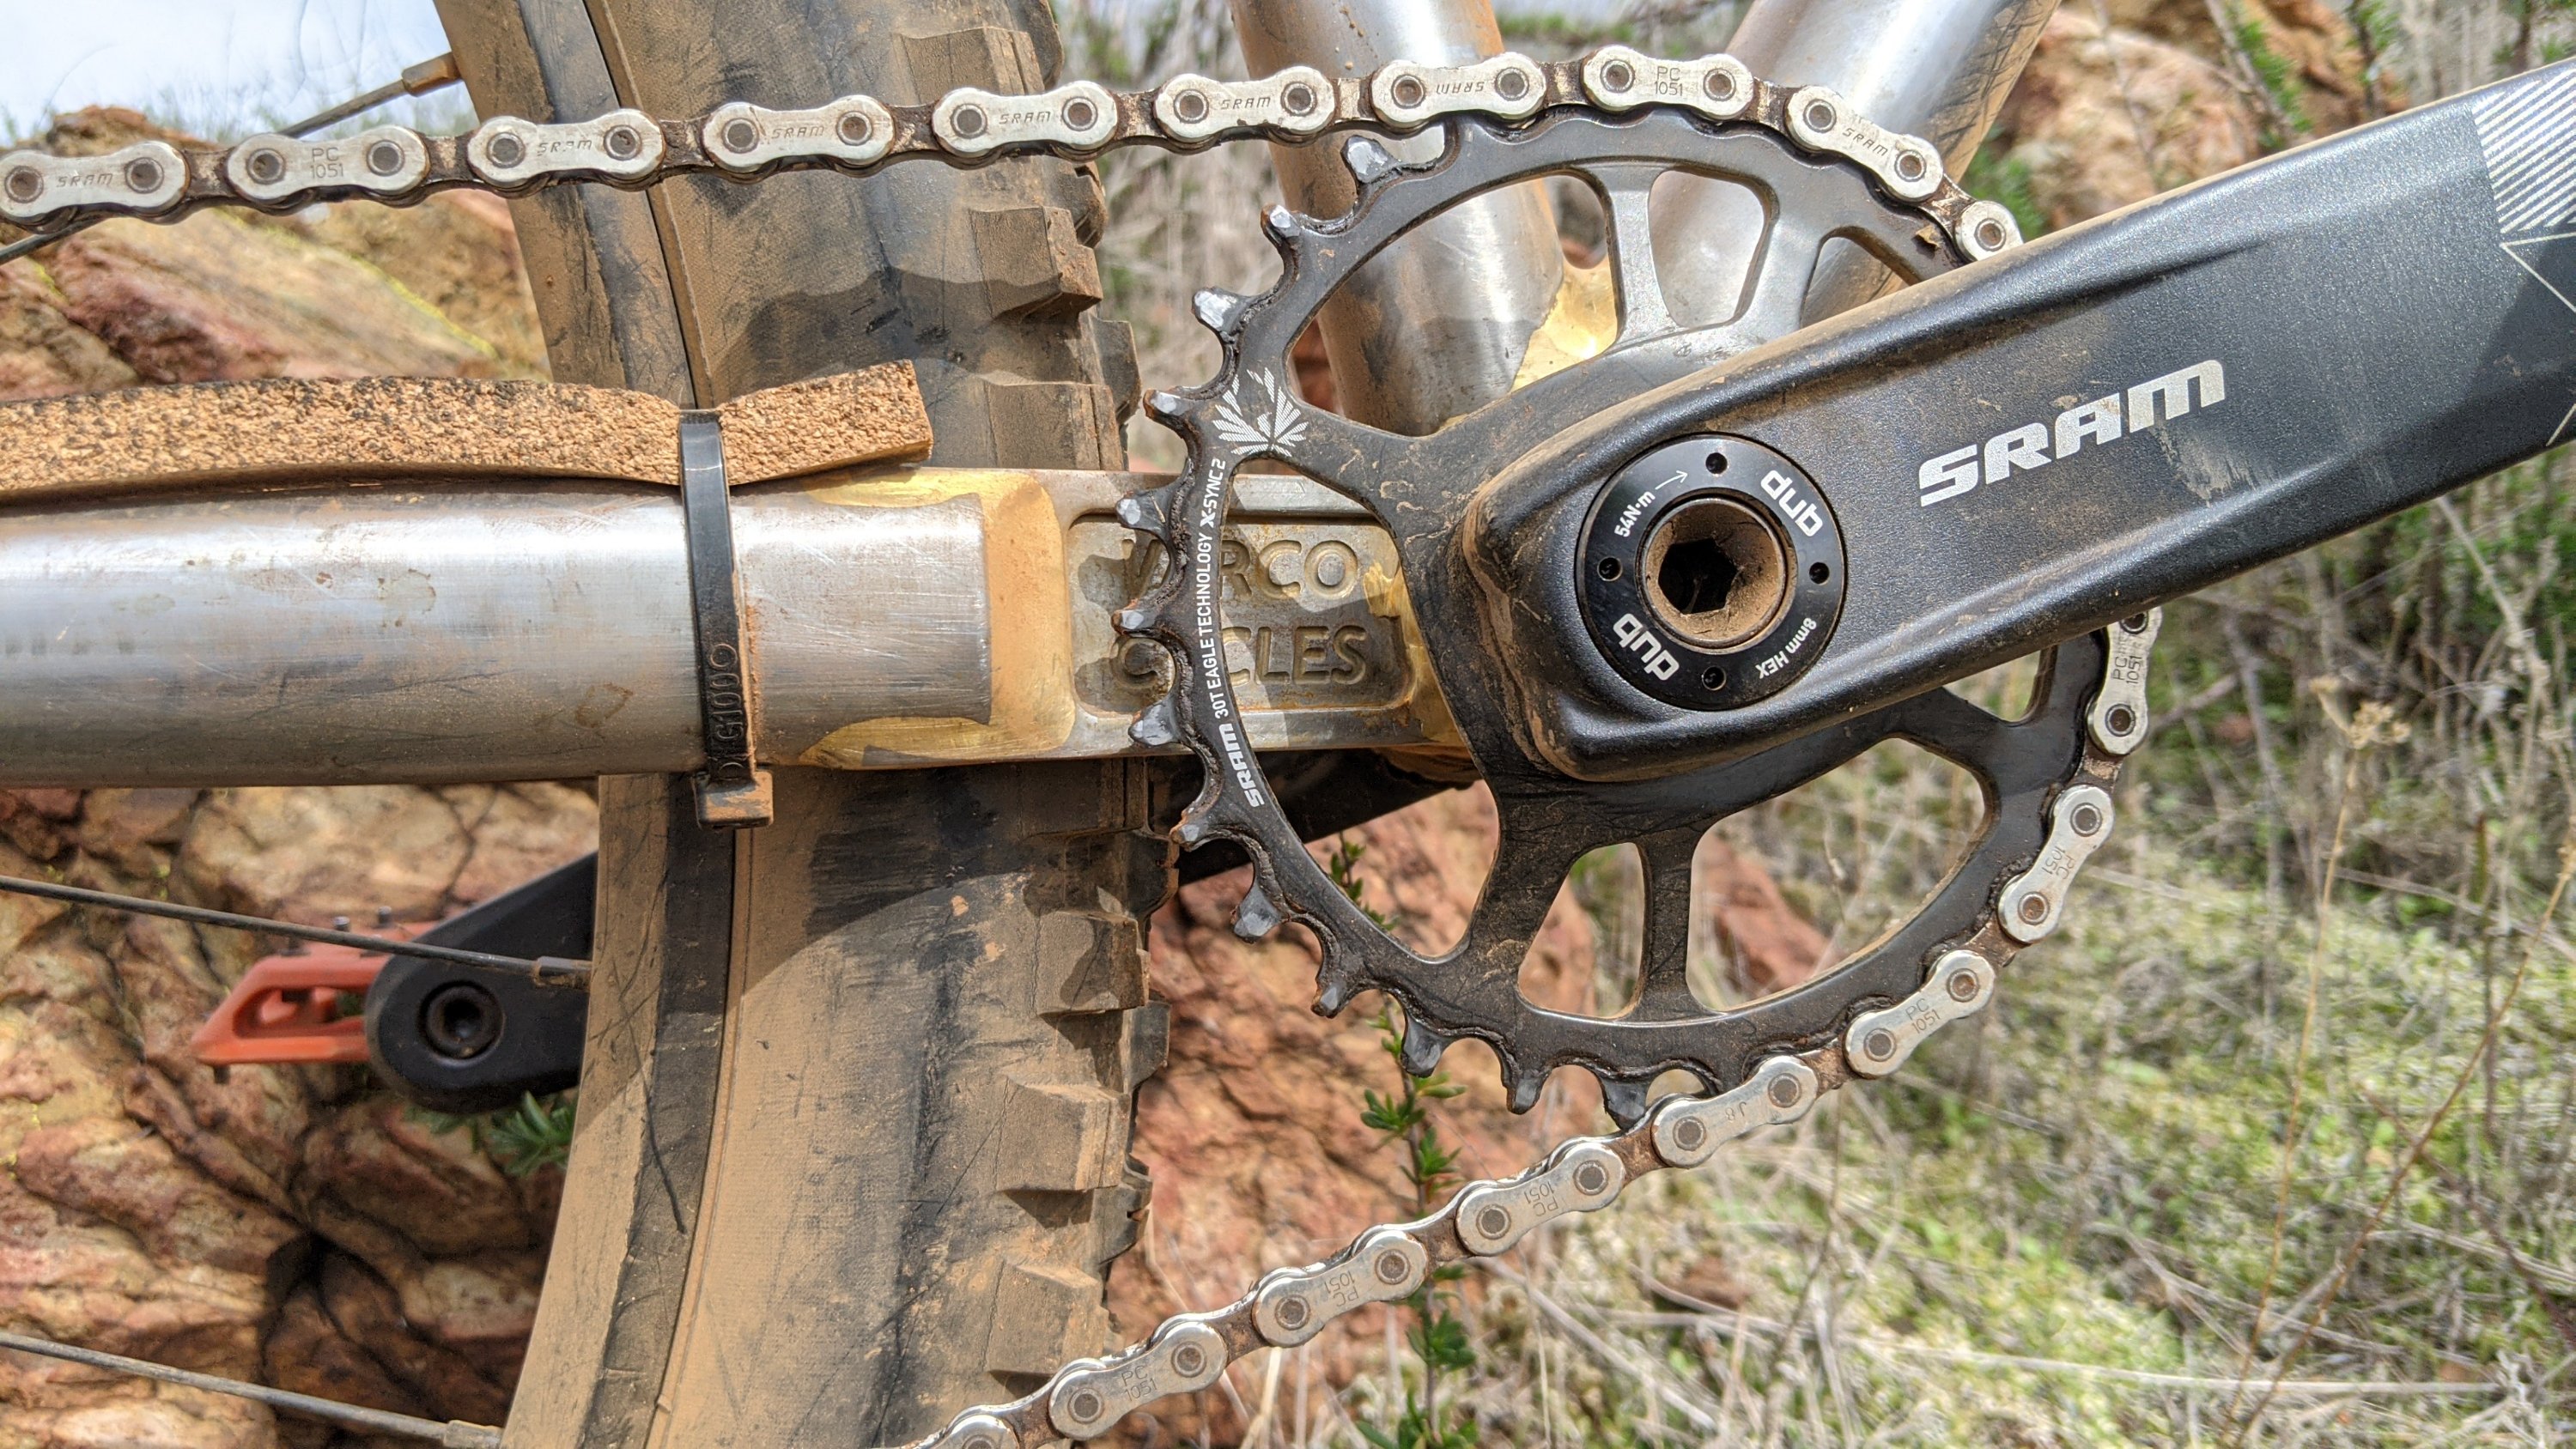
I had already done a couple things for this build in Minnesota before leaving. That chainring clearance flat plate thing is one of them.
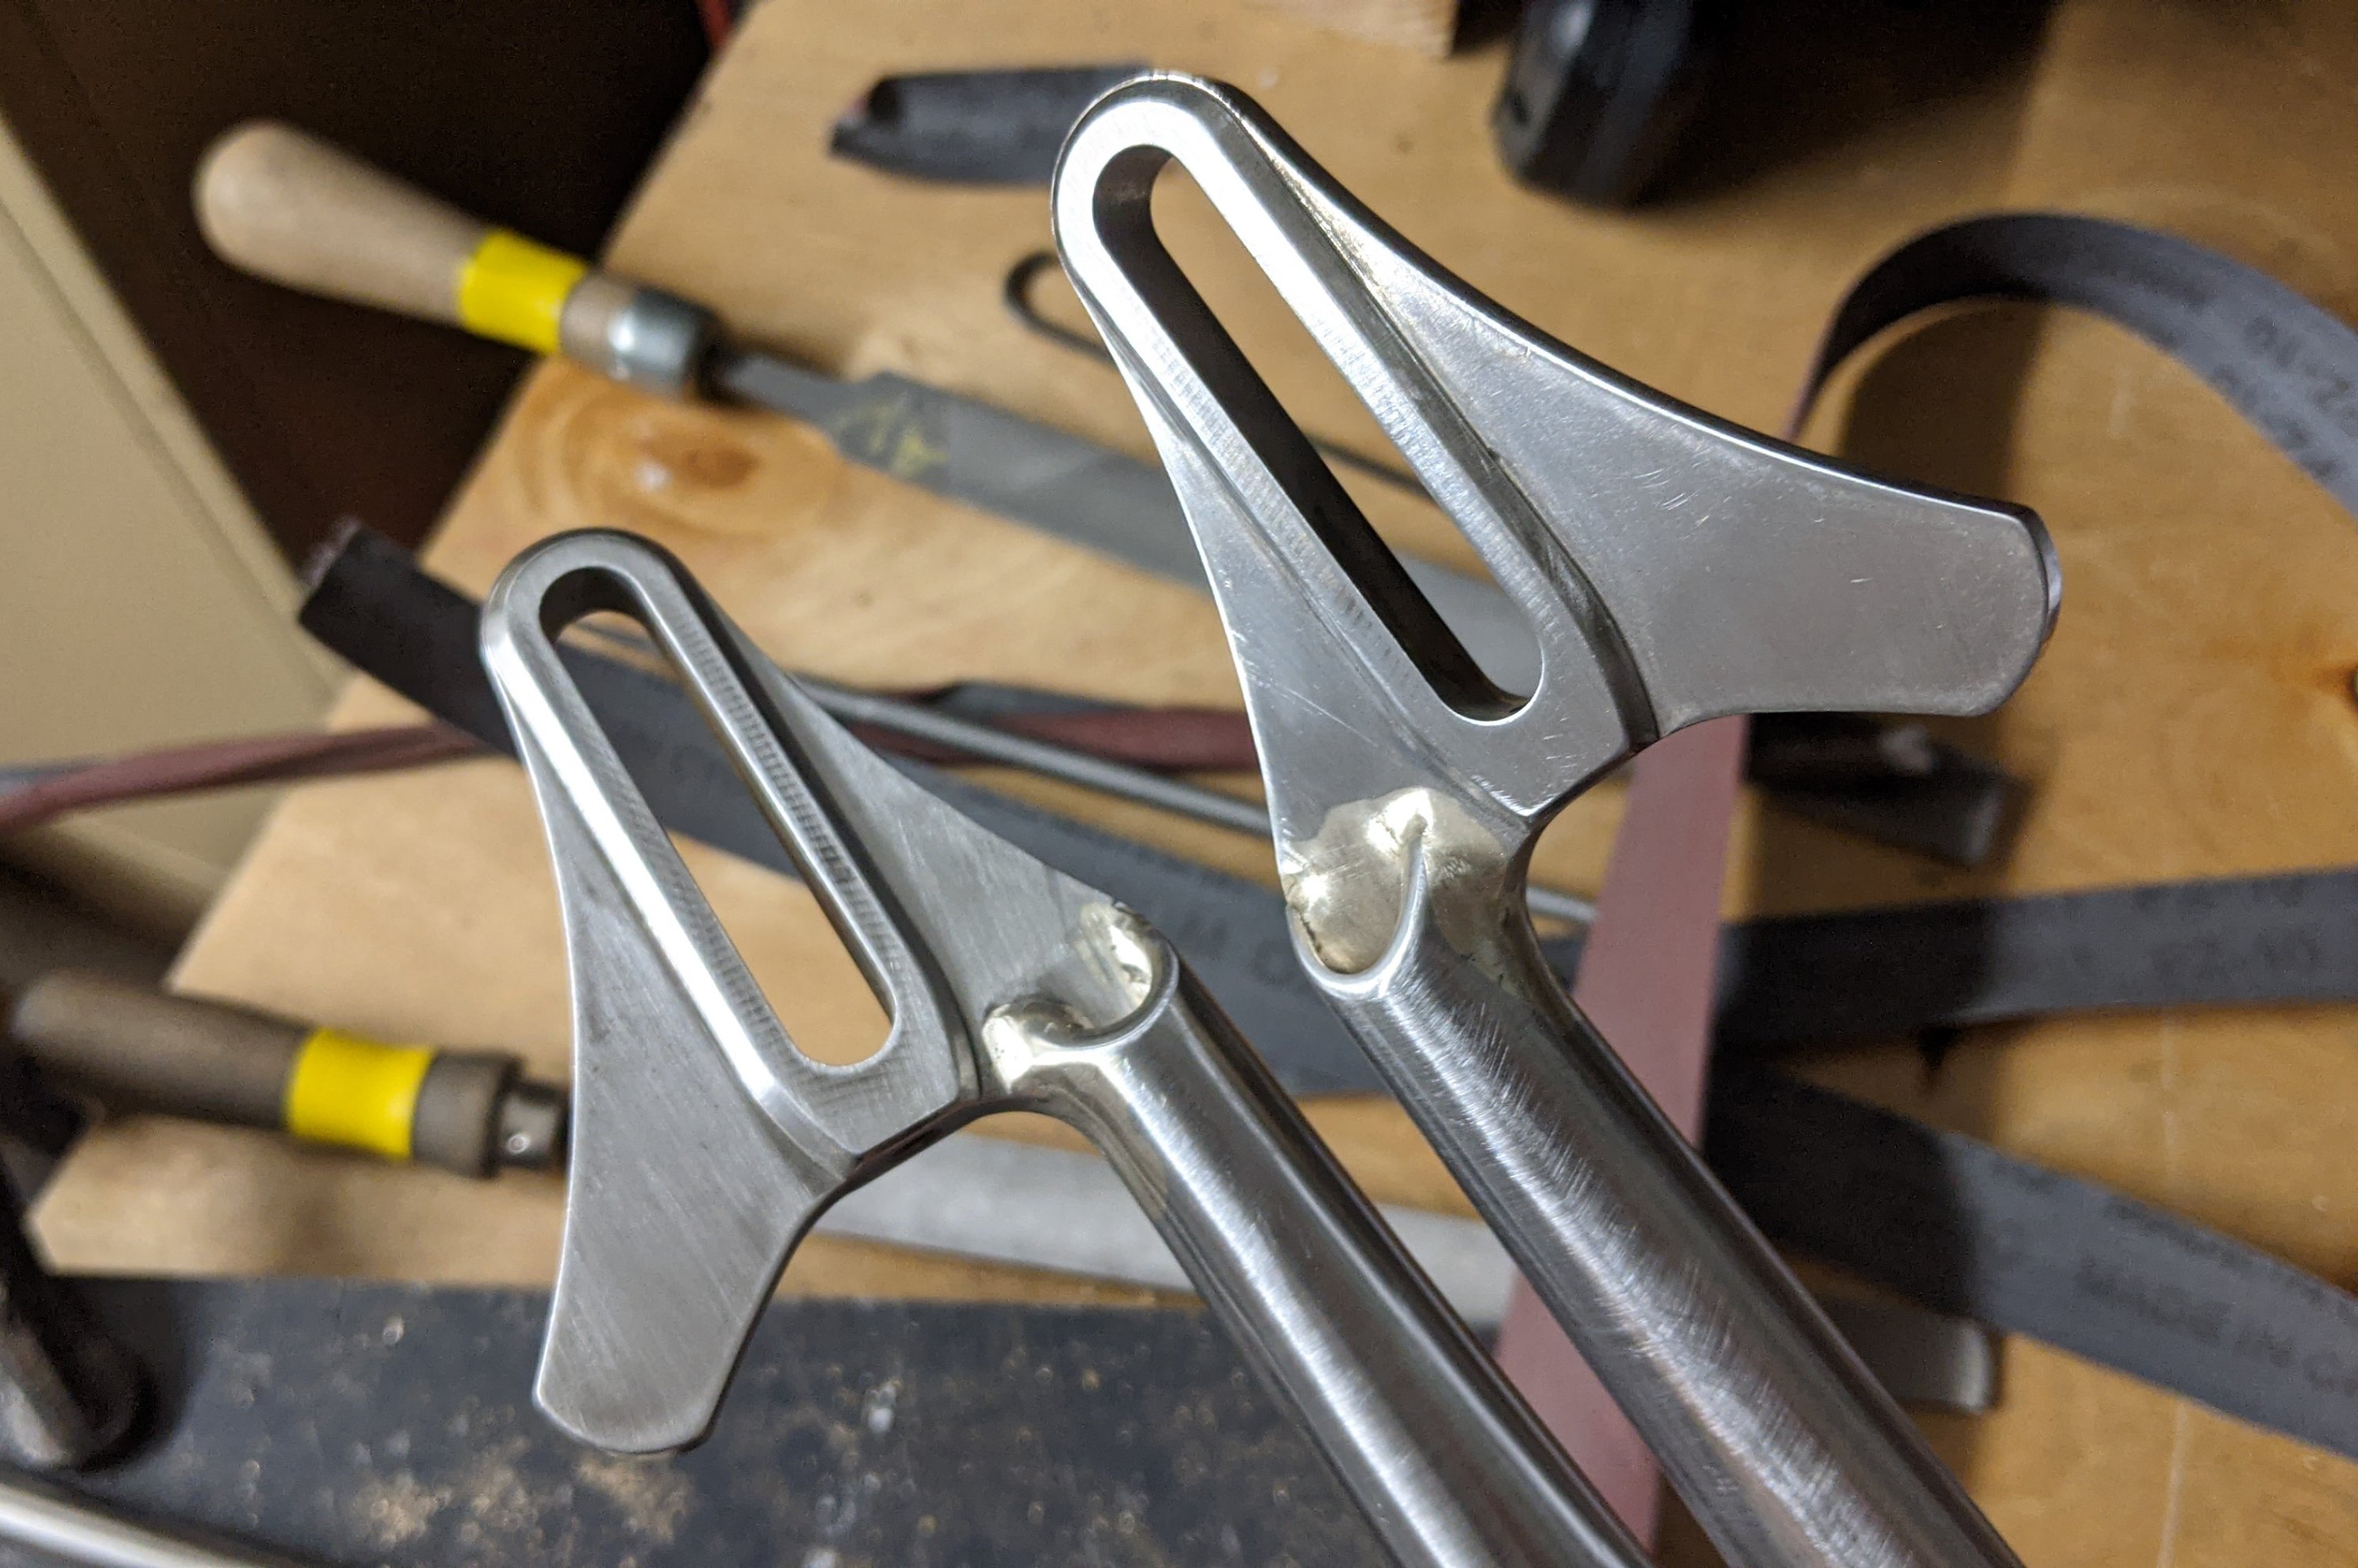
First time using a sliding dropout. These stainless sliders from Paragon are so slick! Seemed funny brazing them with silver but bronze and SS don’t fly.
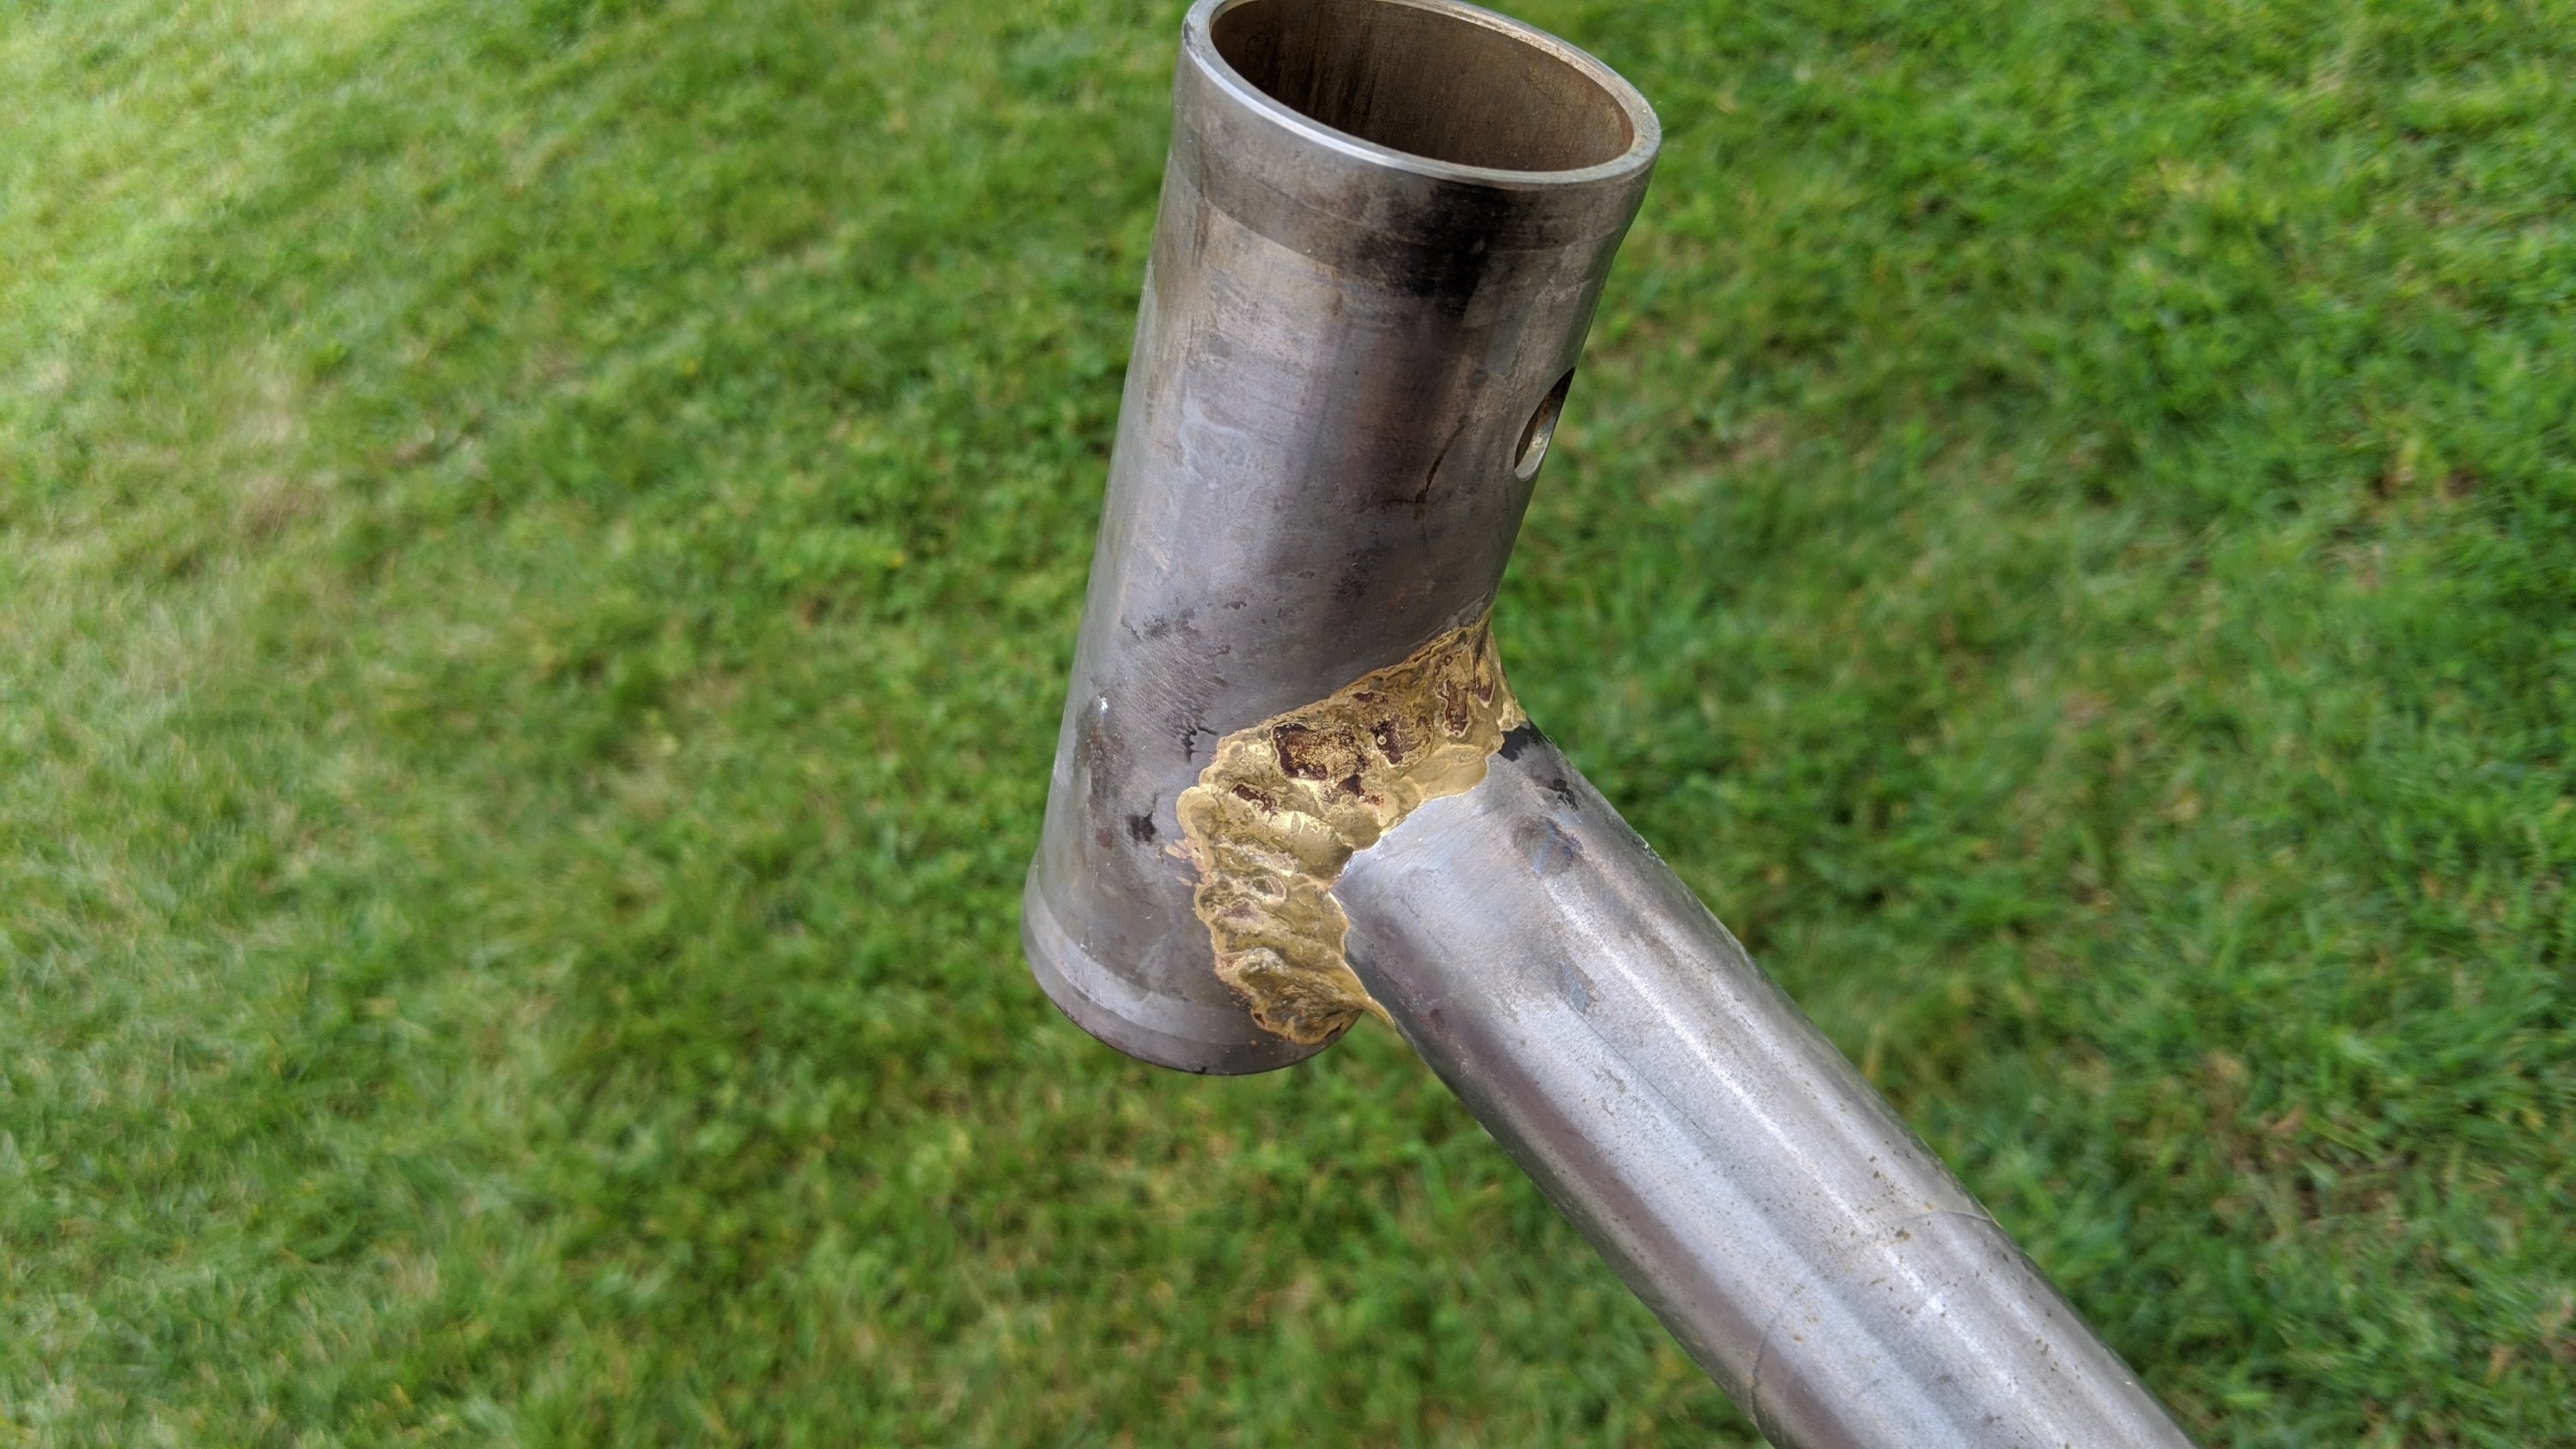
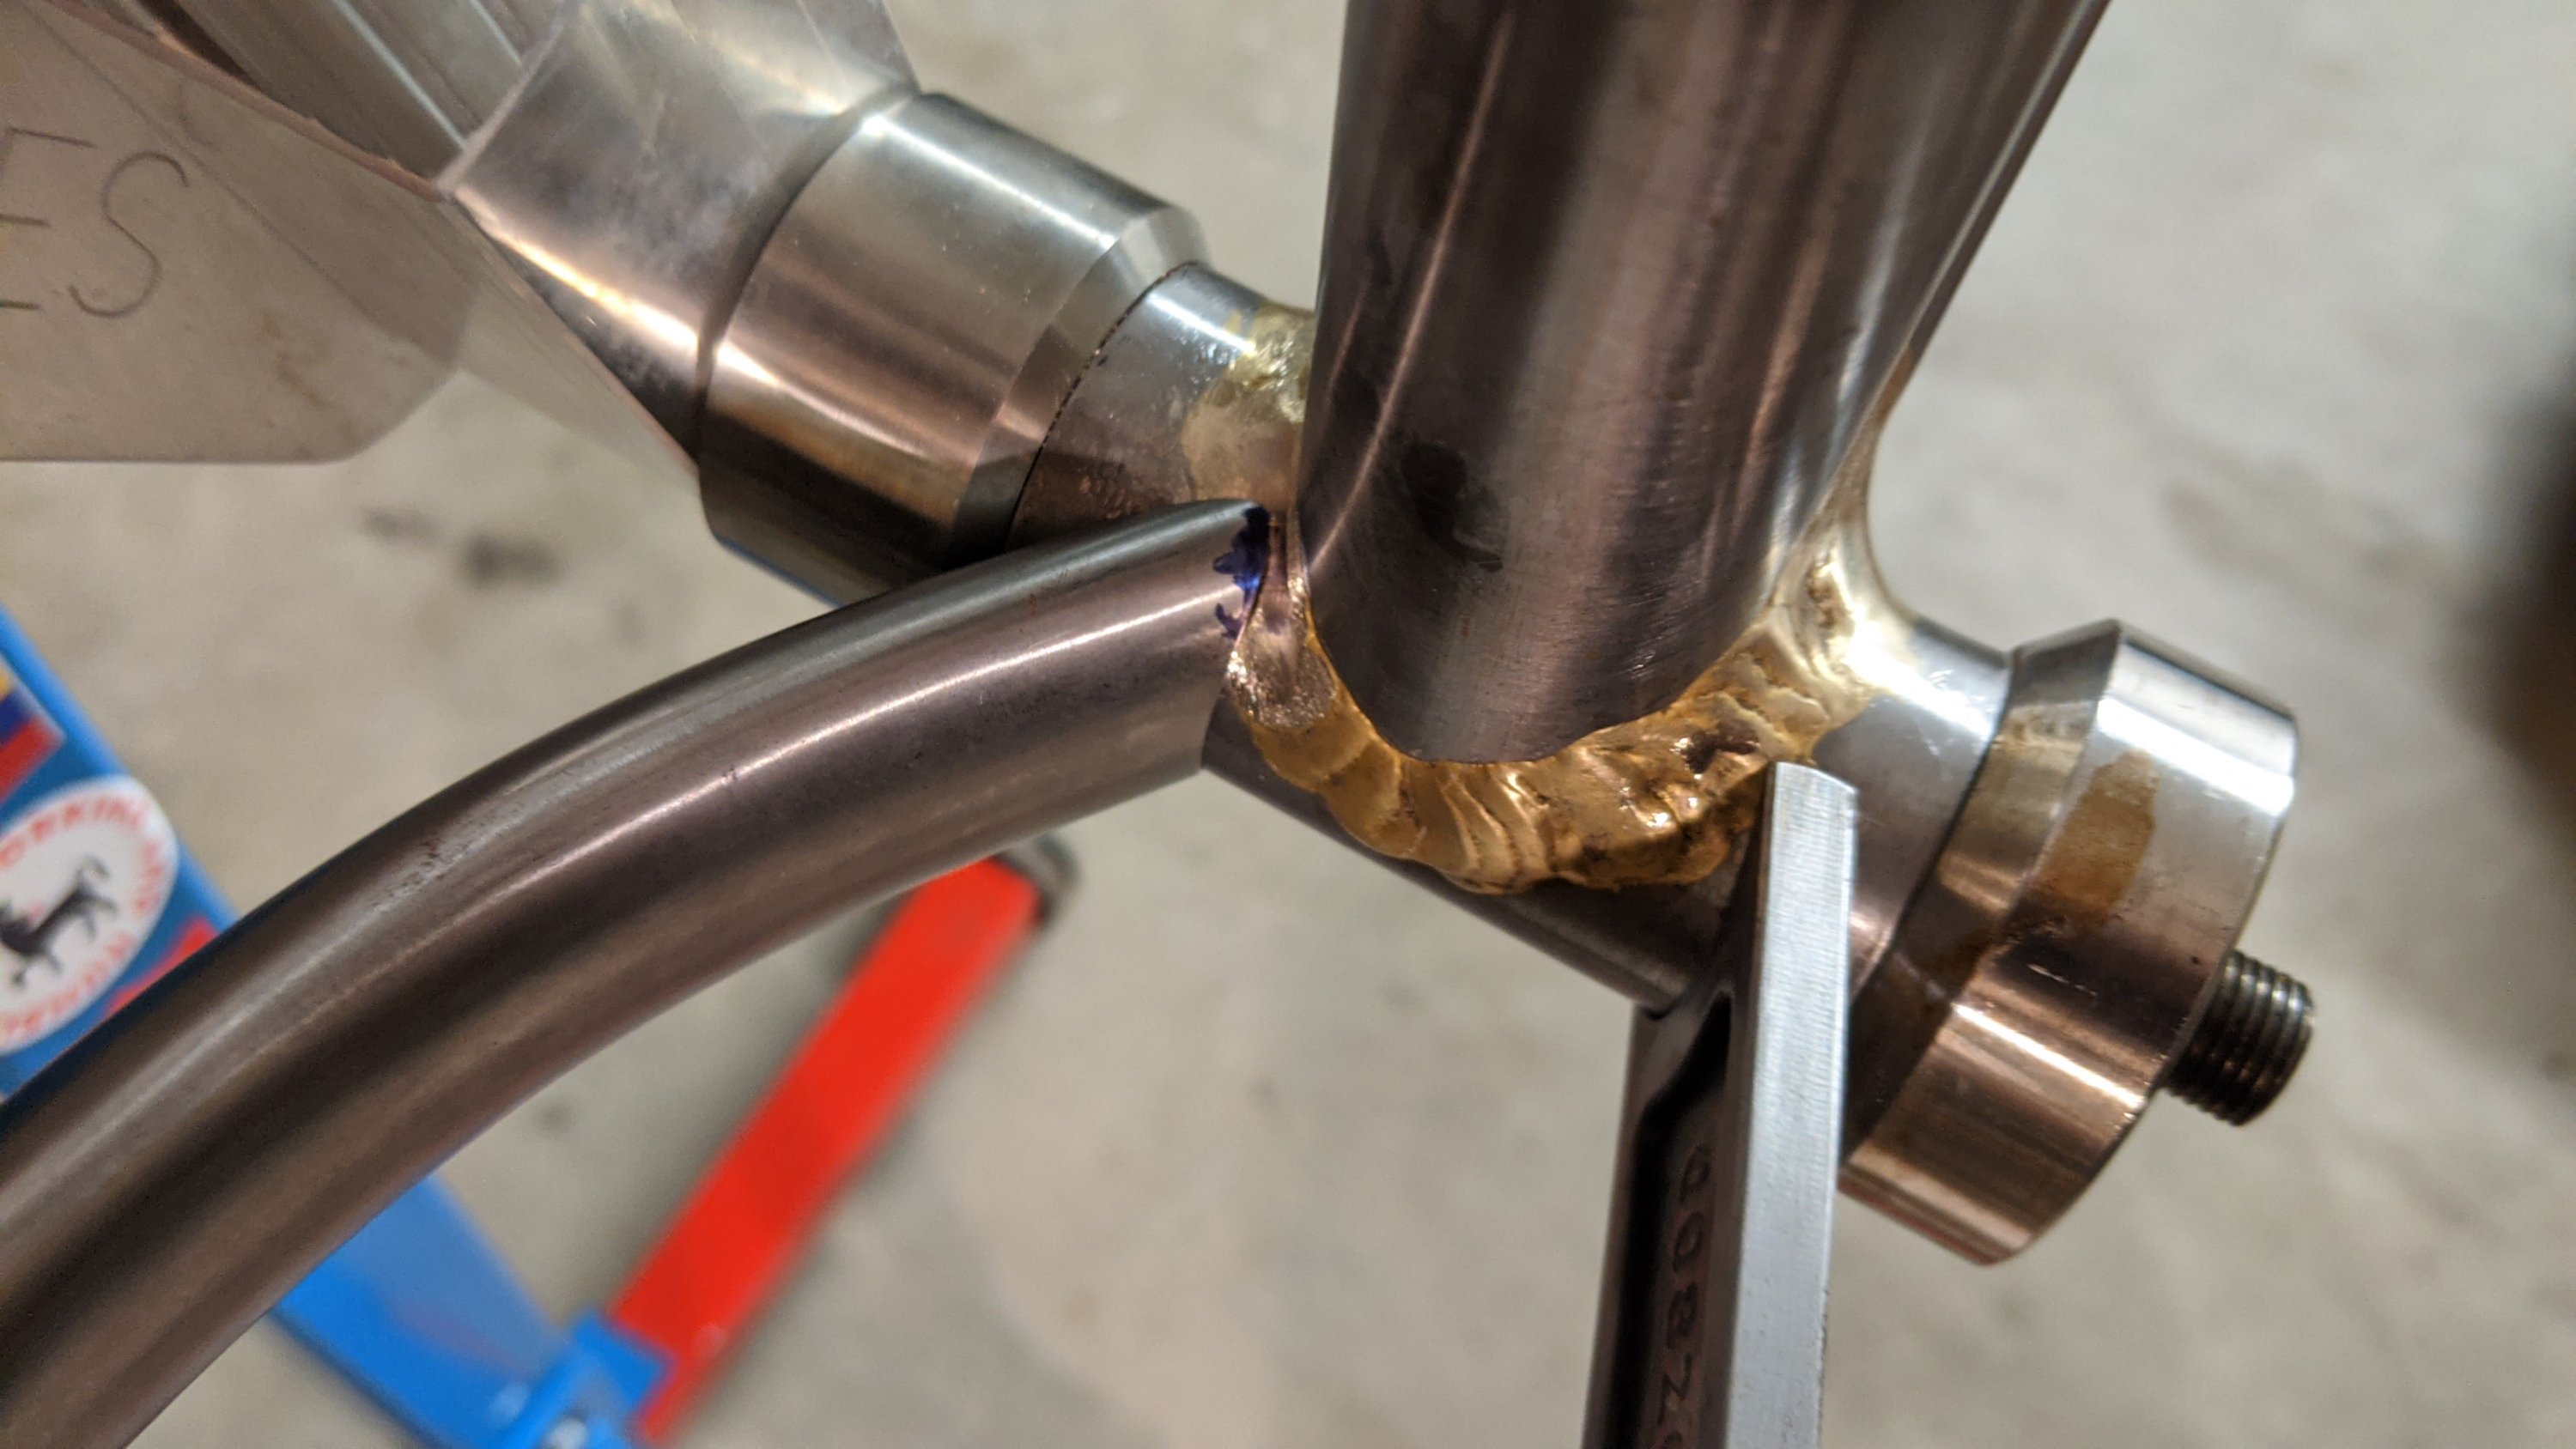
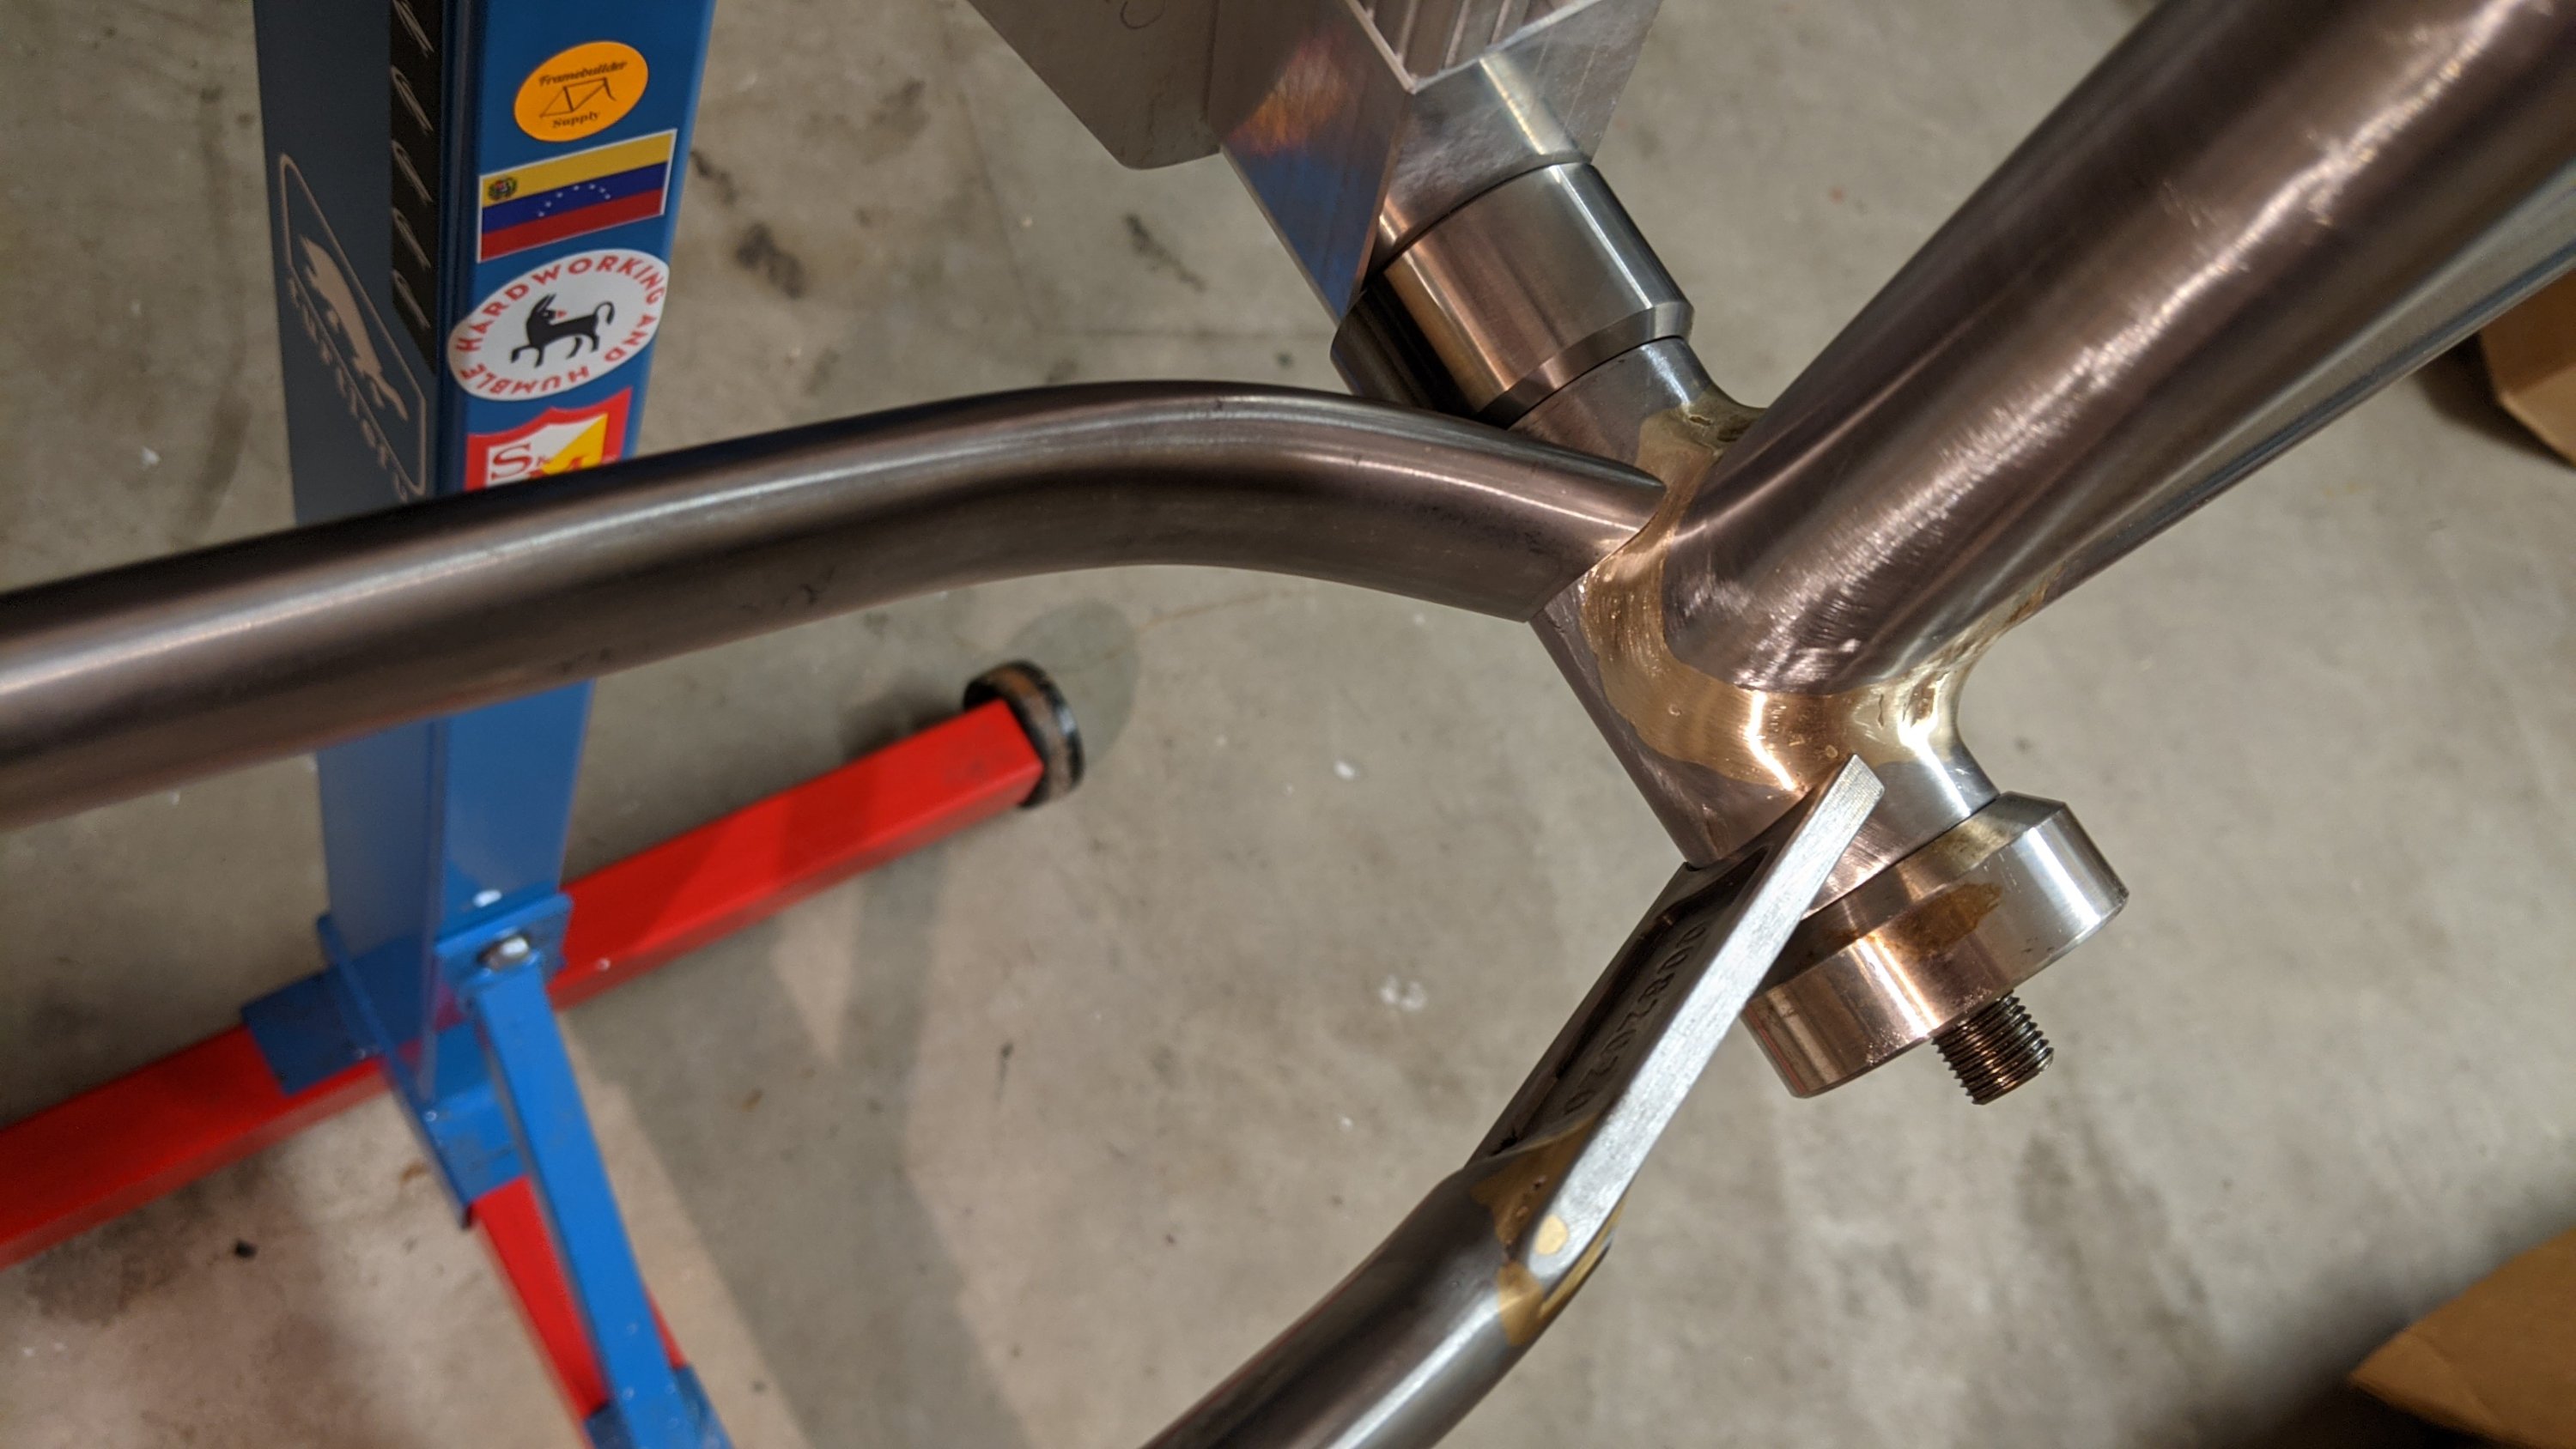
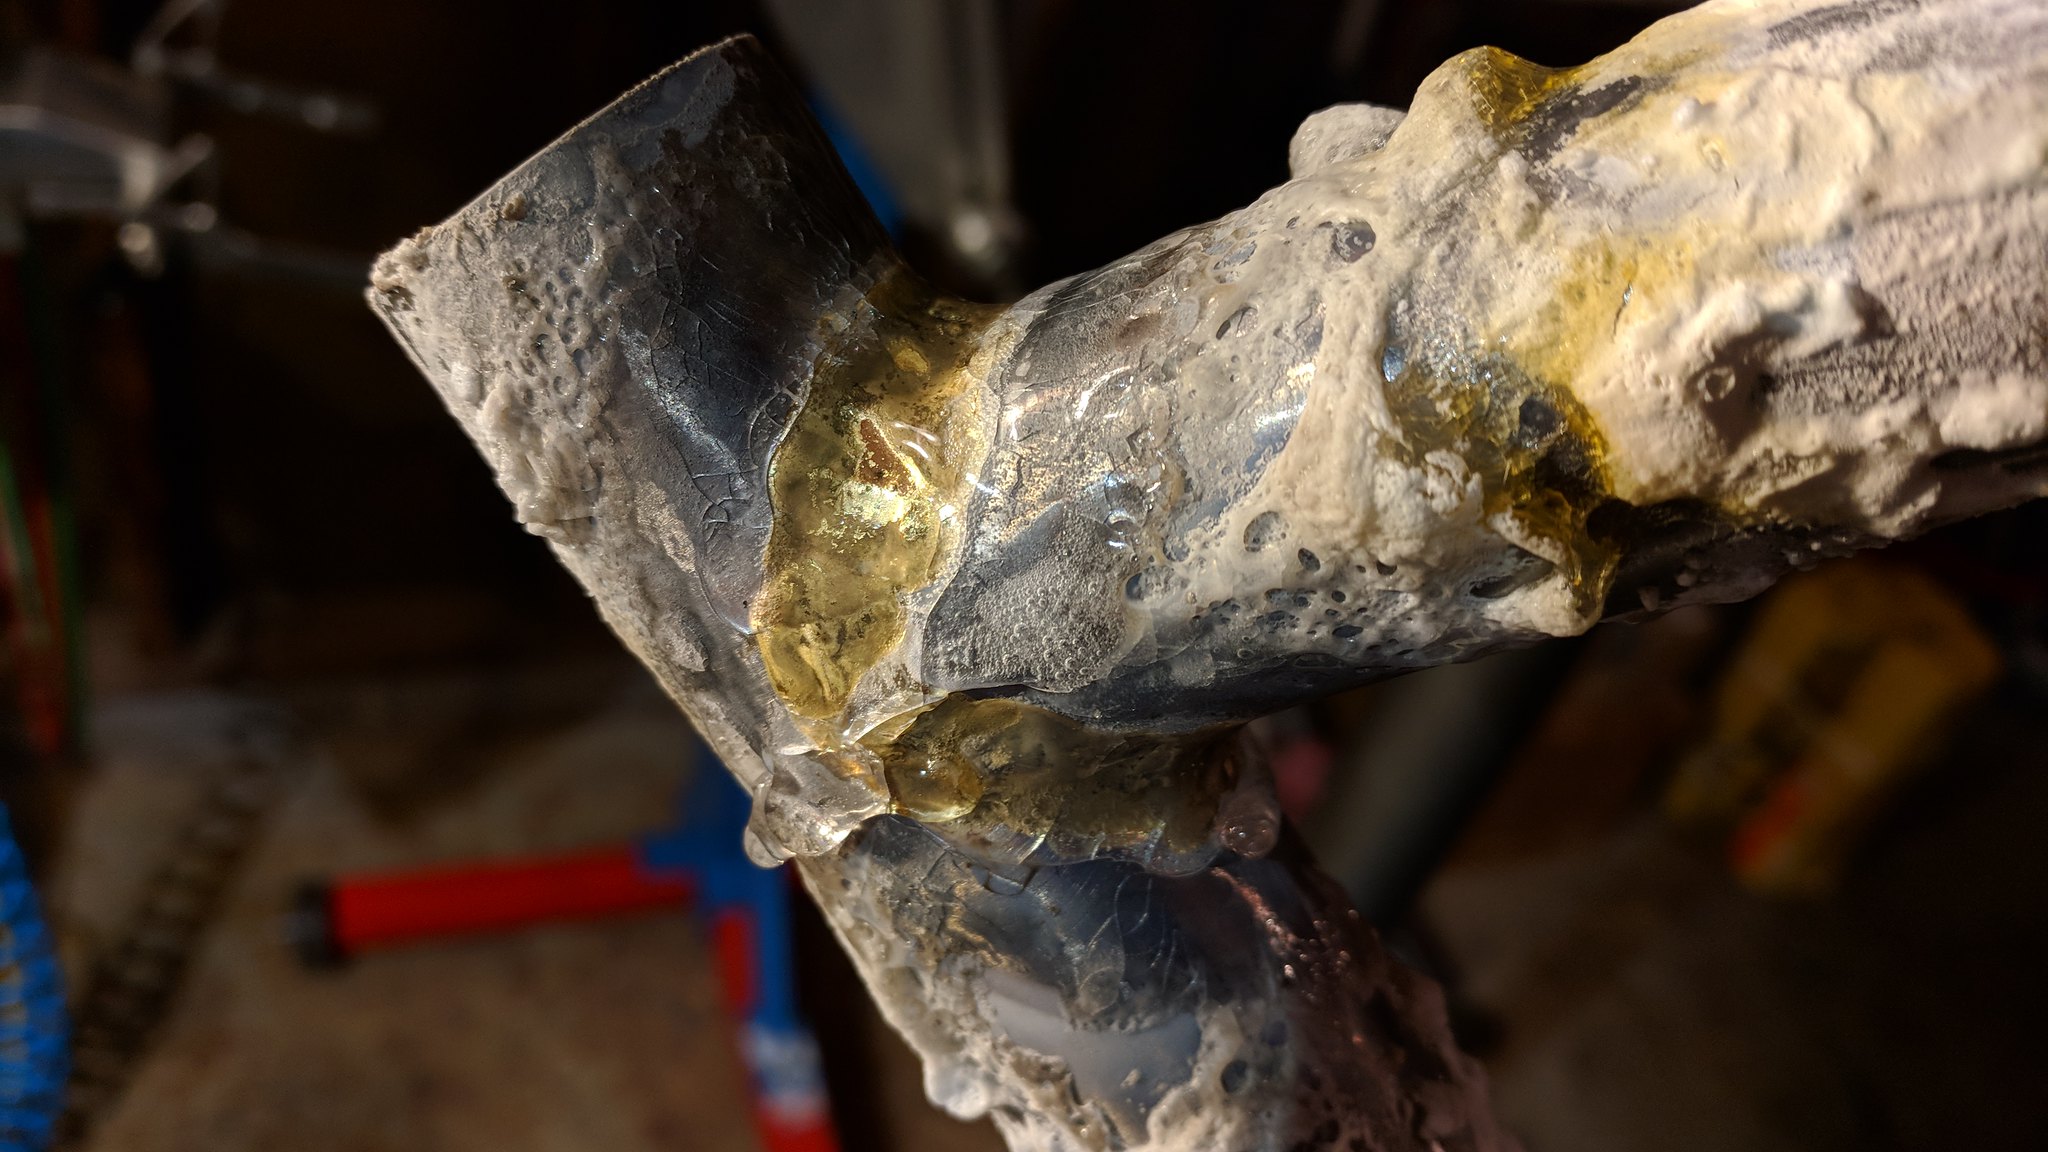
On to the chainstay/BB joint. Shawn Pedersen brought up a good point. Miter the chainstays to fit near the bottom of the BB shell and you won’t have to remove any (or as much) of the braze on the seat tube/BB joint. In other words, the centerline of the chainstays should be below the center of the BB shell. I will definitely take that advise forward! Thanks Shawn! #spreadsheet
Paul Brodie even says to only run a tinning pass on the back of the BB shell until you get the chainstays cut and ready to avoid having to remove ANY of the existing braze. Noted!
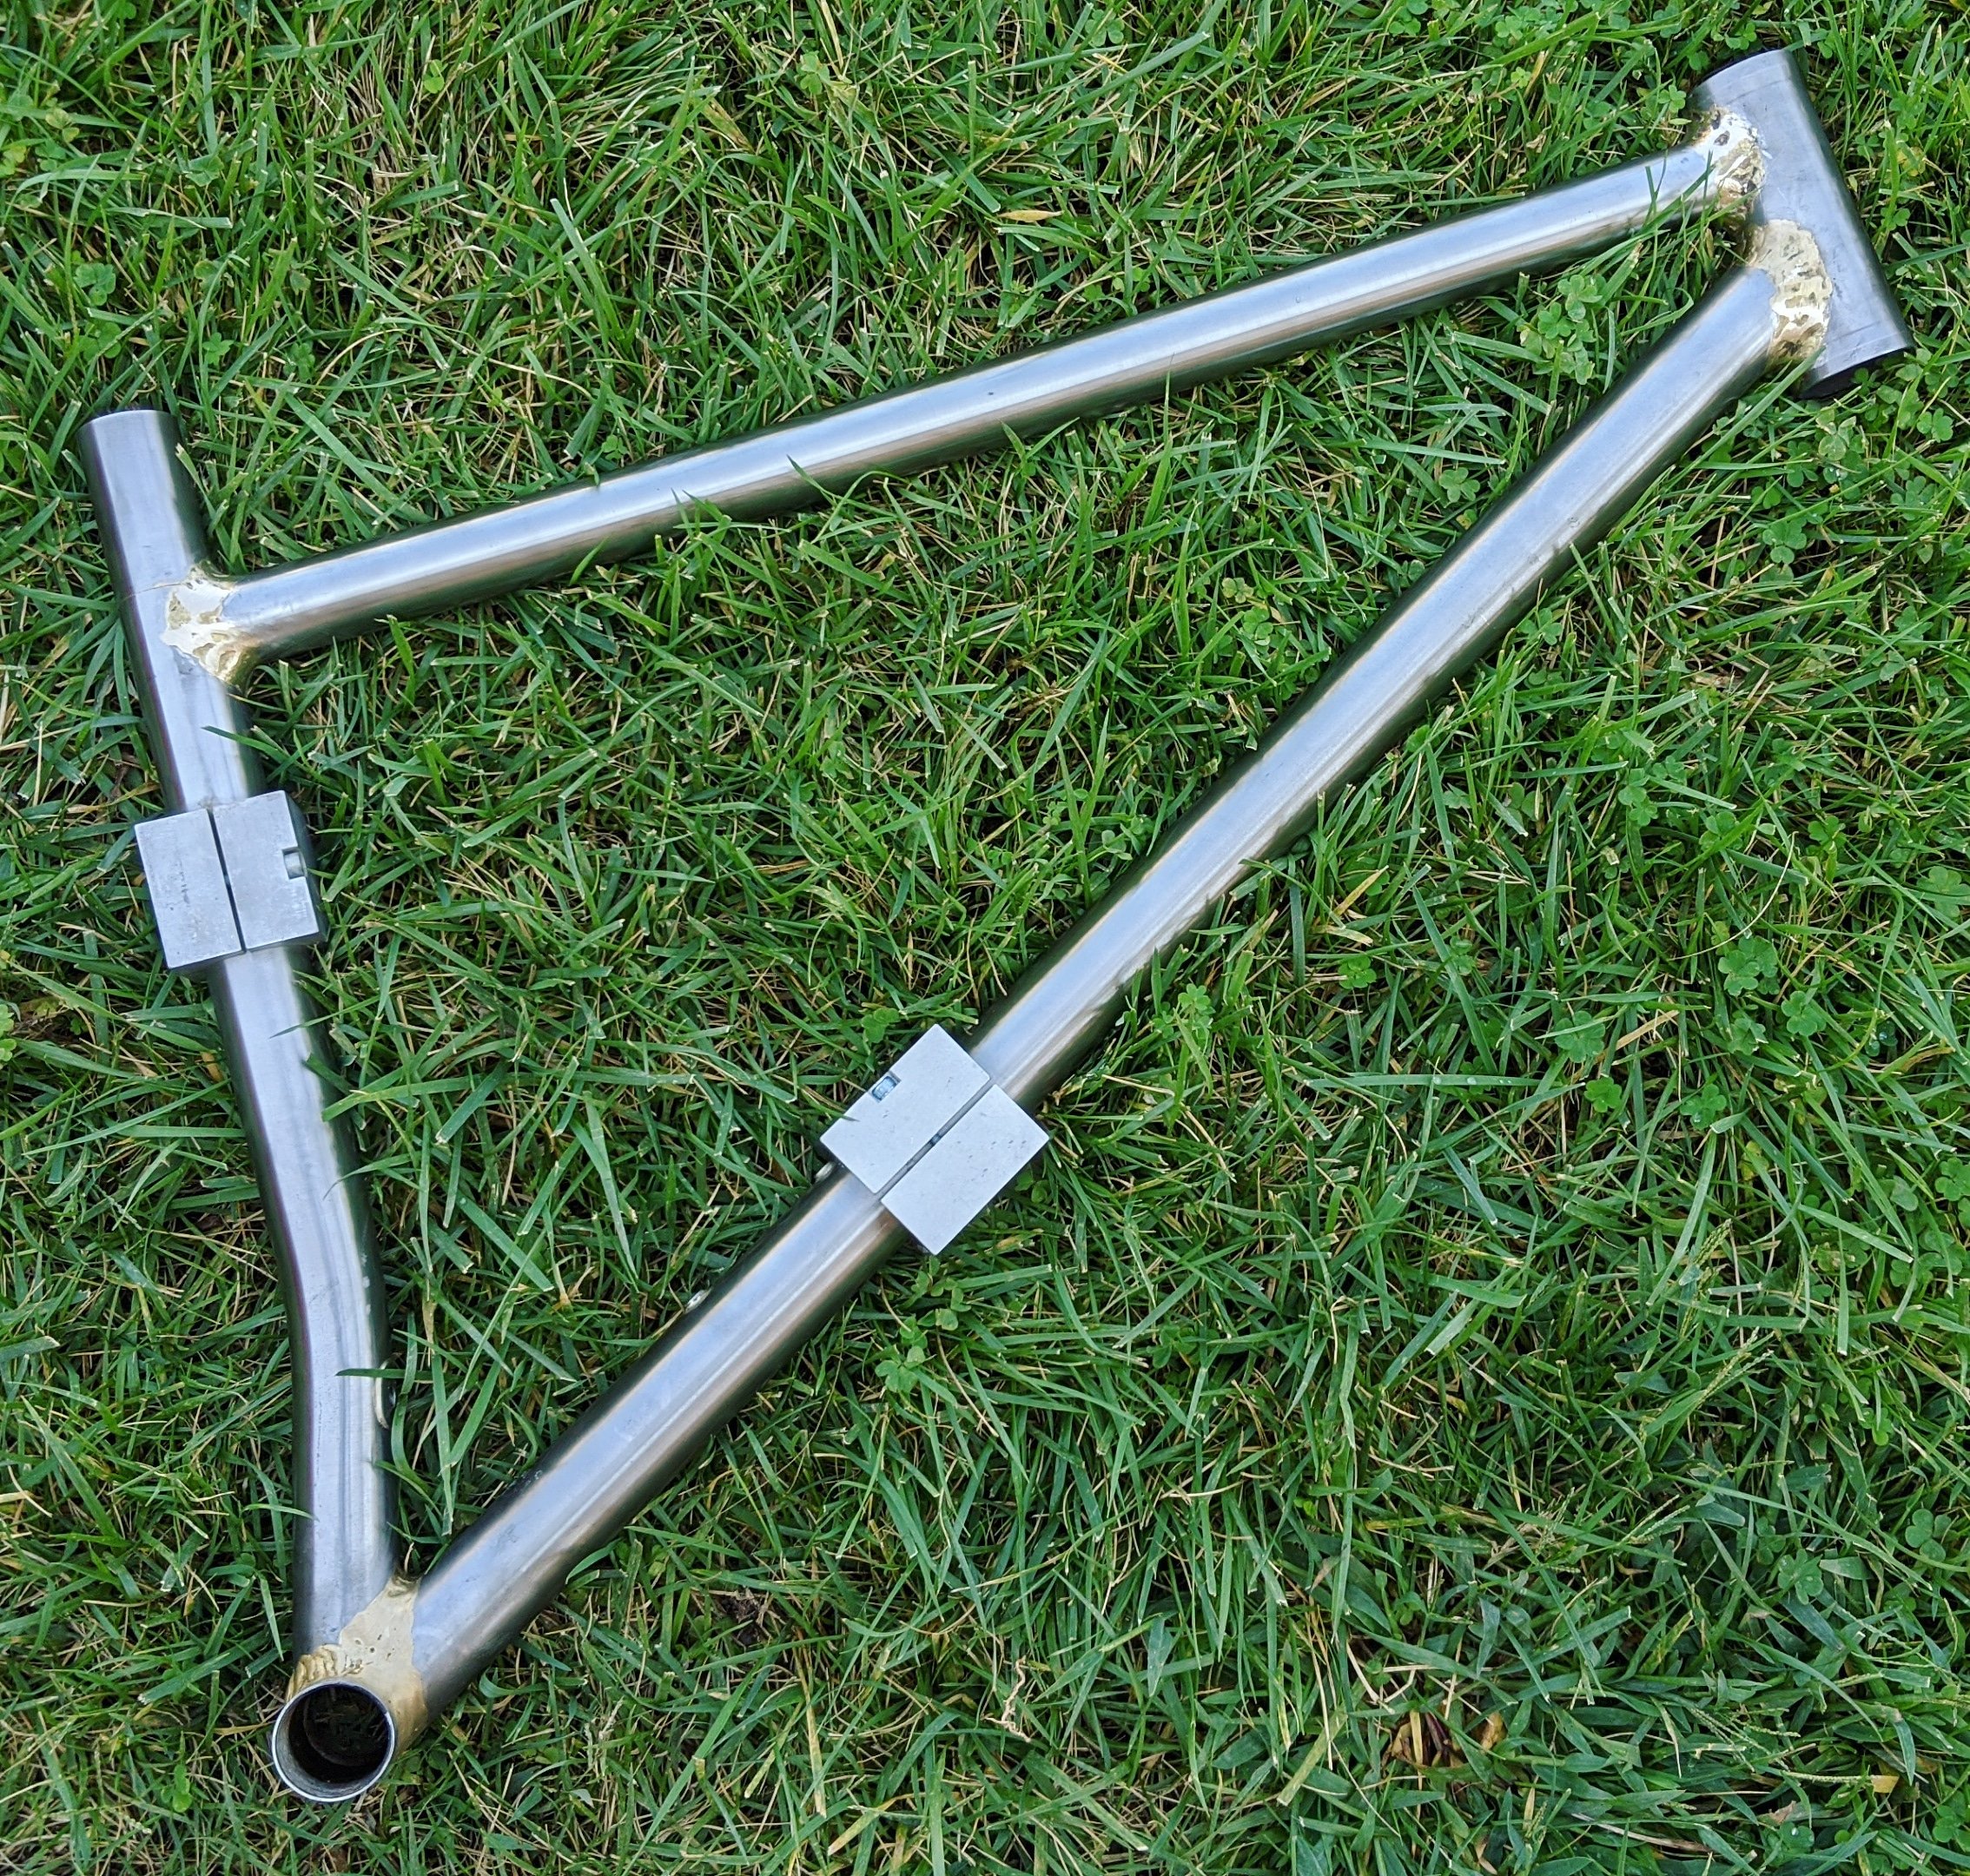
On to seat stays.
This part is usually my least favorite and most time consuming part of the build. I’m usually too cautious with how much I miter from the top. This time I got a bit more aggressive with it and got them both mitered in one evening.
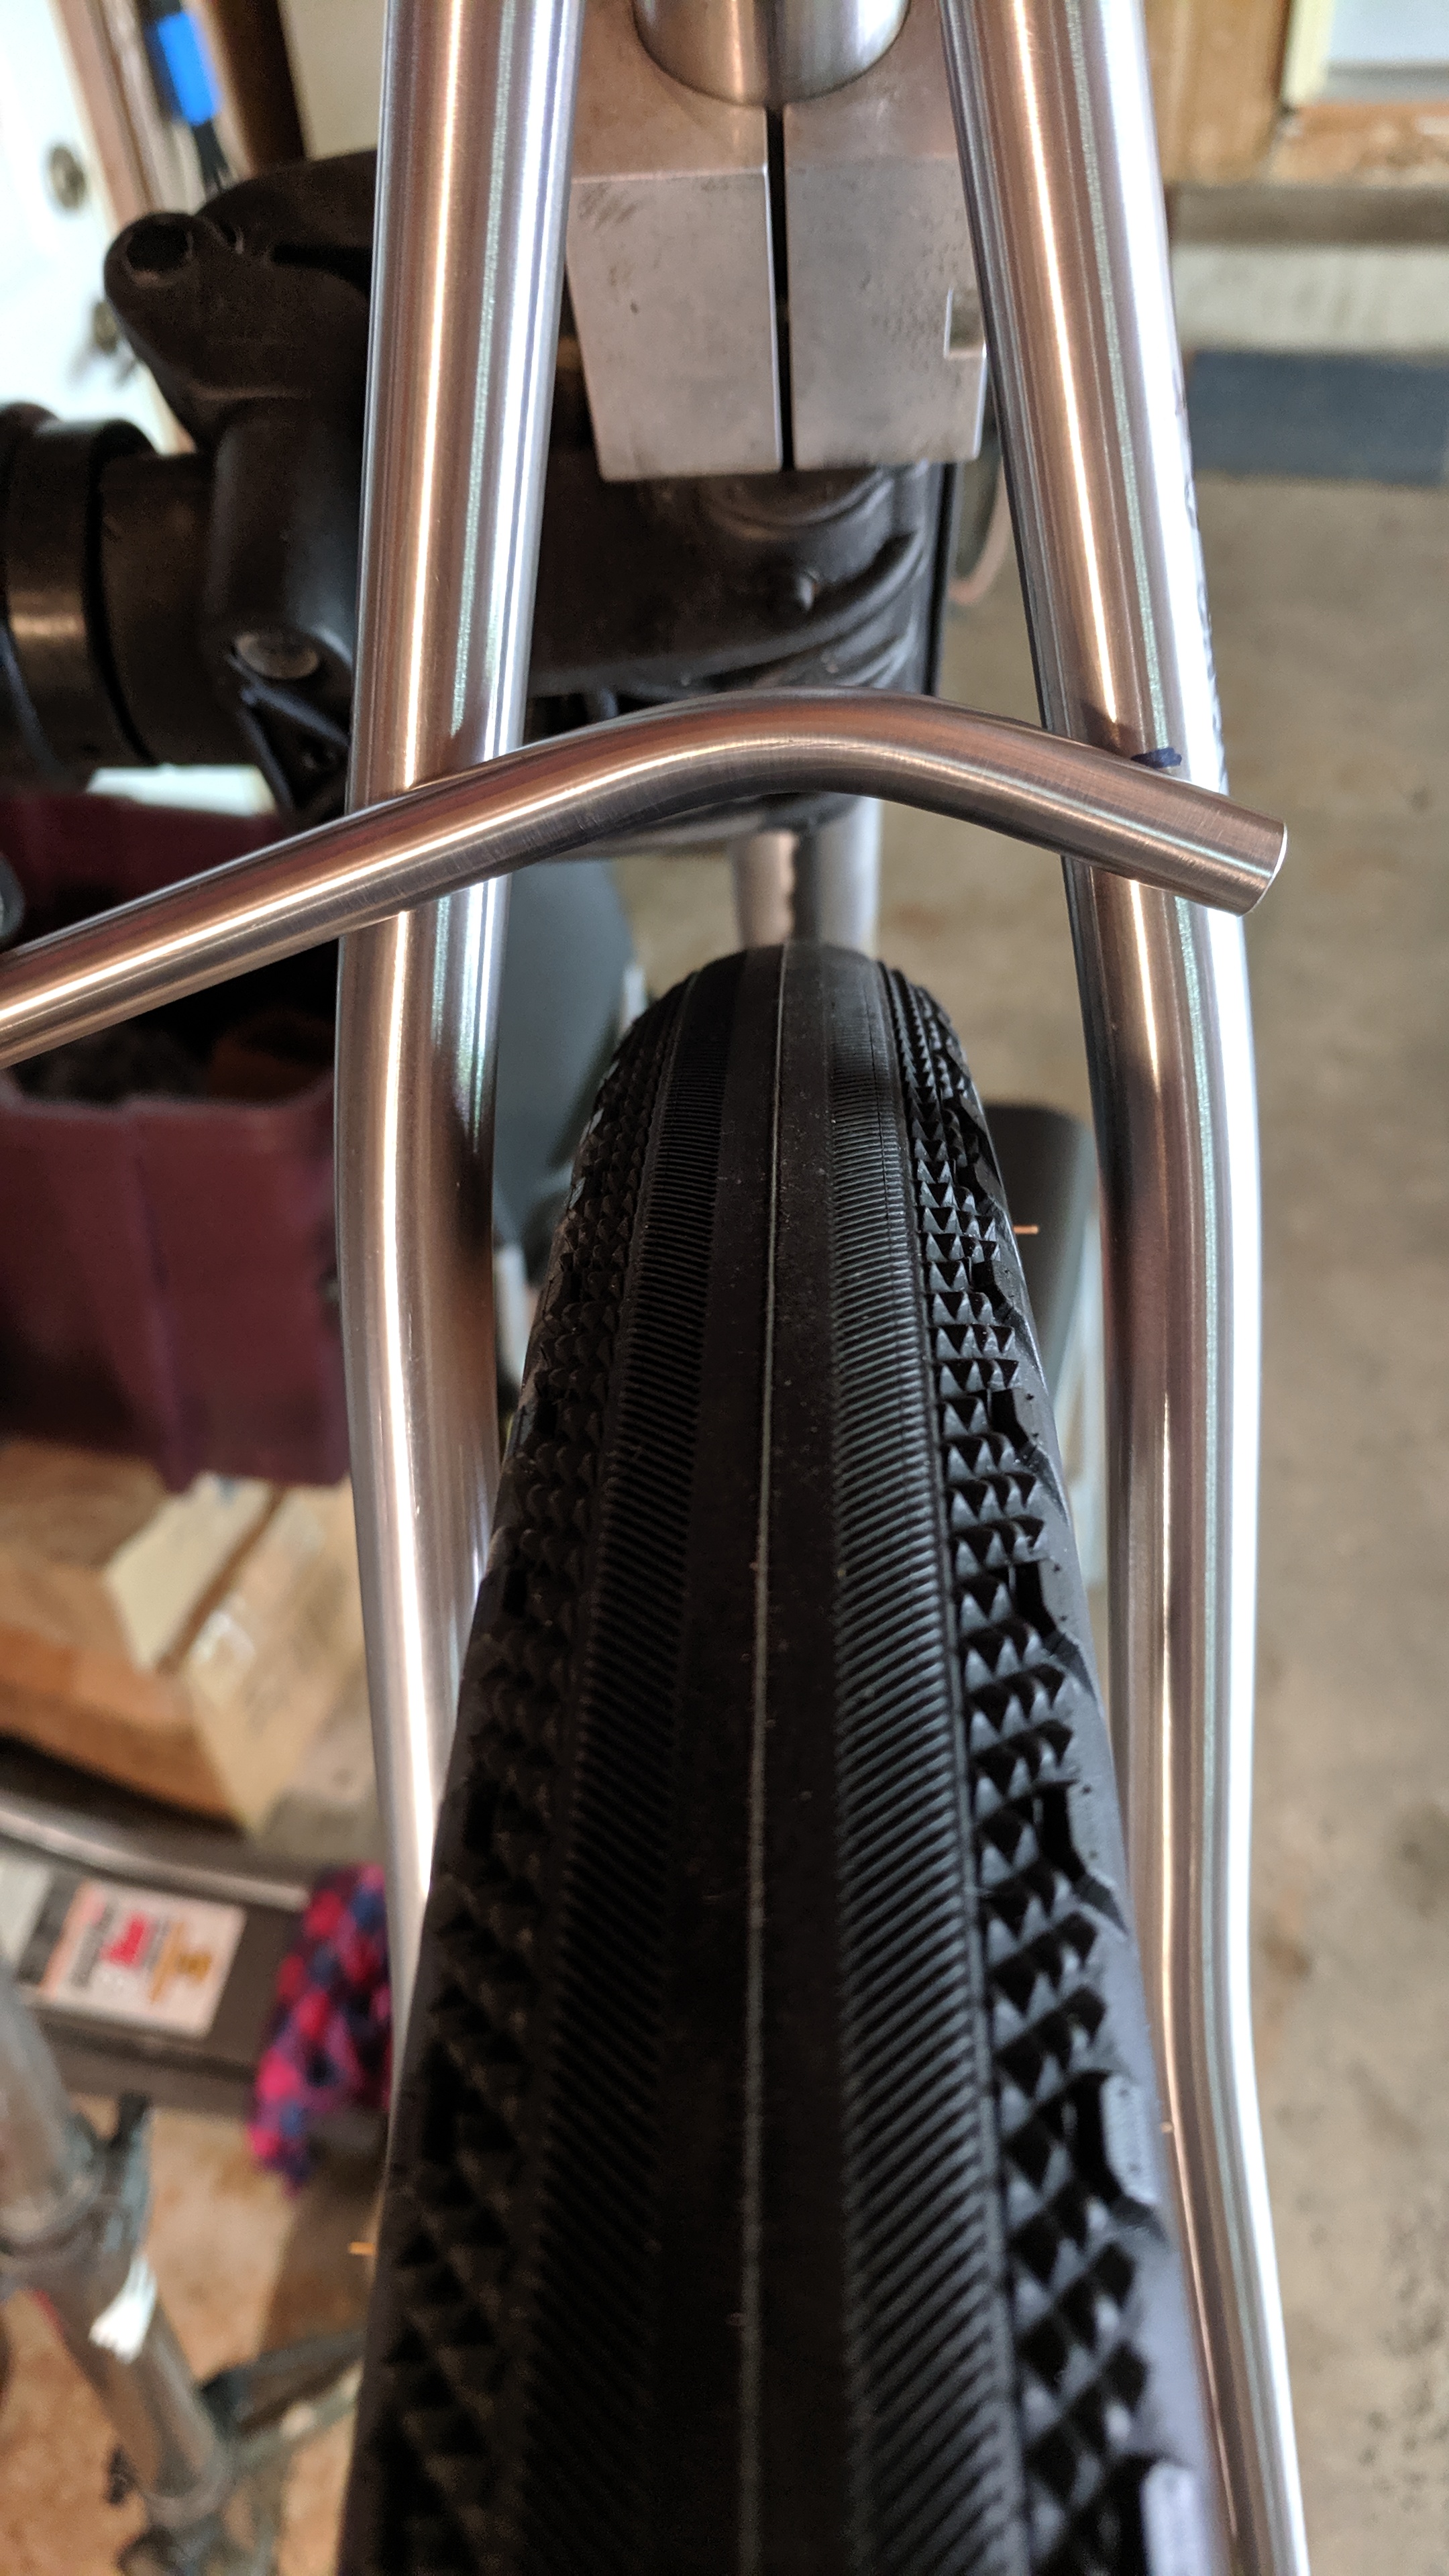
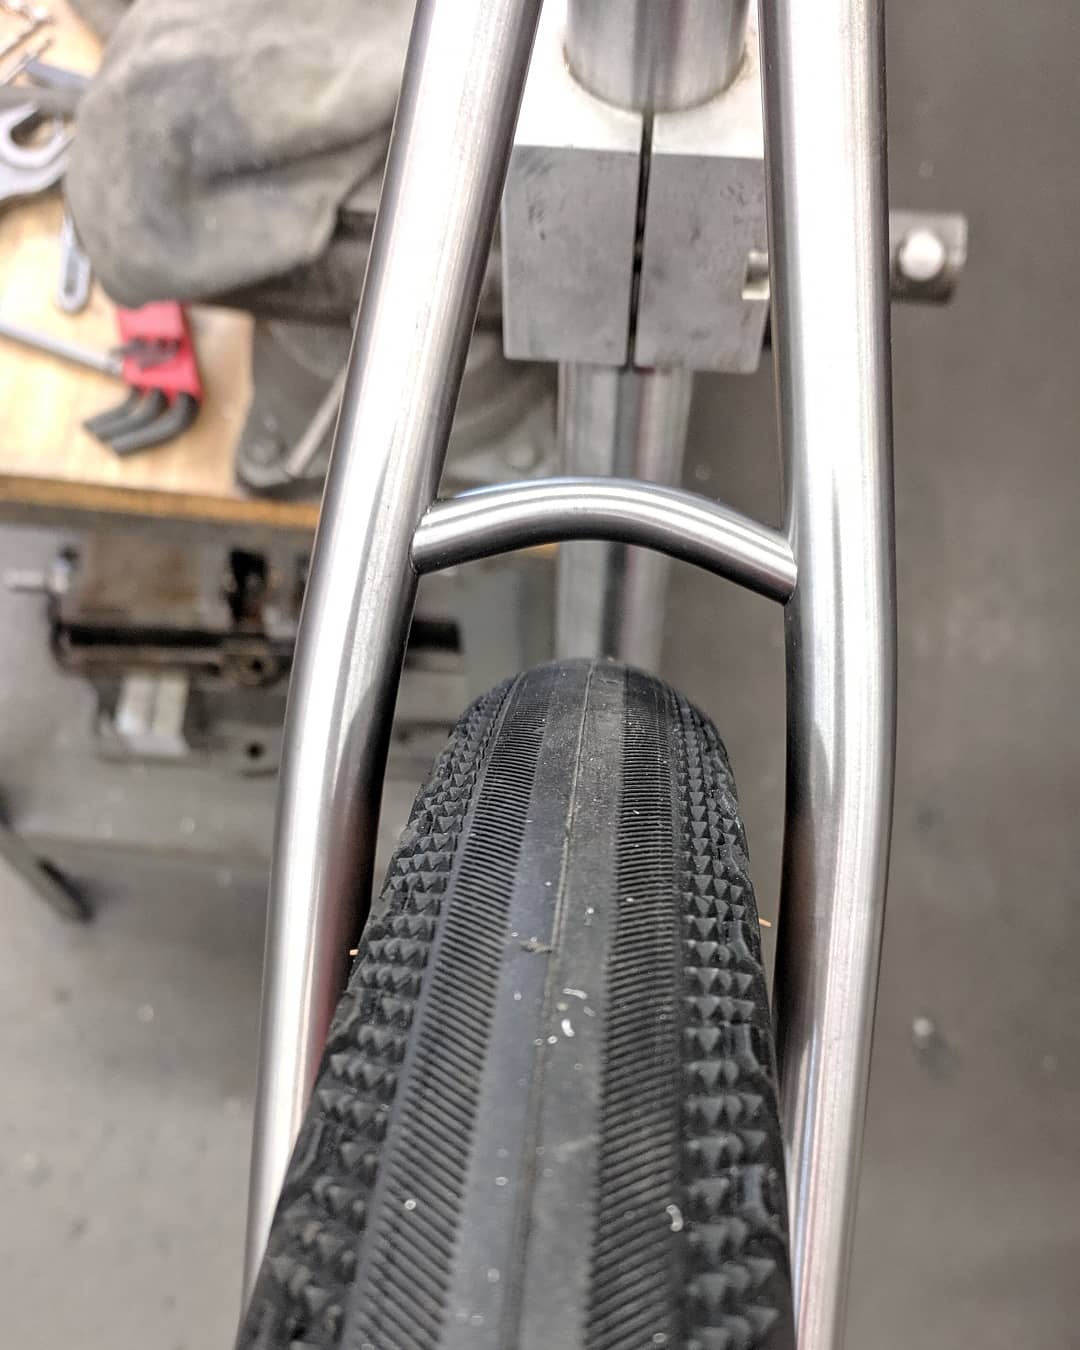
Borrowed a co-workers back wheel to check fitness as I didn’t even have my own tires ready yet. Haha!
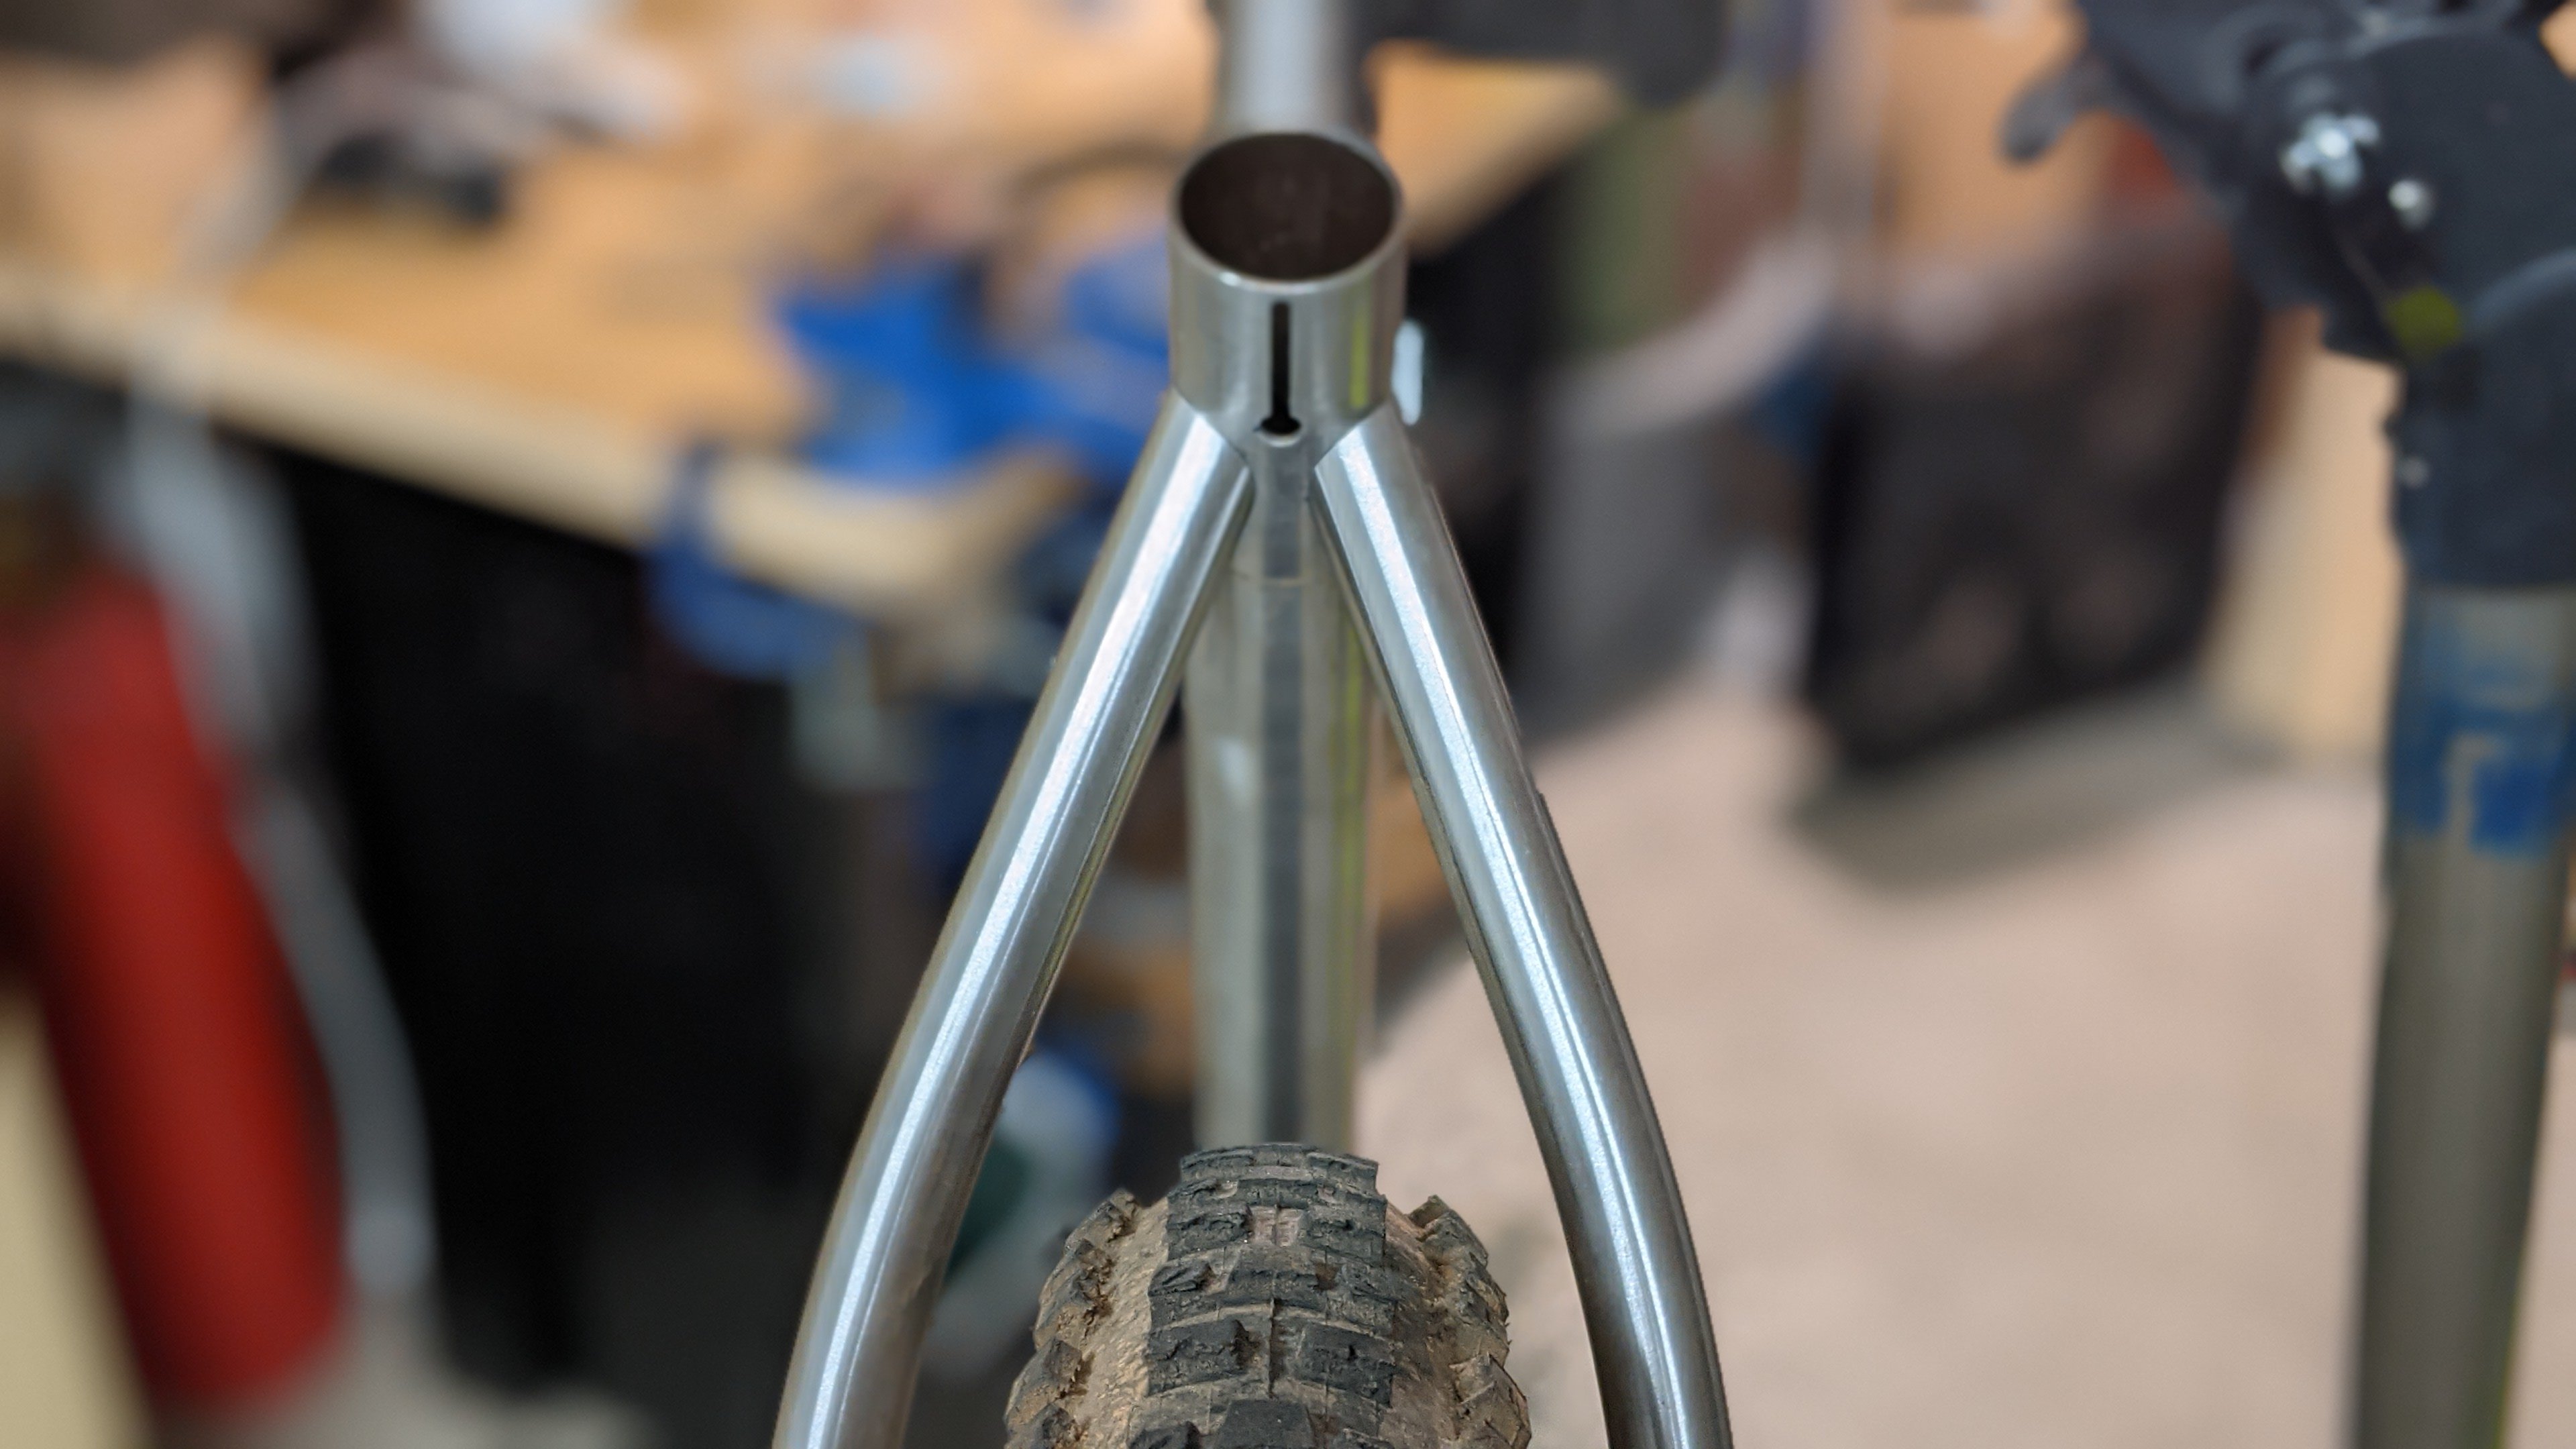
I like small diameter seat stay bridges. I also like them to be curved. Especially when there are curved seat stays. Straight bridges are fine for straight stays.
This took embarrassingly long to get it mitred where I wanted it.
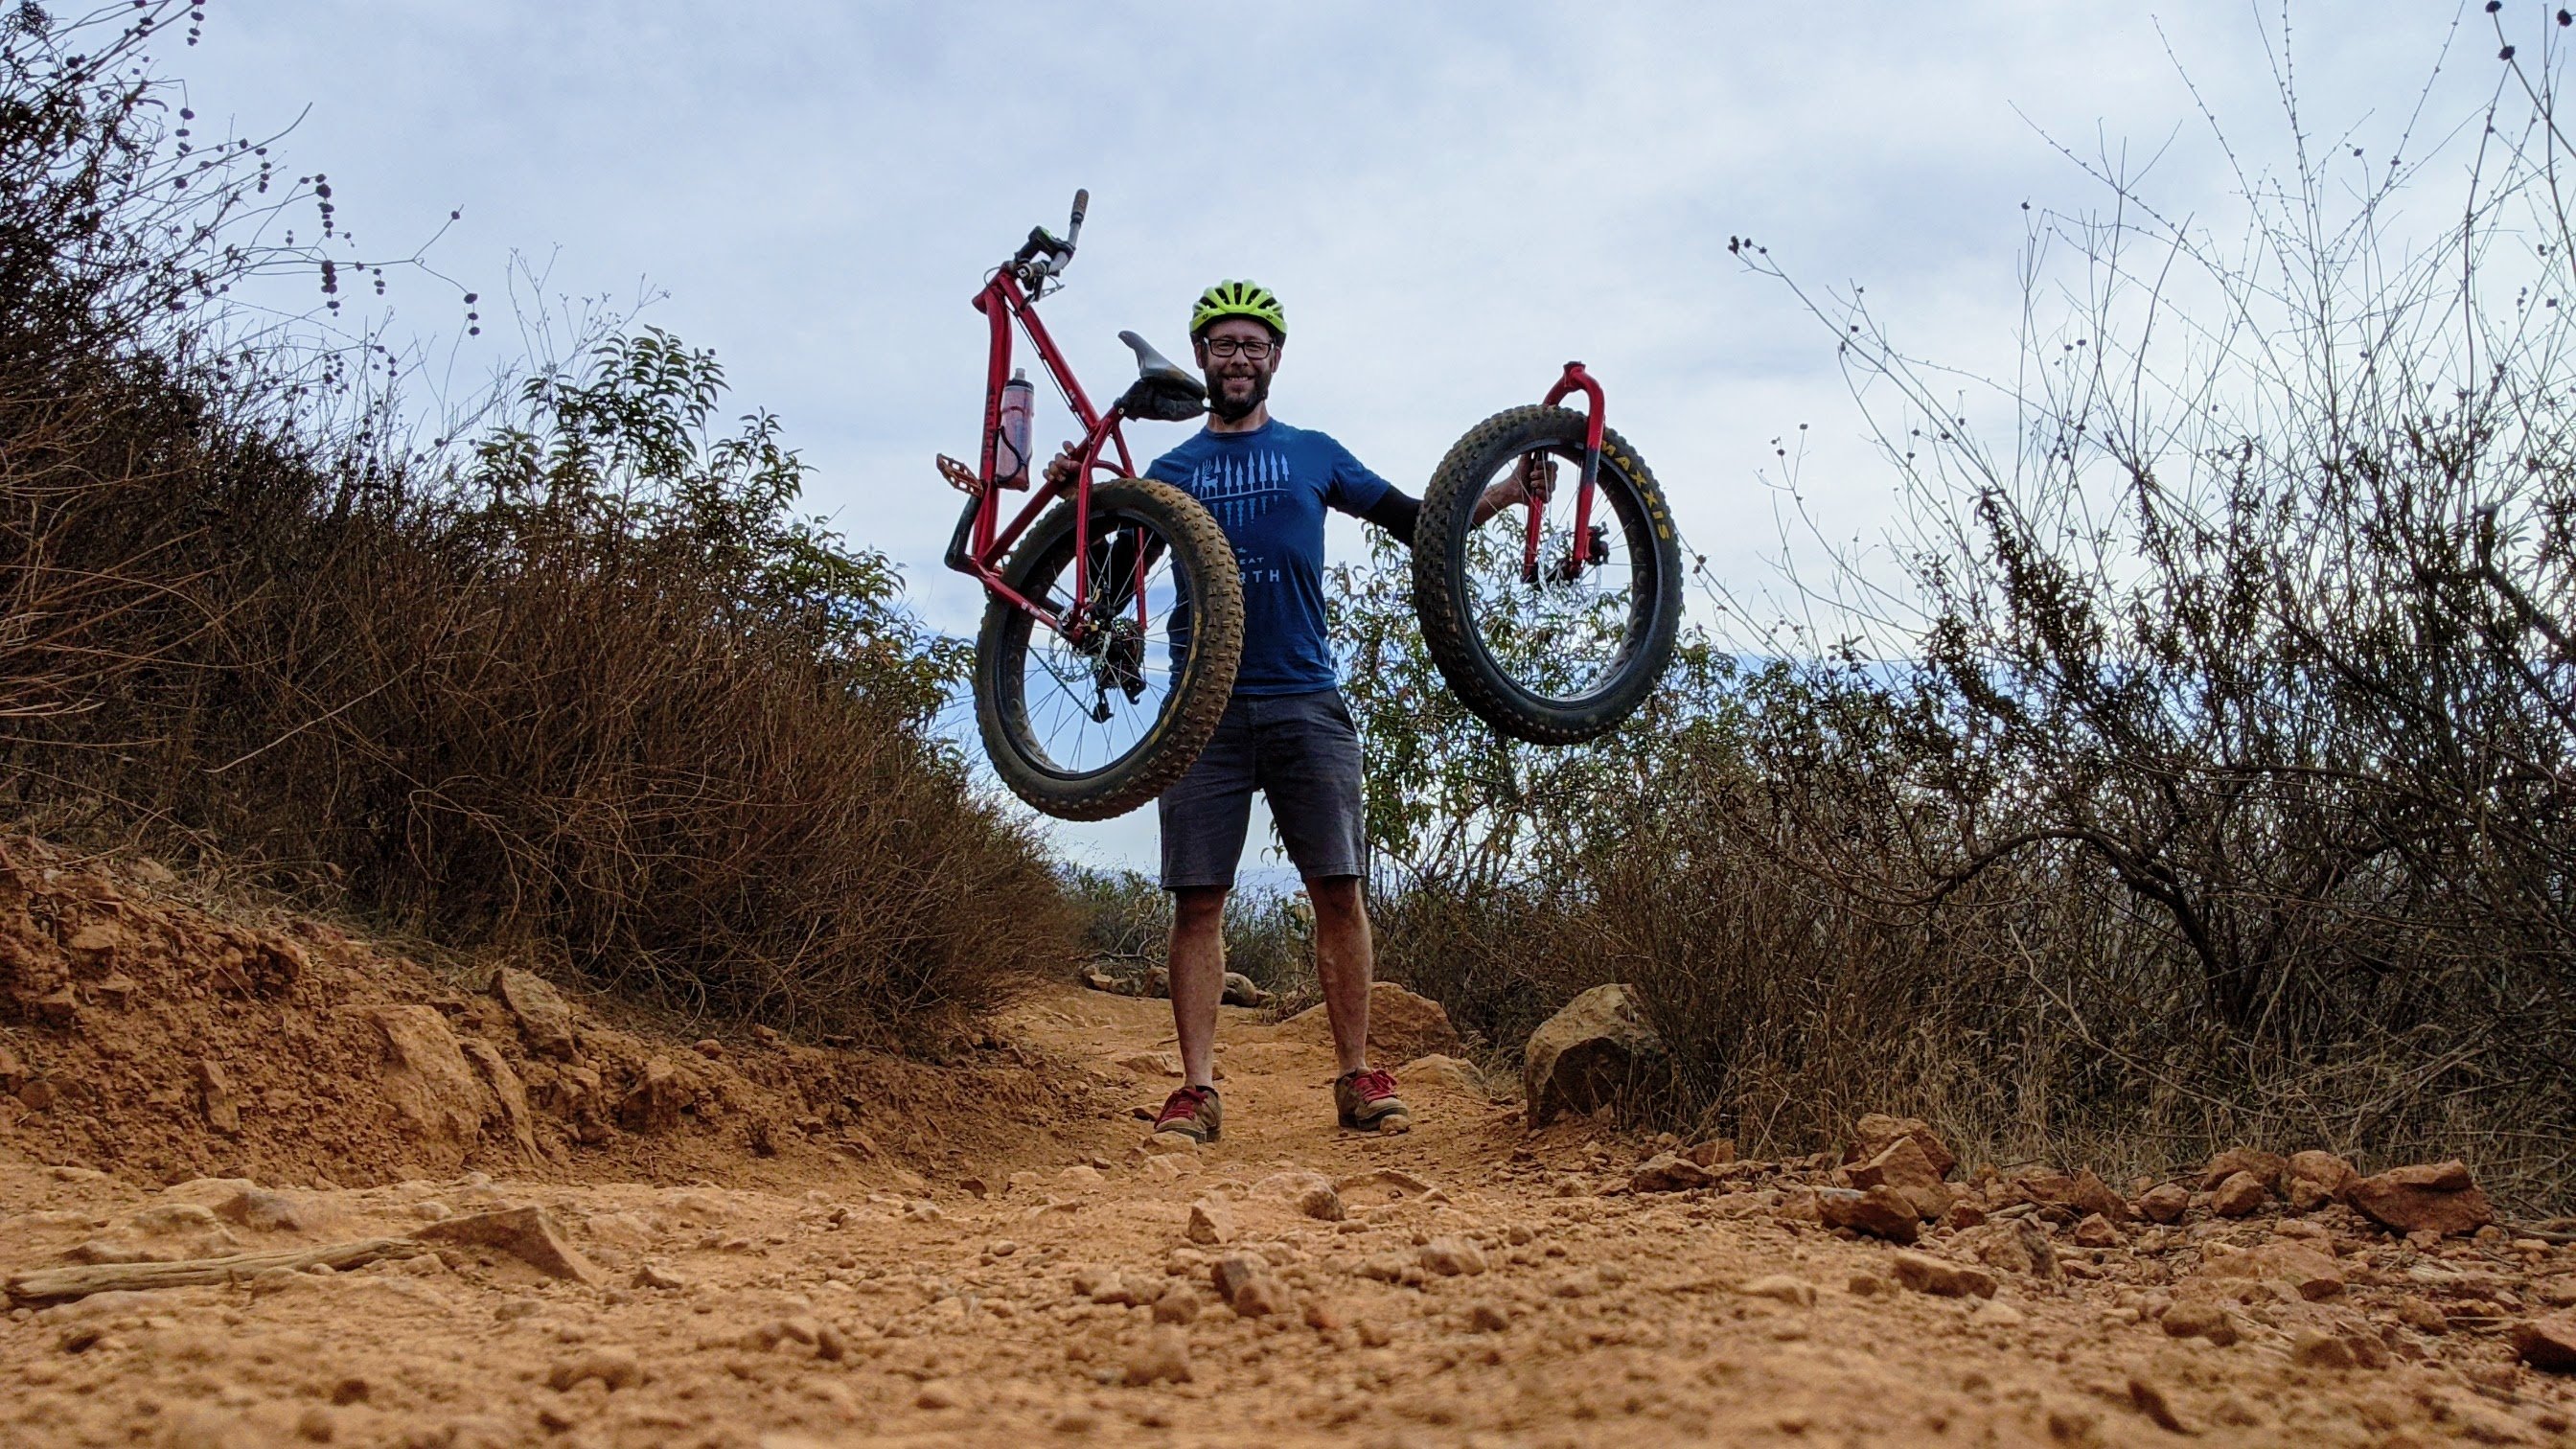
Then something happened!
The fat bike I had been riding was no longer. Side note: I sent Framed this pic and they replied with a 20% off coupon code. I would have bugged out making sure the rider was ok but, that’s just me. Tells you what kind of company they are.
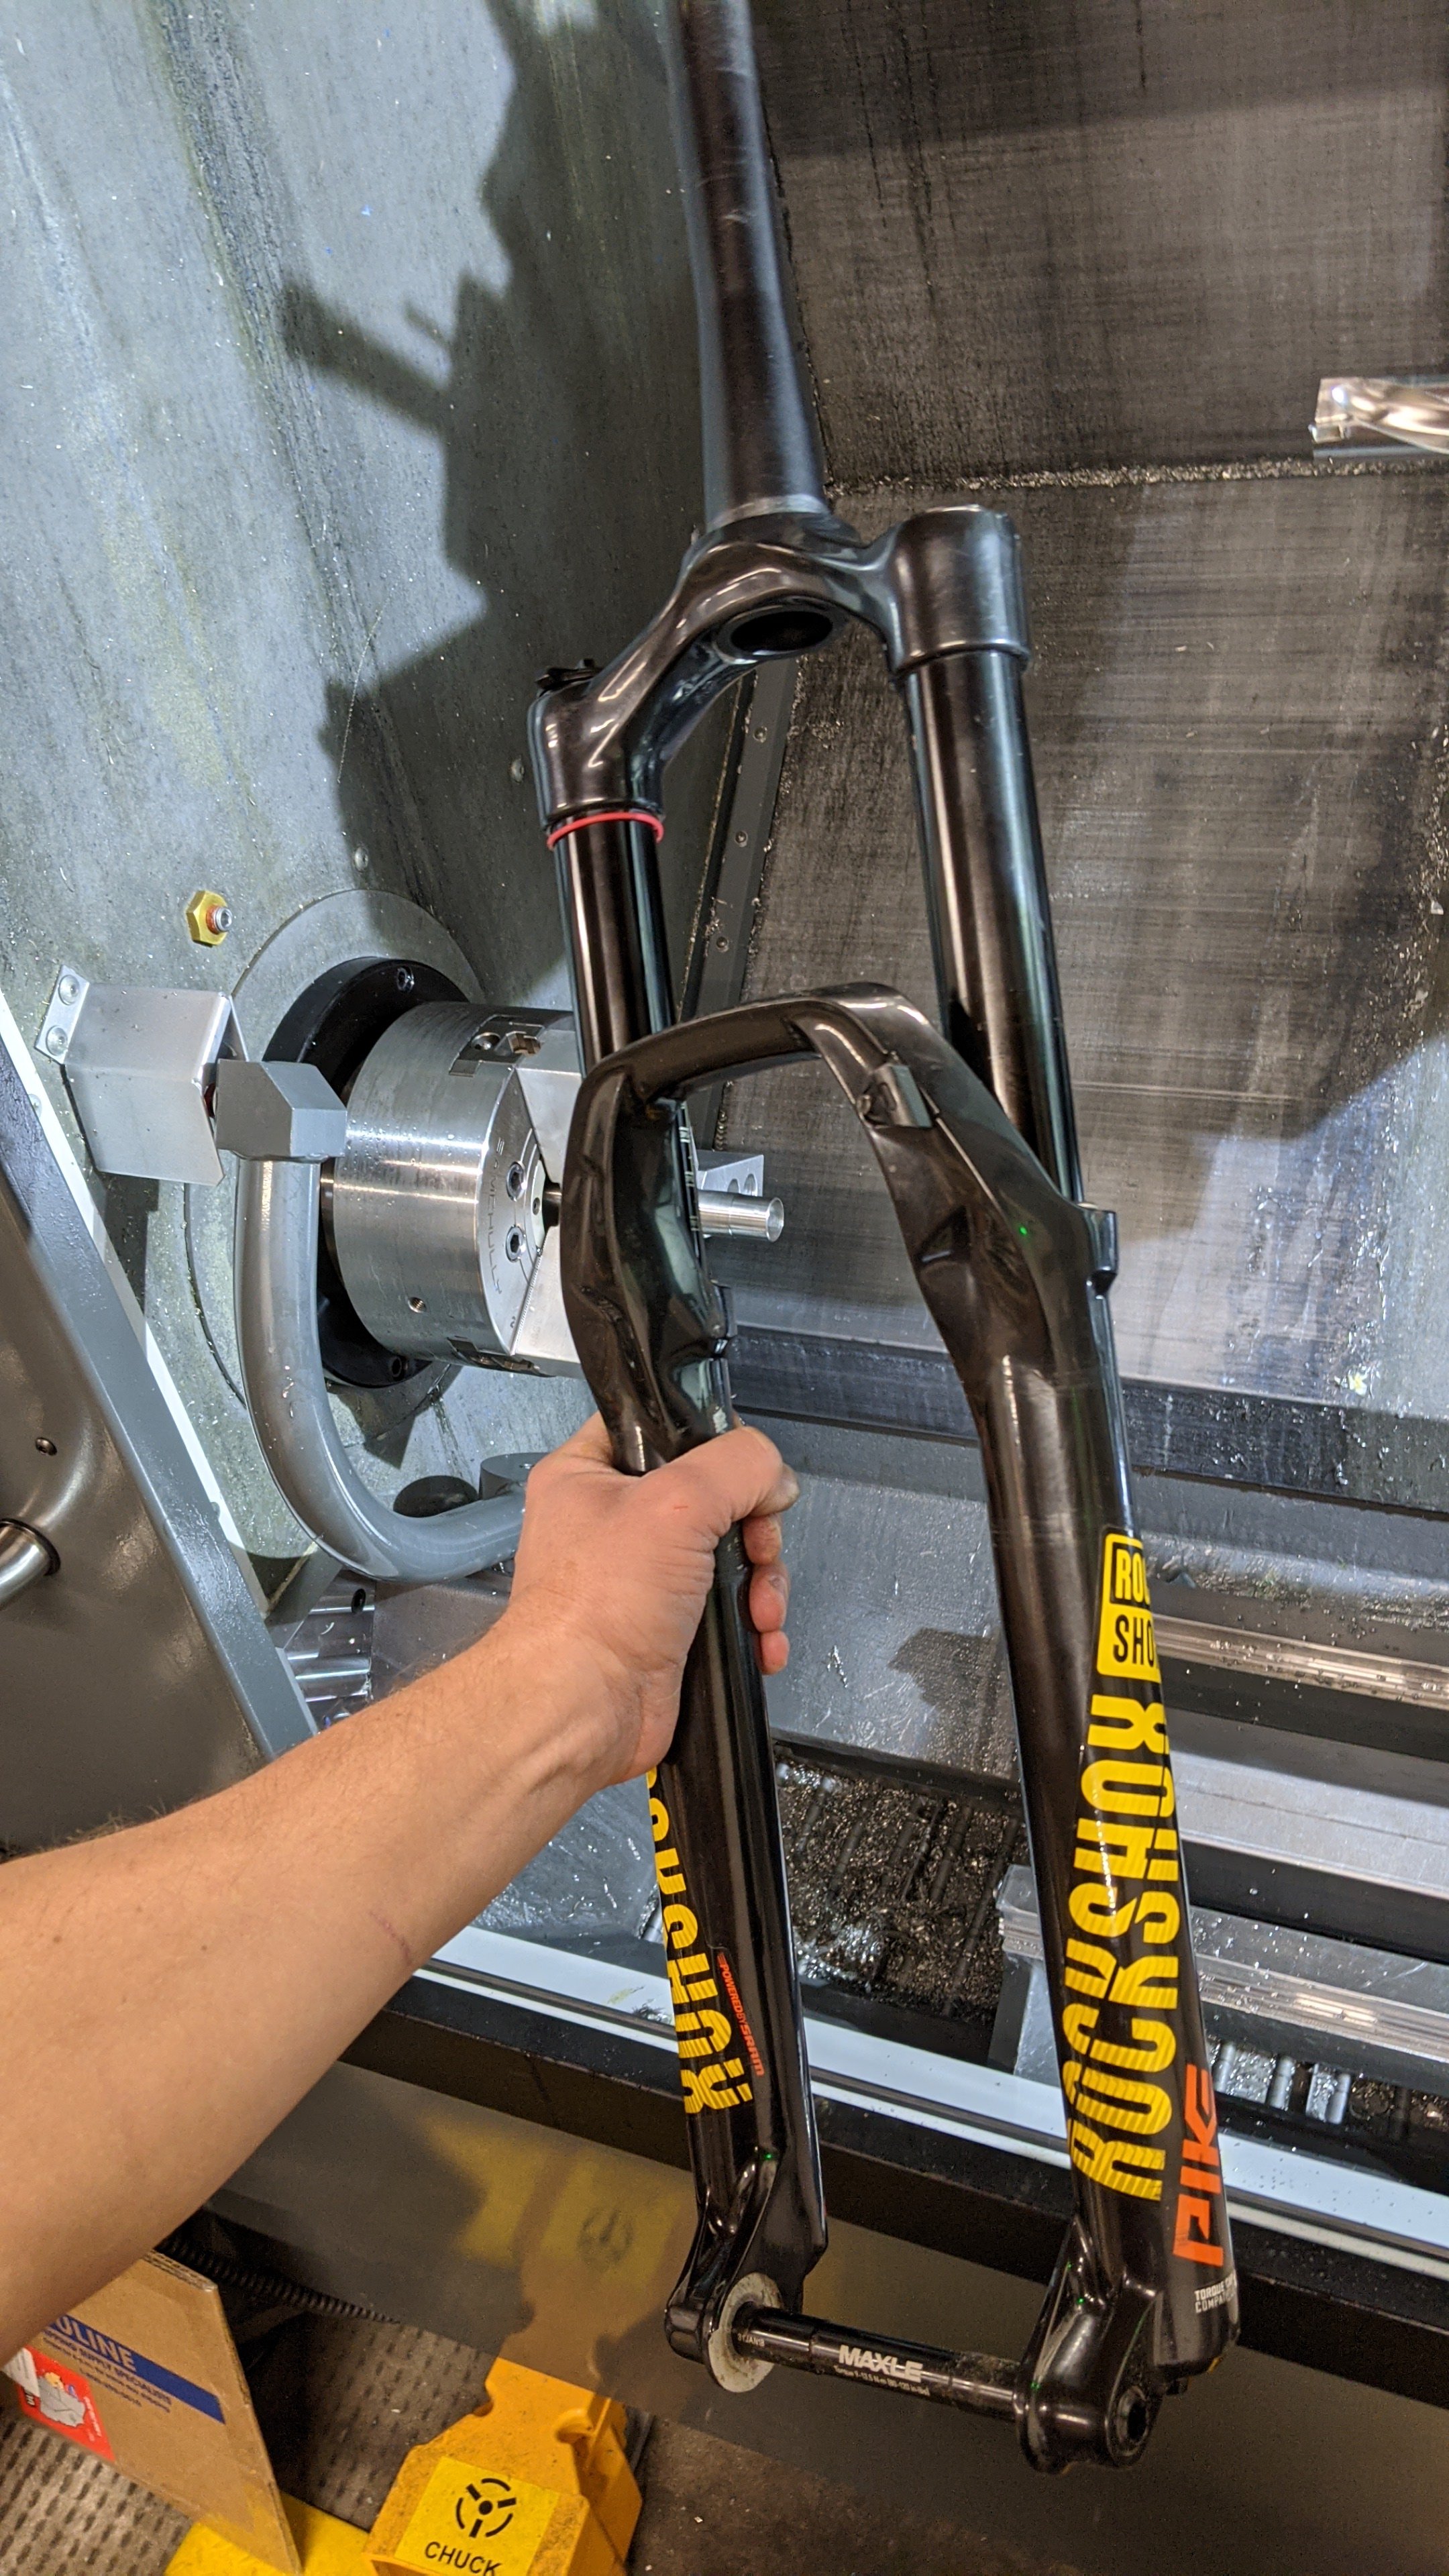
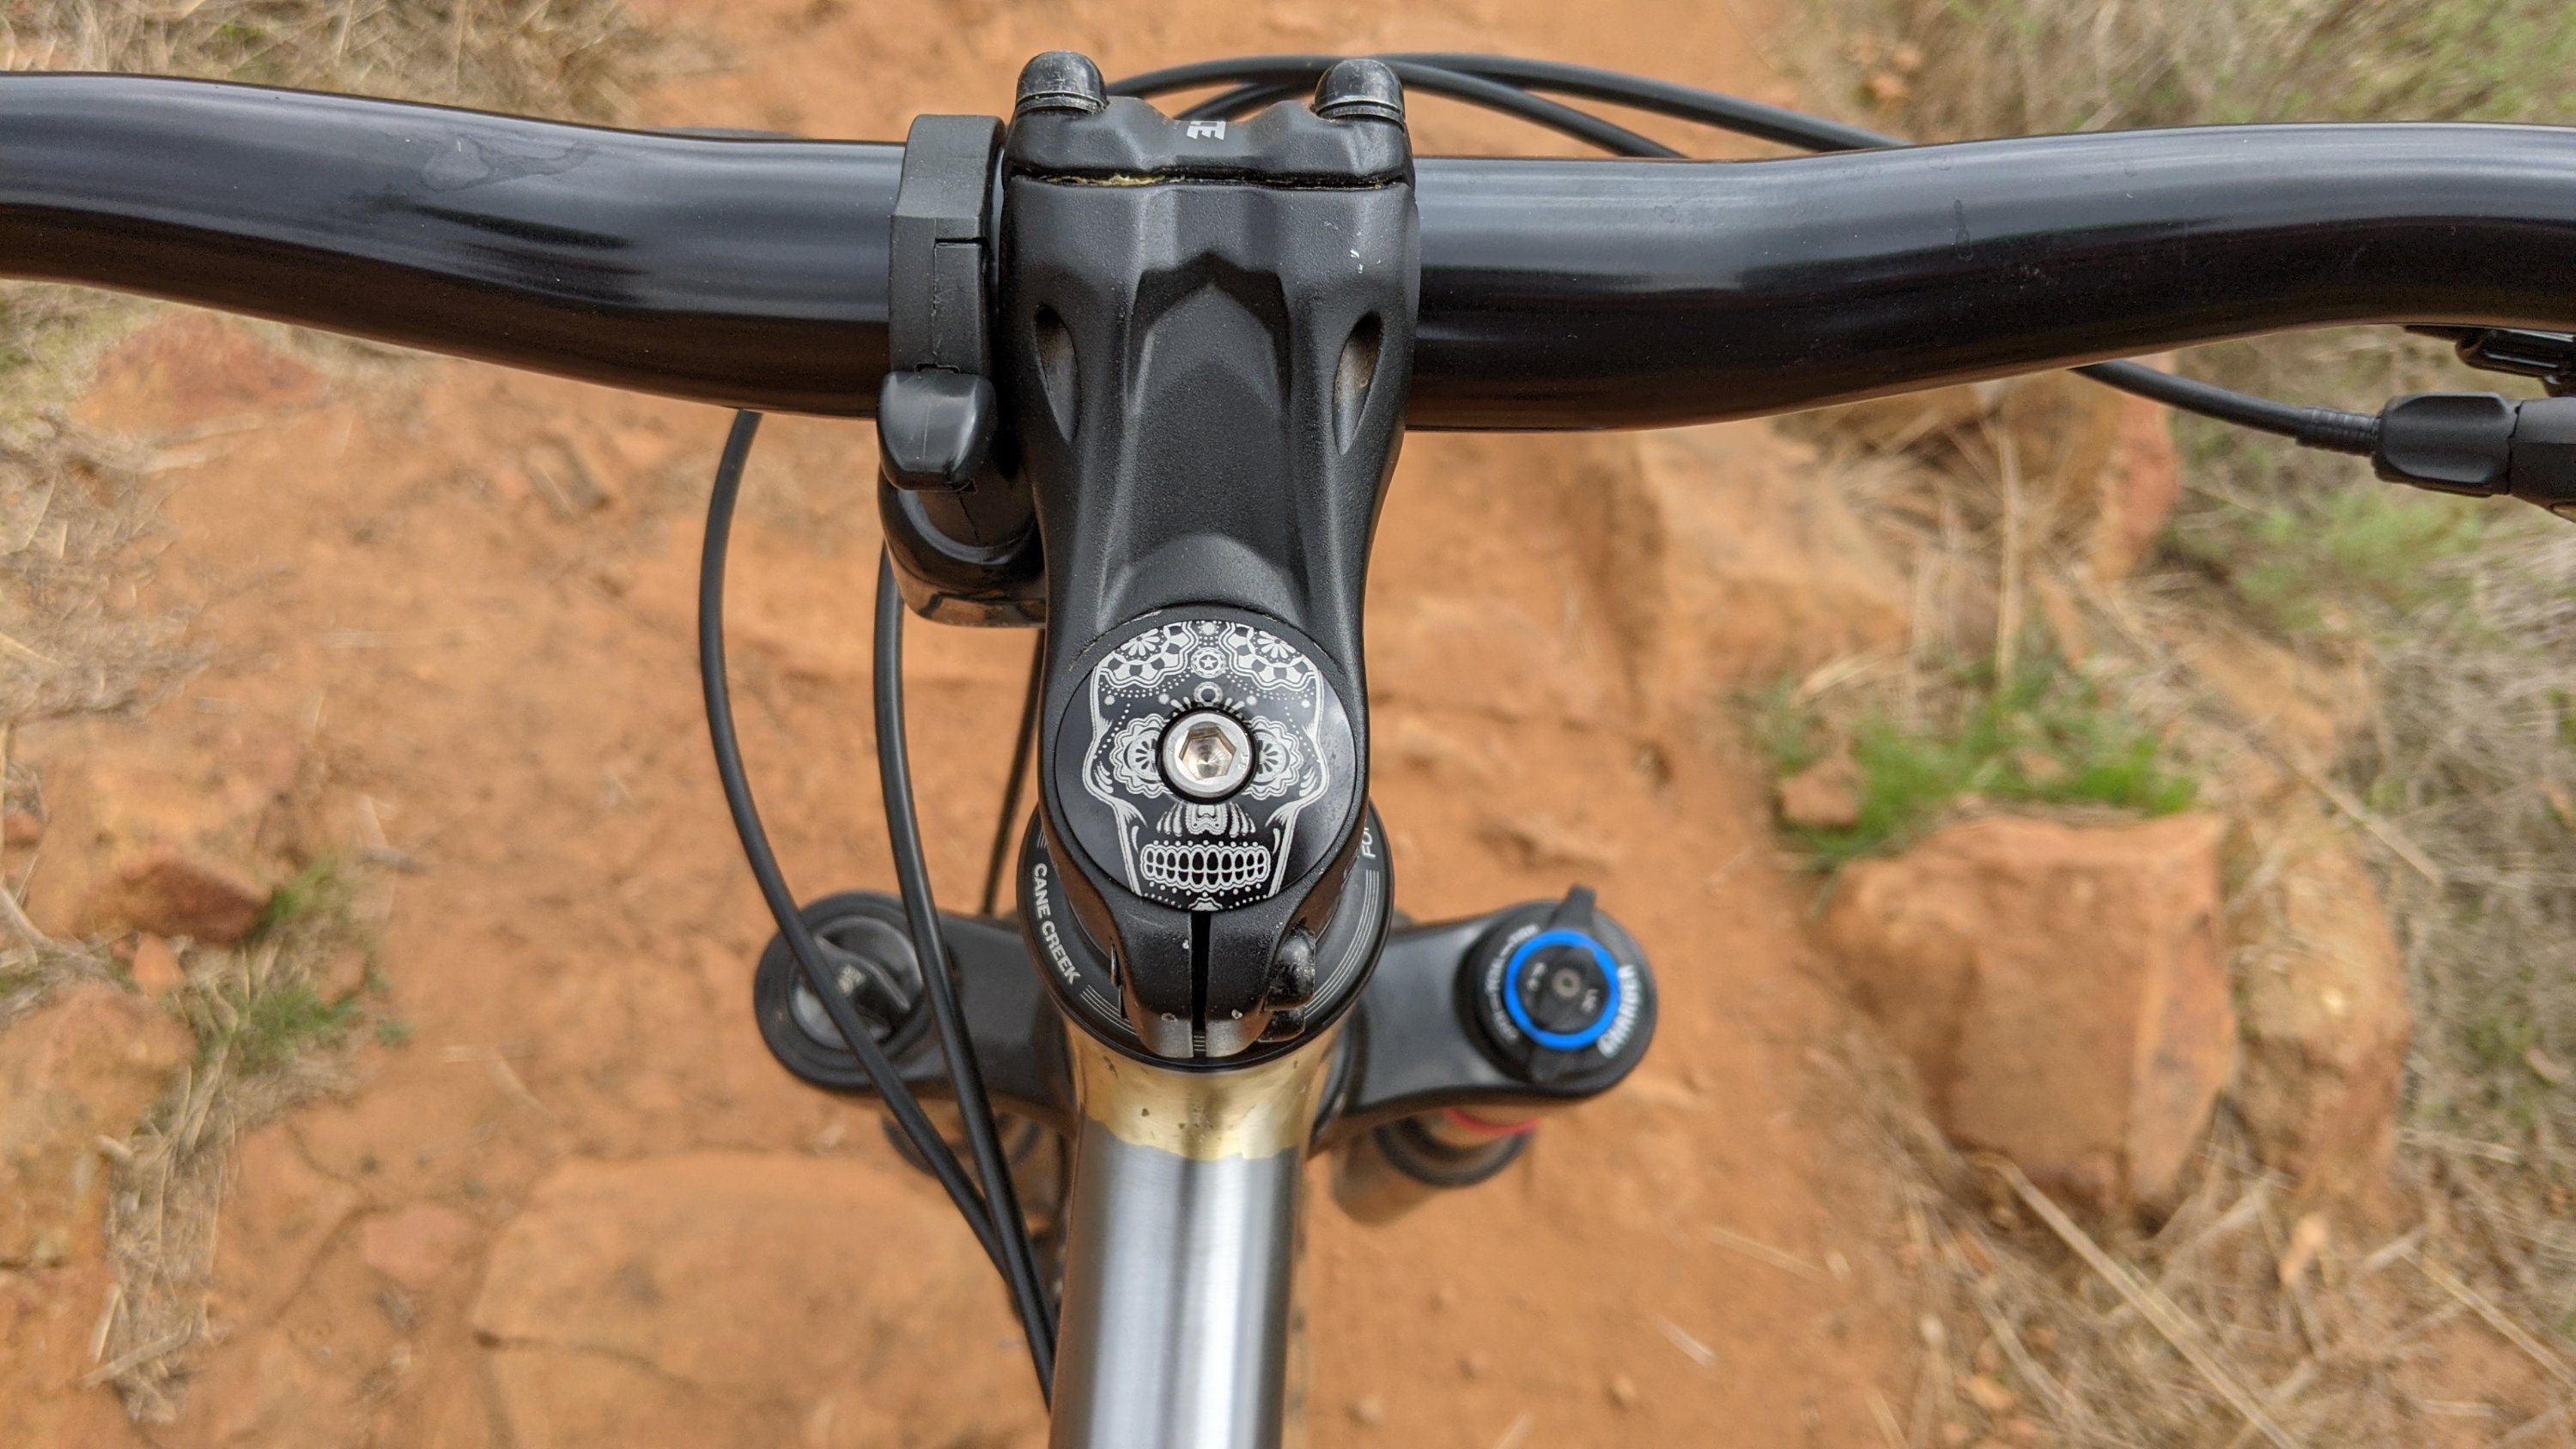
Moving along. This Pike outta fill the void quite nicely.
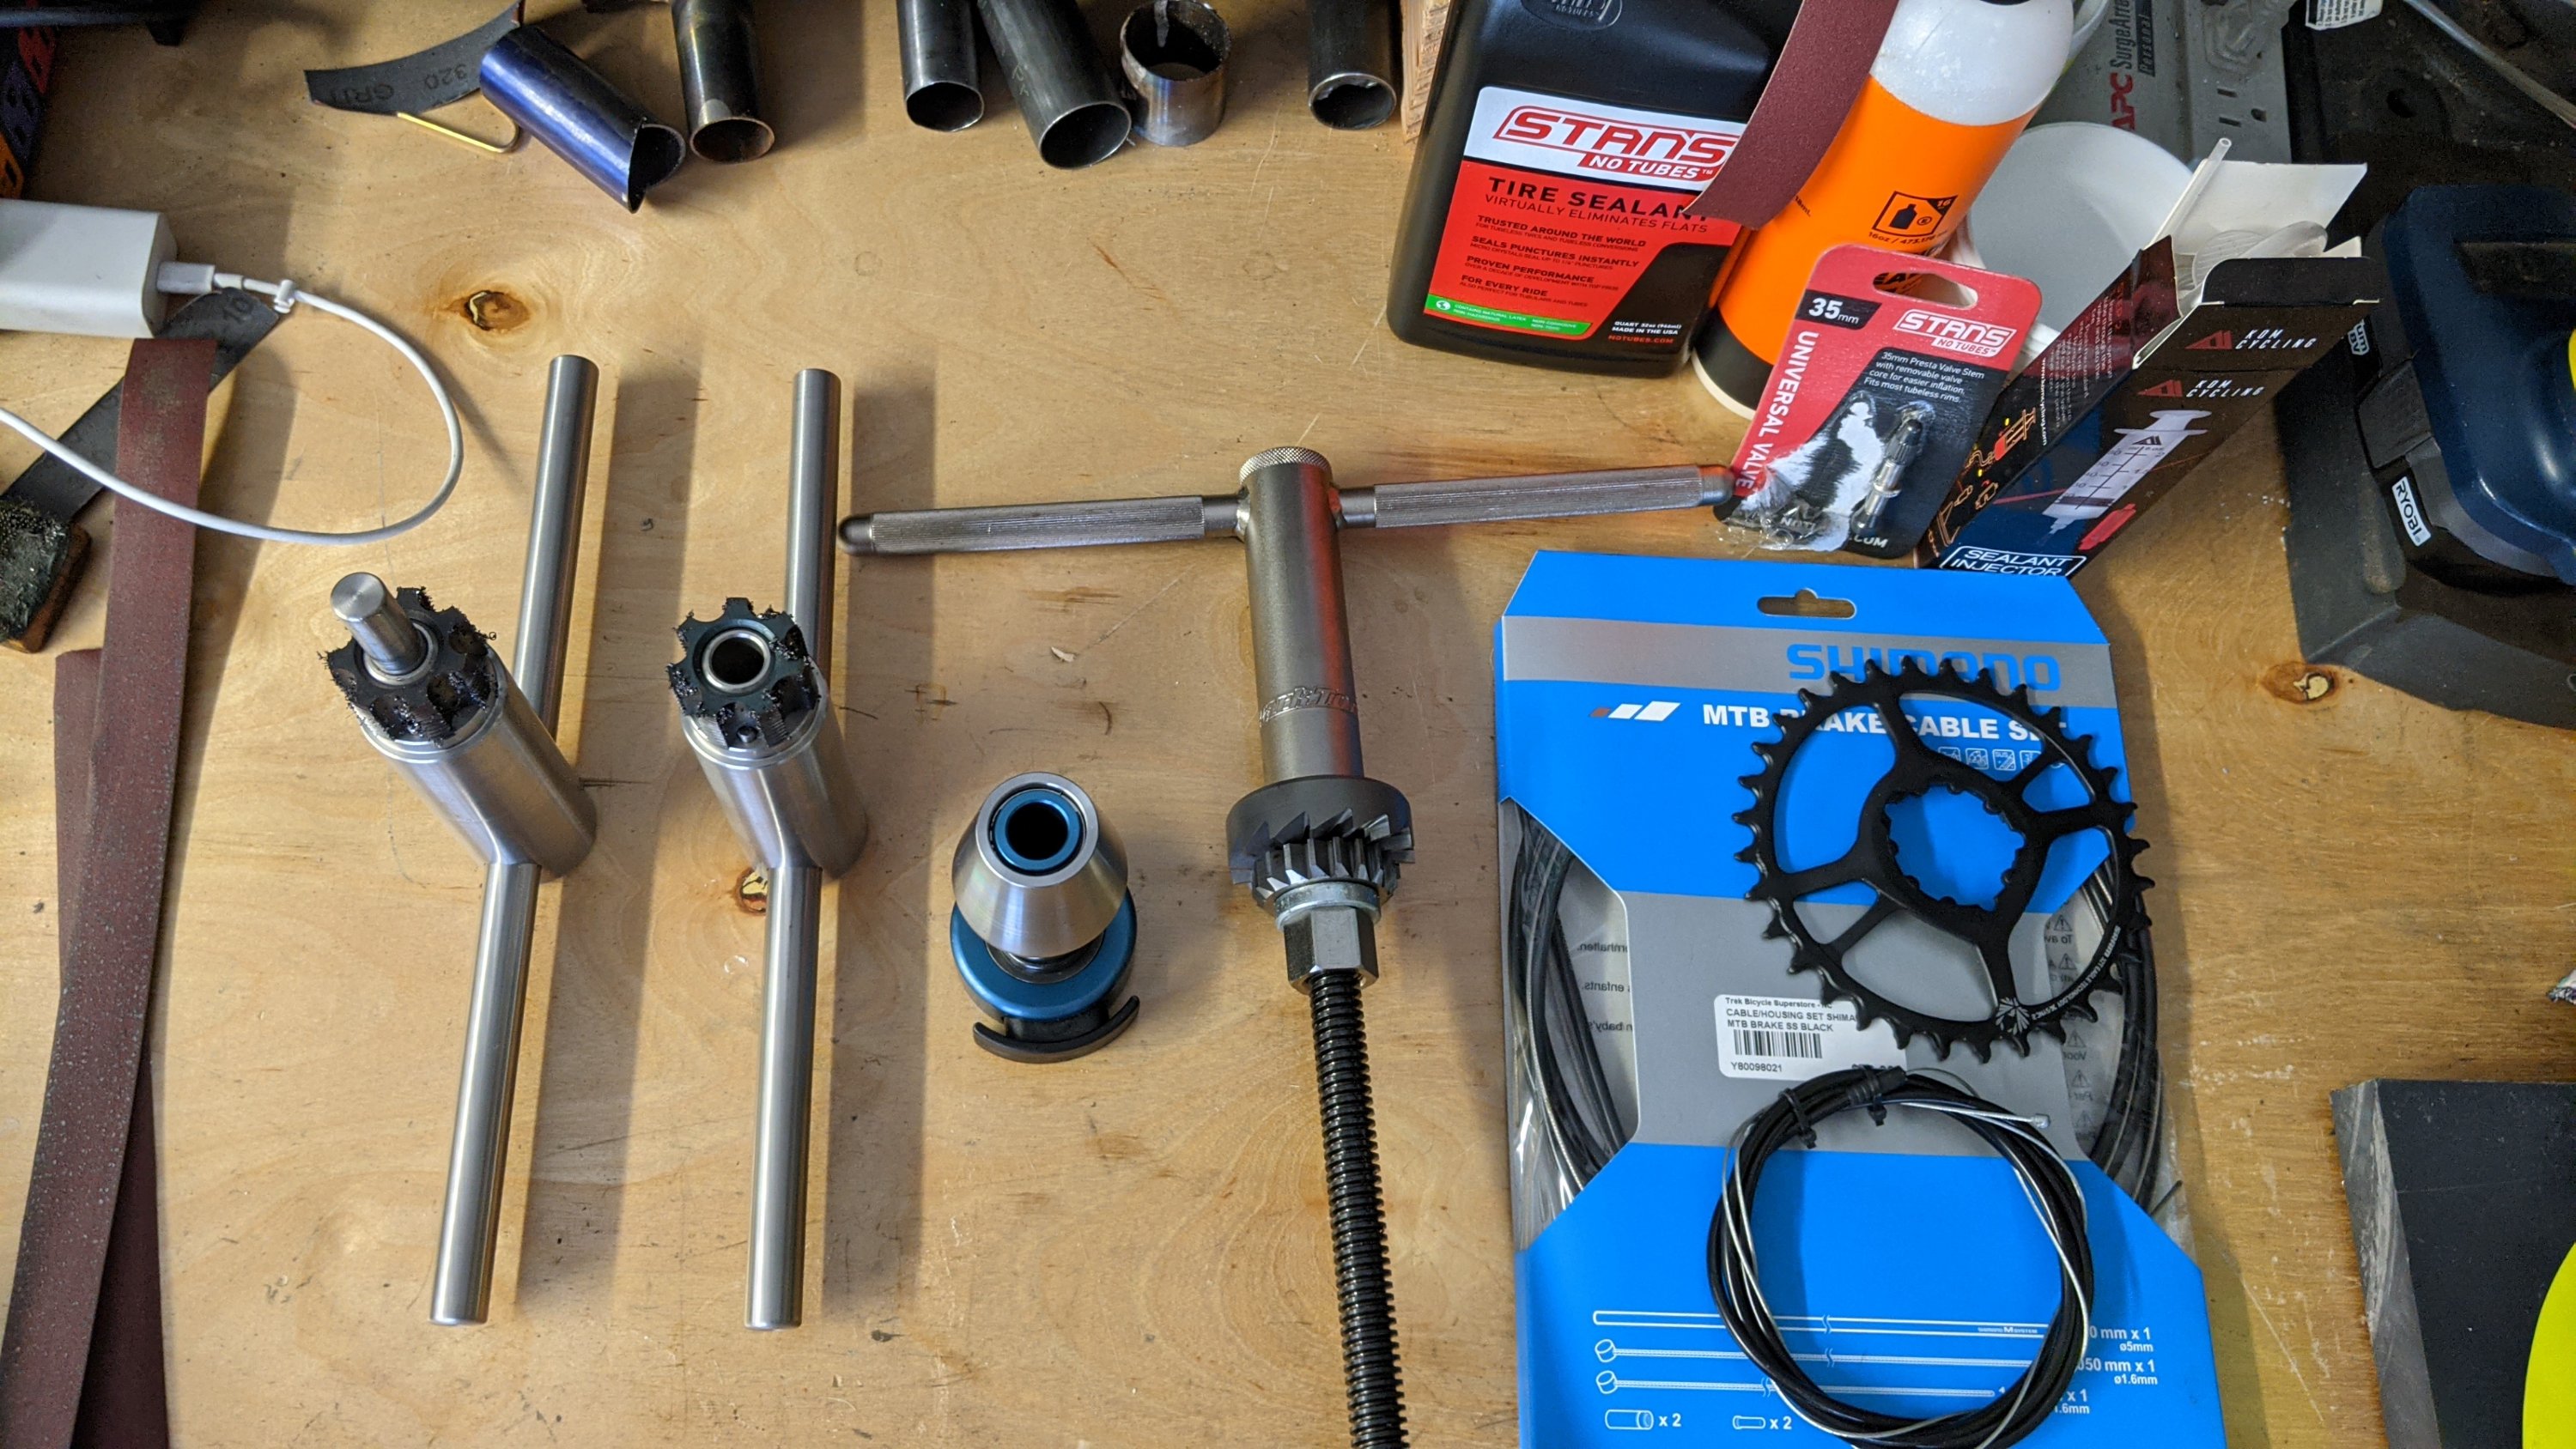
So happy to have finally made or bought what I need to chase, ream and face my frames!
A little chase / face here.
A little ream there.
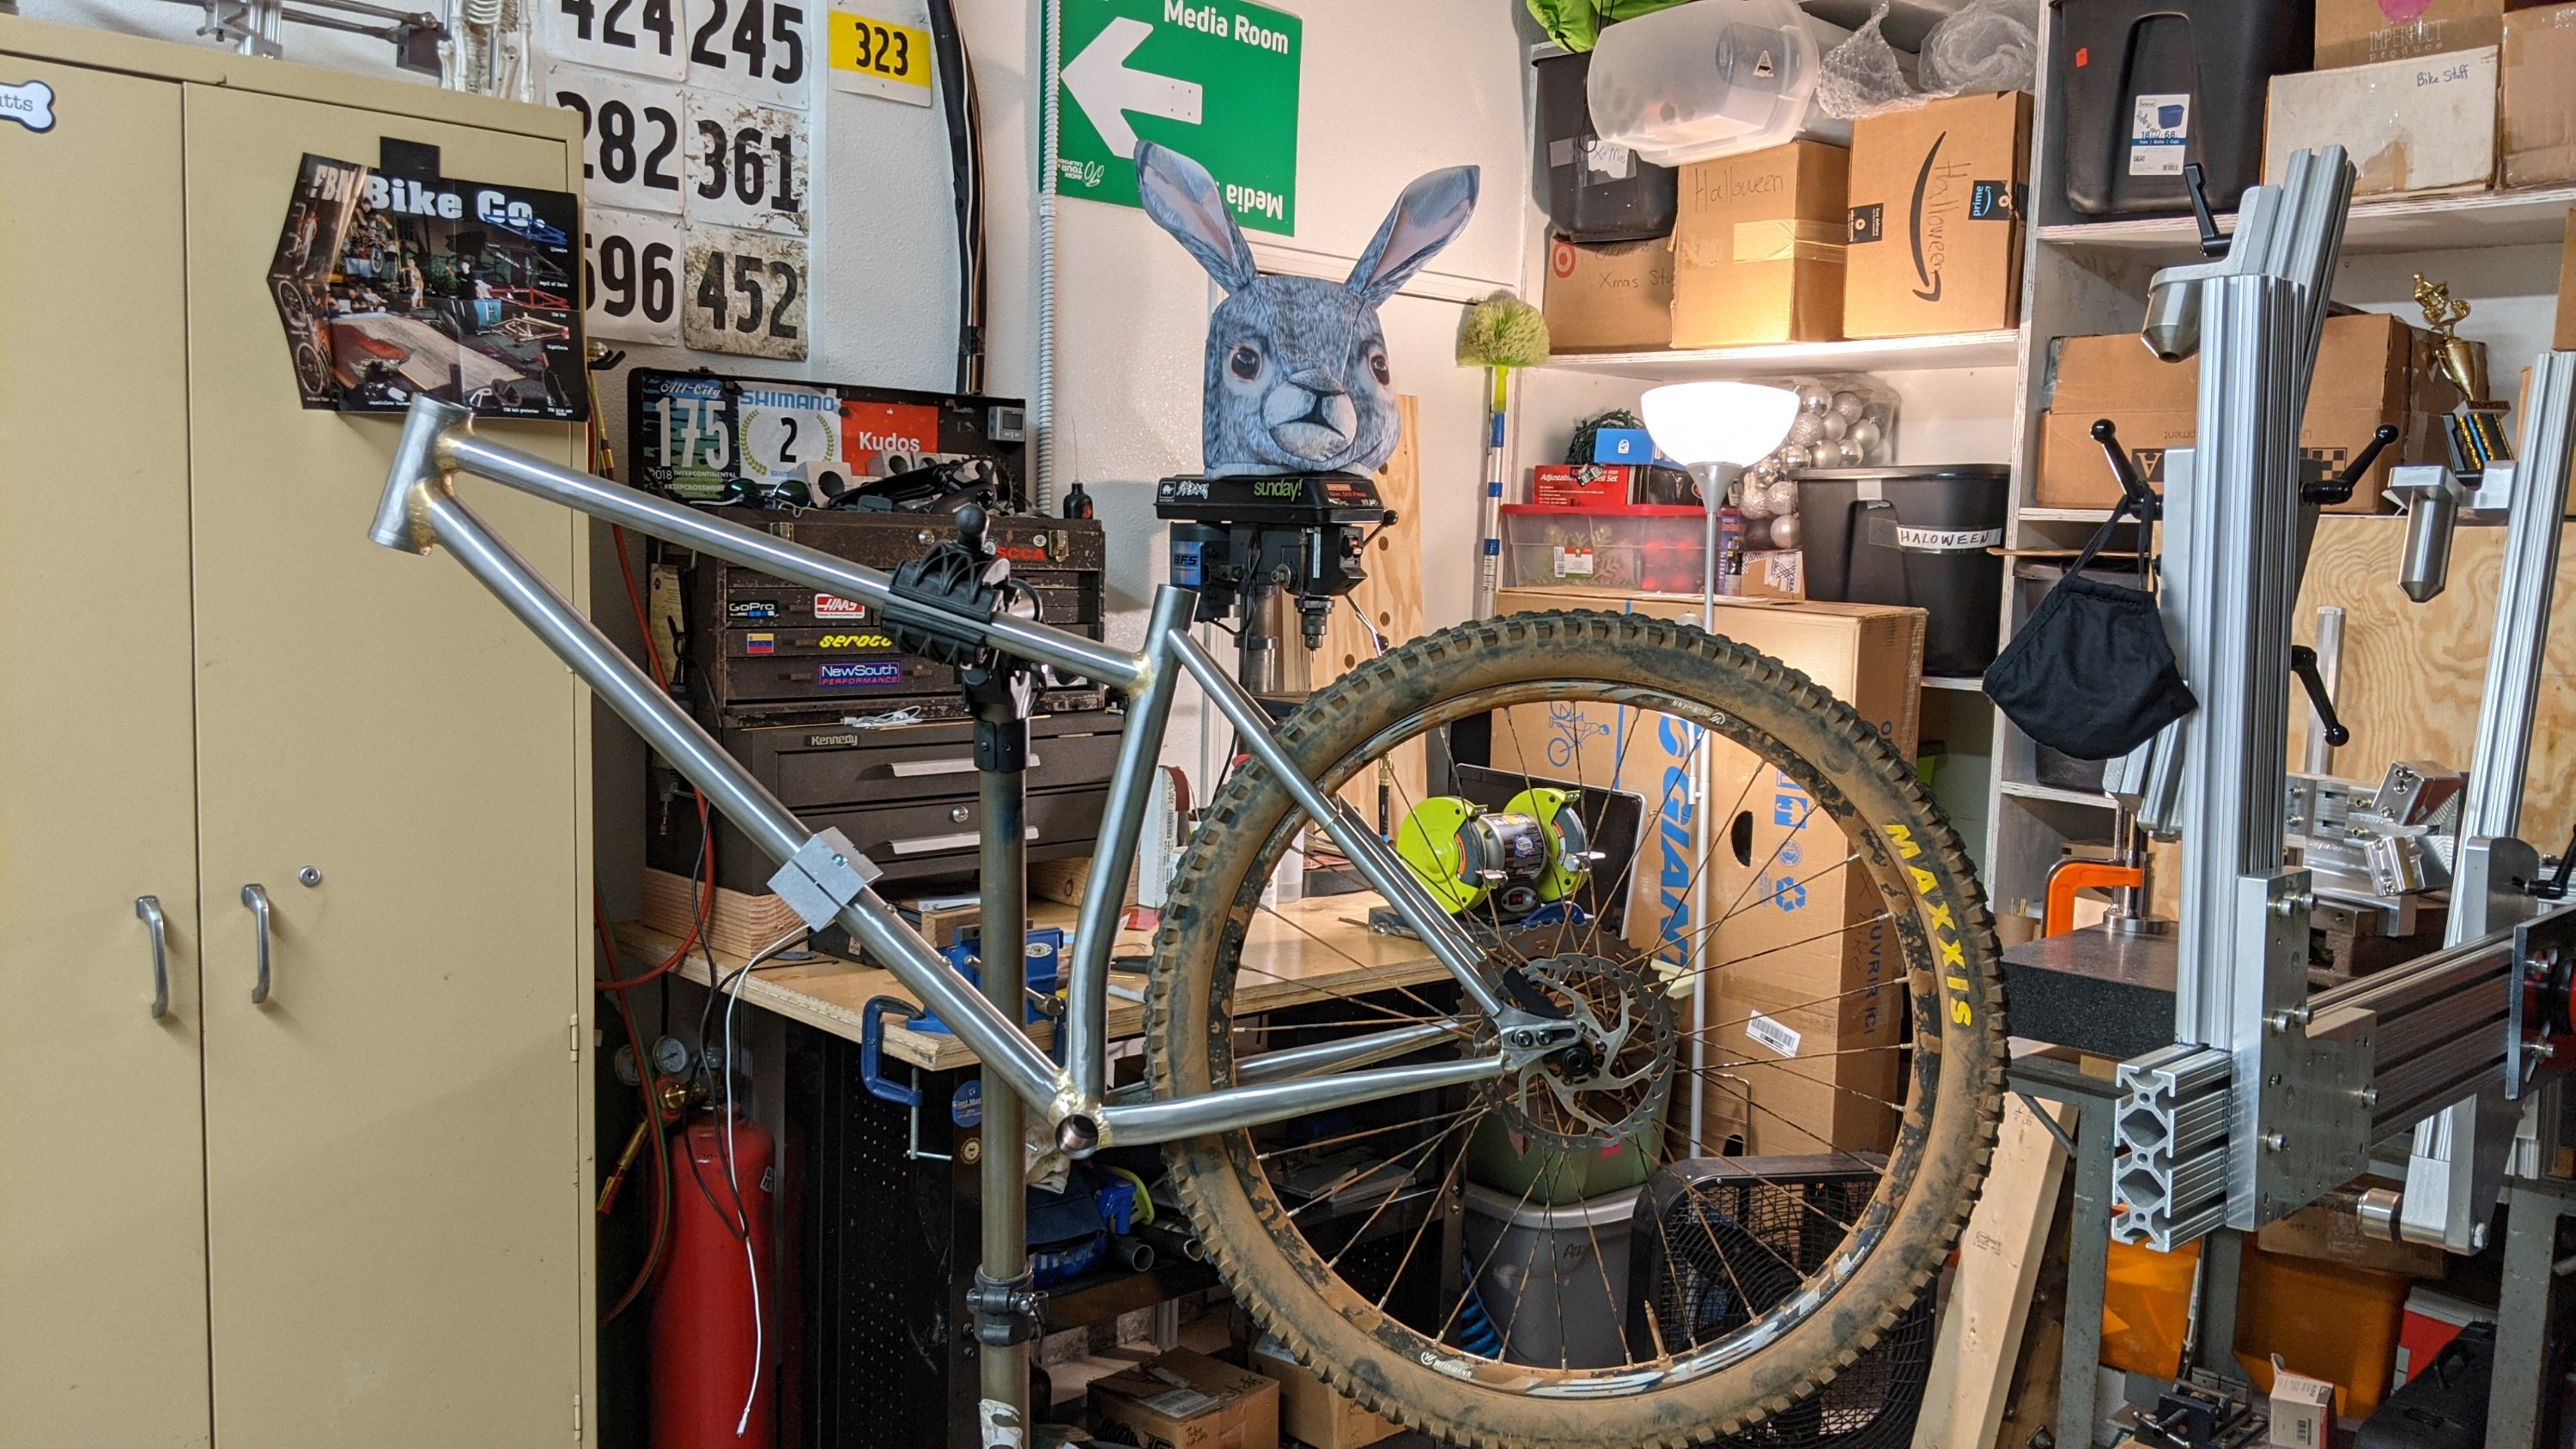
And it’s ready for the trail! Well… Sorta. I had accidentally ordered the wrong brake side slider from Paragon but I was so excited to ride it I took it out without a rear brake. HIGHLY don’t recommend it but first impressions were VERY promising!
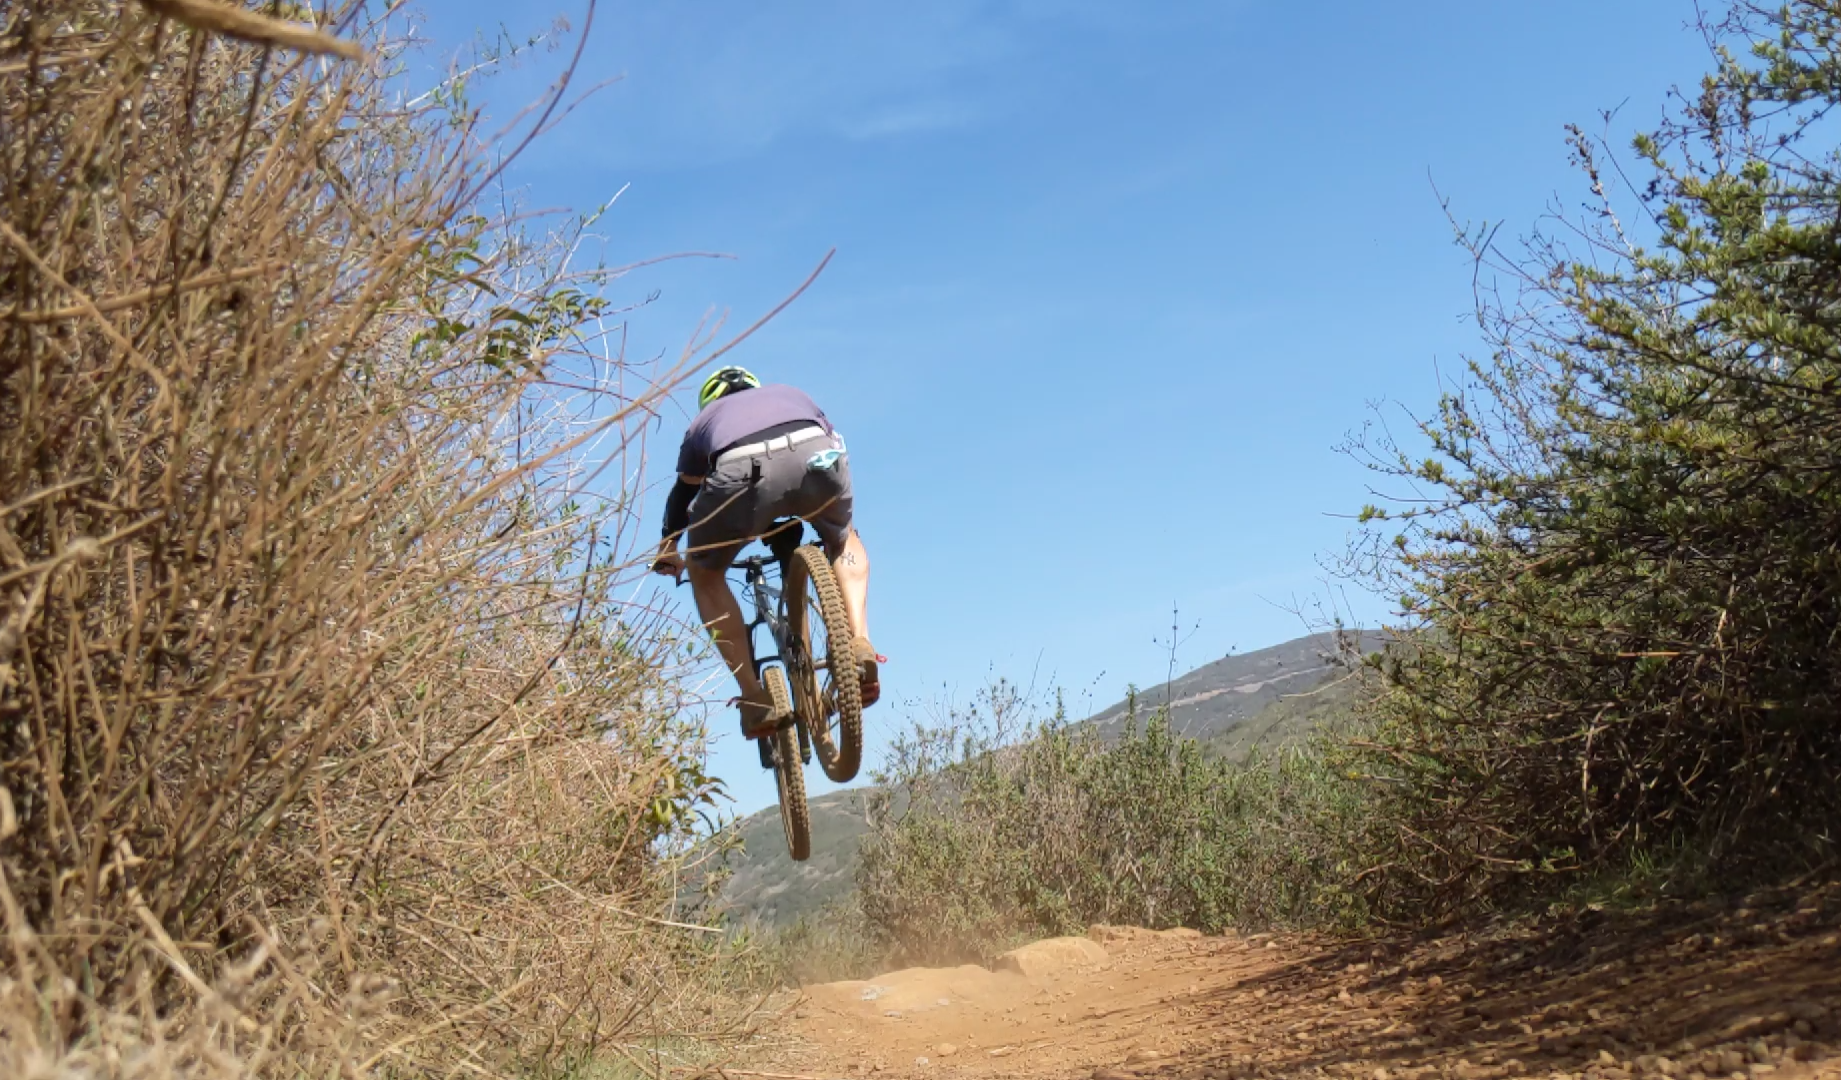
Once the slider insert came it went straight up Denk Mountain! Compared to the fat bike it’s 5-6 lbs lighter and you really feel it when climbing! The 65° head tube angle was a little funny at first but now it feels normal.
First impression: WOAH! SO fun!!! Front end is precise and light. It bunny hops quite willingly!
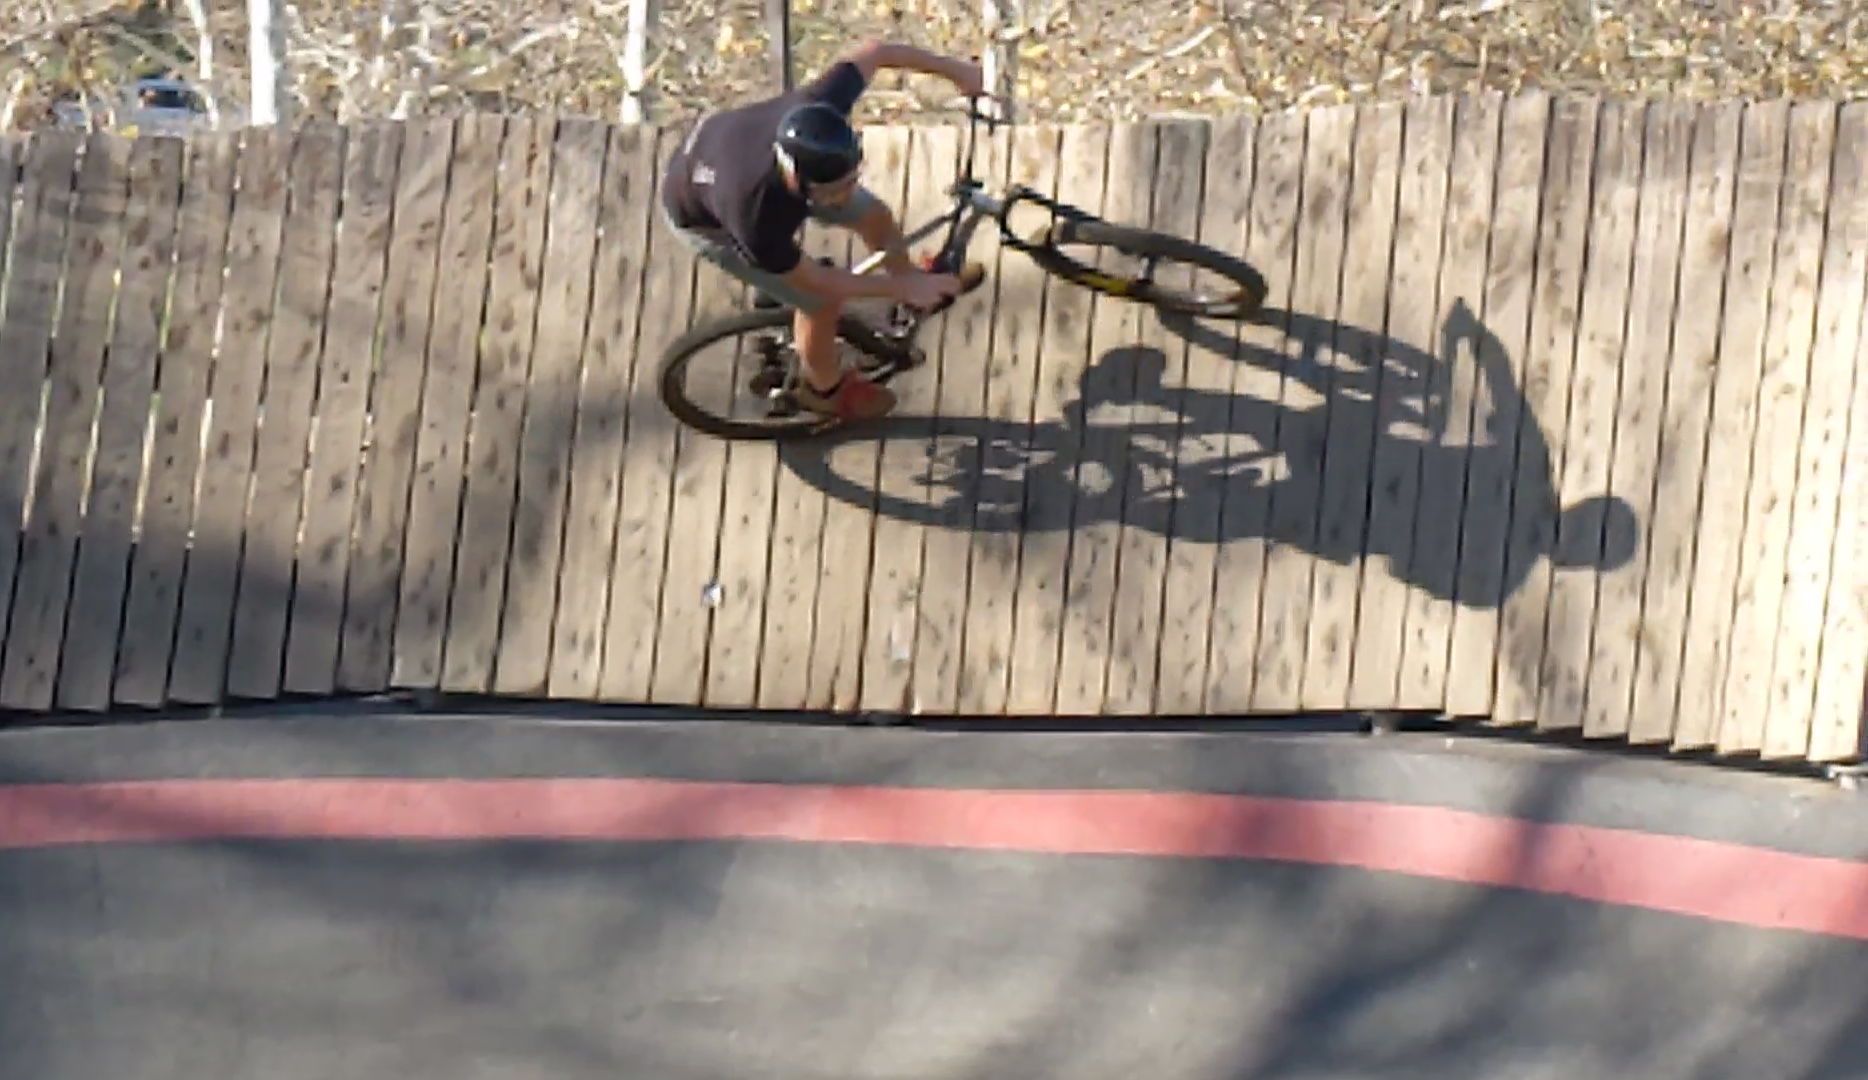
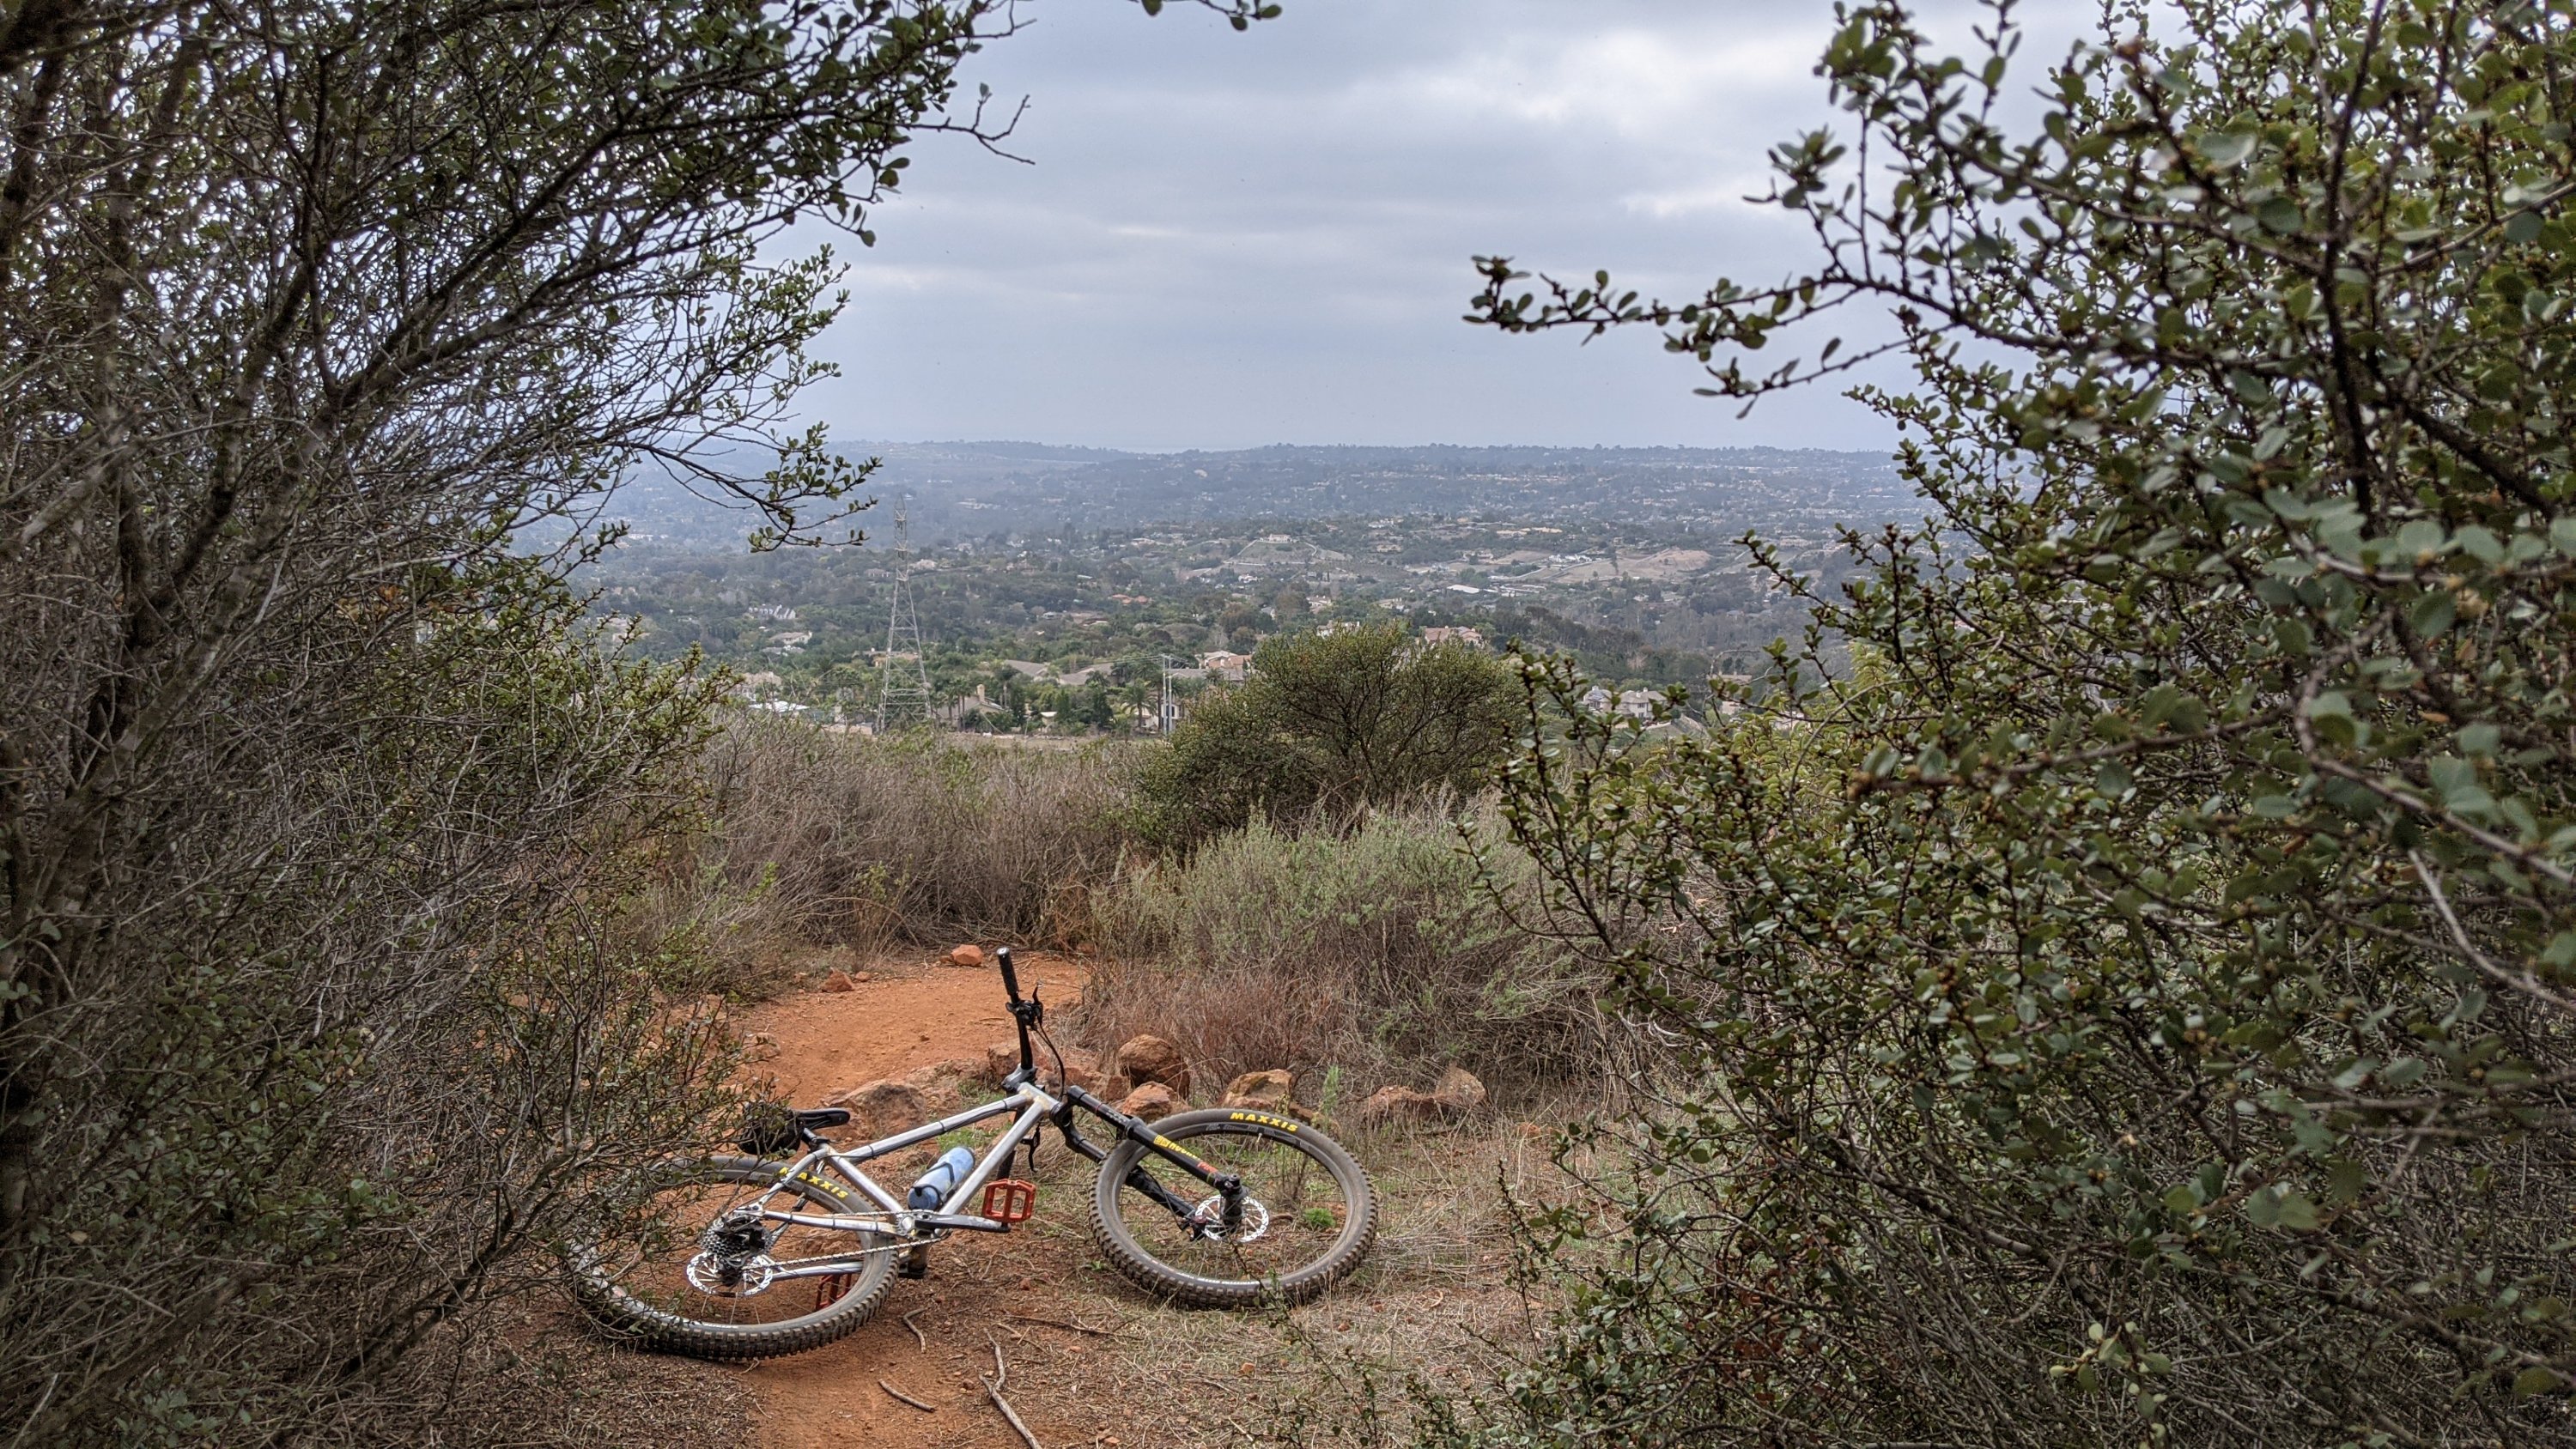
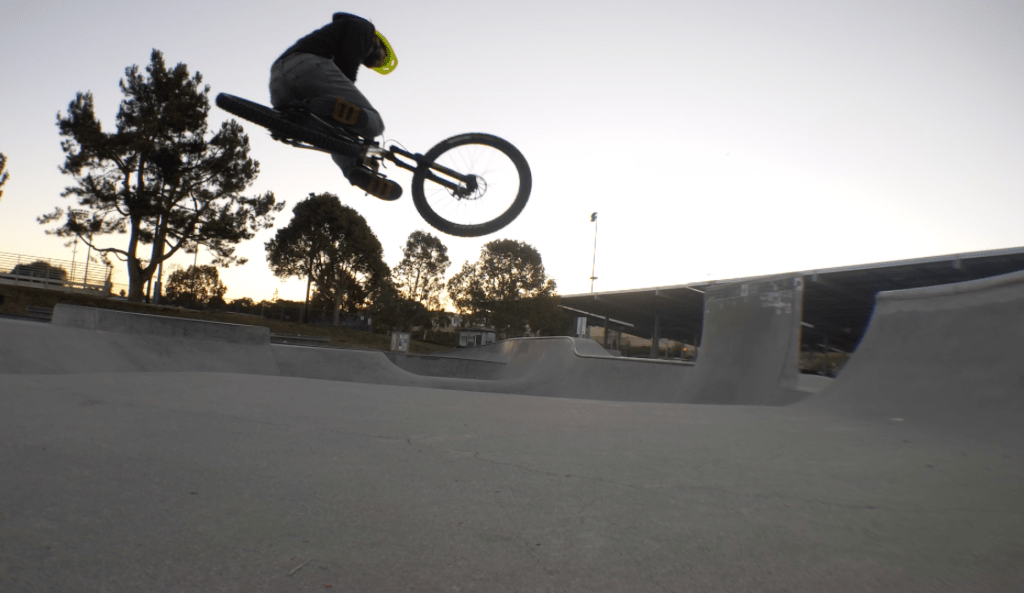
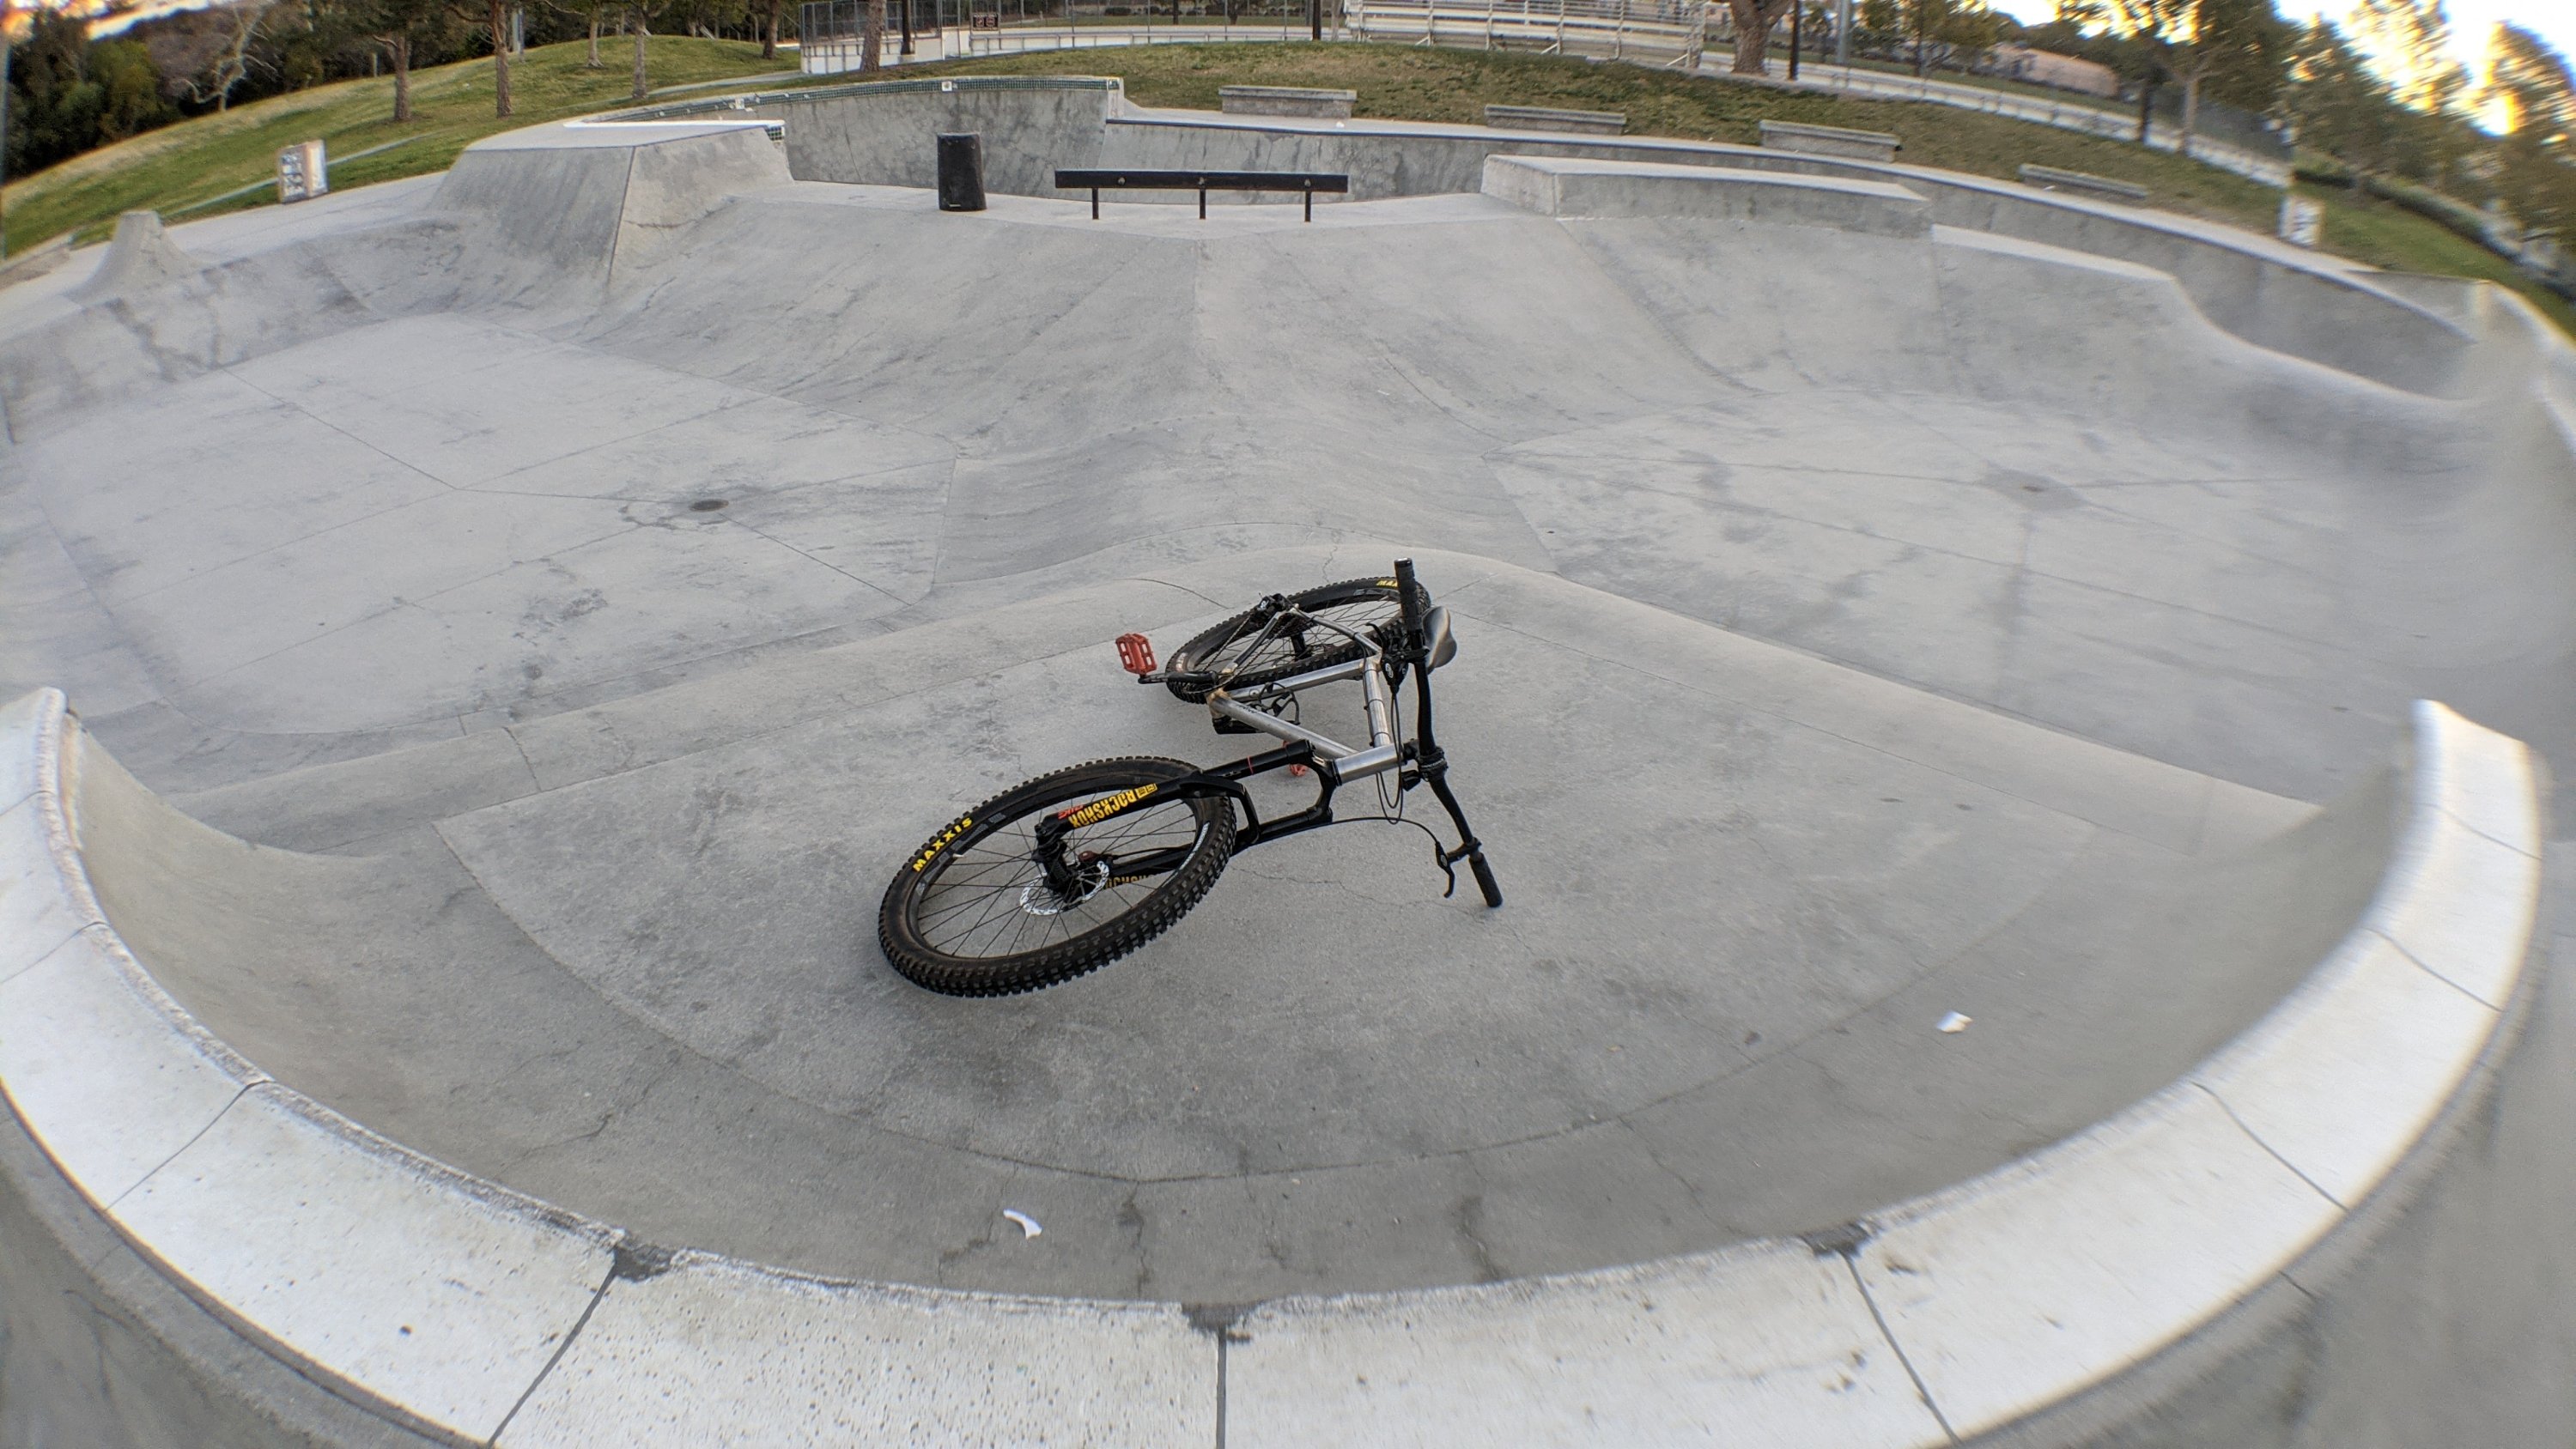
The short chainstays make this bike a DREAM on the pump track! I wish this place was in my back yard!!!!
I still need to add cable guides but once I get a dropper post I’ll figure out where they all go and get this puppy powder coated. For now I couldn’t be happier with how this bike came out!
Obviously, I’ll post pics when that happens! Till then…. HAVE FUN!
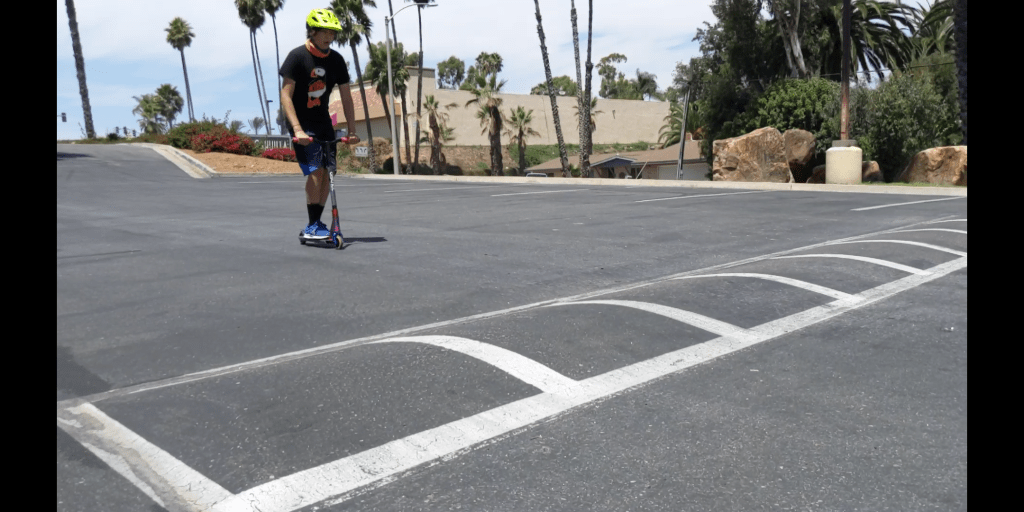
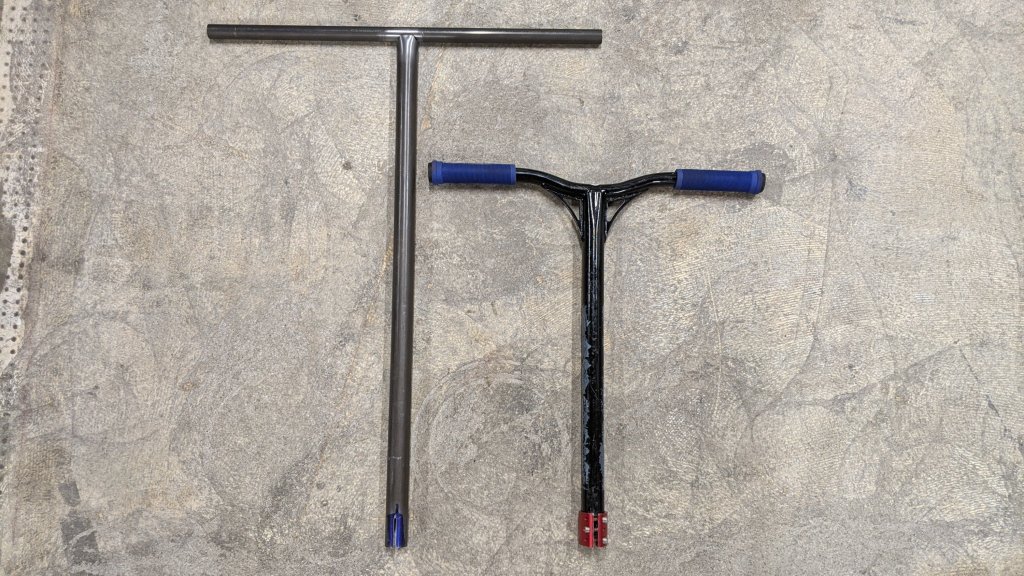
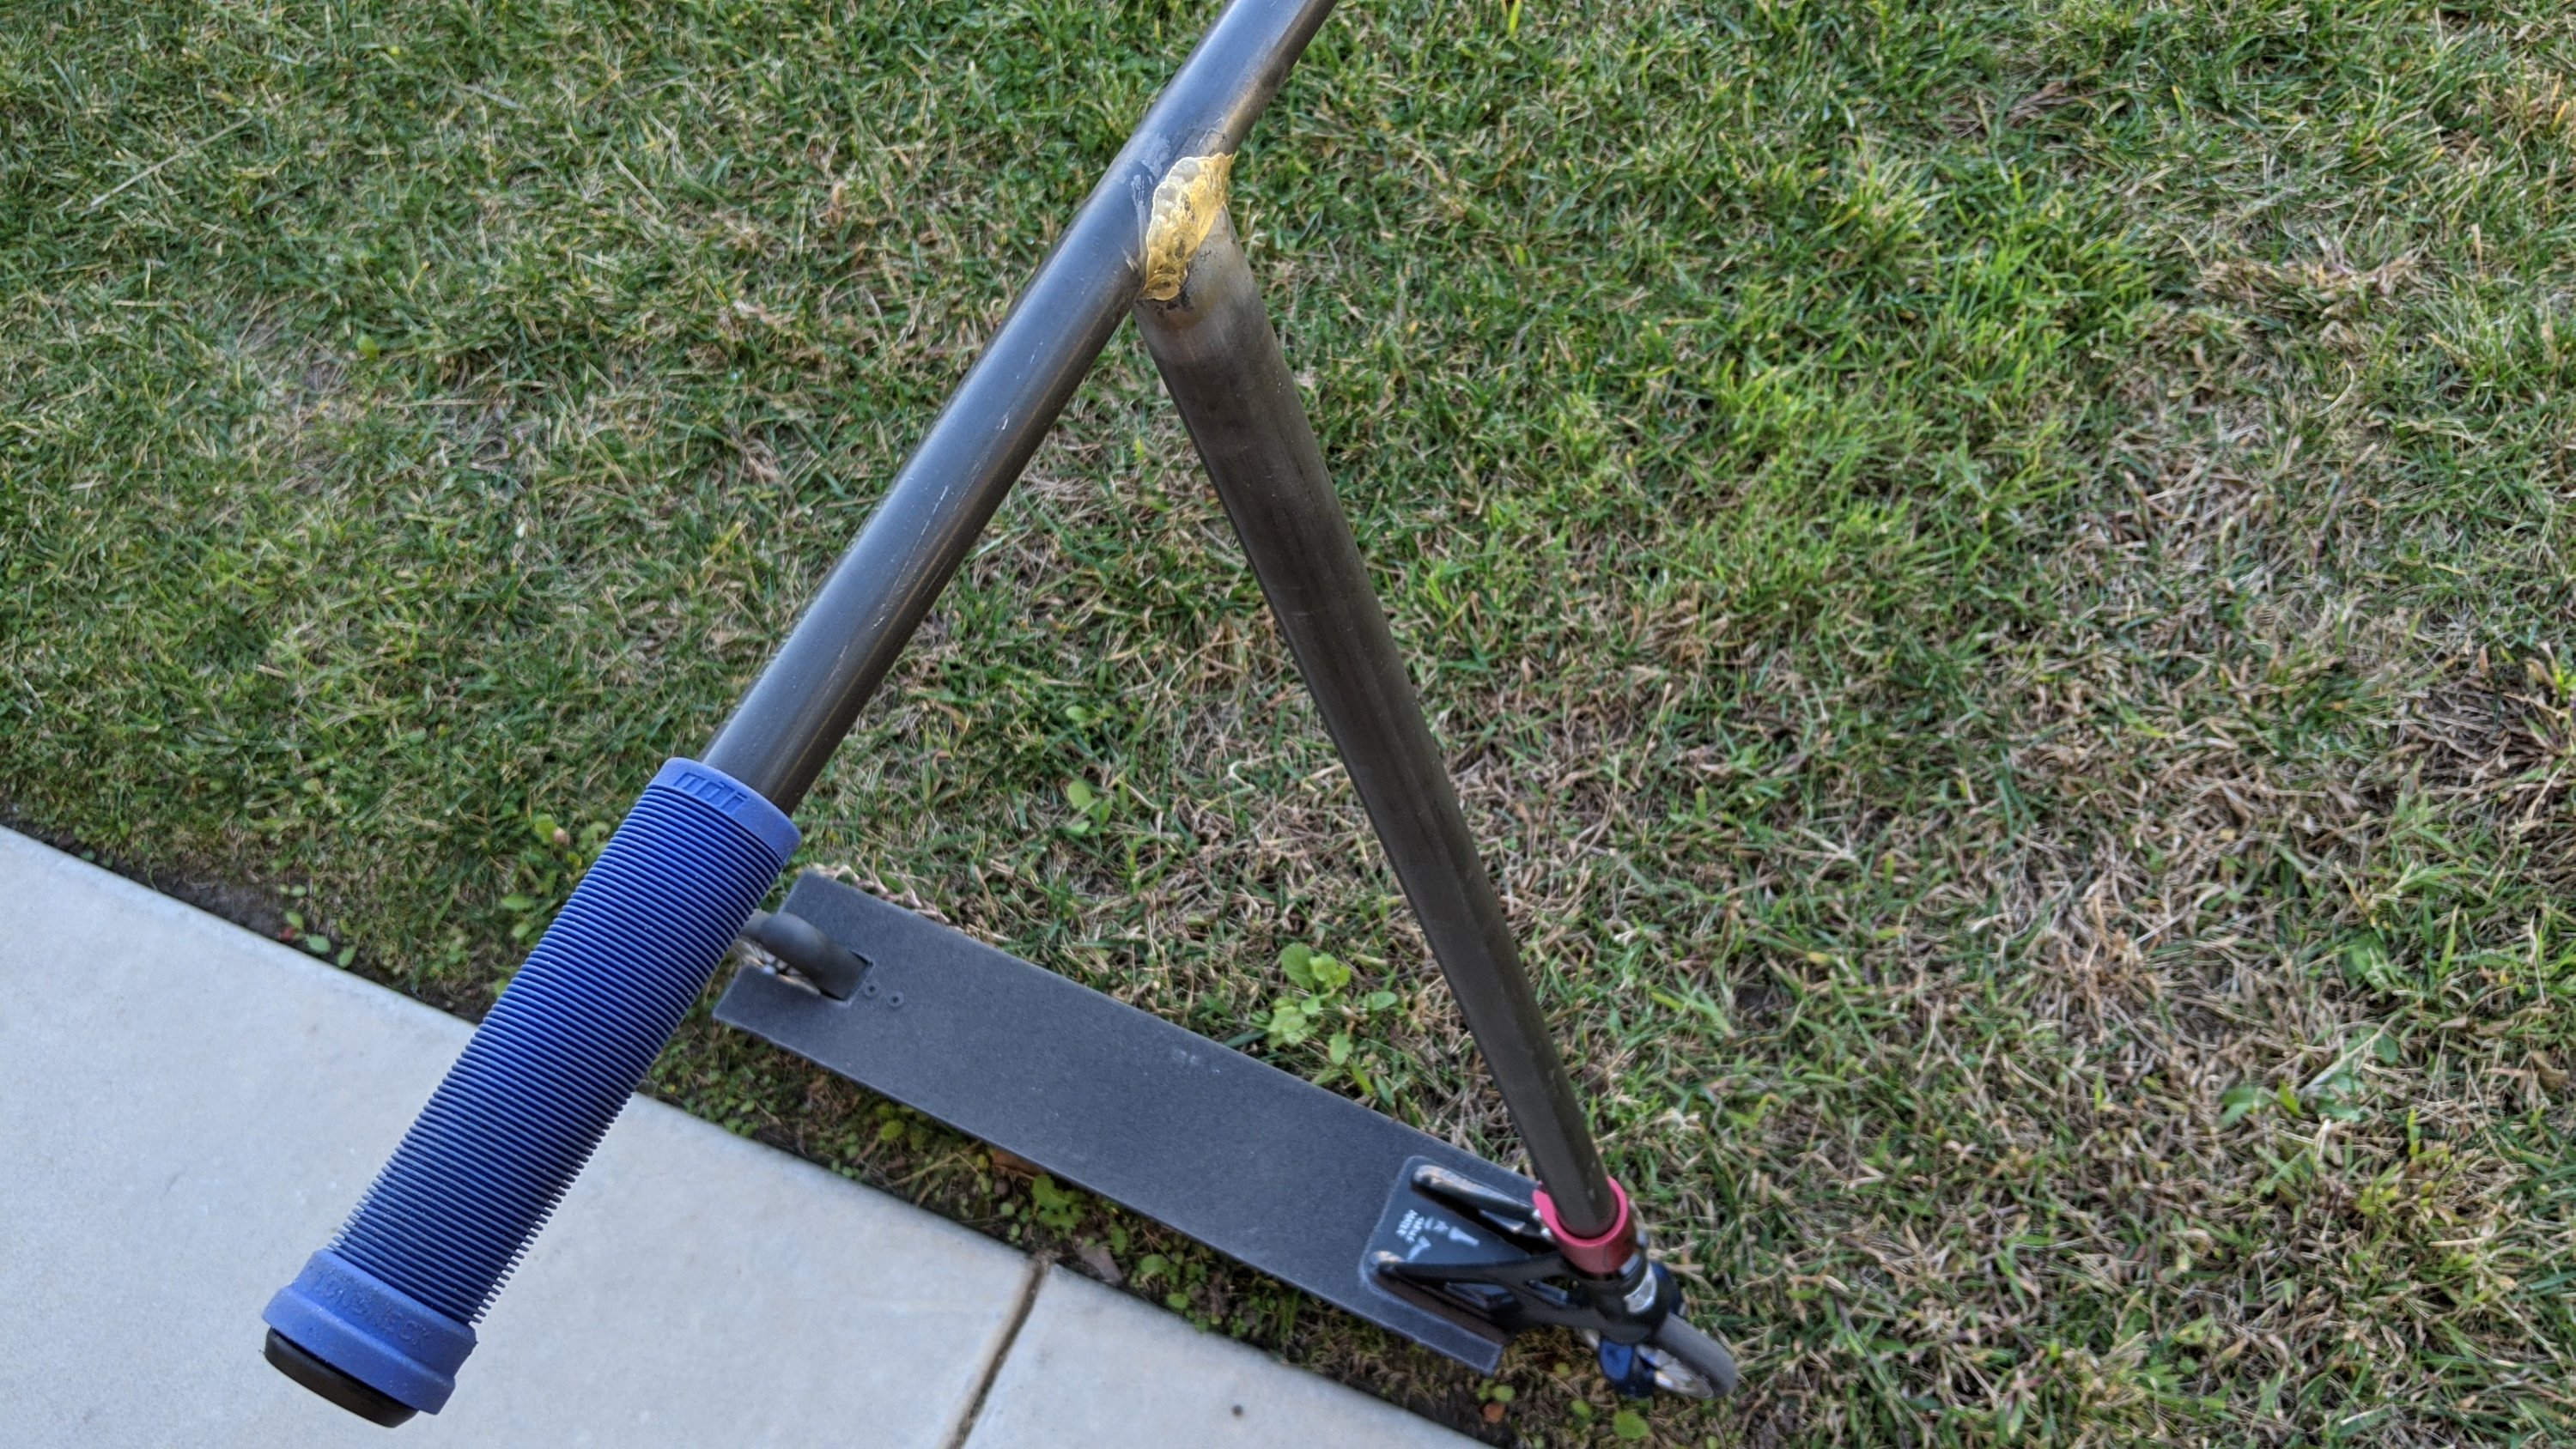
My son is a huge 11 year old. He’s 5’8″ and built like a linebacker. (Is that a large position? I don’t know football for shit!) My monster of a child rides scooters so naturally he outgrew his current scooter.
I did some research on scooter fit. Yes, scooter fit. Basically for different disciplines of scootering there are different bar heights and deck lengths. Basically, bars should be +/- an inch or so from the hip. Skatepark riders usually go a pinch below the hip while street riders tend to go above the hip.
This pic is from August and he’s grown in the last 4 months!
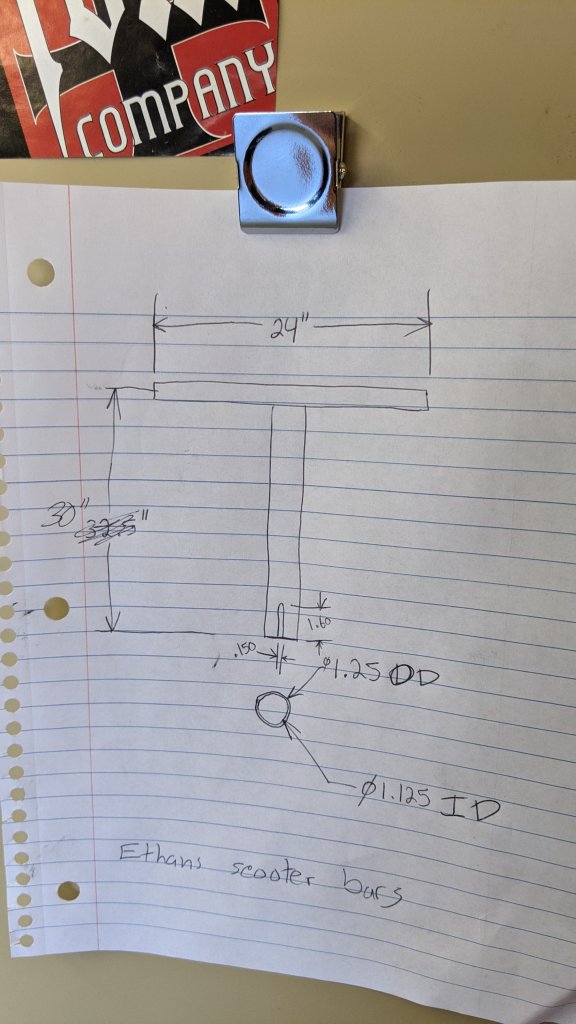
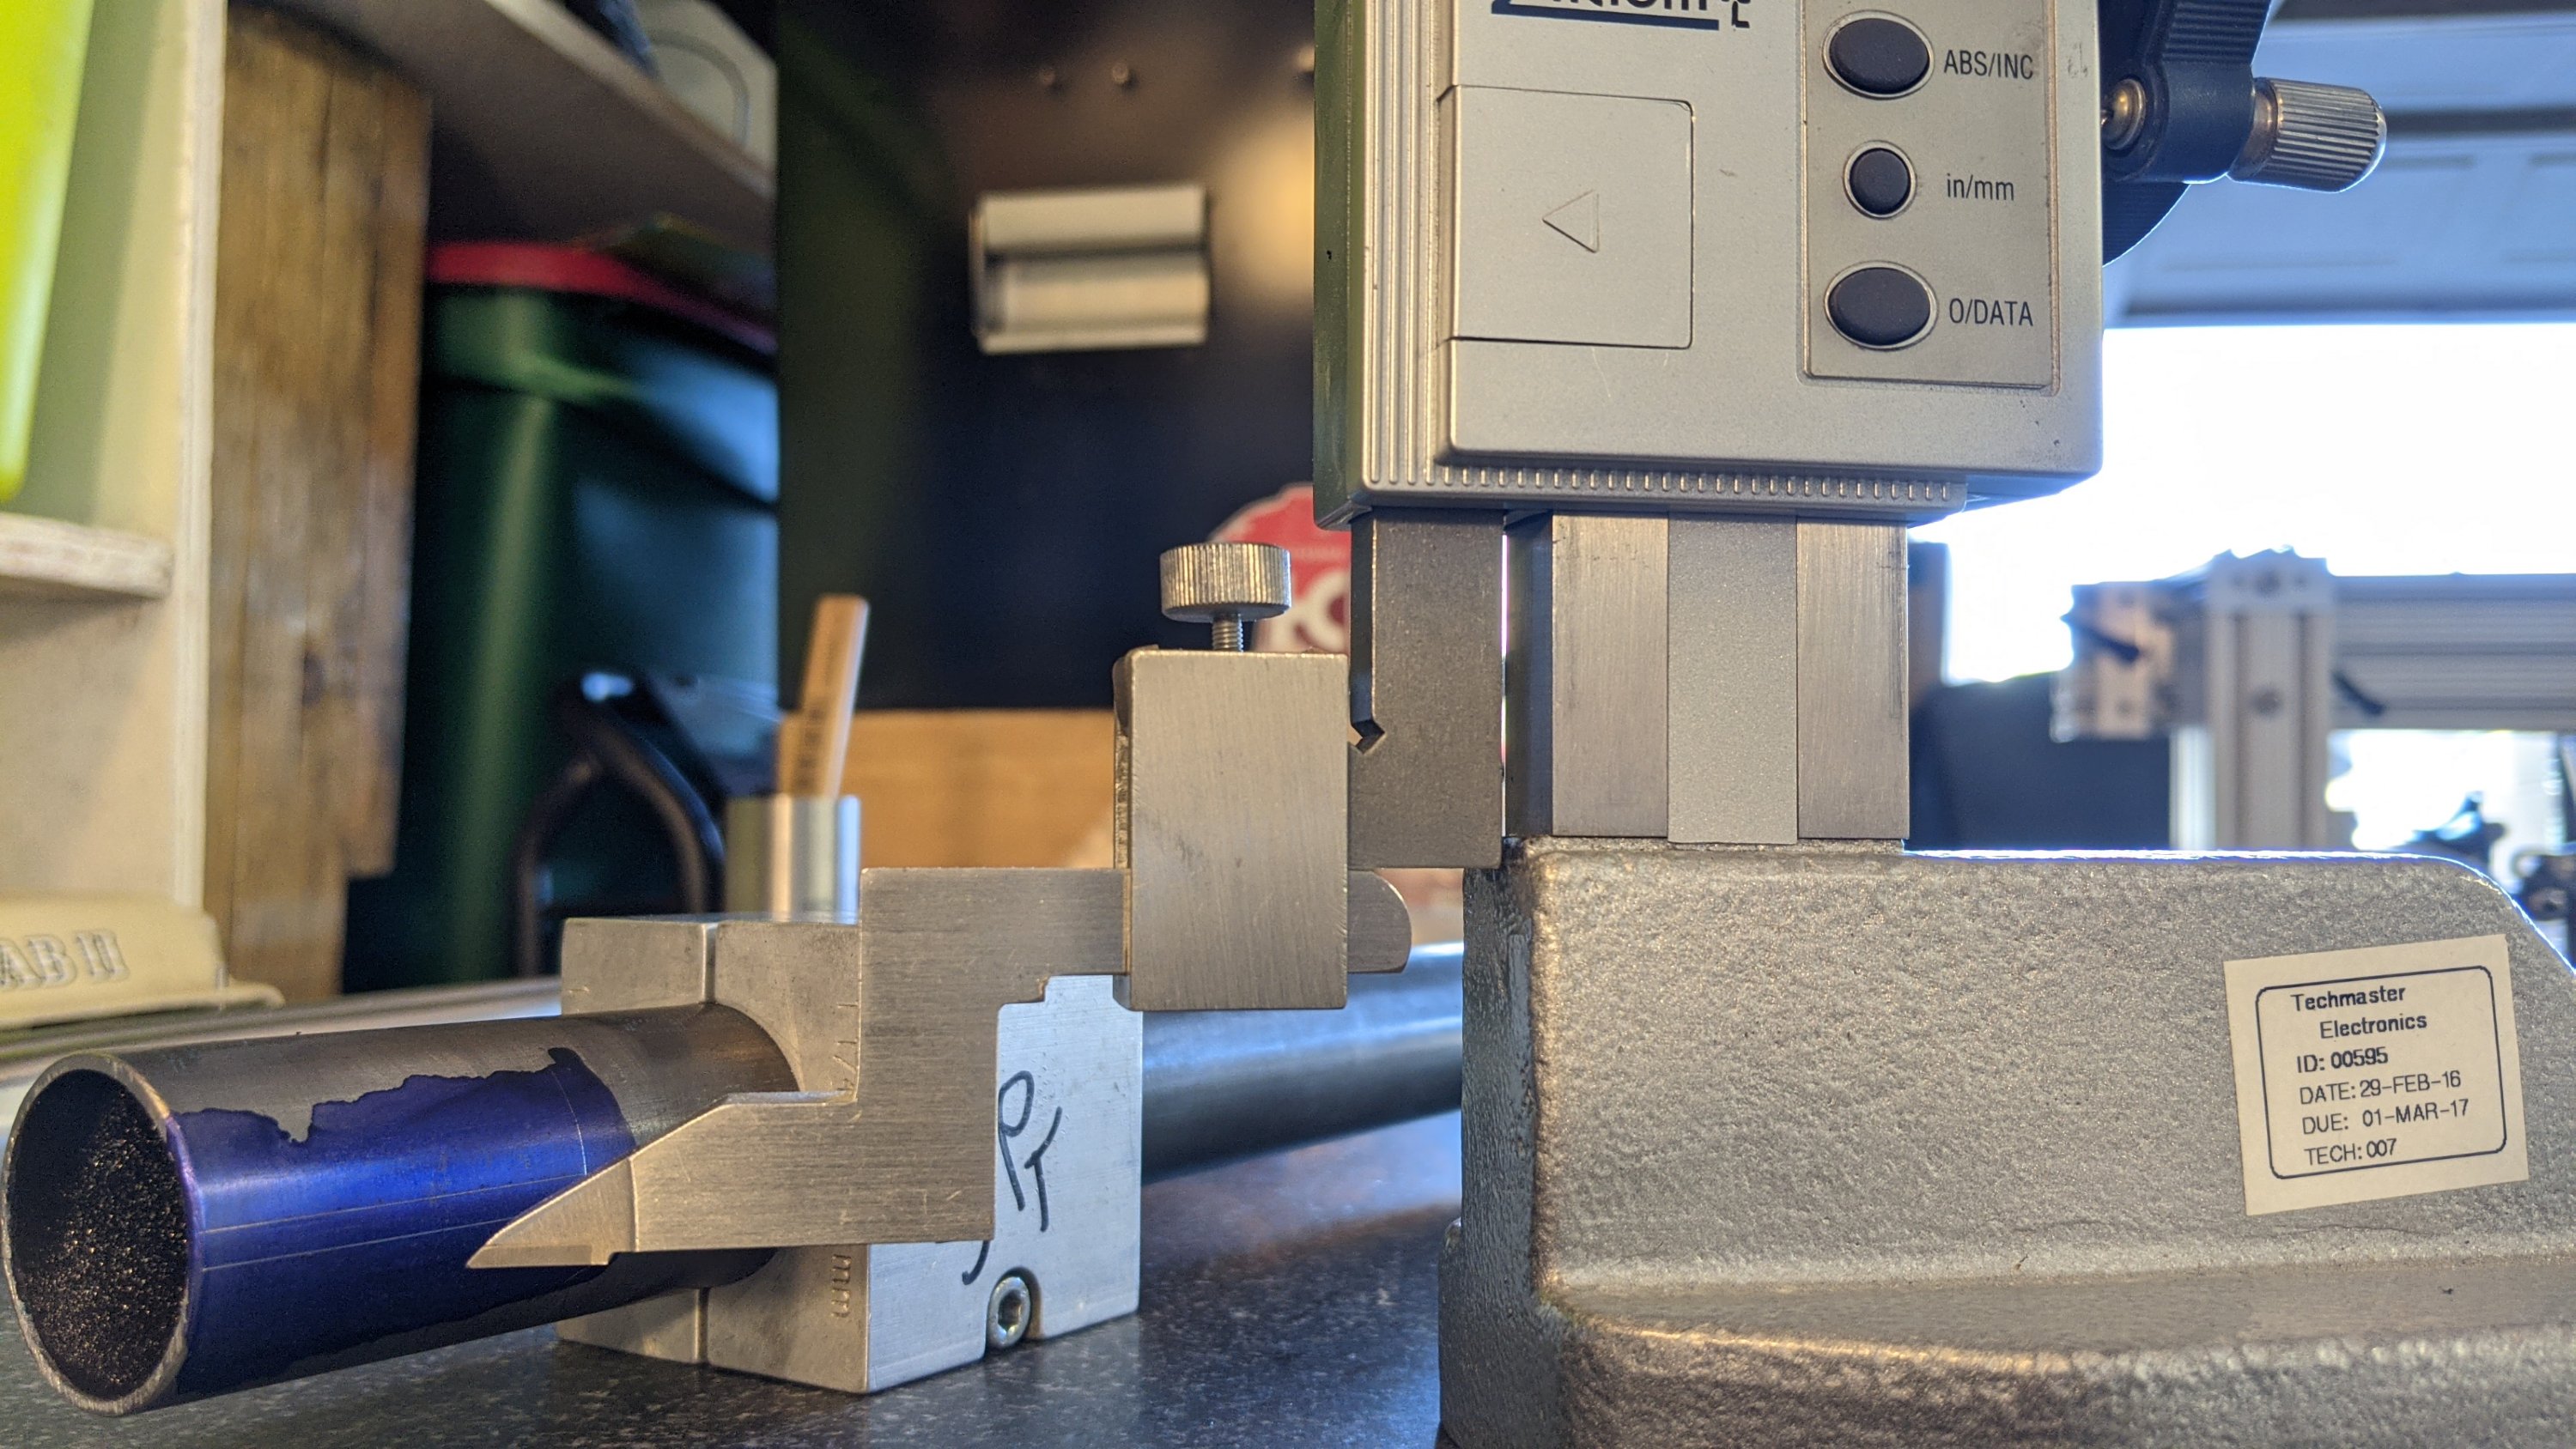
I made him design the bars with me. Measuring fork steerer diameters, OD’s, slot widths, star nut depths and even dog fur and paper thickness just for fun! Since he mostly rides at the skatepark, we went with a bar that he would grow into. He’ll be taller than me by the time I finish writing this.
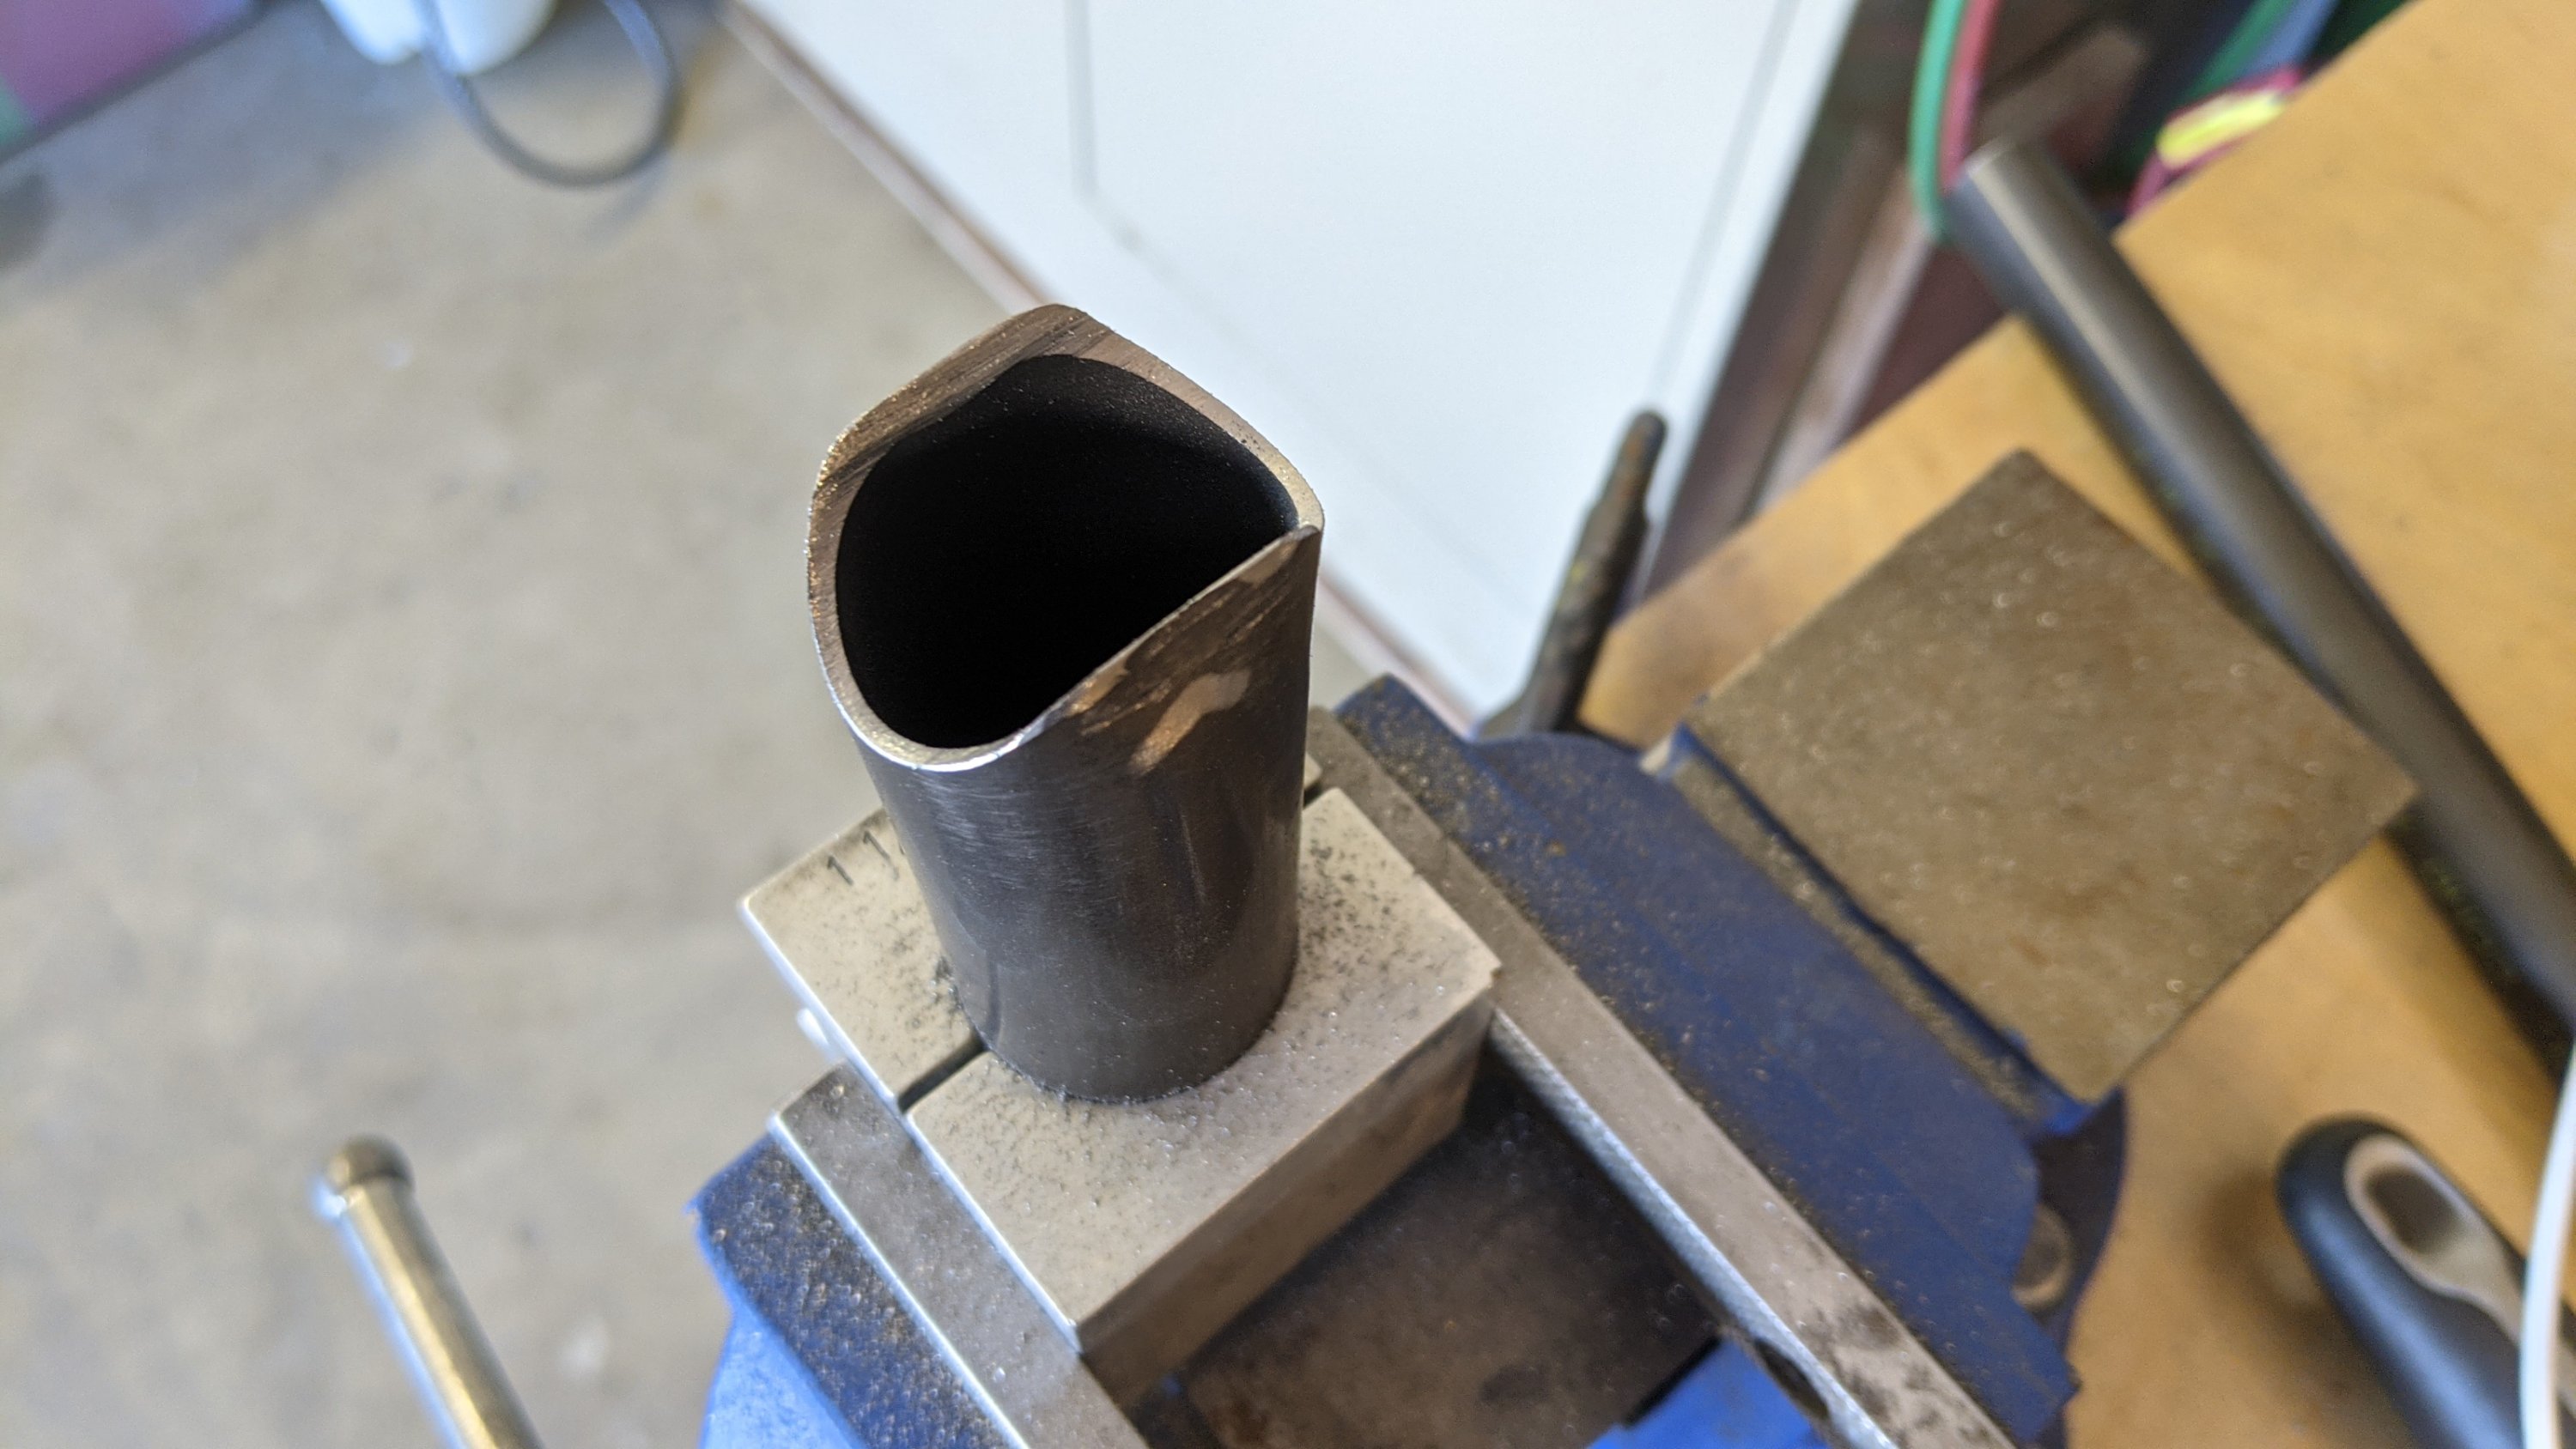
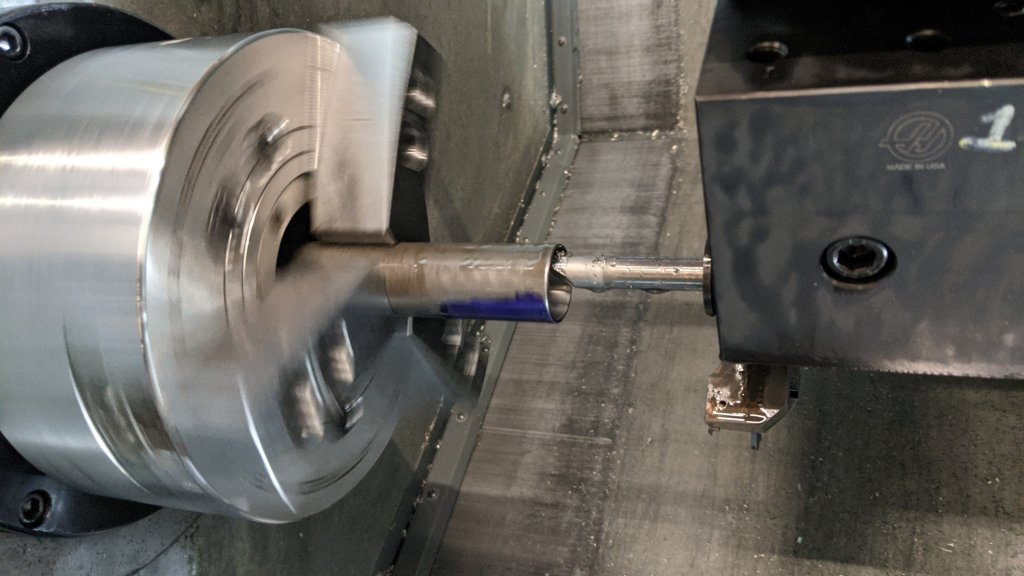
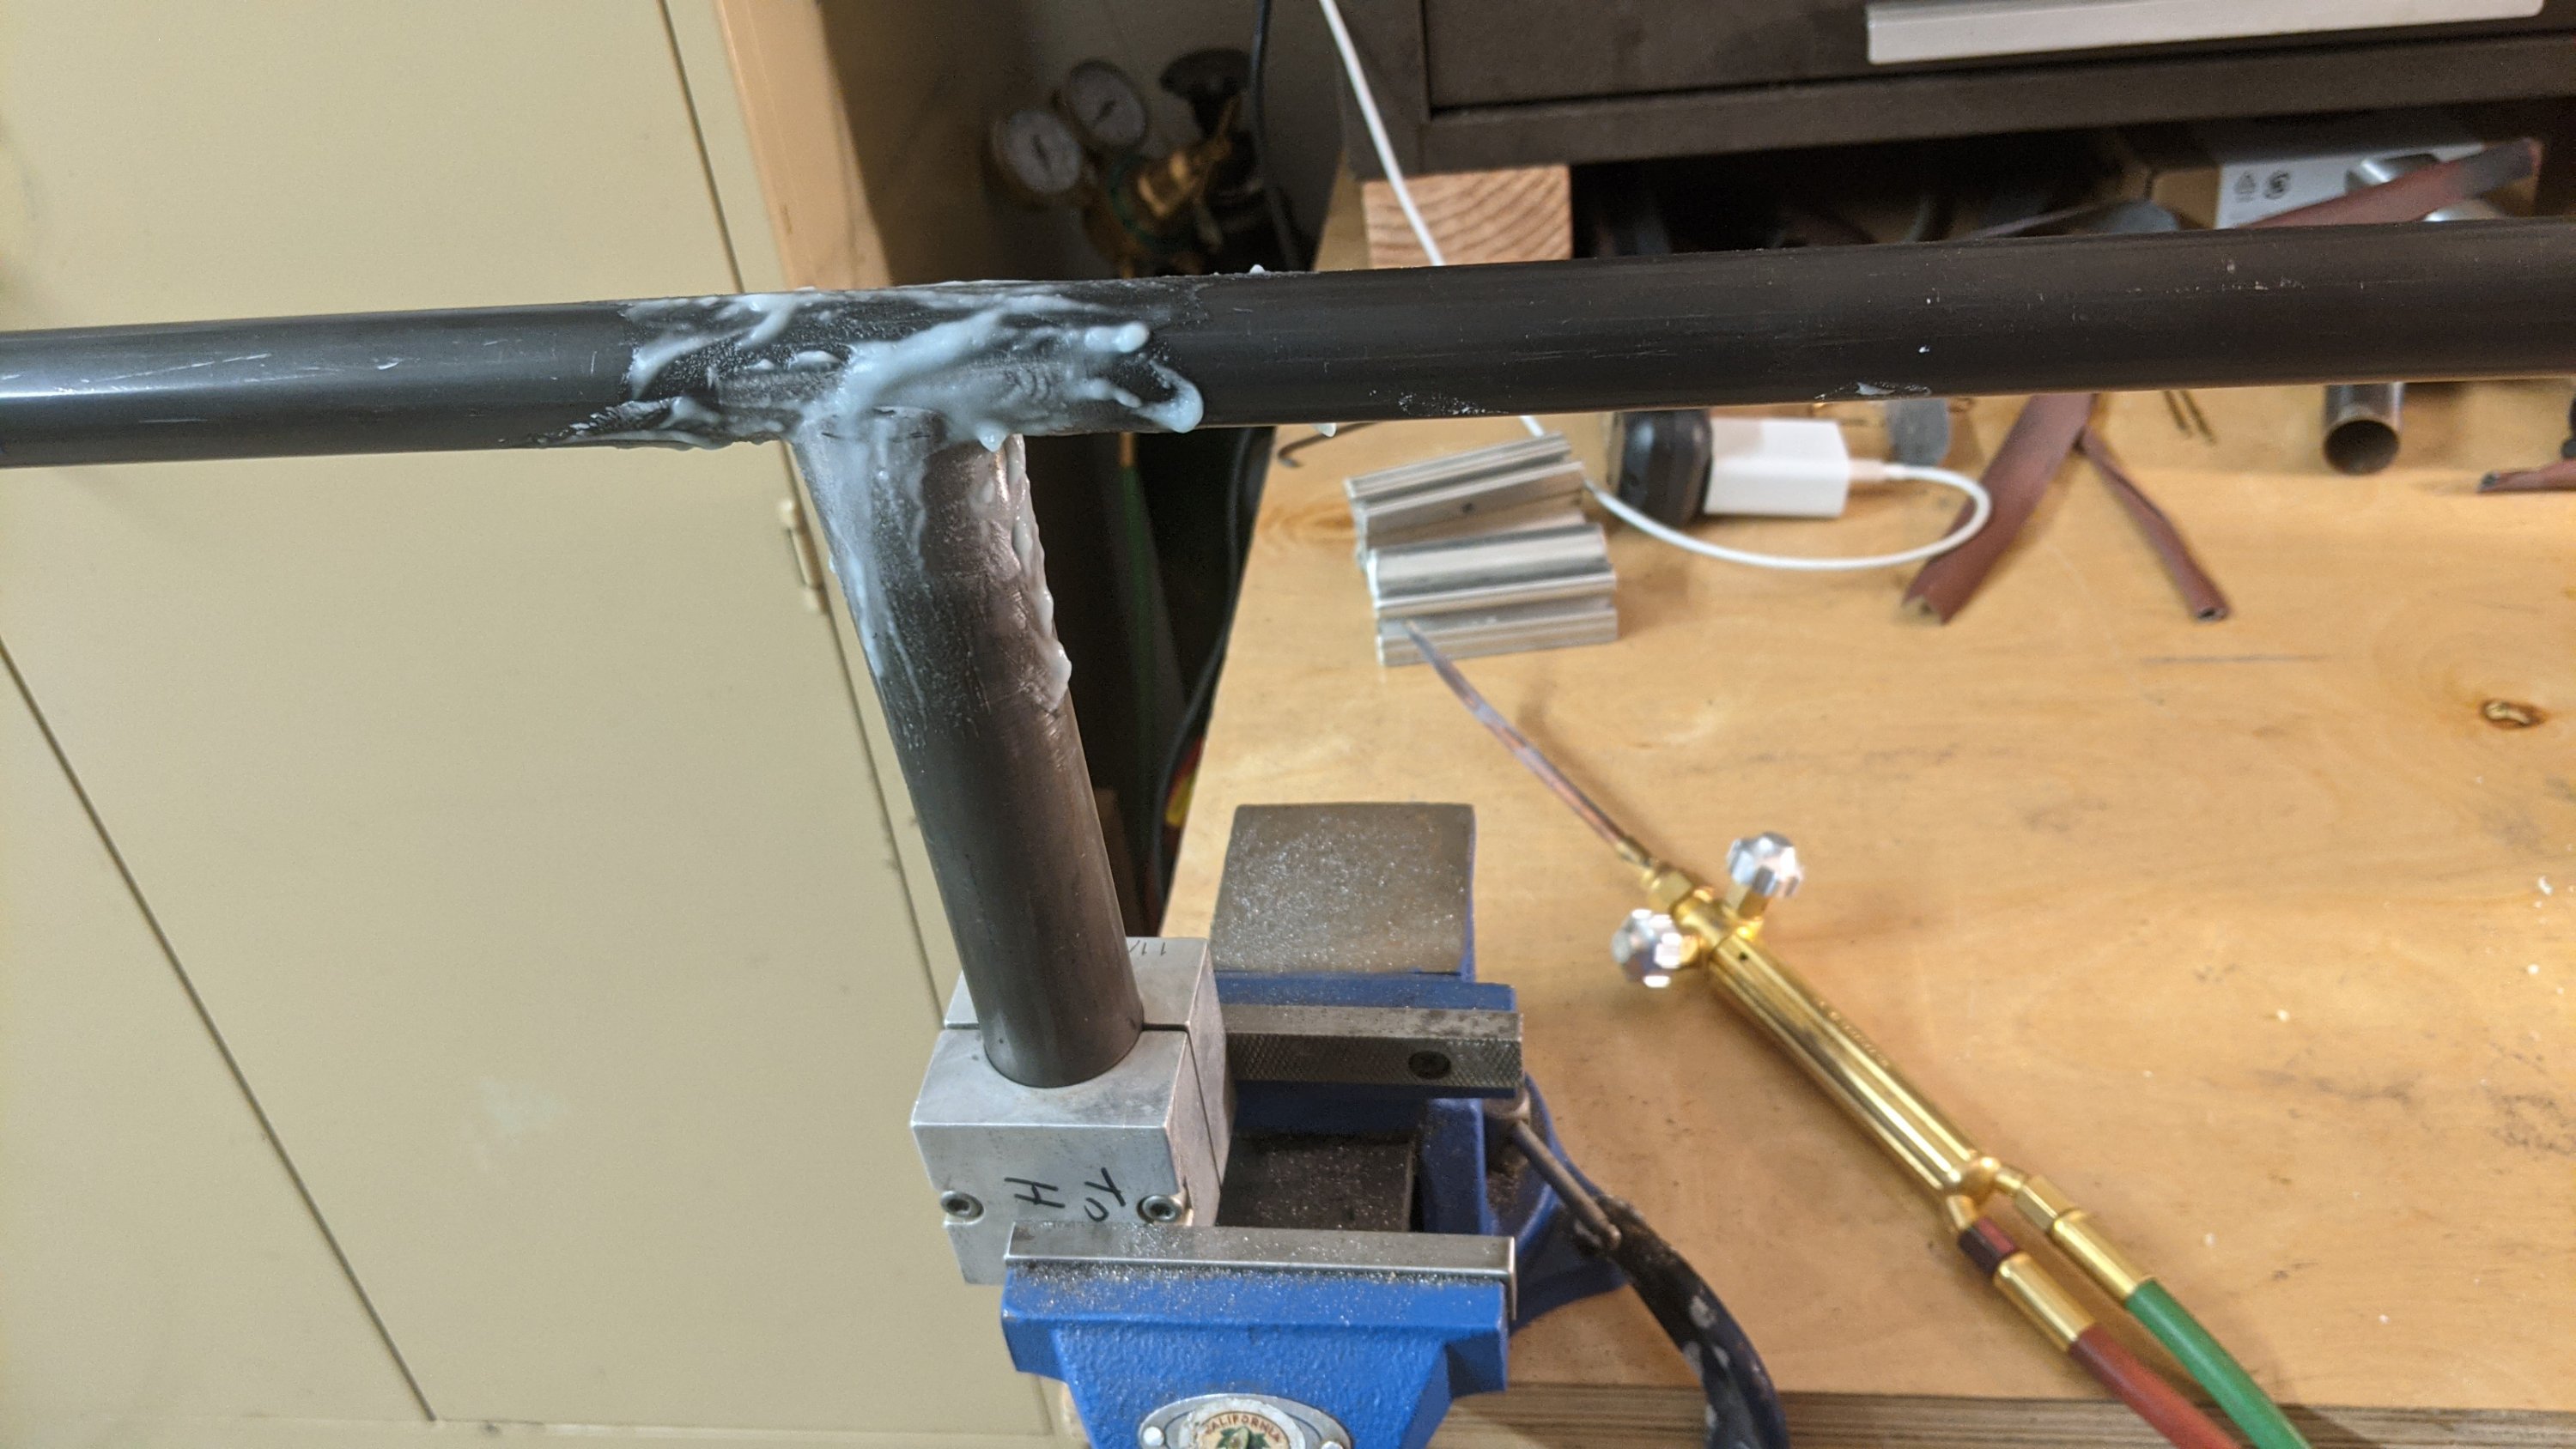
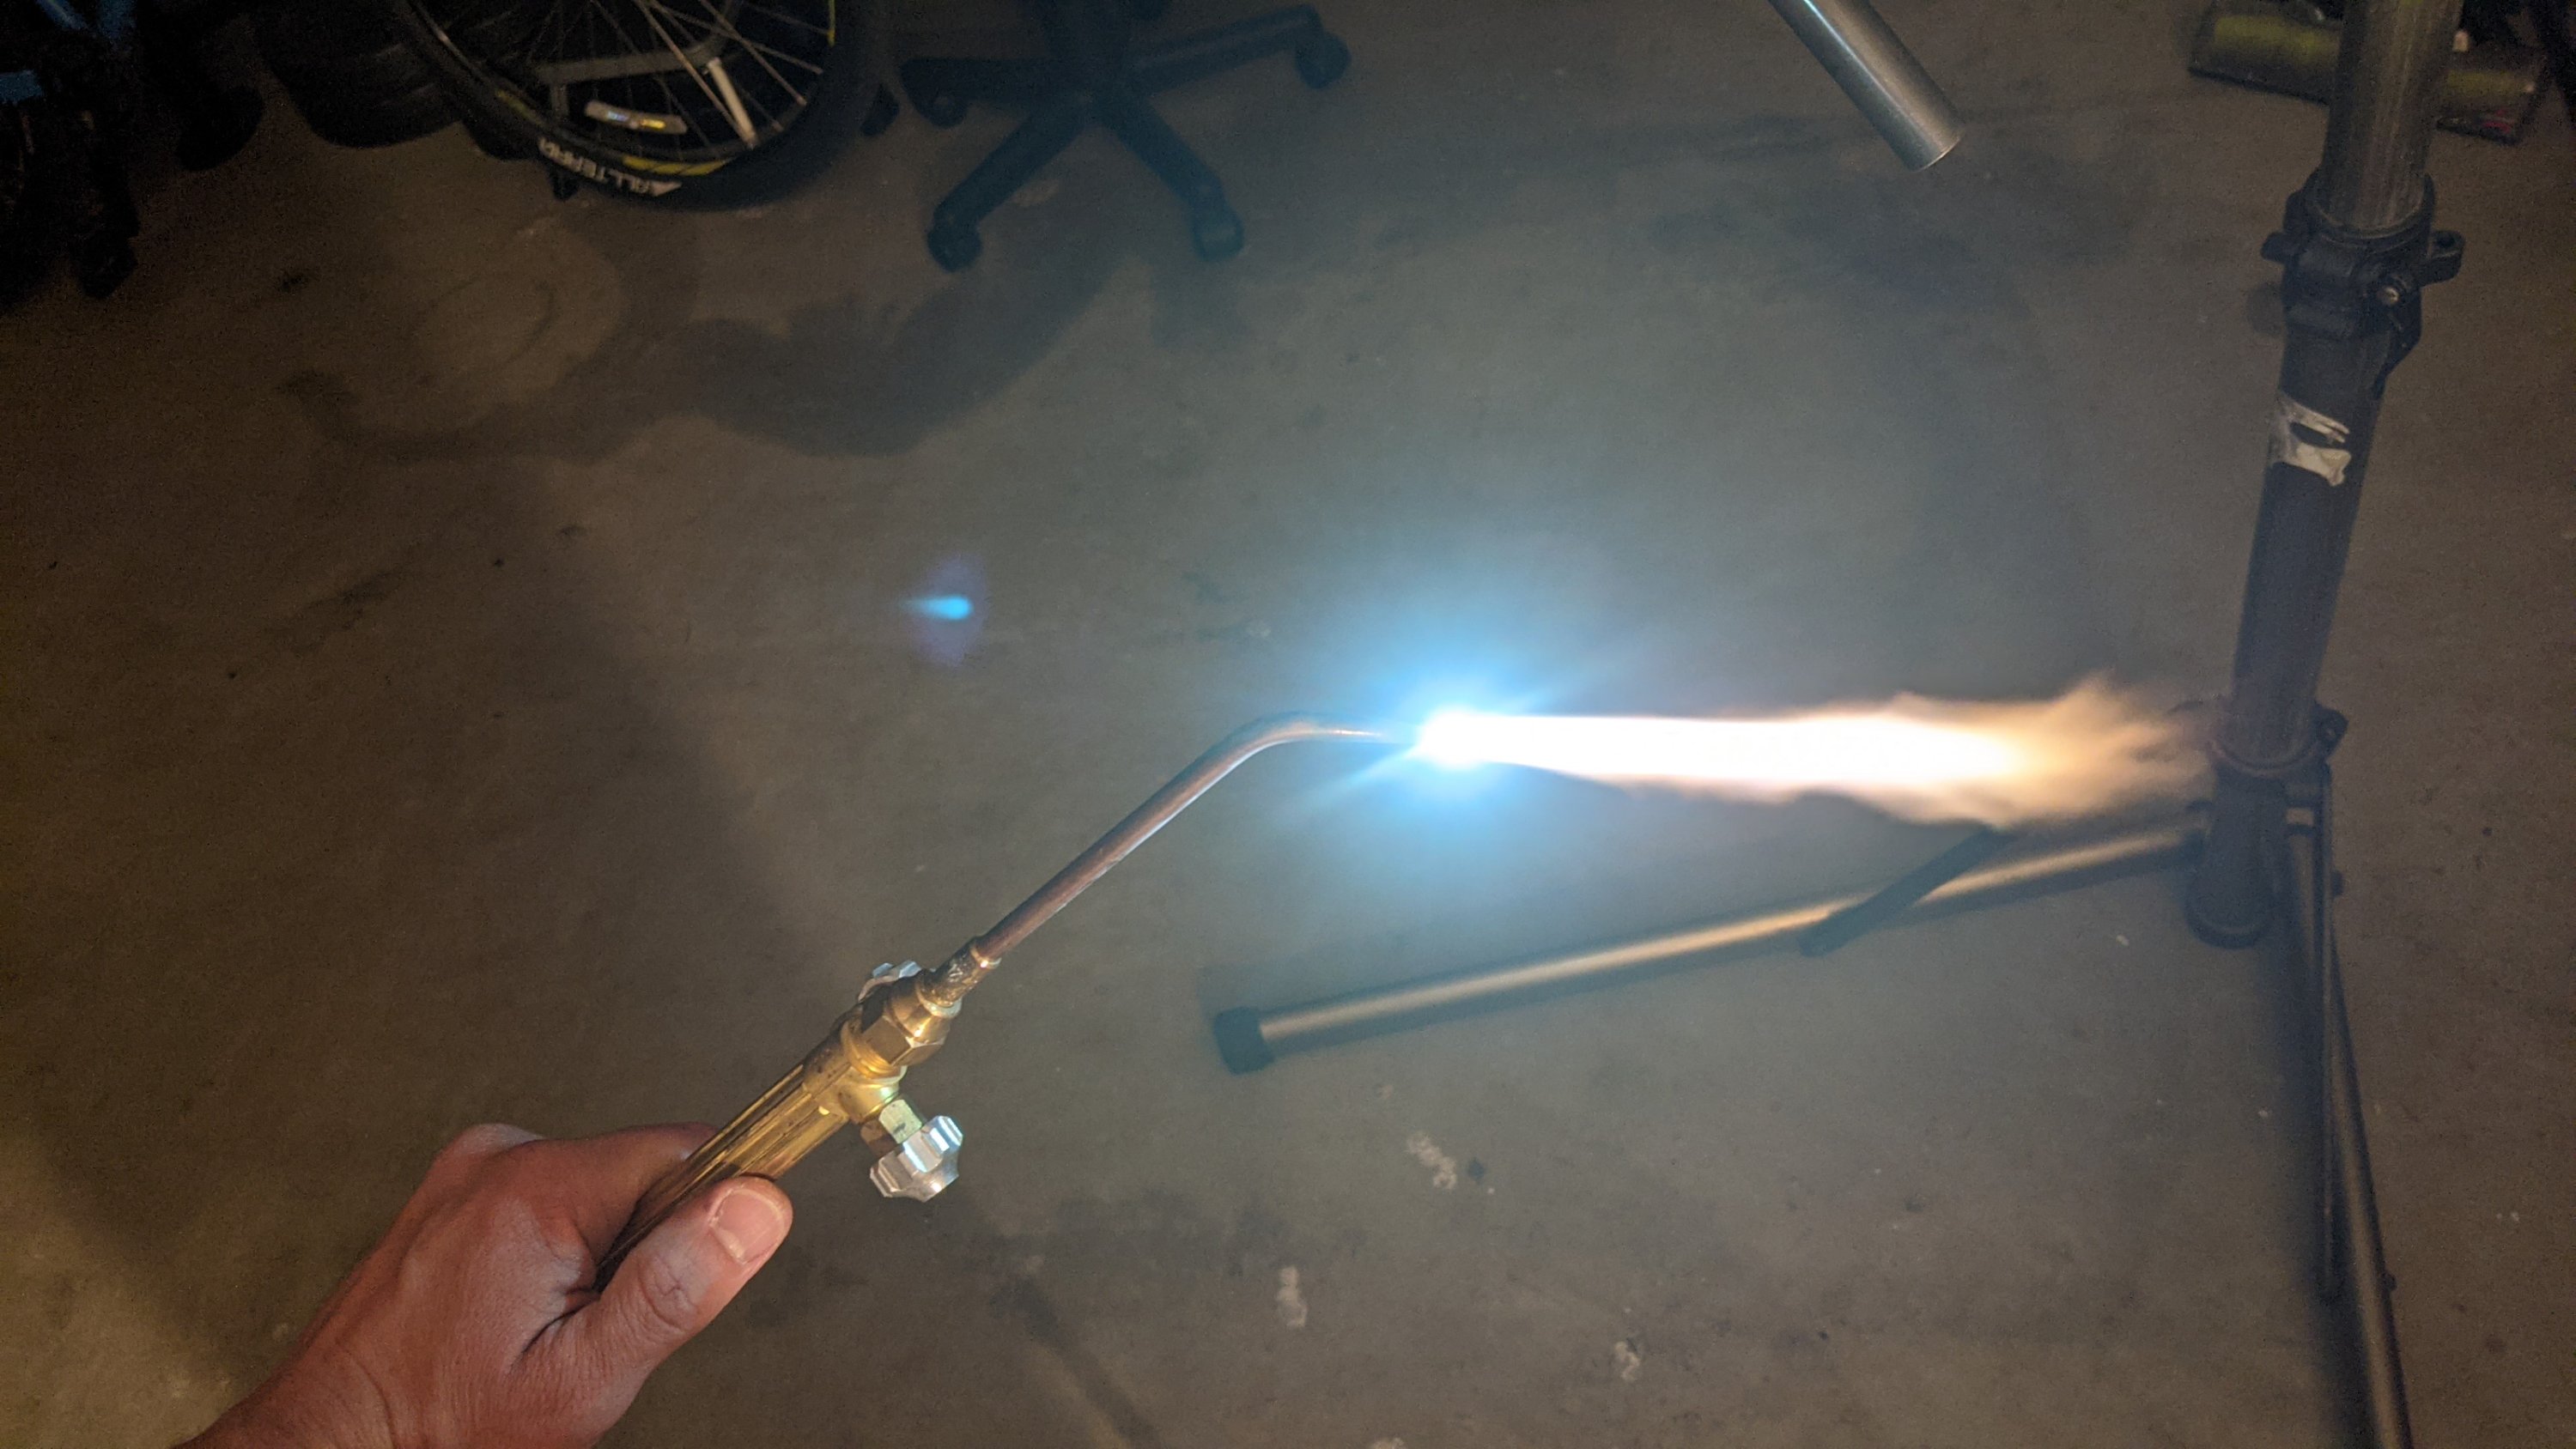
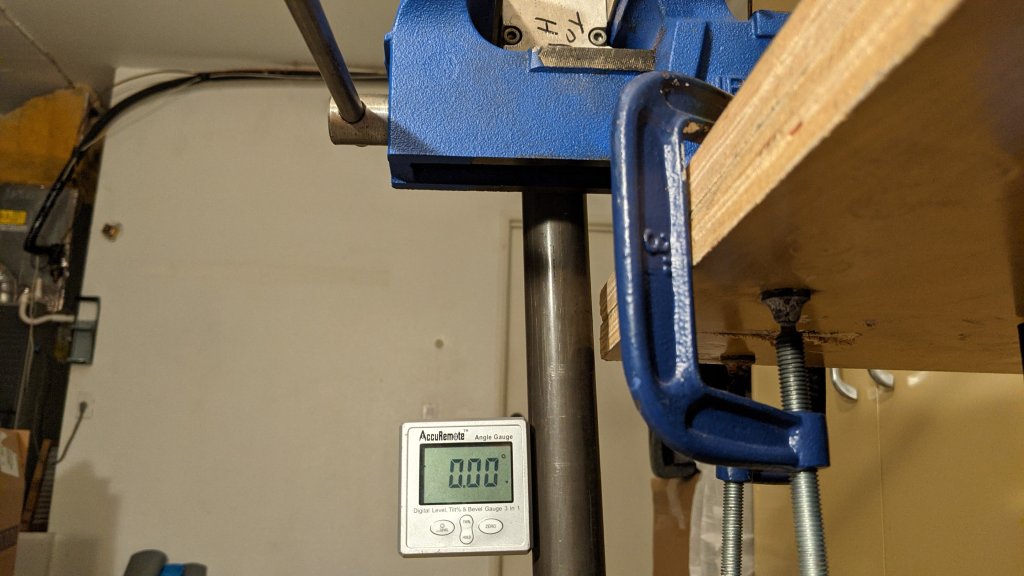
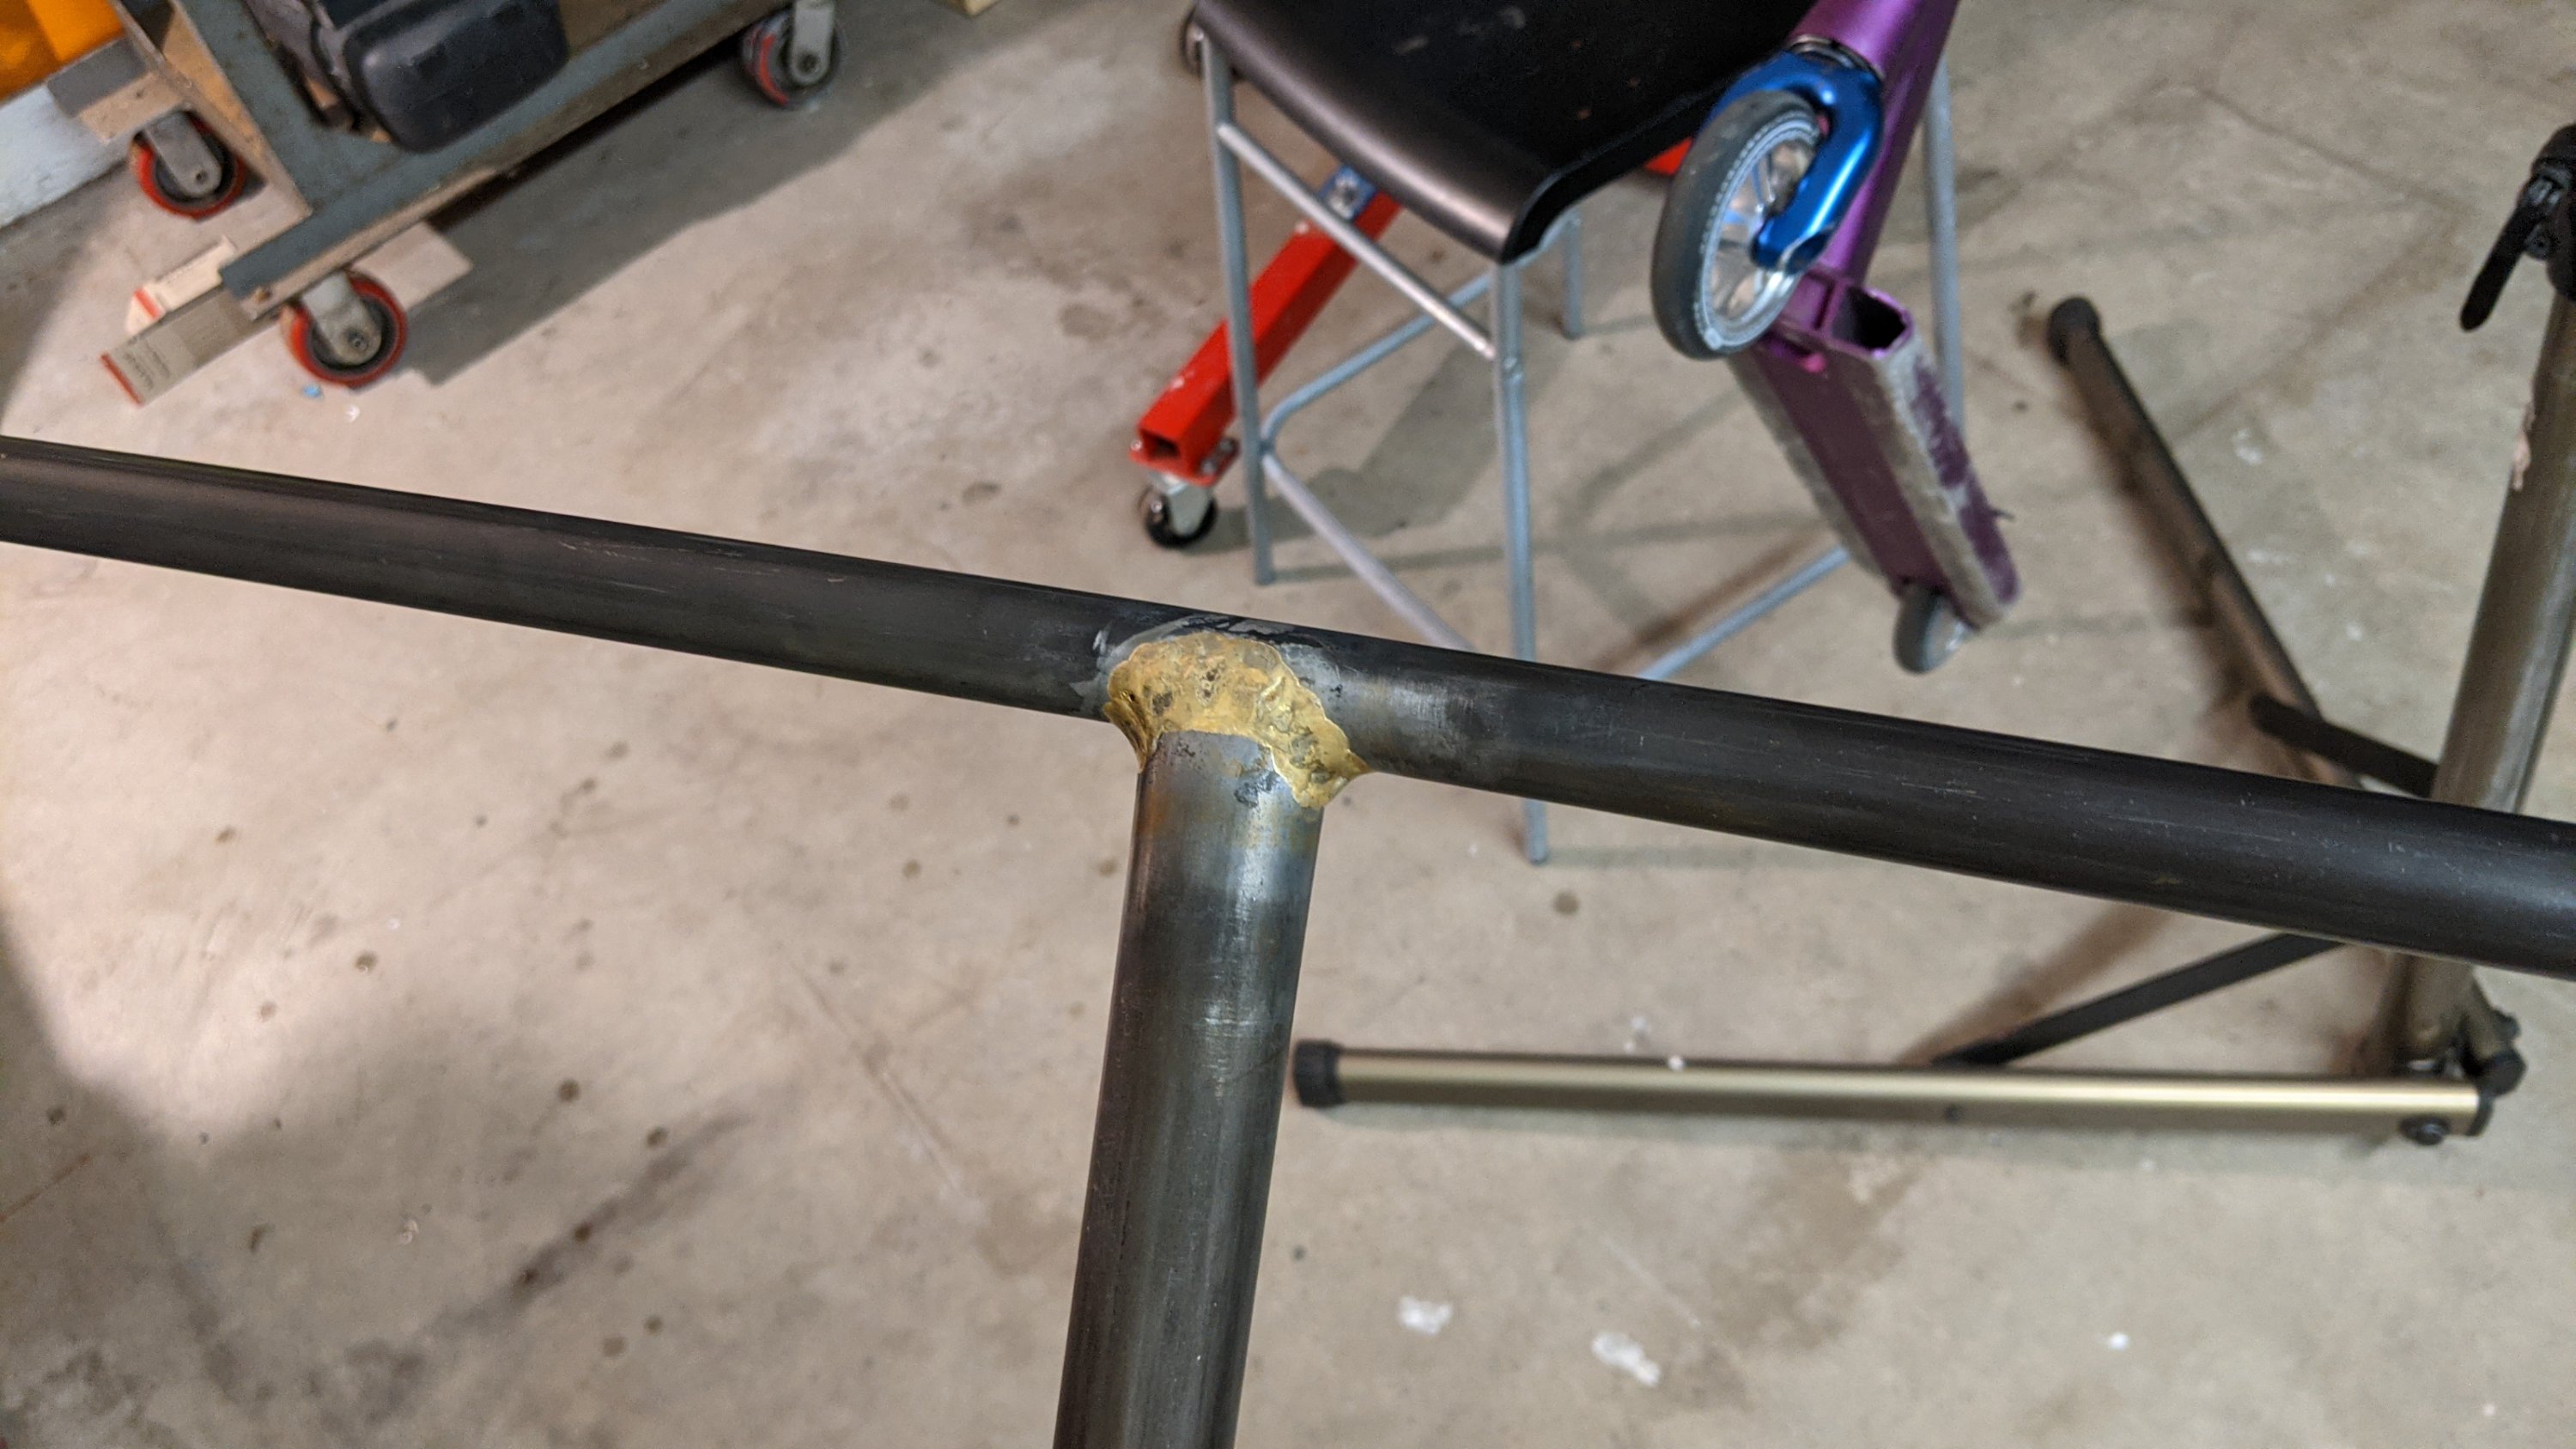
ScooterCAD?How do you miter .875″ to 1.25″? Squishy squish!I scribed the clamp slot thinking I was going to cut it at home but then realize that the ID wasn’t going to fit the steerer tube so, off to work! Bore…Slot… We have a Haas ST20Y at work, perfect for boring and slotting in one chucking! Now the fork fits!Yeah, this is going to be quite a change! Back home. Flux…Fire…Bronze…Checking perpendicularly. Good enough for me! 😁Hot water…Done! Installed!
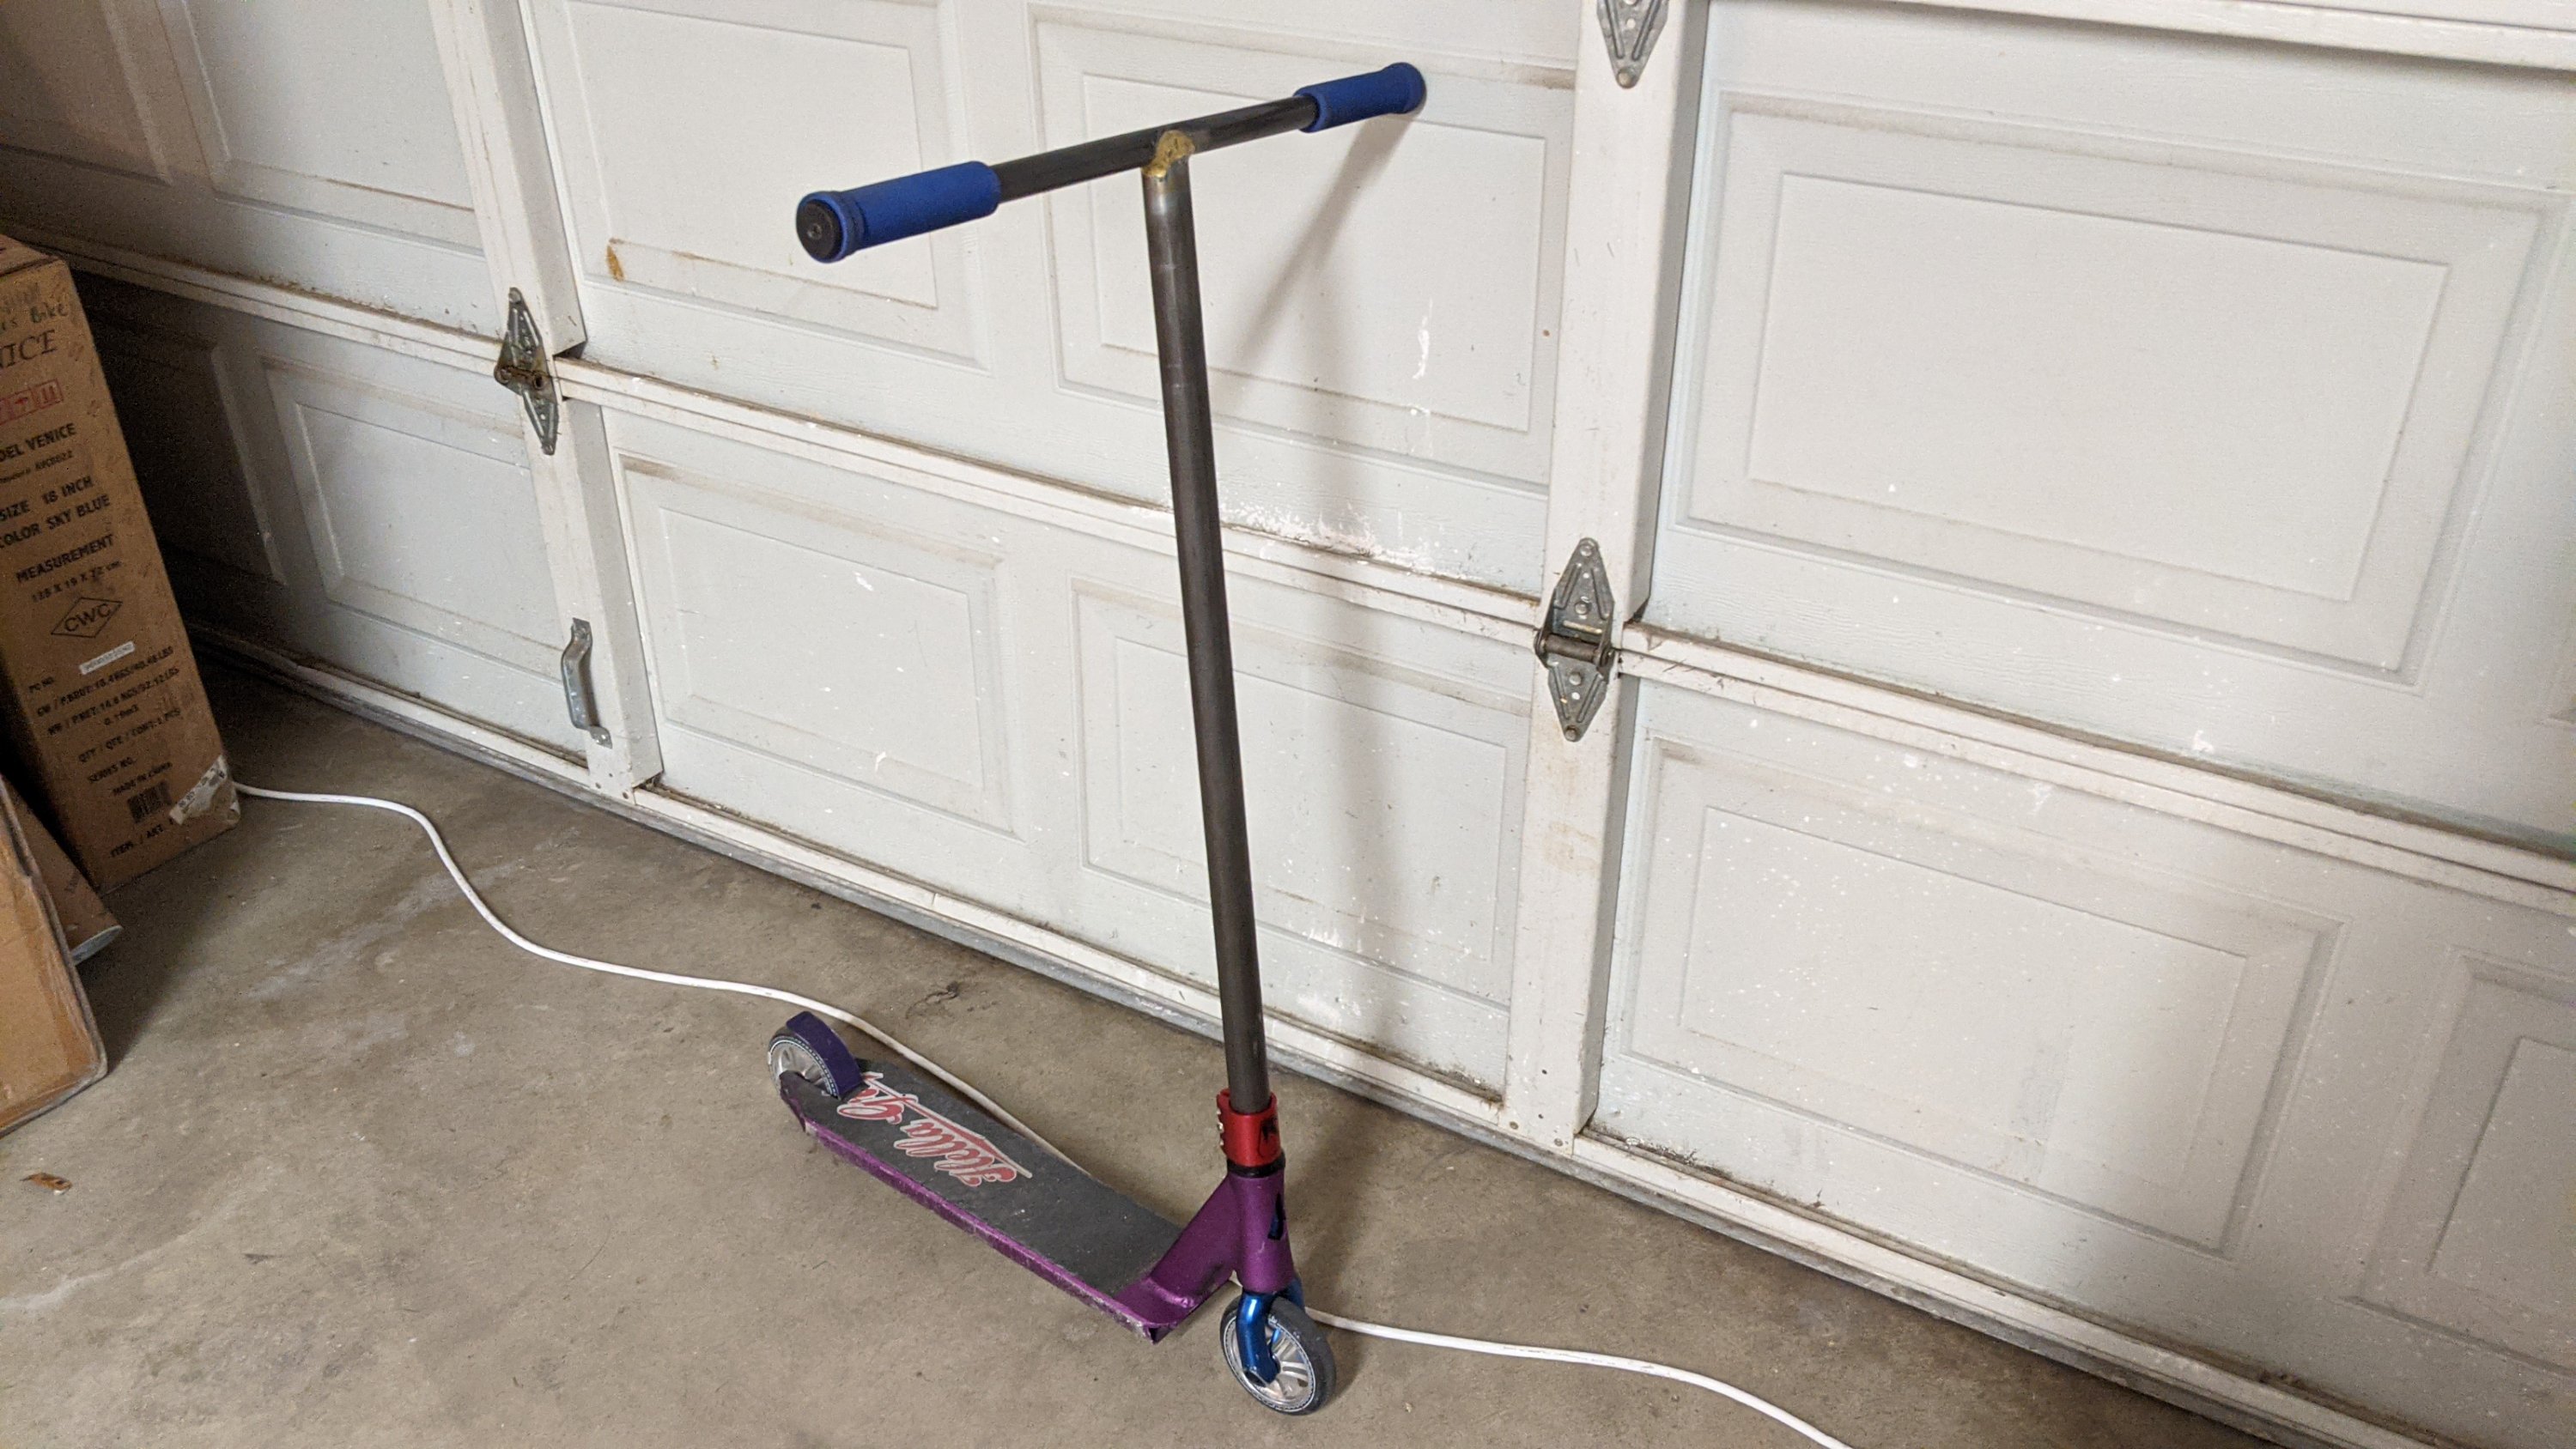
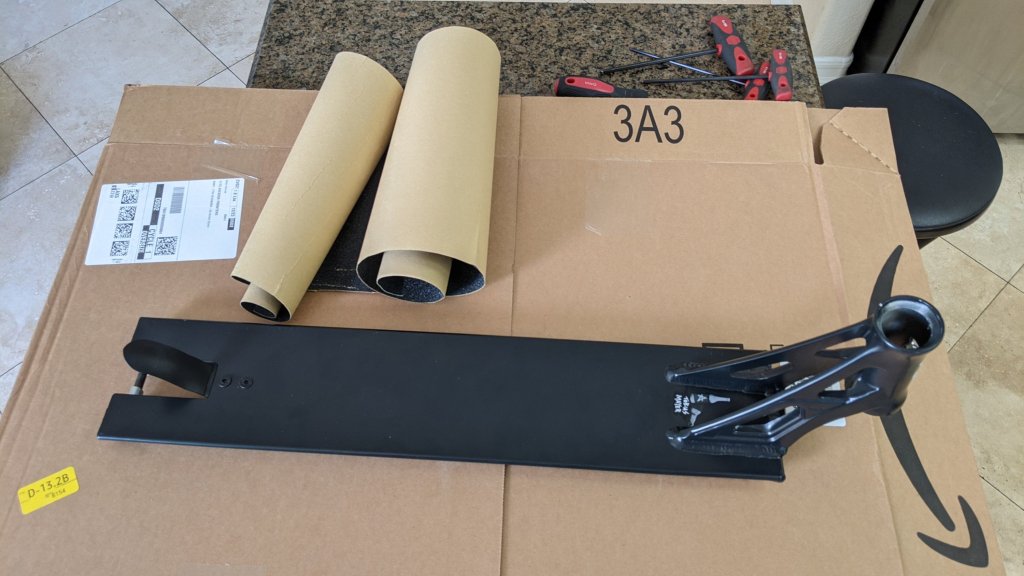
Now the deck is also too small so, what he doesn’t know it that there is a new deck that’s 5″ longer under the Christmas tree from Grandma and Grandpa! (Today is 12/23/20)
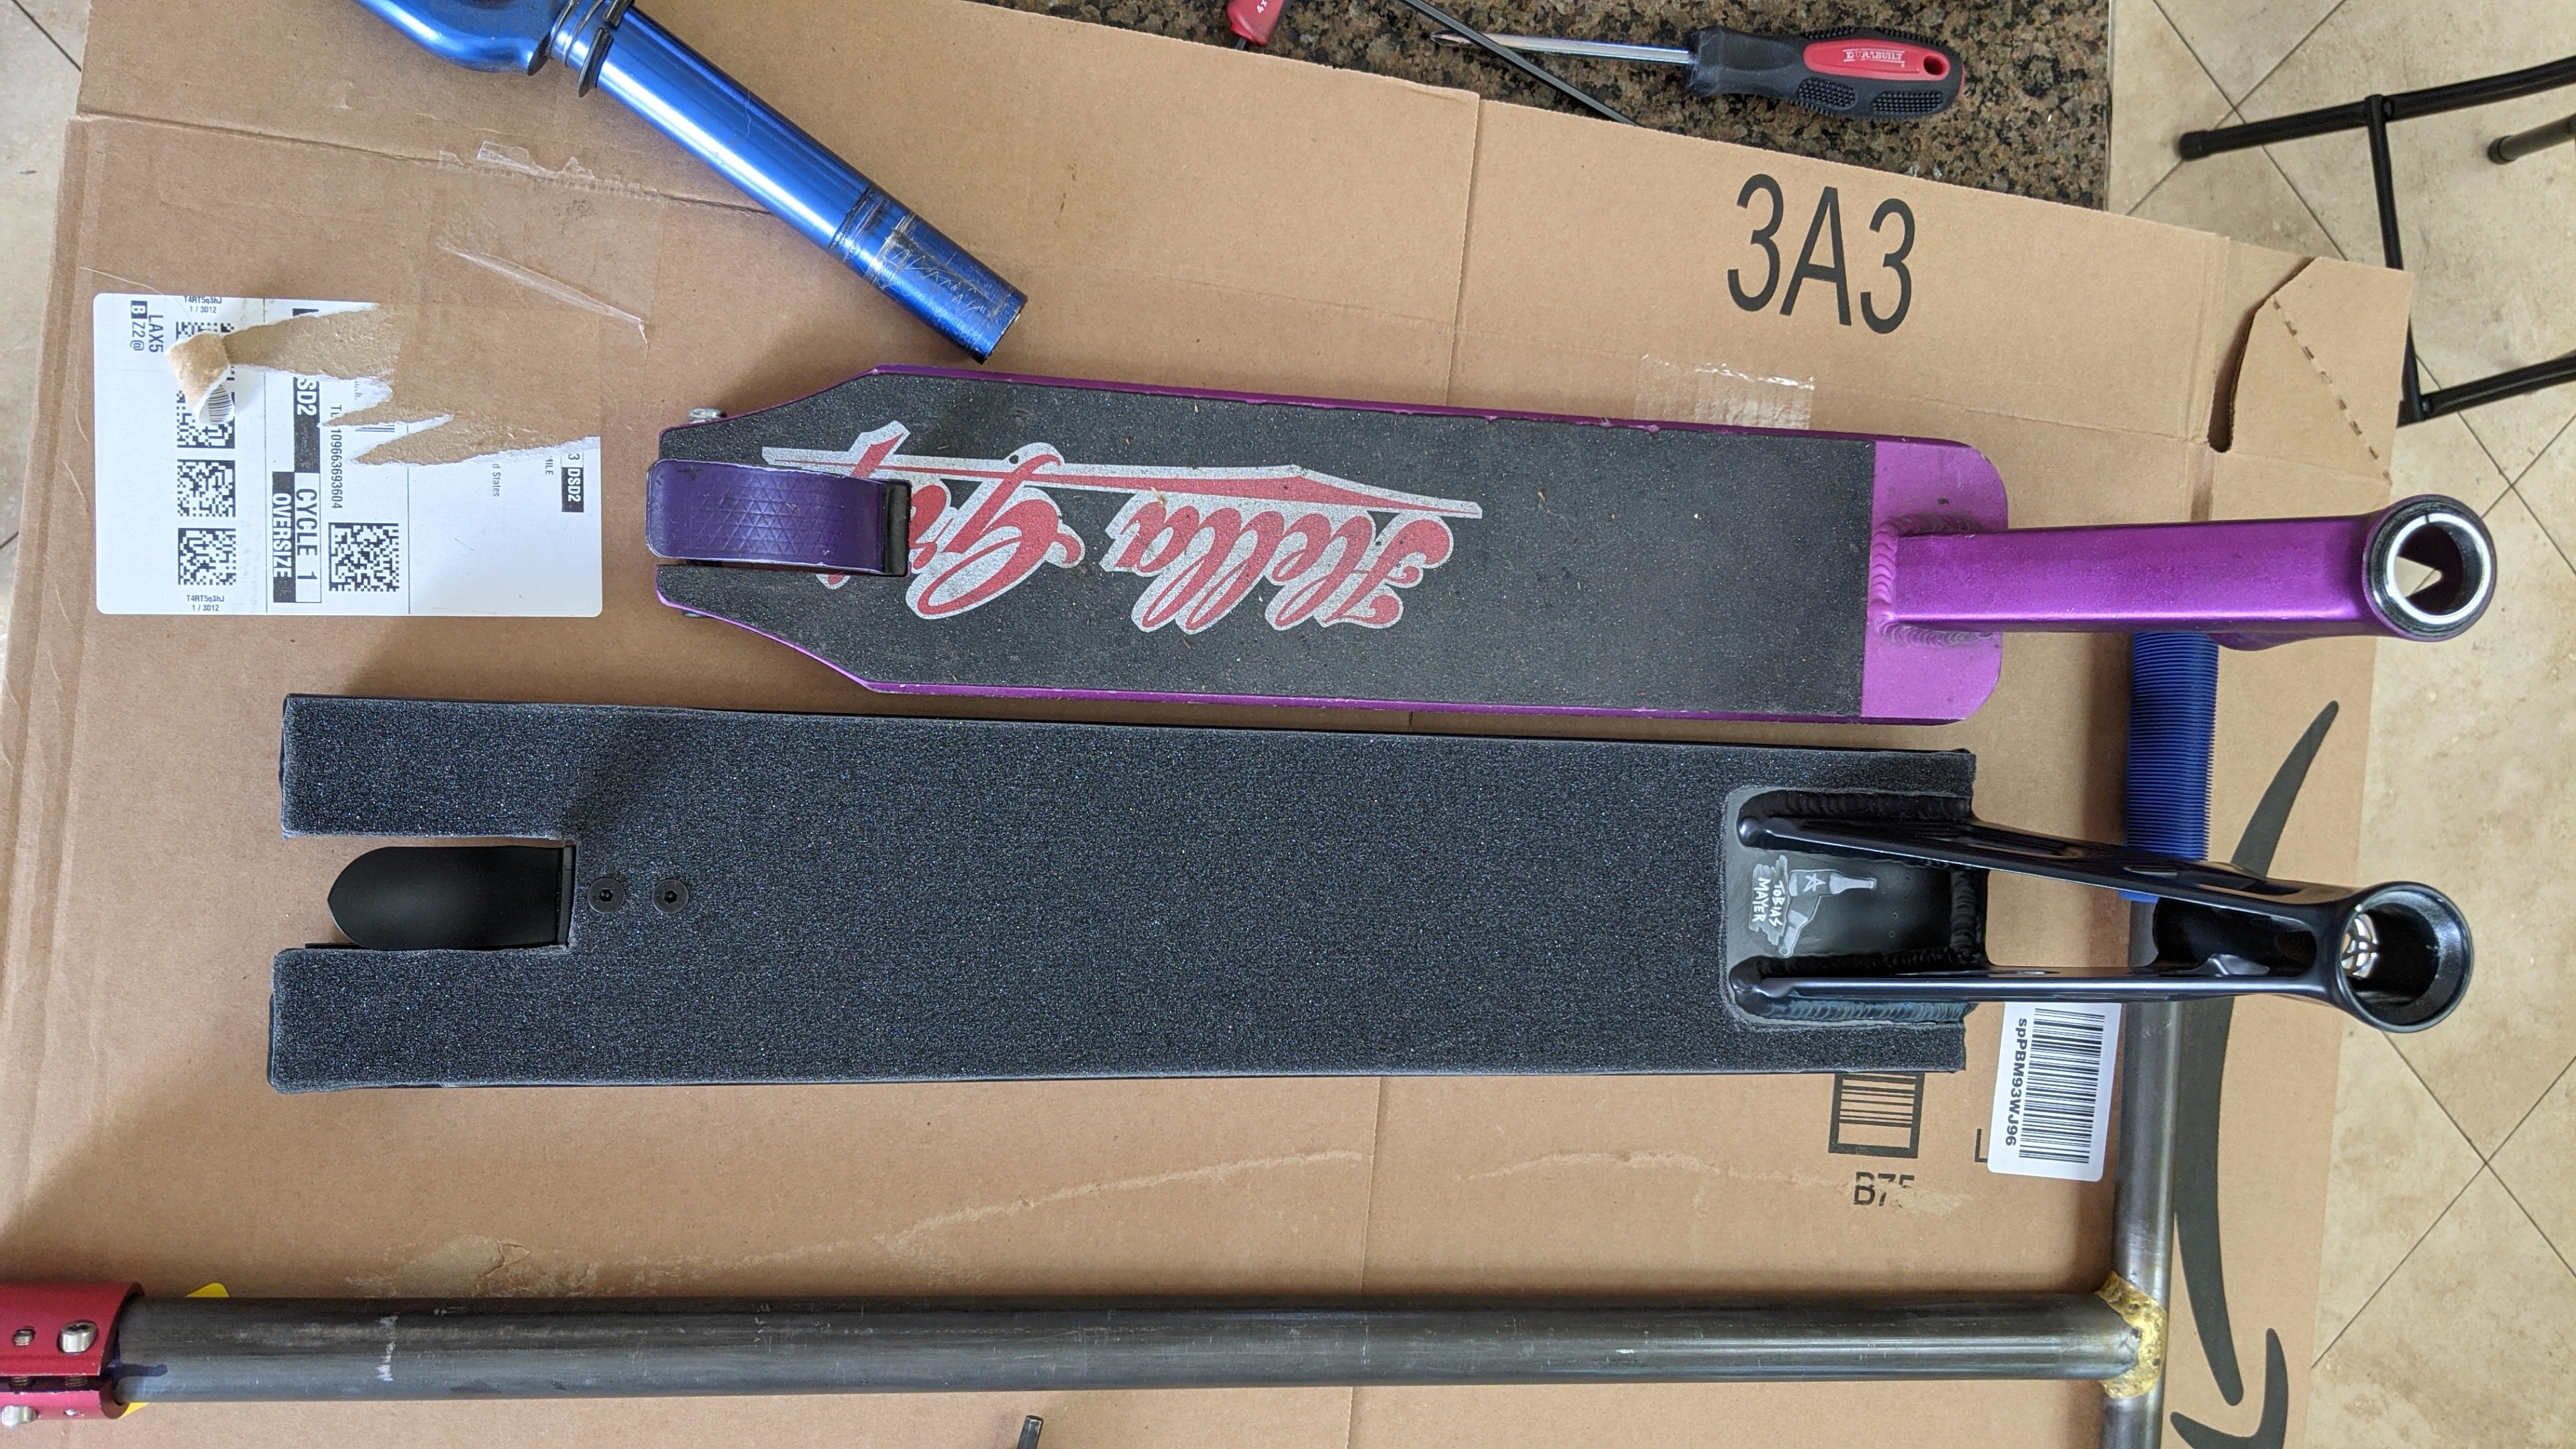
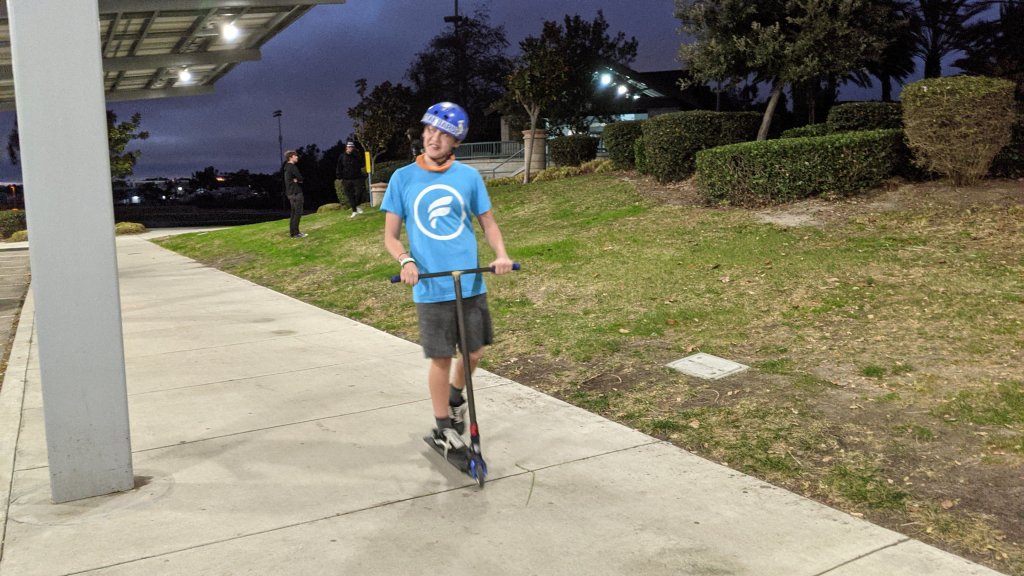
I’ve ridden it as is and it is SO much easier to hop up the curbs in our neighborhood! I can’t wait to see what Ethan can do at the skatepark on the new setup!
Pics to follow!
Till then, enjoy the holidays and go do something with your family!
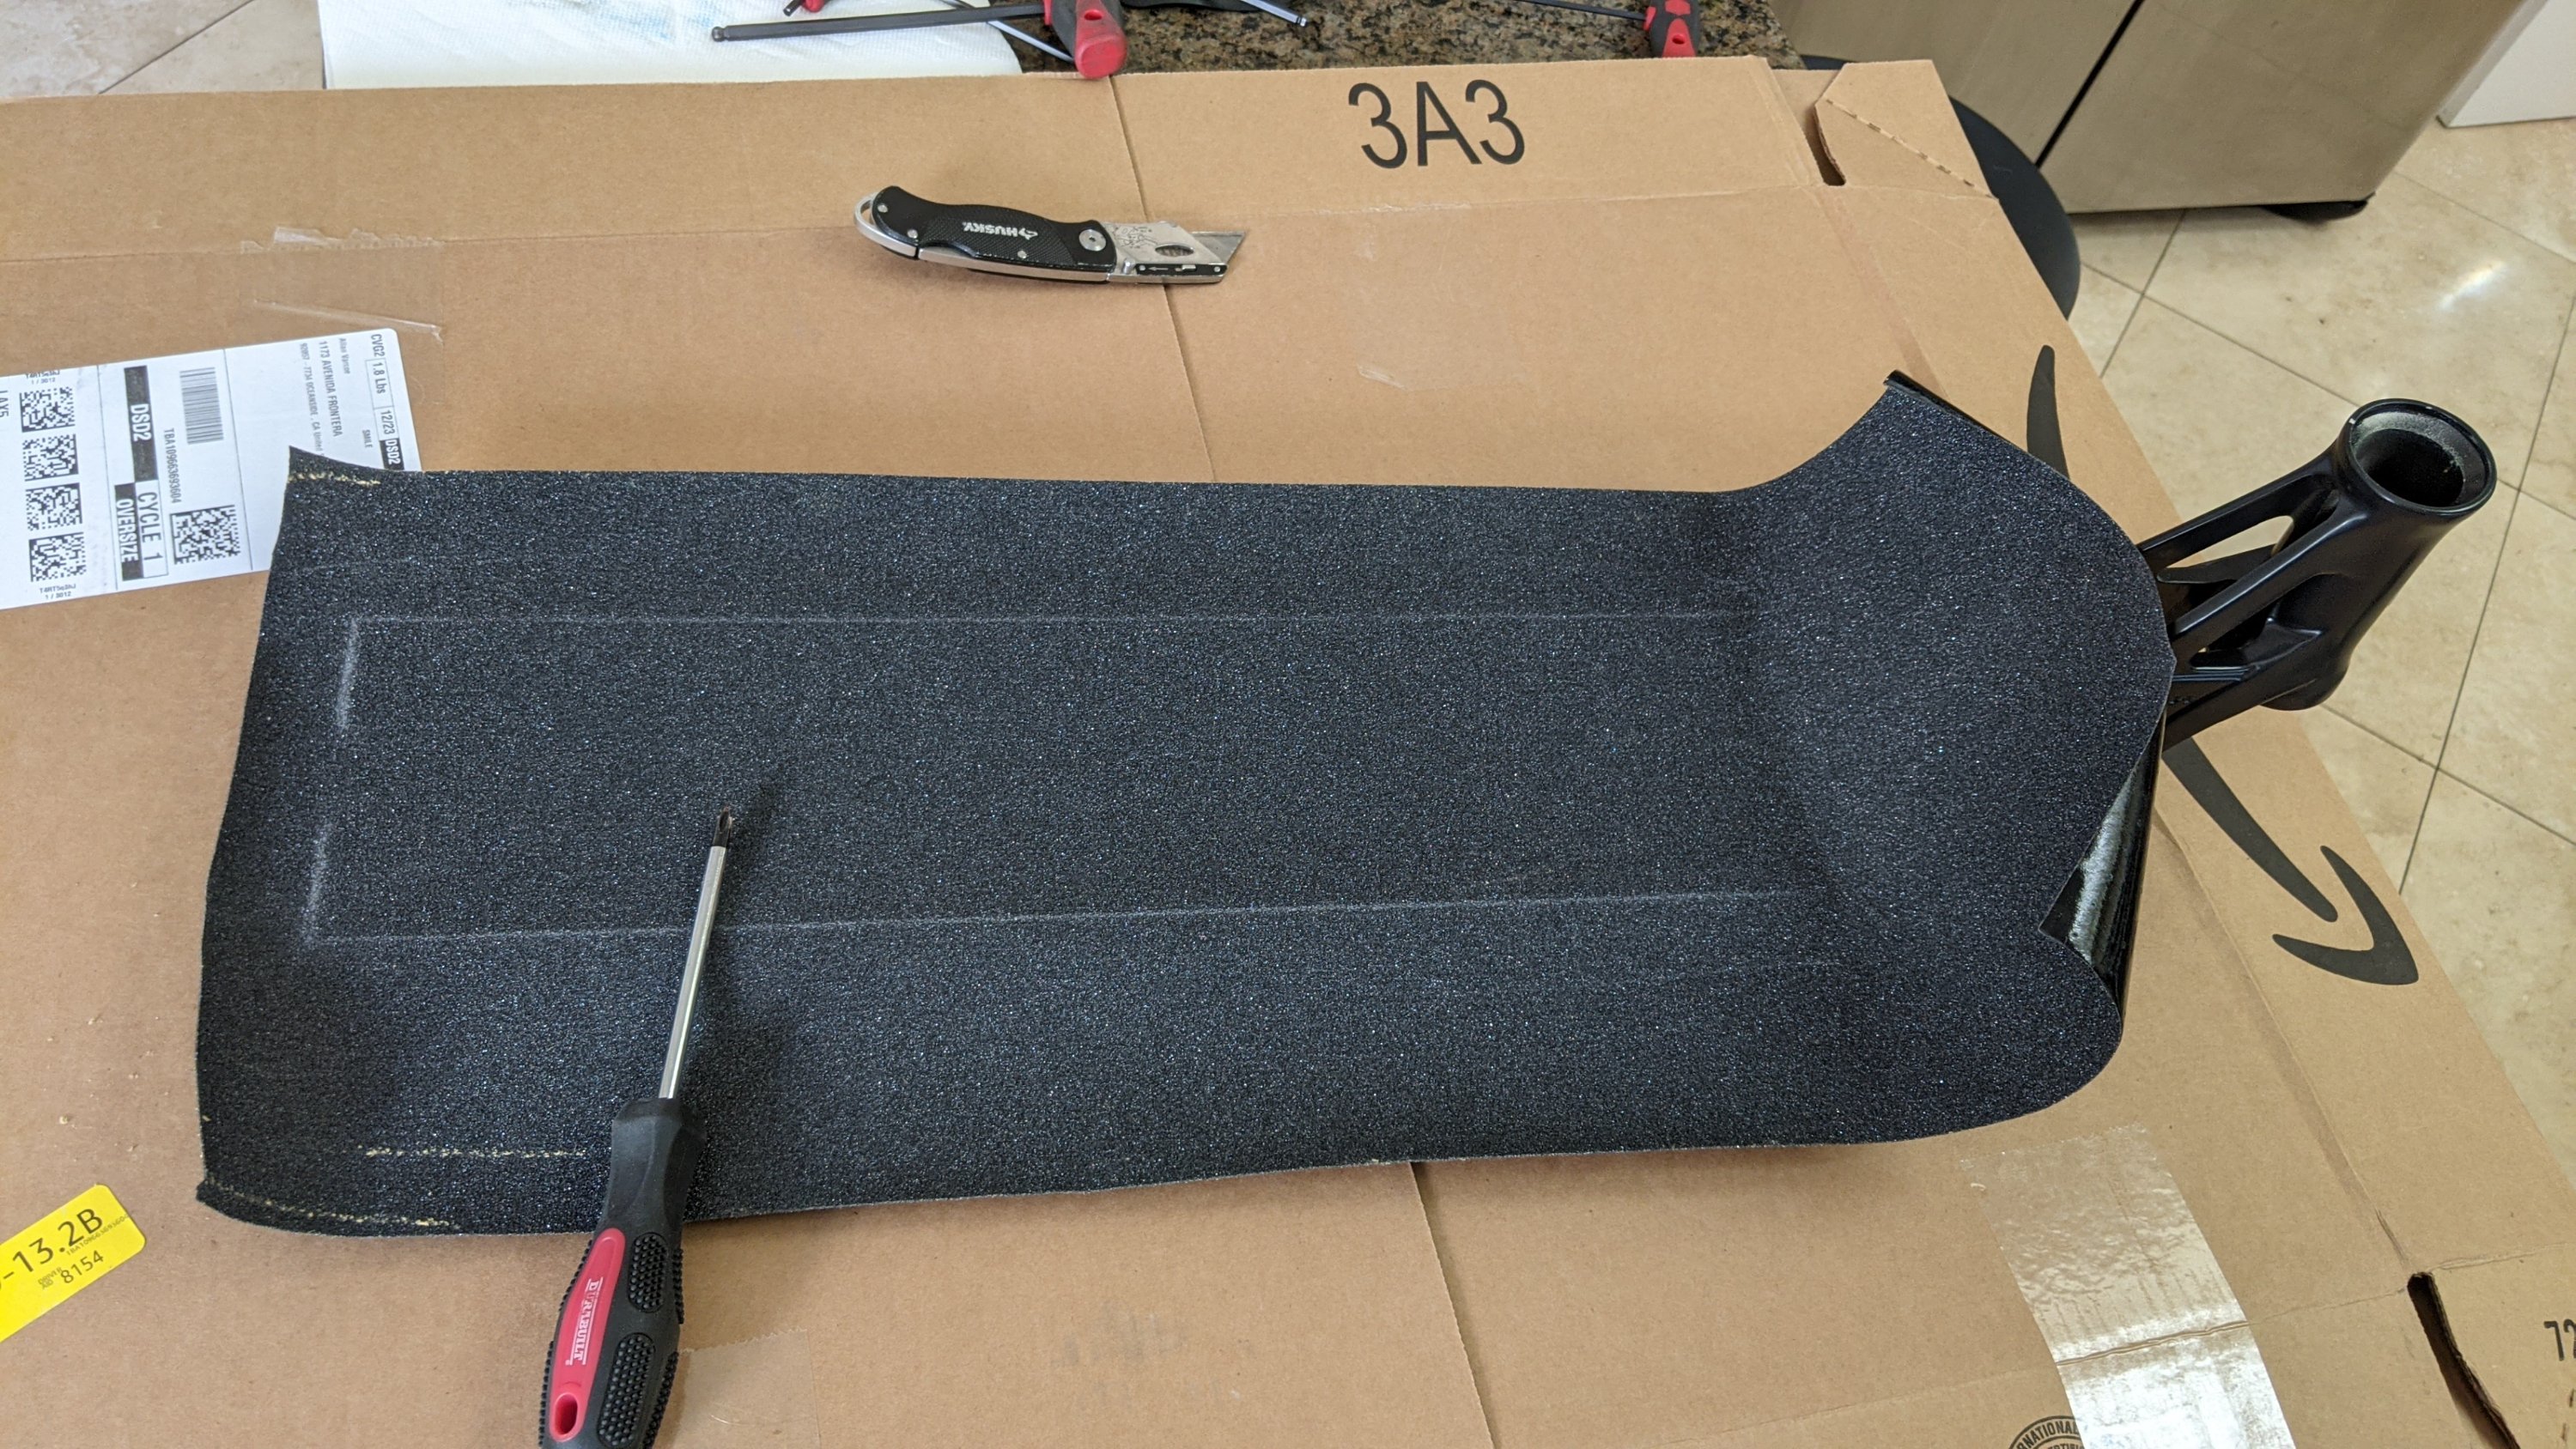
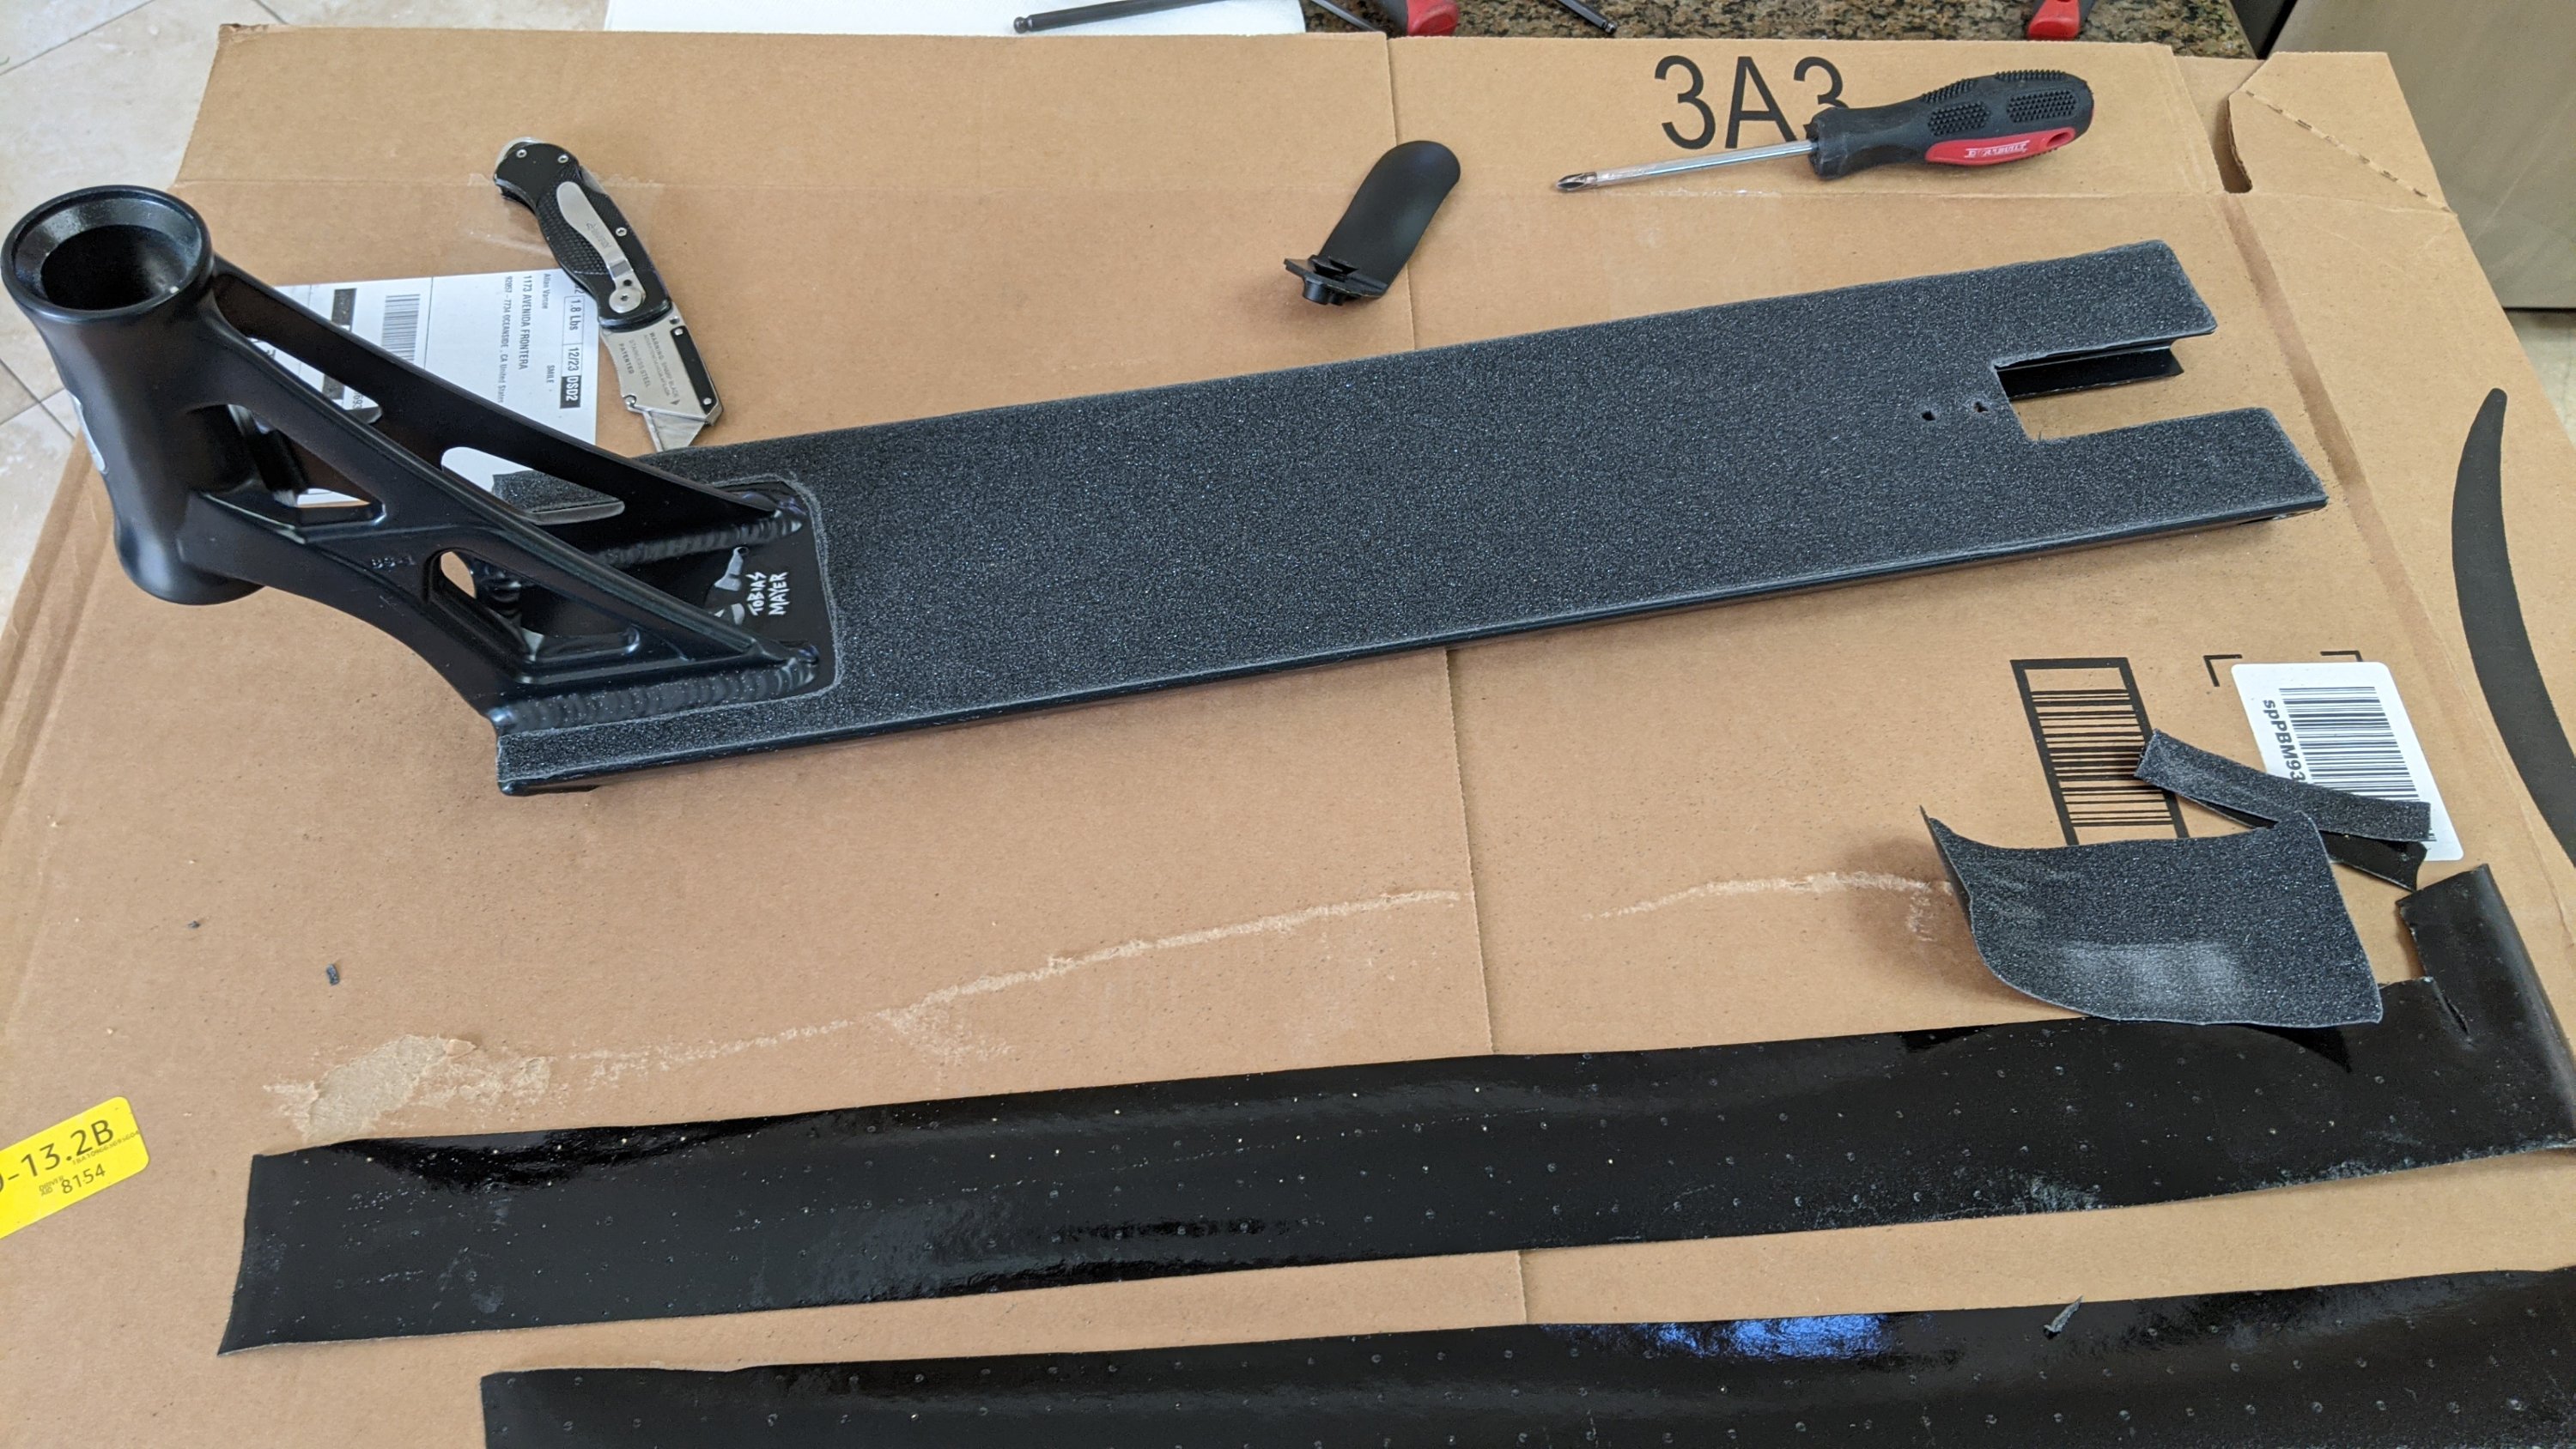
Post Christmas Update:
Let’s see if I remember how to grip tape from the skateboarding days! Screwdriver to mark around the outside. Boom.Somewhat larger. Haha! Assembled! 😜🤪
I started fat biking in the flat smooth singletrack trails of Minneapolis and never thought I’d need to go tubeless. Why bother with the sealant and burping beads, I’d never had a flat. The rolling resistance didn’t seem bad. The Framed branded tires rolled SO much smoother than the crappy Vee Mission tires that we’re on the bike when I got it. Why change what works right?
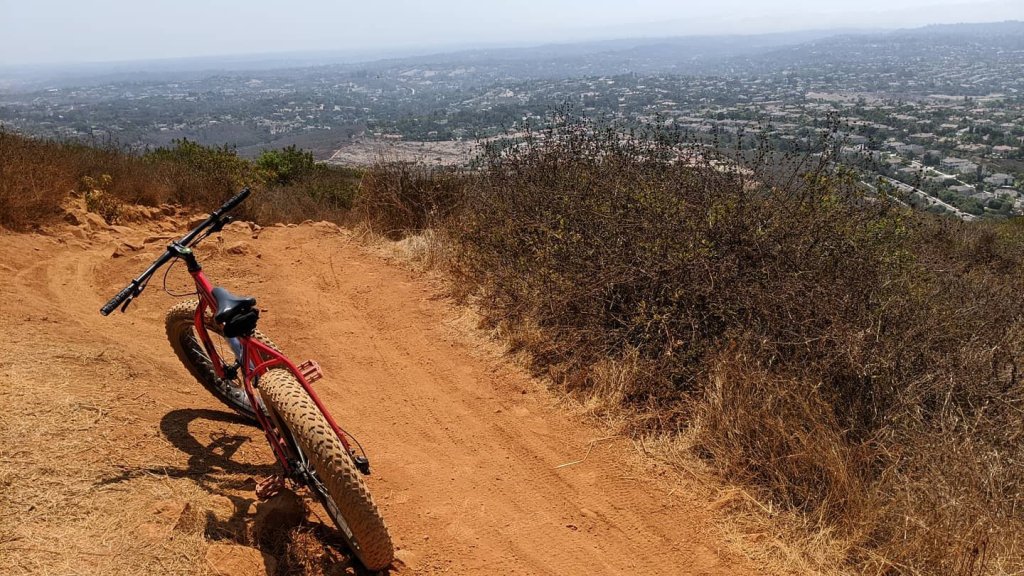
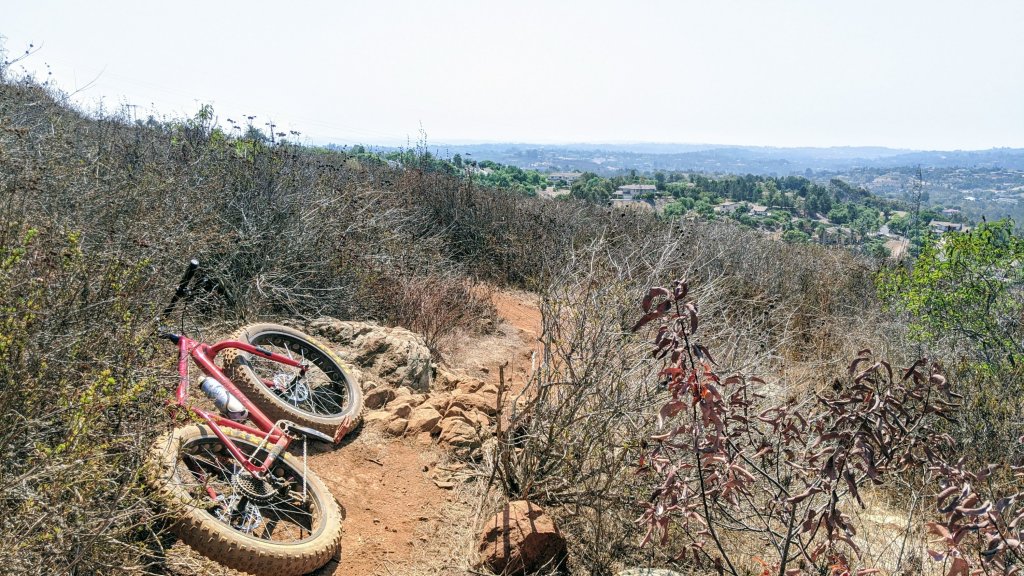
Well, then we moved to North San Diego County and I got a job where lunch rides in the hills around San Marcos were almost a daily thing. Excited to participate and kind of knowing what trail conditions to expect, I put another pound of air in my tubes and set off for my first lunch ride. The trail was SO much rockier than I expected. I’m not talking rounded river stones either. Blades, spikes, spades and scissors are a better way to describe the rocks in these reddish ribbons of dusty trail. But, none the less, my first ride went off great! No flats, seemed to have a little too many psi’s in there but, good baseline.
Fast forward 6 more lunch rides and I’d had 4 flats, none that left me stranded but rather the ones that would have you finding a flat in the morning.
This section isn’t even that bad!
Not too worried but more annoyed with constantly changing tubes and increasing my pressure until the ride became uncomfortable. Tolerable? Yeah, temporarily, sure.
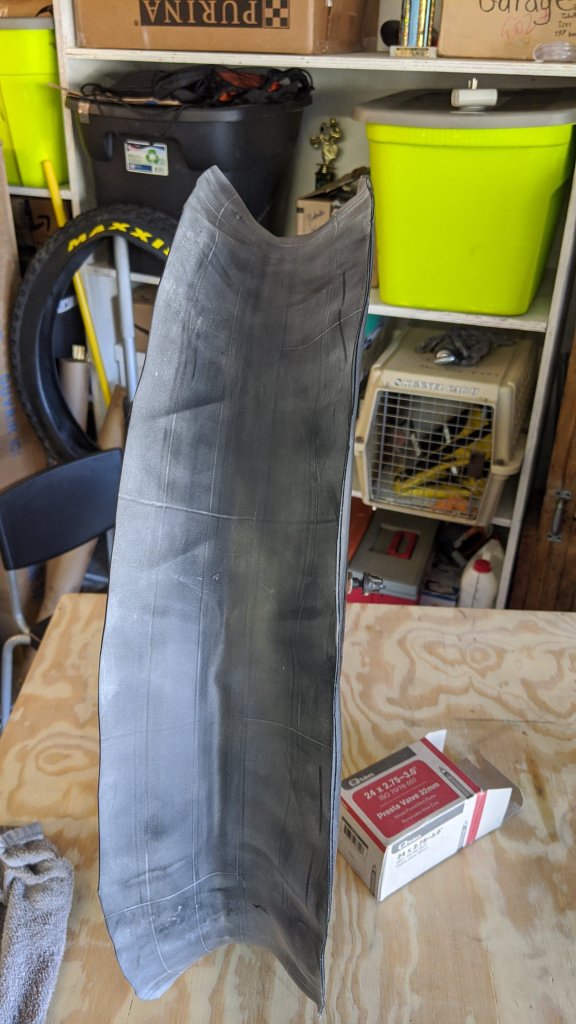
Knowing I had to do something, I decided to try out the Maxxis Minion FBR that I had ordered for a fat frame build I was planning. I ordered the sealant injector kit and 24″ tubes (split tube tubeless was my best option) and then it finally happened. Bombing down Switchbacks, a great test of a bike, rider and mostly tires! Seemed to be having a good run but then I felt it. Rim to ground! It had finally happened. A snakebite puncture!
Like the good boy scout I never was, I was prepared! I HATE having to walk out of a ride! I was ready for this. Pump and tube in hand, I changed out the tube and continued on my way. The whole rest of the way down the trail I was thinking “5 flats, it’s finally time to go tubeless!”
I read up on the conversion and gave it a go! I had rounded up a length of 3/16″ ID clear poly tube to use from my air compressor to the valve stem and shot some air into the tire! Pop! Right on! I hardly even heard any air leaking between the split tube and the tire. Added 4oz of Slime tubeless sealant that I had gotten at a CX race in MPLS and took it for a spin around the neighborhood. Done. Pumped it up to 10.5 psi (where I ran my tubed Framed tires) and went to bed. Next morning, still reading 10.5!
One of our favorite rides at work is up Switchbacks and right back down it! As challenging as Switchbacks is to go down, it’s just as challenging going up. Steep and technical is the name of the game on this ride! I noticed that the grip in the back was improved! I was climbing areas where I would have slipped out on rock on the old back tire. Bitchin’! On the decent, the rear felt more supple and gripped the turns just enough to be noticably better! Bitchin’! No flats either! Bitchin’!
Rides we’re going well! Tubeless in the back and the old way in the front. No flats for over a week!
Still the front Framed tire.
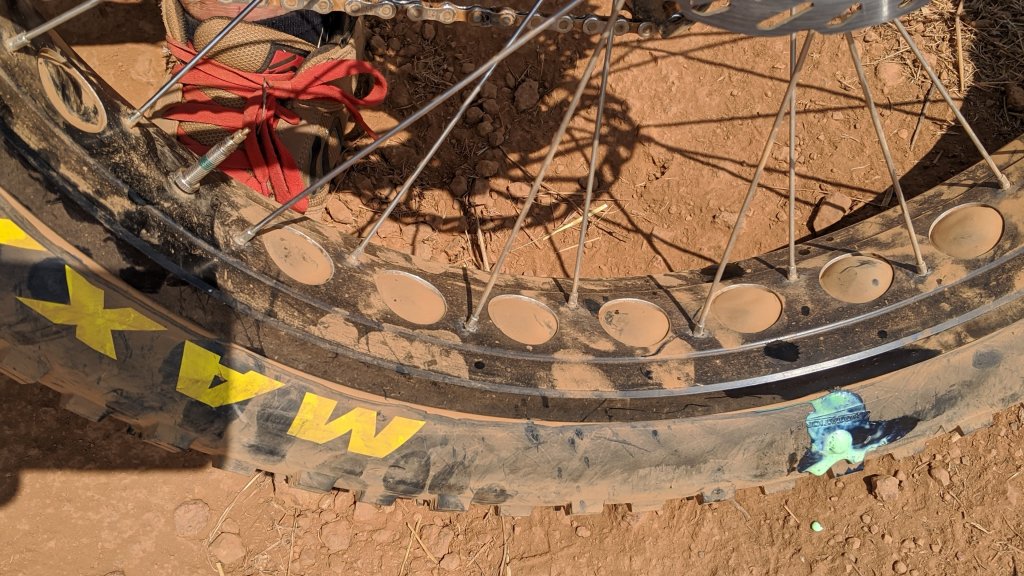
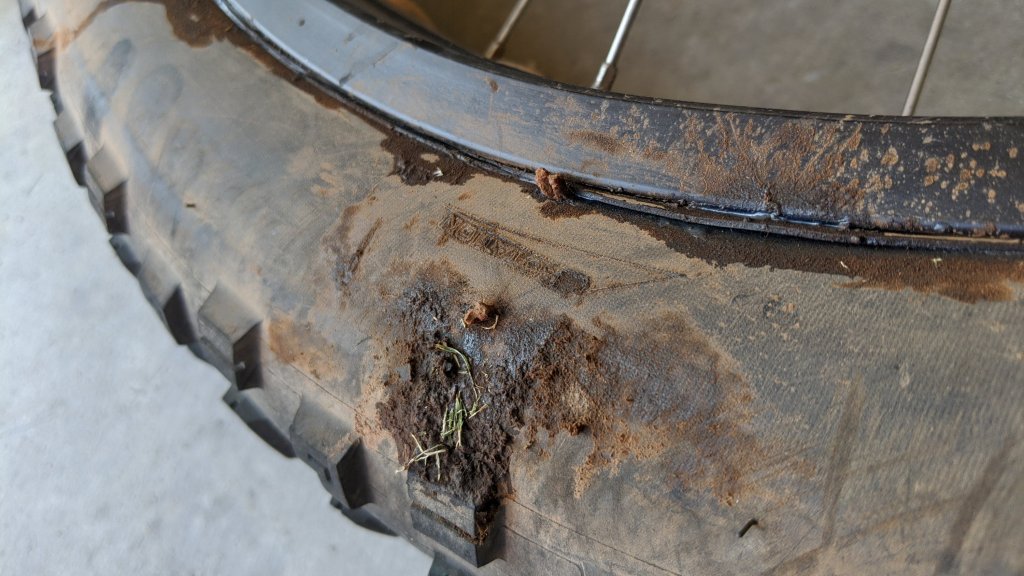
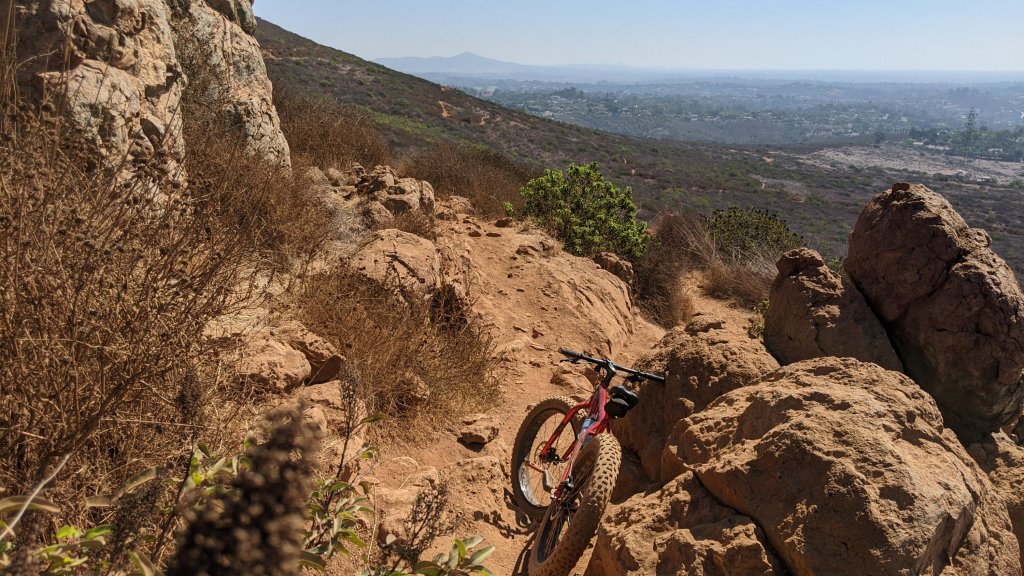
We ride different trails or link up different trails almost every time we ride. Keeps it fun. Another demanding decent is a trail called Whiptail. Whiptail is as brutal on tires as Switchbacks only faster. Wednesday, we set out, I was riding quick, light, nimble… felt good! Then another rider in our group flatted. He had just switched to tubeless but got a puncture sealant wouldn’t fill. Damn. He wasn’t prepared. Nobody has plugs. He had to hike out. The ride goes on. Not more than 500 yards down the trail, I notice my rear tire is low. Pull off the trail to find this.
Shit!
Sidewall bite! Sealant isn’t stopping it. Crap! I need a plug or I’m walking out too! Lucky for me the leak was slow enough that I could pump it enough that I could ride for a half mile or so then pump back up, half mile, pump, half mile… Made it back to the shop. Rough day for tires in San Marcos!
Got some bacon strips from a local shop and and plugged it right up. It actually had two holes come to find out. No prob, fixed.
🥓 strips!Mmmmmm
In the mean time, the front Maxxis Minion FBF tire came in along with some highly recommended Orange sealant. Excited to get totally tubeless, I do the swap that night!
The split tube!
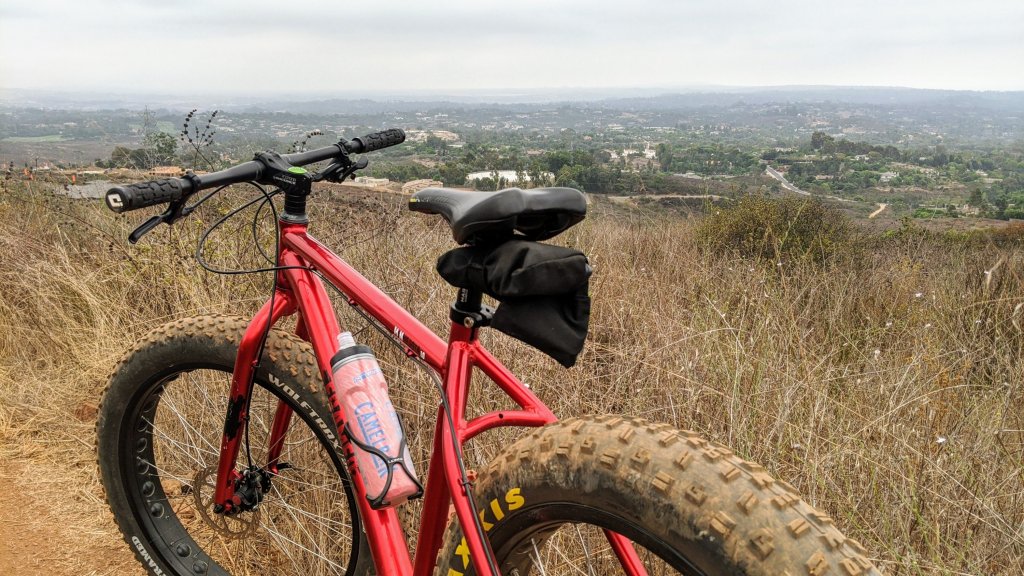
Being tubeless in the front I could REALLY feel the suppleness! I mean it was like I had a short travel suspension fork. I wound up putting another pound of air in the tire because it seemed SO soft that I didn’t want it to come off the bead. We were planning the most techincal ride we do and I didn’t want any issues. In the parking lot there was a noticable difference in rolling resistance and on the trail, even with 11 psi front and 12 rear it felt smooth and grippy! Traction was definitely improved!
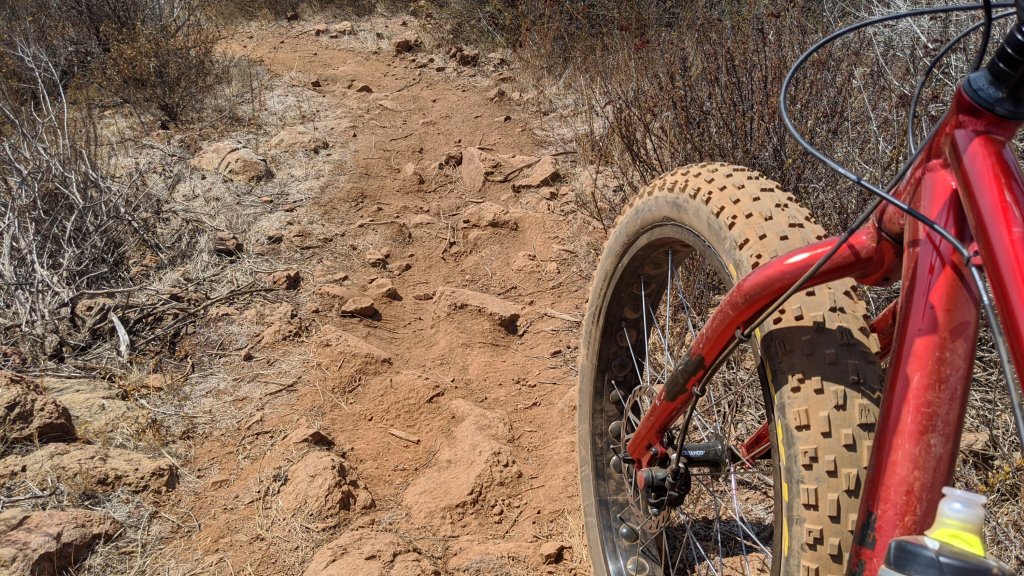
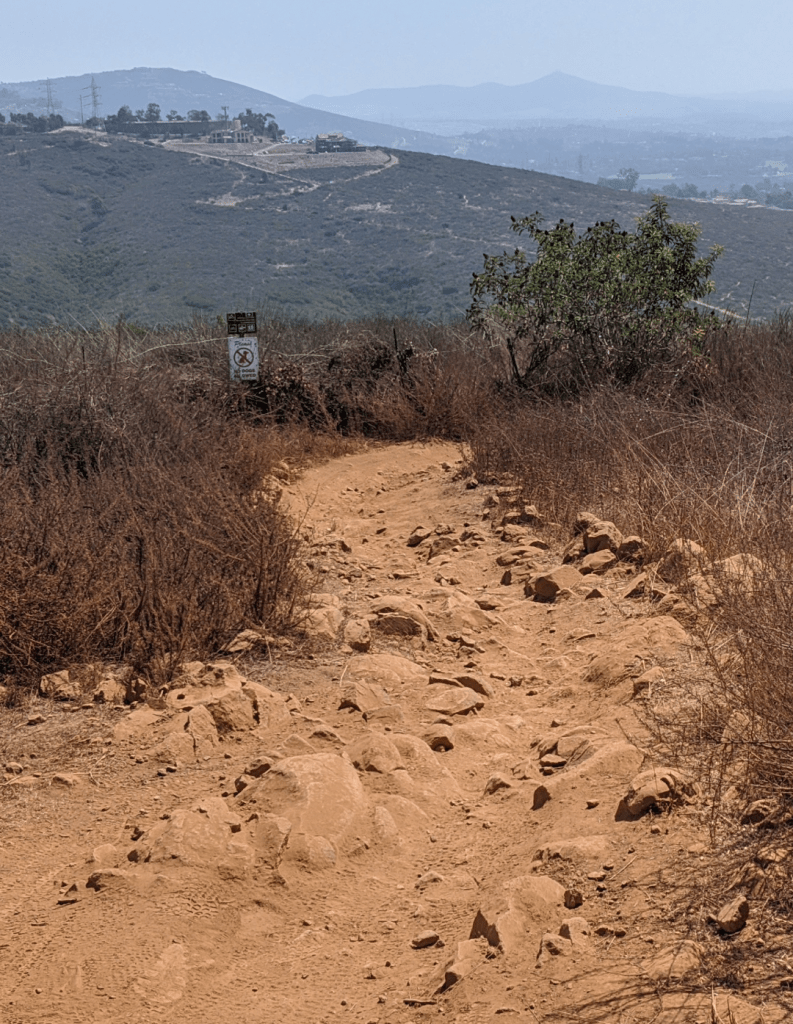
Just an example of the trail conditions.
While out on the trail I actually felt like I wanted more pressure! Something I had never thought on the old setup. The way the front tire would confirm to the surface had me riding a bit more cautious. Funniest part, is that now having the front properly setup I now REALLY noticed how supple the REAR tire was!
Tubeless is so smooth!
What do I take away from this?
1. Go tubeless as soon as you can! Especially on a fat bike, plus bike or anything!
2. Be prepared for ALL tire failures! Carry plugs, pump, a way to fix larger tears in the tire and even a tube as a fail safe.
3. The brand / type of tire makes a difference in different conditions! I think I could have run a really fast and light tire in Minneapolis but that tire would have gotten destroyed here in San Diego.
4. Pressure is SO key on fat bikes! I knew this but it seems even more important now that I know how different tires and tubes/tubeless setups handle pressure.
I will update this post in a couple weeks if there is anything worth sharing but for now I think I have the right tire setup for the trail conditions here. Tubeless is never anything I was against, just didn’t feel I needed. Well, I’m pleased to admit I was wrong. I am convinced, there are clear advantages to tubeless! You should try it if you haven’t already!
Have fun out there!
Allan 9/19/20
Edit: 10/8/20 VERY pleased to report zero flats! I’ve settled on 11F and 13R! Been having a LOT of fun on this bike and worrying less and less about flats! Such a relief!
If you need a great tire for brutal conditions, Maxxis Minions are the way to go!FYI
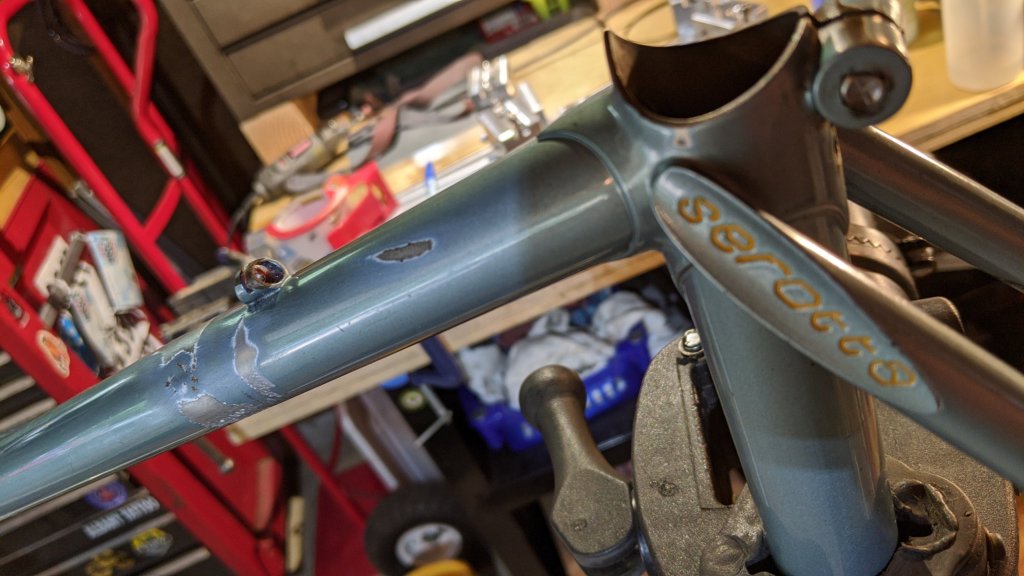
I guess some people do read this blog! I got an email from a guy who has a nice older Serotta. Based on what’s left of the serial number and the traditional sized tubeset, he thinks it’s a 1982. Well, it had about a 10mm dent in the top tube. Totally structurally sound still. Sweet!
Here is how I removed the dent.
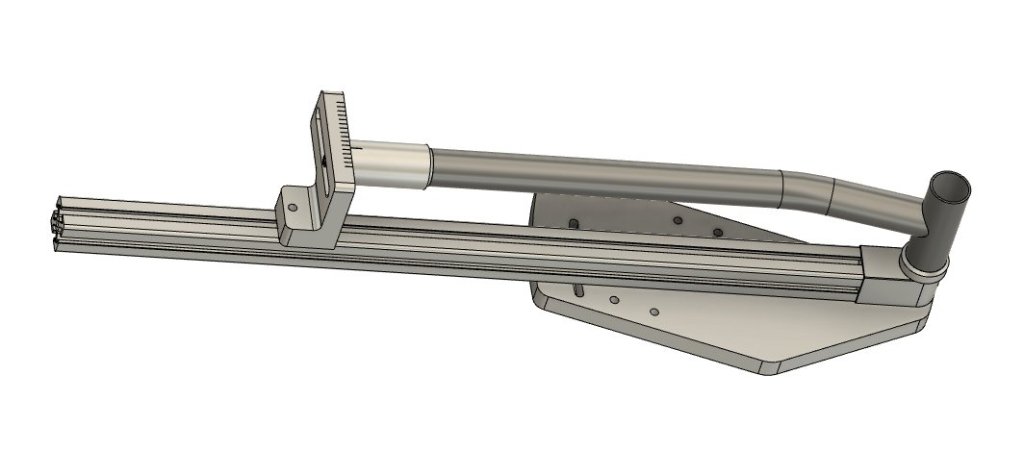
When you dent a tube, not only are you pushing material down but you are pushing material out on either side of the dent. The way to get rid of SOME of that raised portions is to use a tube block. The idea is to clamp the tube in a tube block and rotate the frame around the dent. This helps to flatten the high spots and if you’re lucky, pop some of the dent back out.
Cool! Except I don’t have a 1″ tube block. Ha! Figures. So I made one.
Here is my step by step process for dent removal.
Step 1. Sand the paint off all the way around the dented tube.
Step 2. Apply grease to the frame and the tube block. This allows the frame to rotate in the tube block without galling.
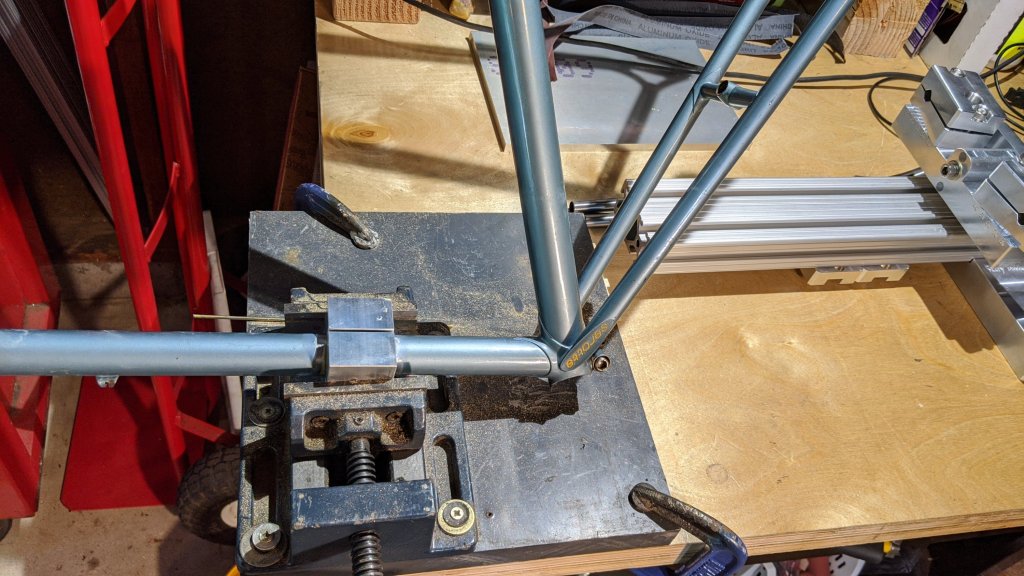
Step 3. Clamp the dented part of the frame and tube block firmly in a vise. Now, don’t kill it but it does have to be pretty snug.
Step 4. Rotate the frame along the axis of the tube back and forth several times.
You may notice the vise is a tad lose now. That’s cool! That means the tube is rounder than before. You can tighten the vise at this point and repeat this step. You can always take the frame out and check it for progress at any point. Just be sure to reapply grease.
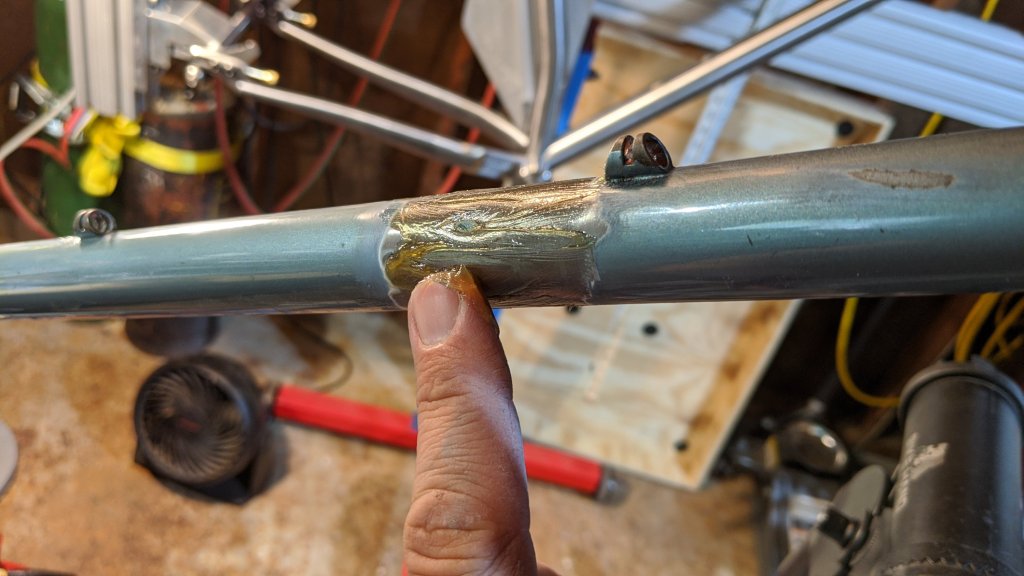
Step 5. When you are happy with your progress with the tube block, clean off the frame and get ready to fill with bronze.
Step 6. Prep the frame how you would for brazing a joint but make the dent face perpendicular to the ground (straight up) this way gravity will help keep your bronze in place.
Be sure to fill the dent with bronze and then some. You will be removing the protruding bronze, smoothing it to the tube.
Step 7. Soak the flux off.
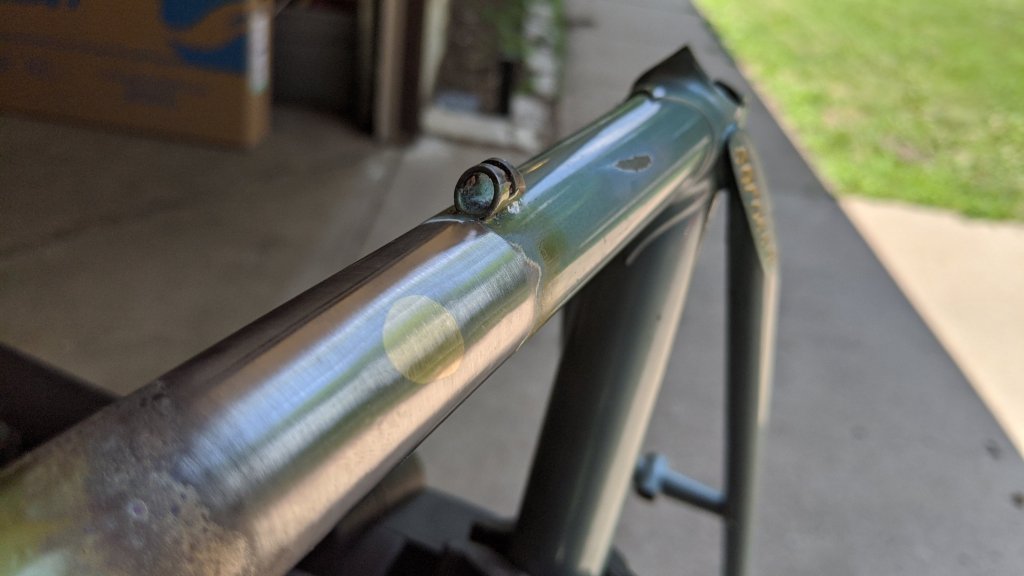
Step 8. File it smooth! Make sure you don’t remove too much bronze or file too hard into the steel. You don’t want to thin the wall of the tube.
Send it off to the painter!
DONE!
Hopefully these directions can help someone keep a beloved bike on the road! I love being able to save a classic Serotta! Hopefully I’ve made Ben proud. 😁
The owner will be repainting and rebuilding it with period correct components. Hopefully he sends me pics when done so I can add them here.
Please let me know if I’ve missed anything or if you have questions / critique.
Wow, I am totally unprepared to build a mountain bike! …..or at least the one I want to build.
I don’t really know too much about mountain bikes because before I got this fat bike I hadn’t owned or really ridden one for…IDK, 25 years. Between BMX and cyclocross/gravel I just never got the urge.
Well, the MTB bug bit me so logically, I want to build a MTB! One problem. I’m geared to build lugged “road” bikes, not aggressive hardtails. At least I have one fillet brazed frame under my belt!
New challenges for his build will be:
1. I have NO idea what MTB geometry I want to use. Ok, not totally true. I’m tall, so I want a long reach. I want to be able to take his bike to he skatepark so gimme a low top tube. I like short, twitchy rear ends so I’m going to use sliders to “slam” the rear end. That’s all I know!
2. Fully fillet brazed bottom bracket! I’ve only used lugged shells so far. My stay mitering fixture should help this out some what.
3. Bent Seat tube. Wanting that short rear end I would like to try a bent seat tube! That in itself leads to a fixturing issue that is the whole reason for this post.
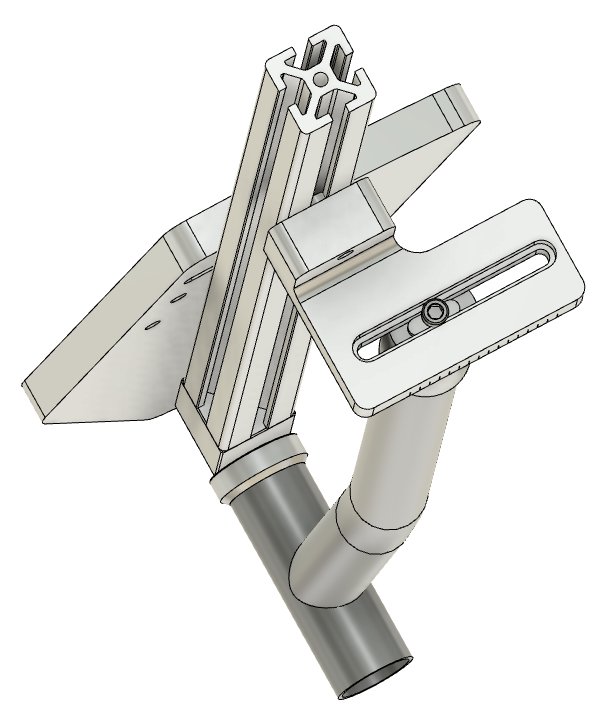
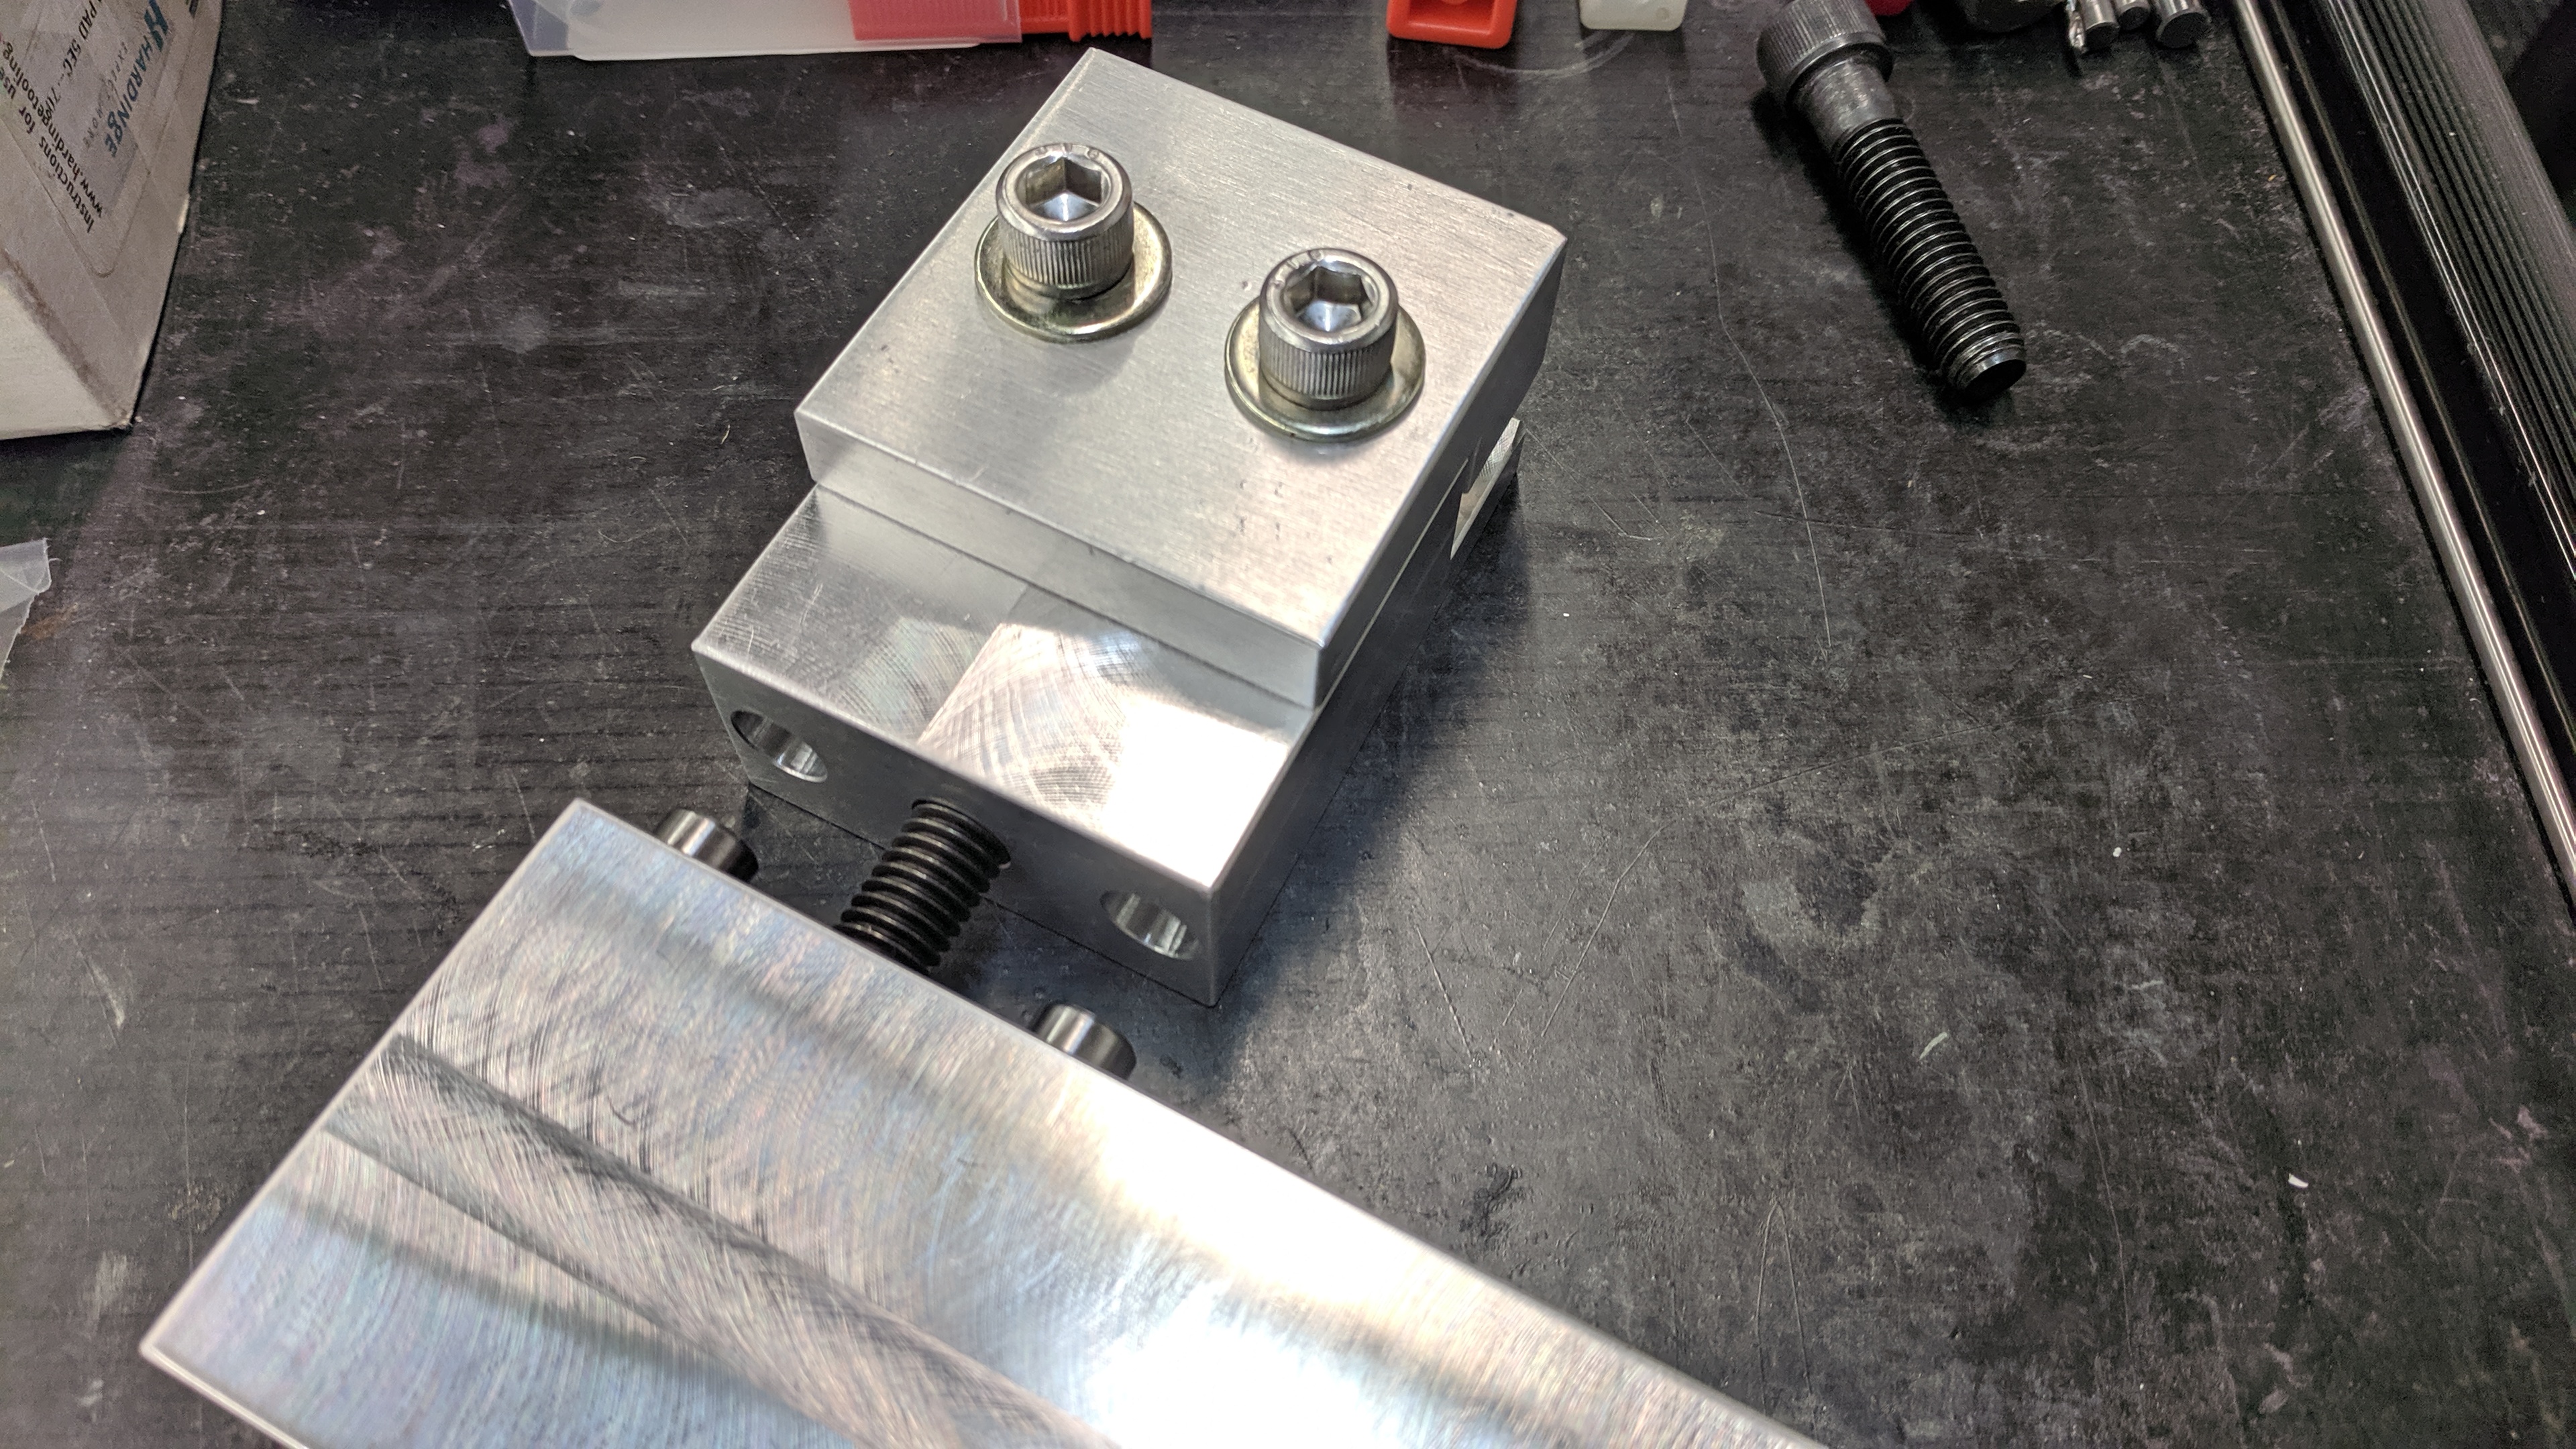
You see, all of the road frames I’ve made up to this have had seat tubes that are directly inline with the center of the BB shell. Peter Verdone came up with offsetting the straight portion of the tube so that the frame fixture can be setup based on numbers from your BikeCAD design. Perfect! I have wanted a reason to model my frame fixture so here goes.
The top part (left) holds the ST cone offset from BB center.
I now also needed a way to use wider BB shells. My current fixture was setup to build 68mm shells only. A standard MTB is BB shell is 73mm wide.
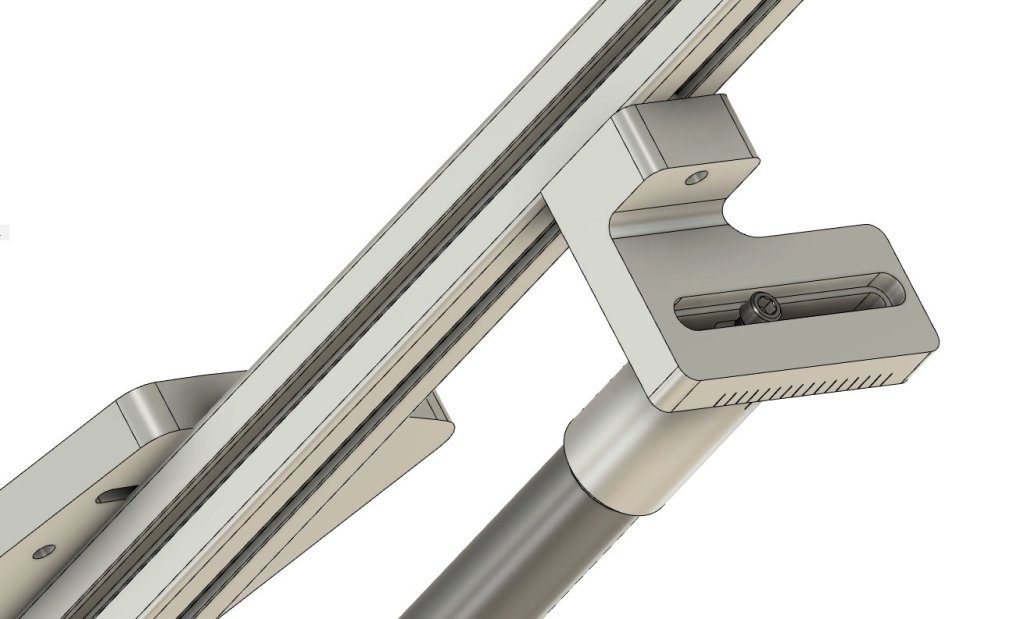
With this design I can change between 100, 83, 73 and 68mm BB’s in seconds.
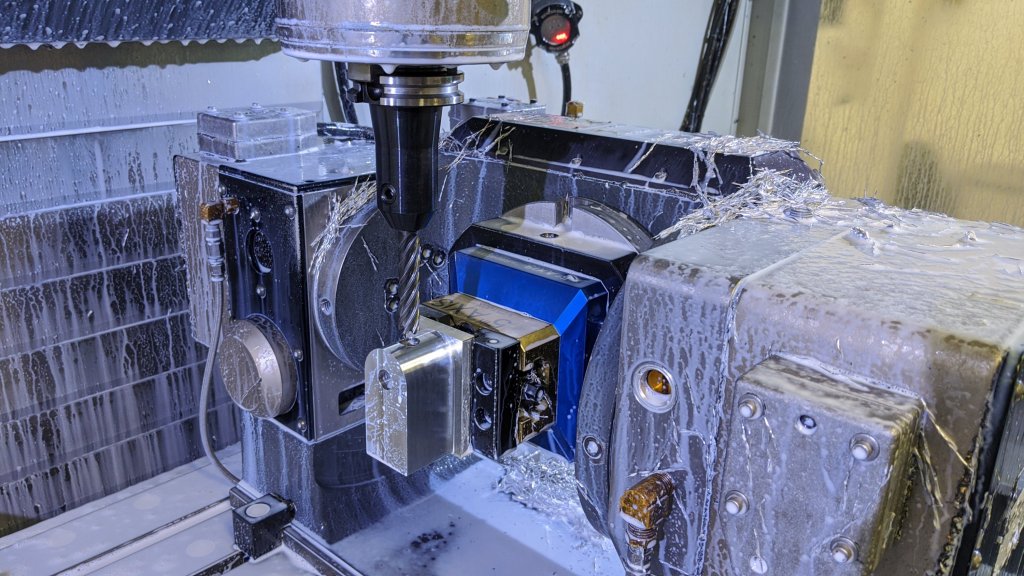
These spacers just slide on a 1/2-20 heat treaded threaded rod and against this guy. The 5 axis at my work was open so I made this part in there.
Like you wouldn’t!
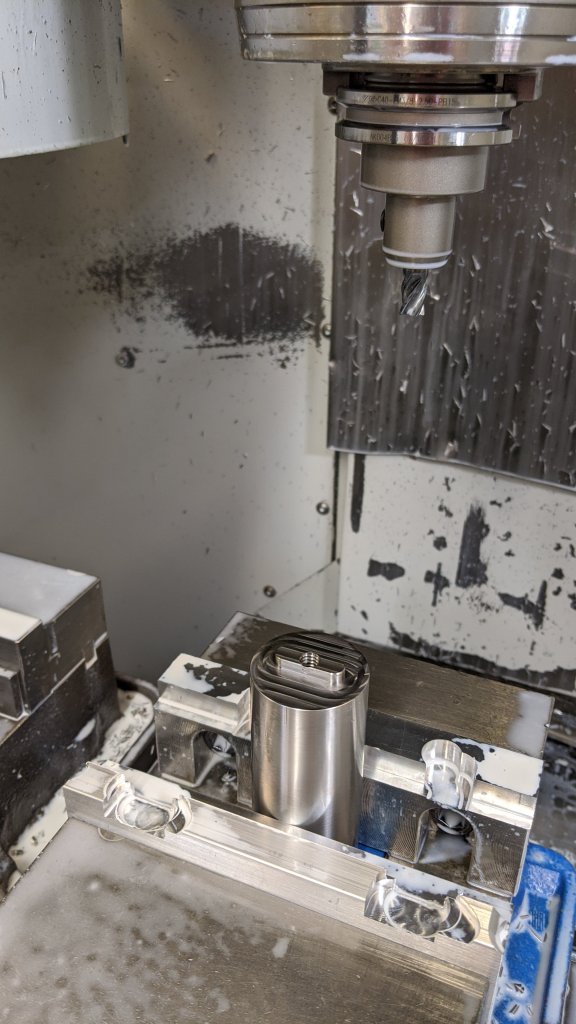
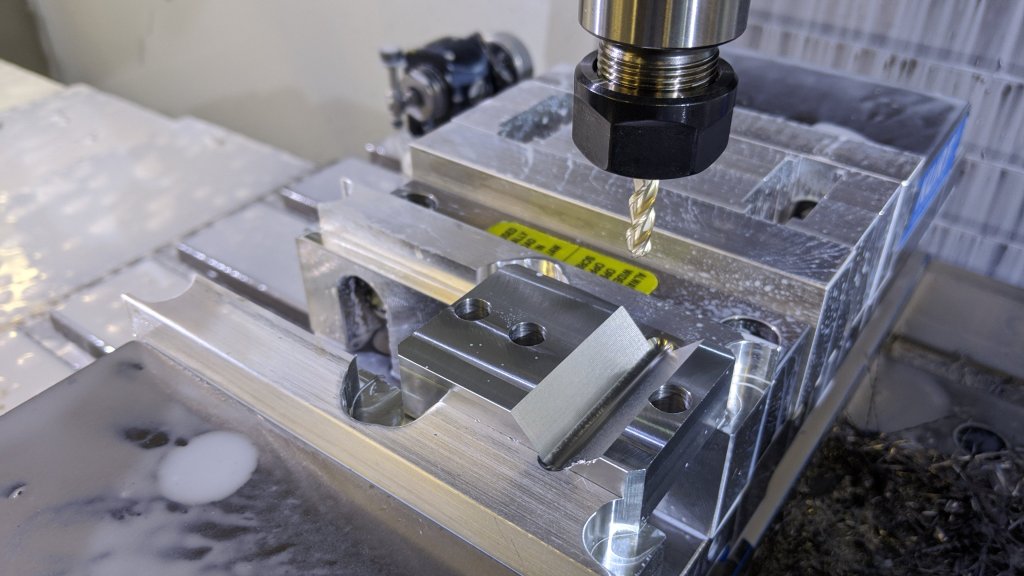
Time to machine the offset cone holder.
I forgot to rough one face of this part out and when I dropped a 1/2″ ball end mill into a spot where I think there’s .010″ and there’s a fucking 1/4″, it came flying out of the vise! Oops!
Hey, at least I get to put the word FUCK into something else! Graduated!
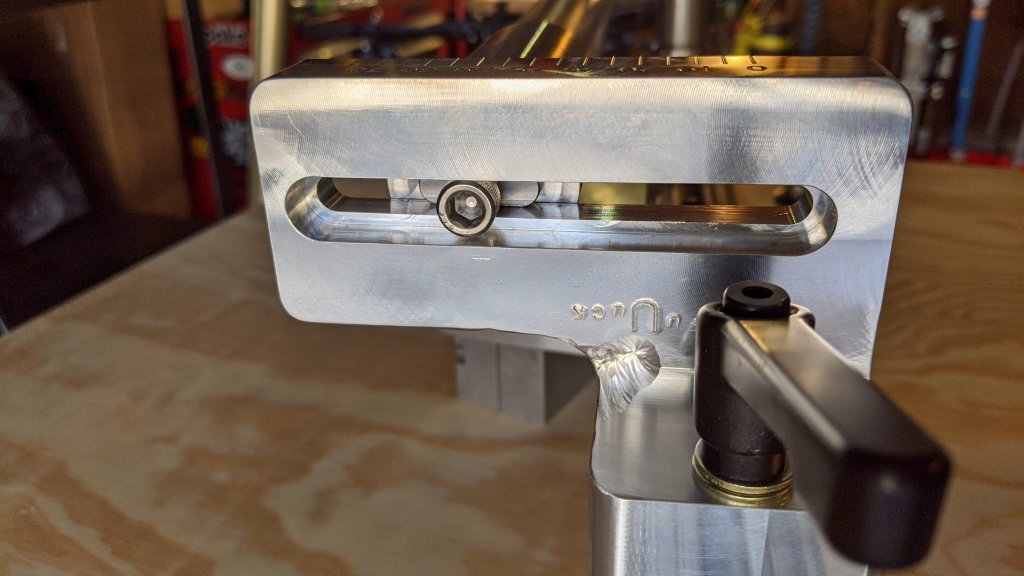
For the ST cone I wanted 2 things. To be longer for torch access and to be keyed so it would have an indicator line to be able to tell how far offset I was.
The cone end!The keyed end. You can JUST see the indicator line in front. You can just see the indicator line here too. It keys into the slot in the offset mount. (Don’t worry Dad, I’ll make a washer that fits in there before I tighten it down!)Here it’s shown with a 100mm wide BB shell. Switching to any other size takes 2 seconds!
So here is my frame fixture as it stands now!
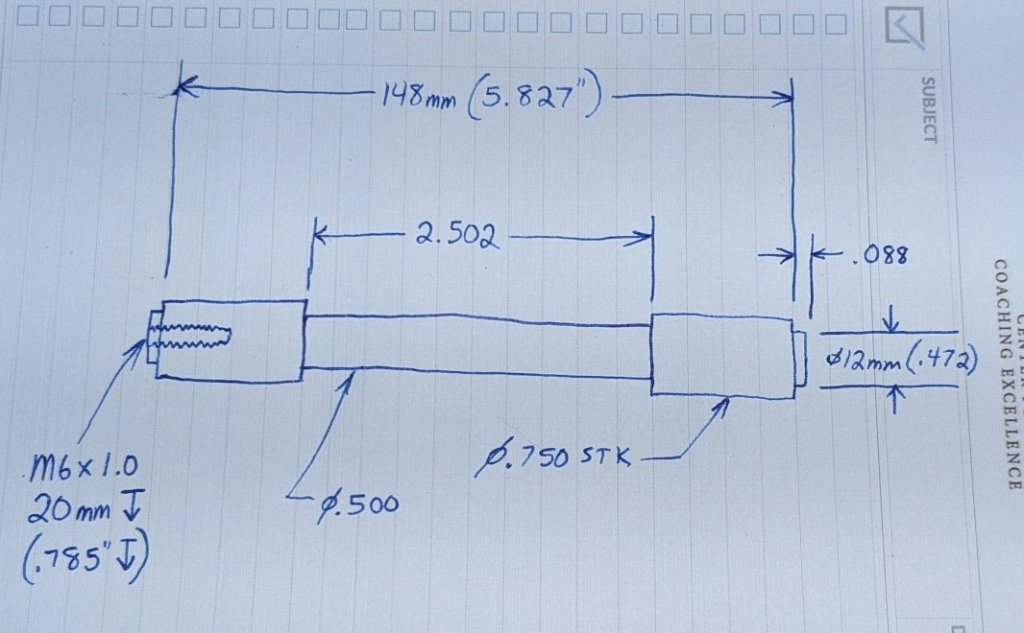
I am now ready for my next excuse to not actually BUILD the frame! Dummy axle! With COVID19 shutting things down I can’t just order a Boost spaced dummy axle from Paragon… Luckily I know somebody who can machine stuff.
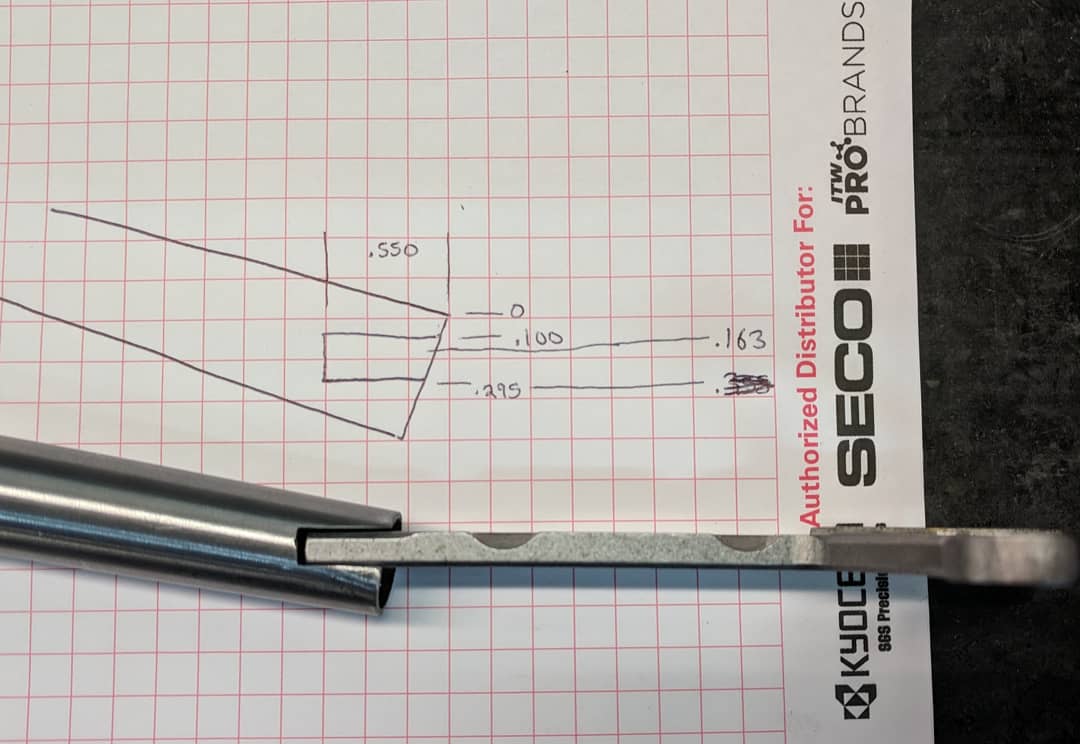
Yes, I still draw stuff on paper. Some things are so simple they don’t need CAD.
I should probably fire up the BikeCAD and design the frame now! 😂
Until then, spring is springing and the trails are drying up! As fun as winter fat biking was I’m looking forward to getting the fat bike out on the dirt before we move back to San Diego in August!
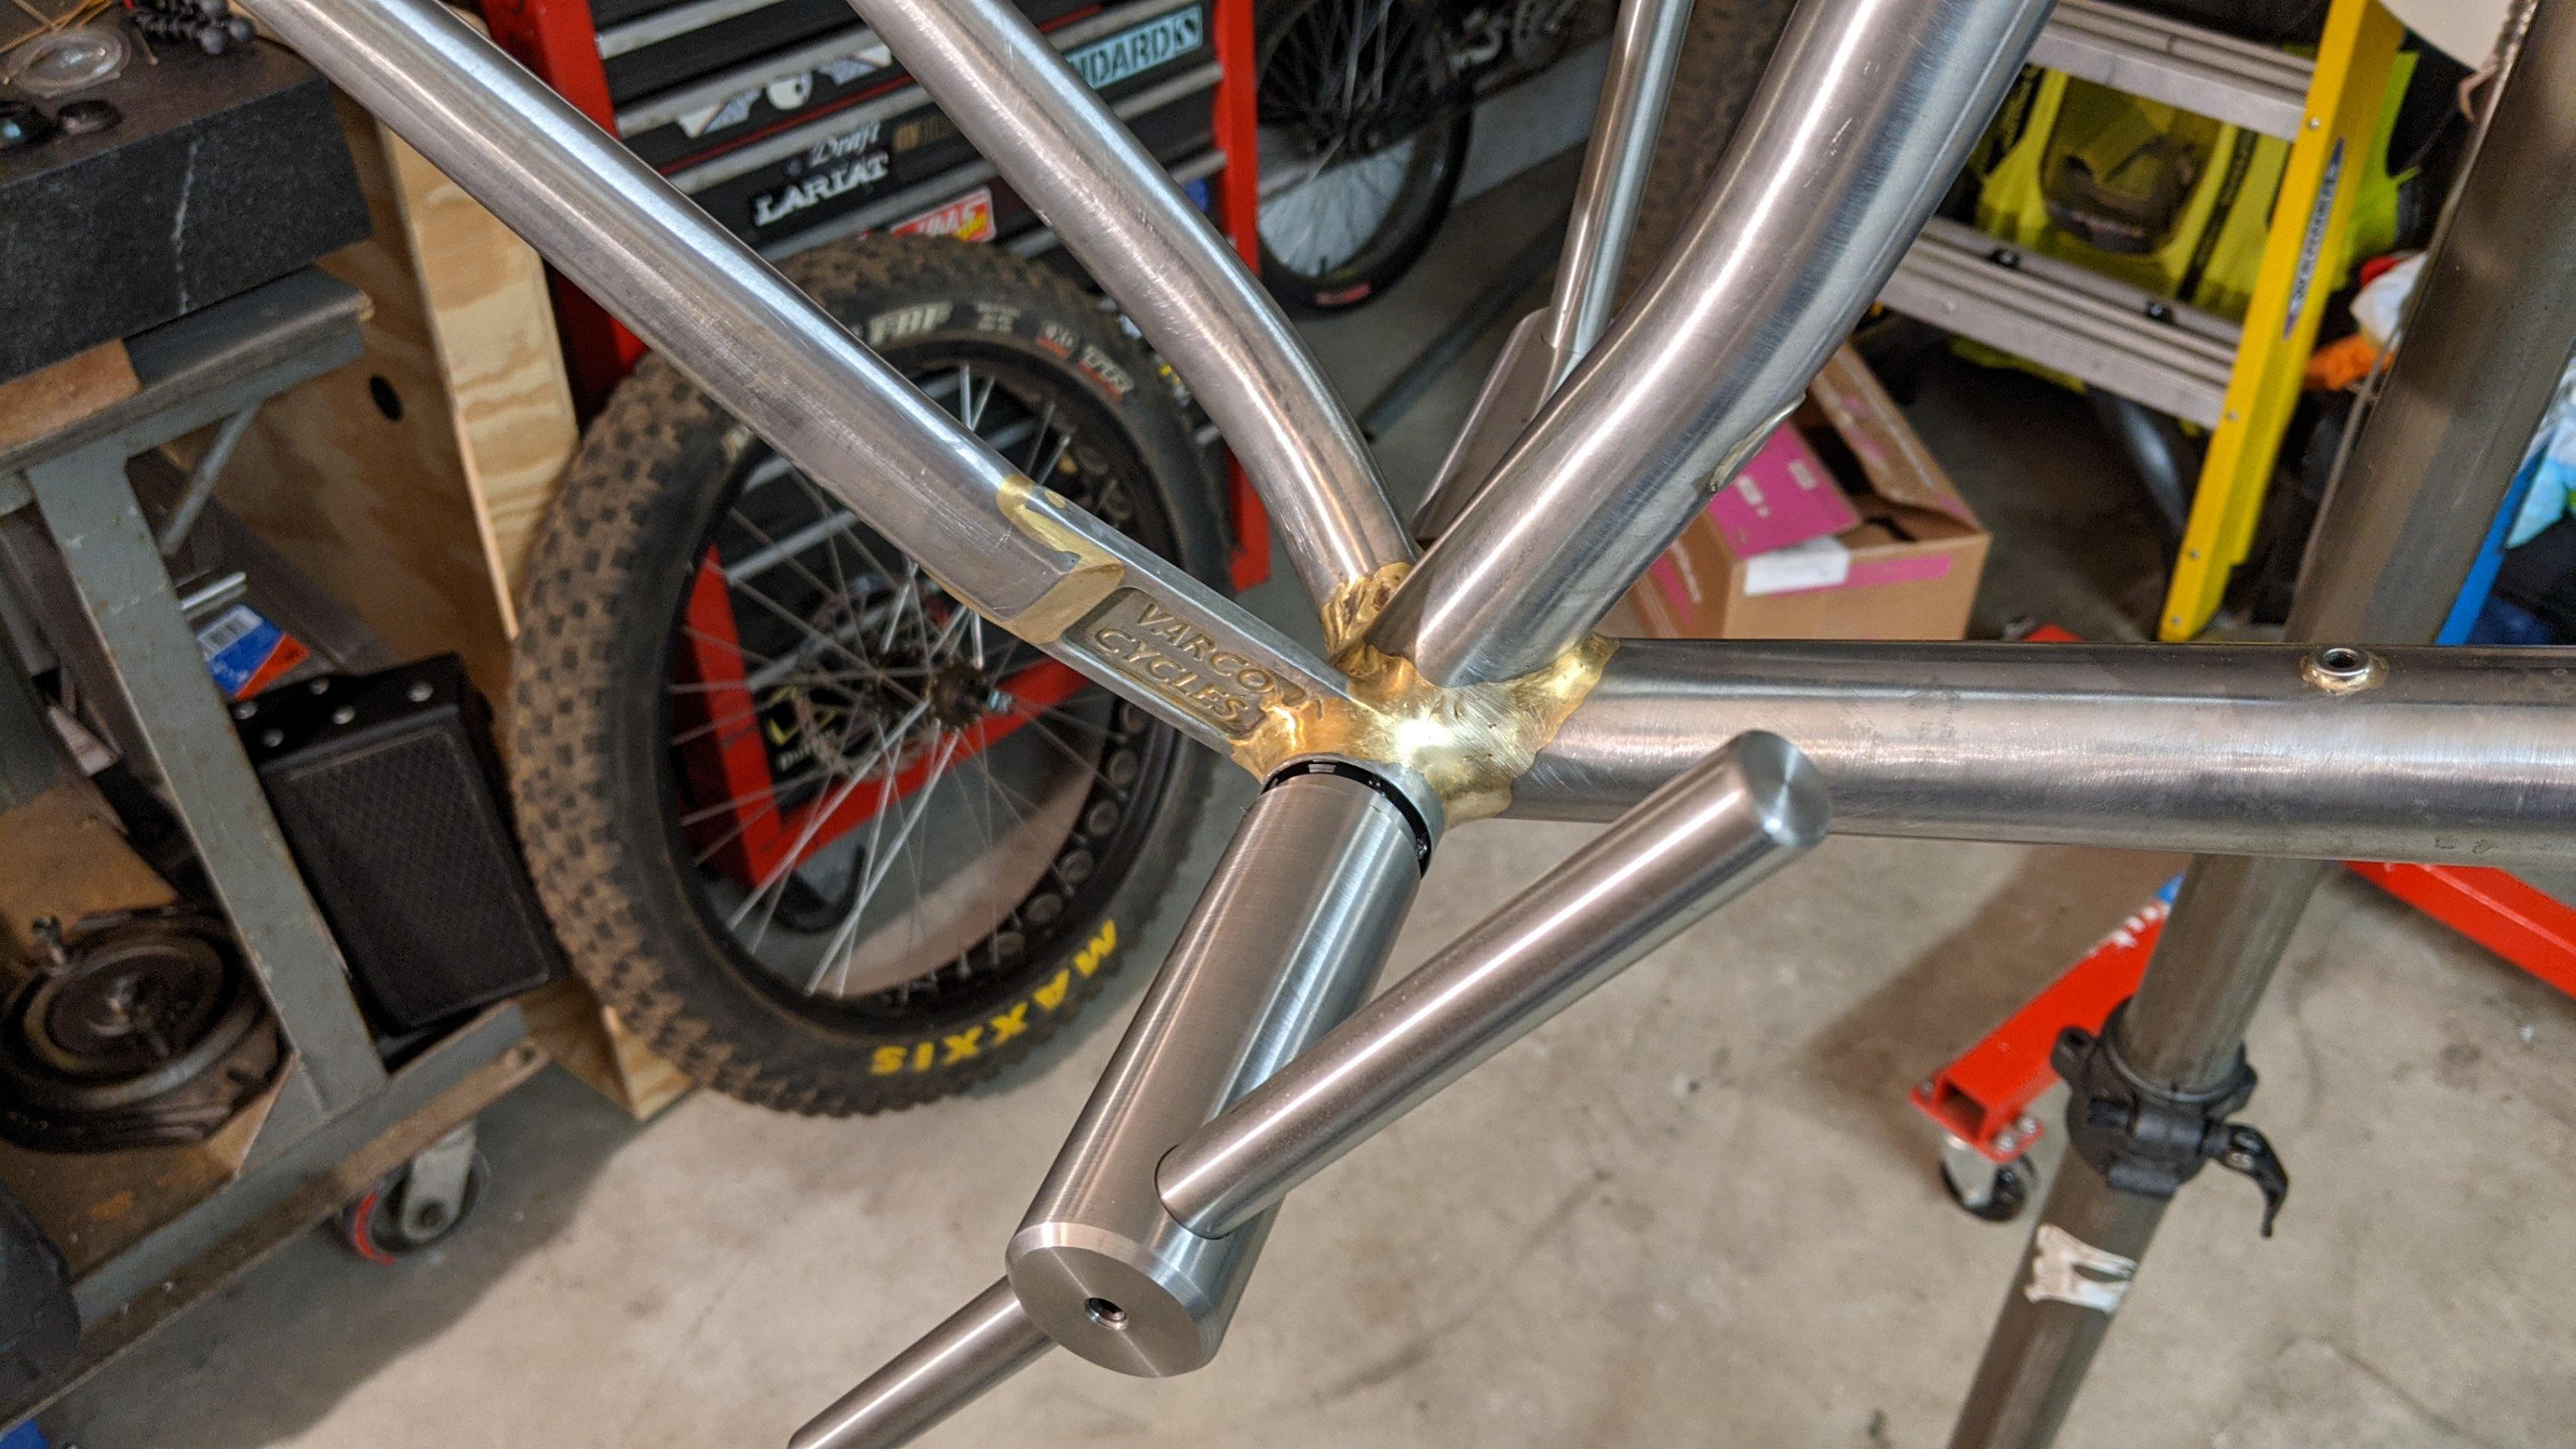
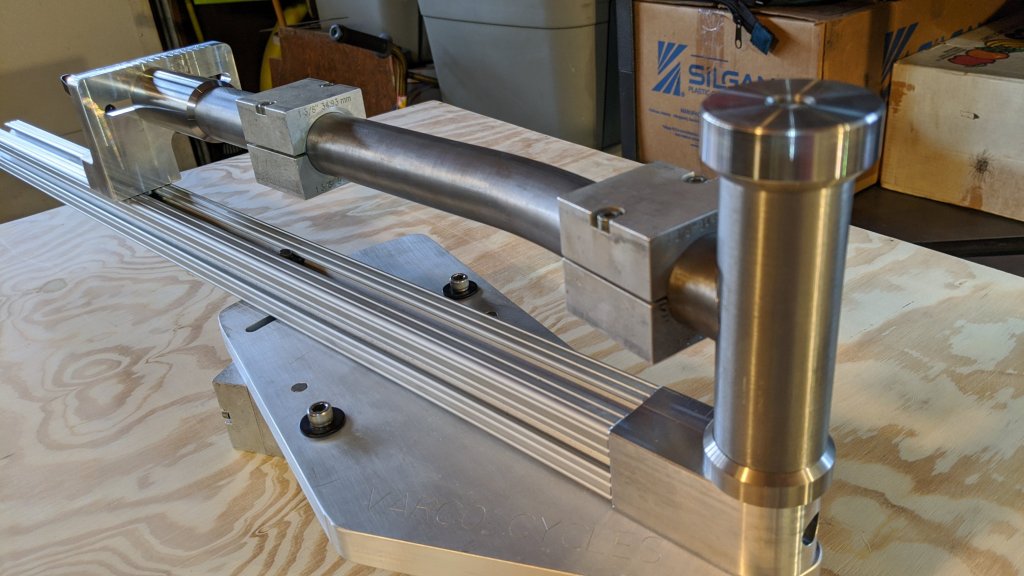
With every frame I have built, I have thought that I really need to make a chainstay and seatstay mitering fixture. And every frame I file the miters in and it just sucks! I’m doing this like a caveman. Like using a rotary phone while someone sits in front of me on their smartphone.
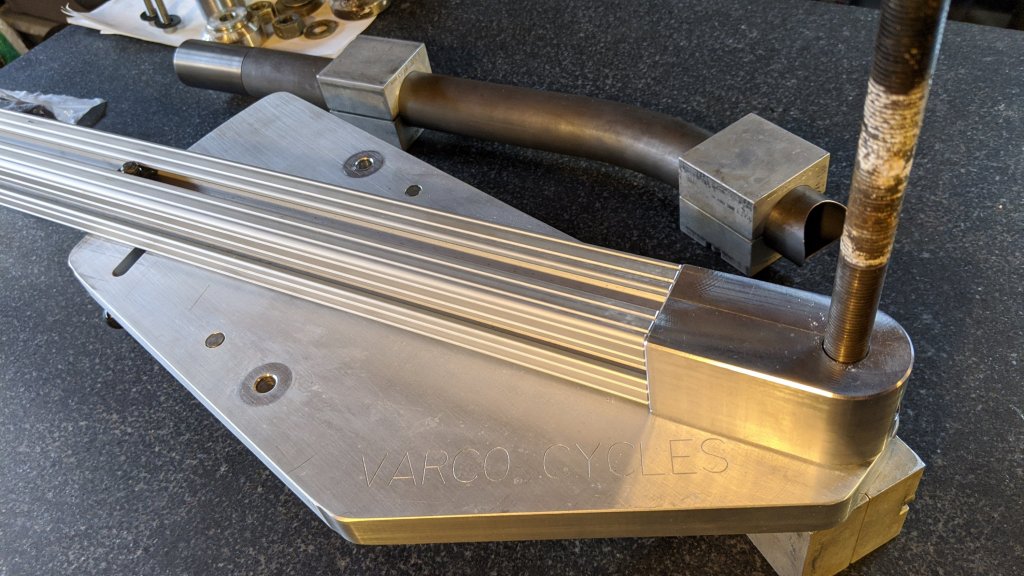
Naturally, I was going to make my own! I scoured Google Images for stay fixtures that I liked, I probably have a hundred screenshots on my phone in an album. There has never been a stay fixture that I was really psyched on building. But over time I settled on a design in my head. One day while it was cold as shit here in MPLS, I finally decided to start turning my ideas into pixels. My #1 goal was to be able to miter BOTH ends of chainstays AND seatstays all in one fixture! (Not at the same time. Haha!)
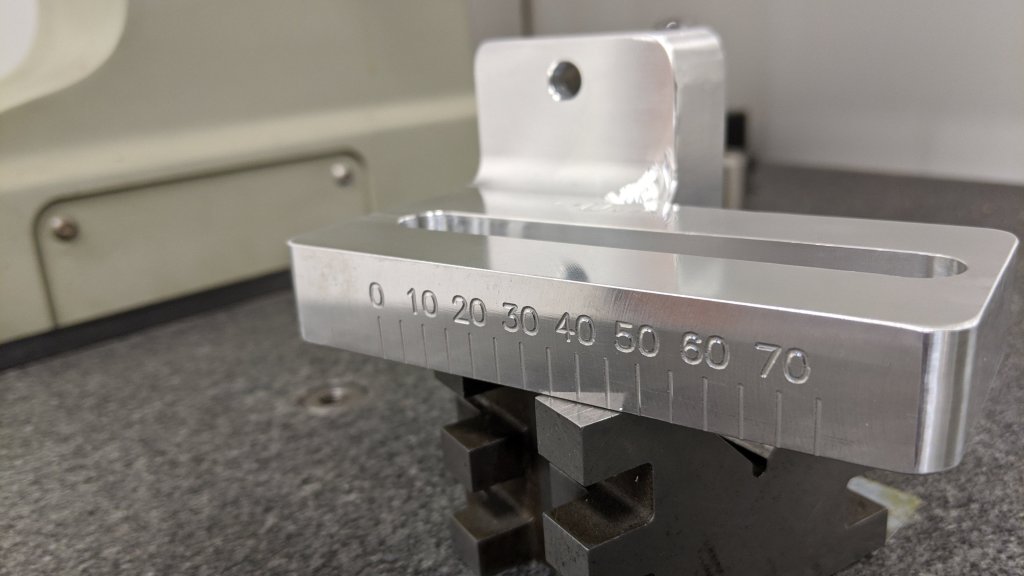
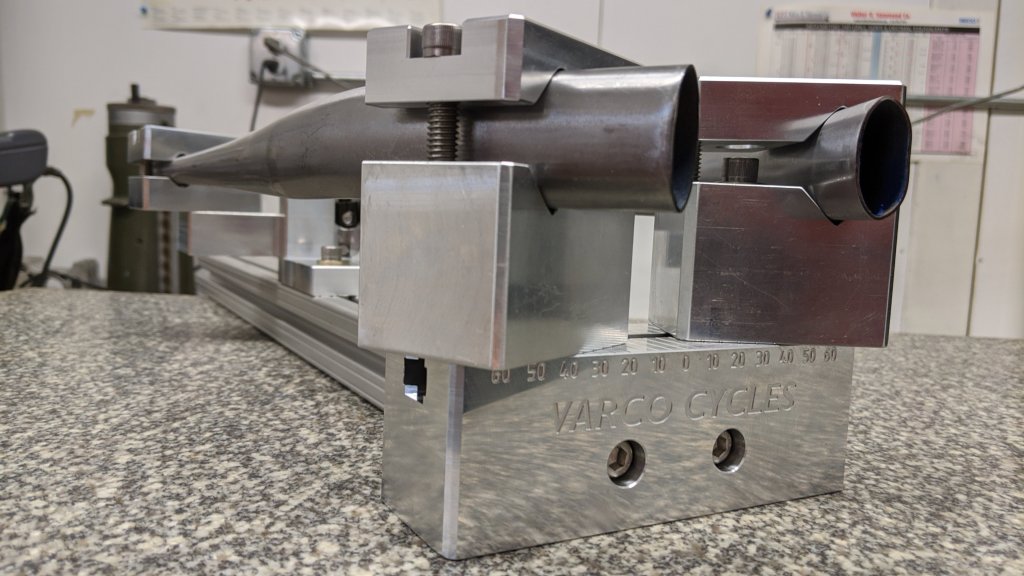
I decided to use a 1530 extrusion from 80/20 for the main beam of the fixture. This provides a wide base that’s rigid enough to support the tube blocks. Then I needed to make the dropout side of the fixture height adjustable to handle the tapered tubes of the stays. So I whipped up a simple bracket with a platform that raises and lowers on a slot with two pins as a guide. This platform holds tube blocks. I added markers to reference the distance from center so it would be easier to set up the stay ends evenly.
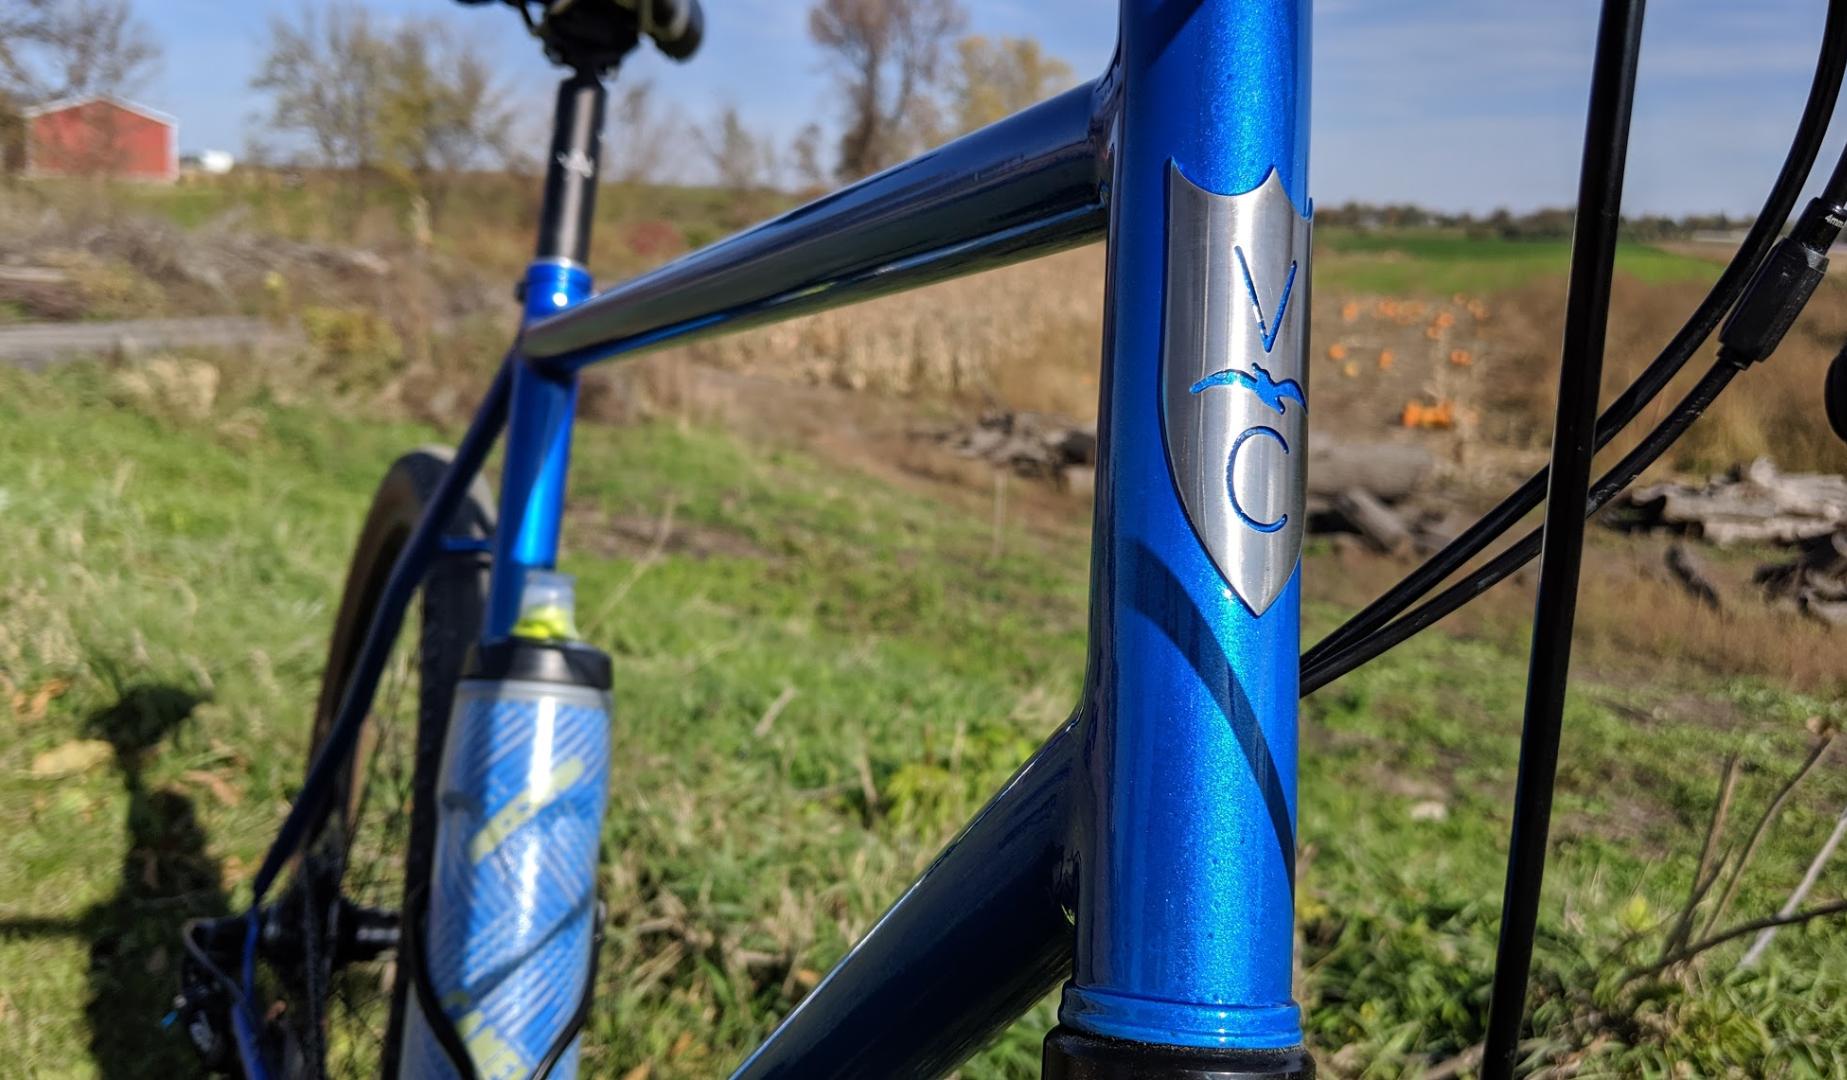
The BB and ST side uses similar tube blocks and has a fixed height block with similar reference markers. Of course I had to add “Varco Cycles” somewhere. 😁
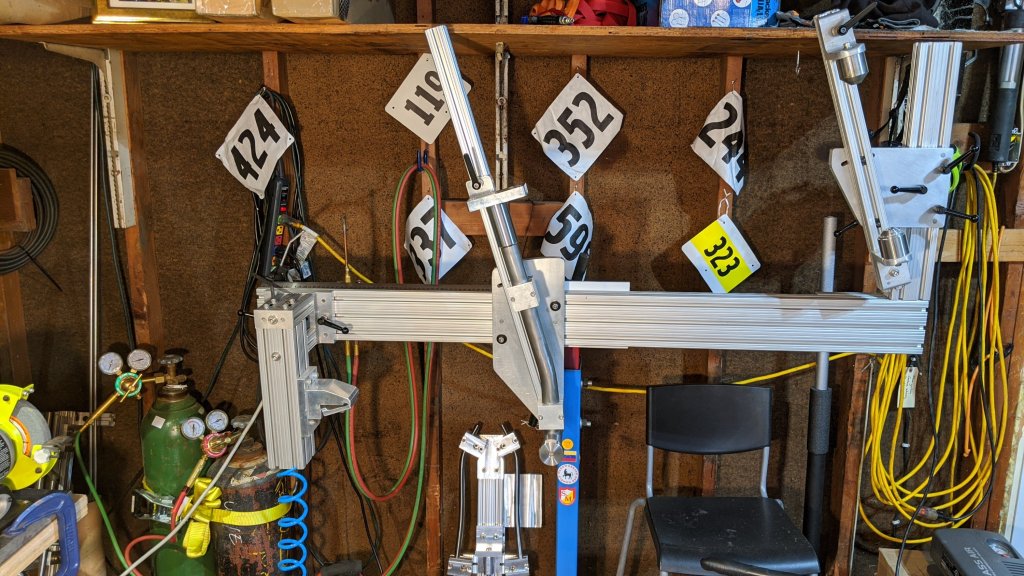
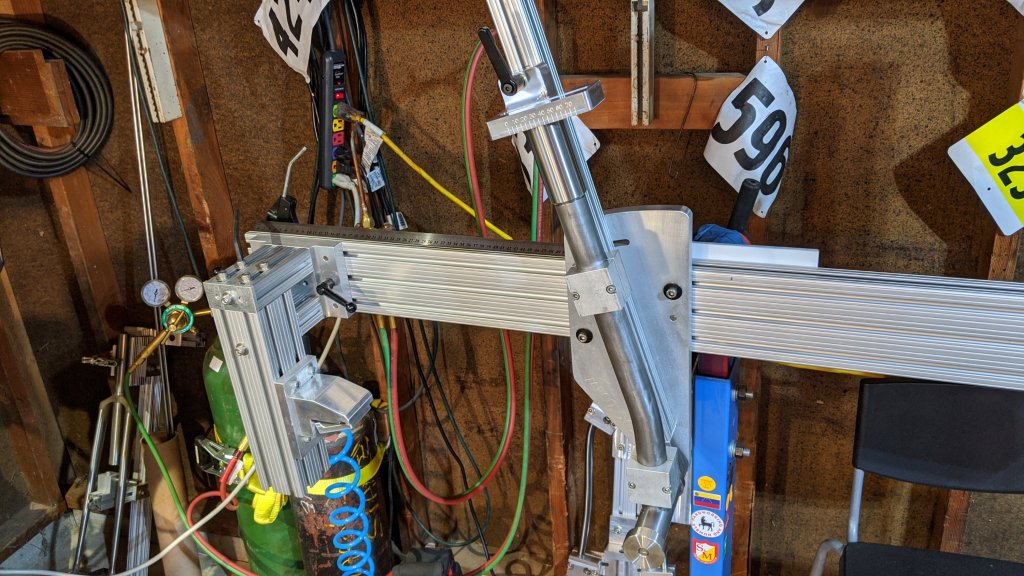
Ok, cool! Time to machine it!
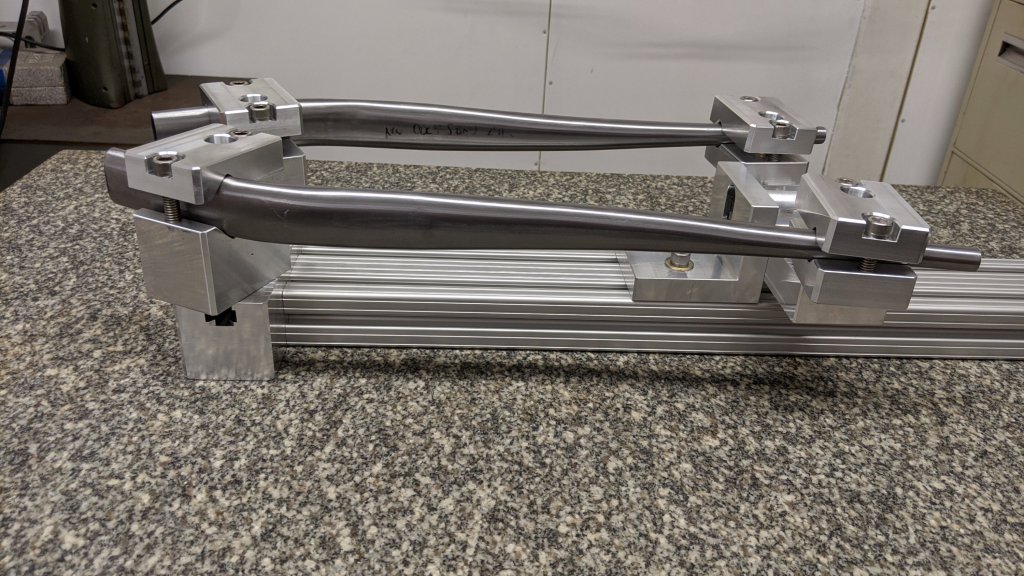
Here is the unverified version. (I still need to try it out) I’ll be building a completely fillet brazed fat bike soon and using this fixture. But first I’ll most likely lend it to a friend who is about to do a short production run to test out. If you have any suggestions PLEASE let me know! You can leave a comment here or on FB/IG, email me (allan@varcocycles.com) …. however we communicate weather we know each other or not. I’ve already gotten a couple of great suggestions for improvement so thank you to those folks!
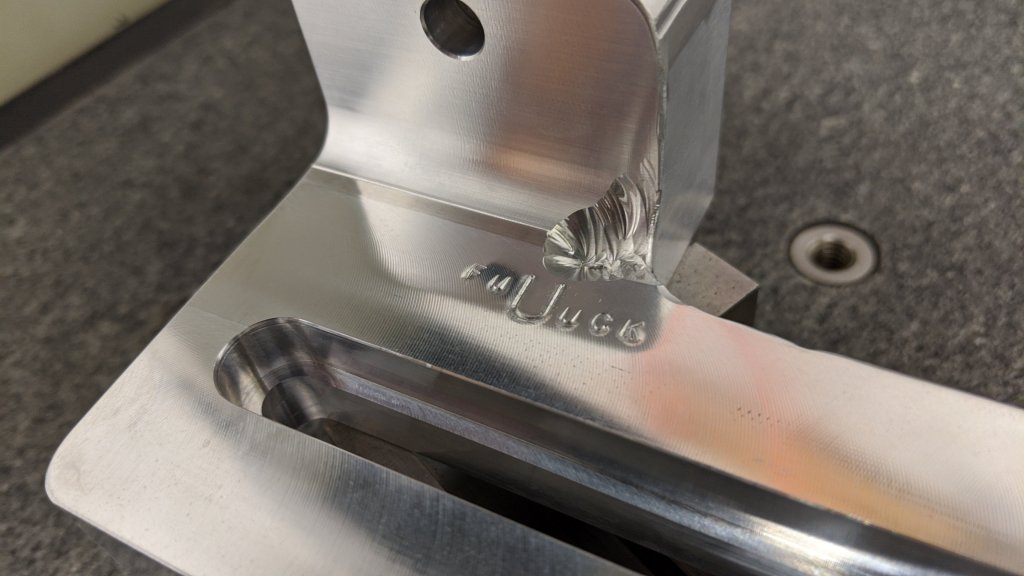
I added a couple things based on the recommendations from seasoned builders.
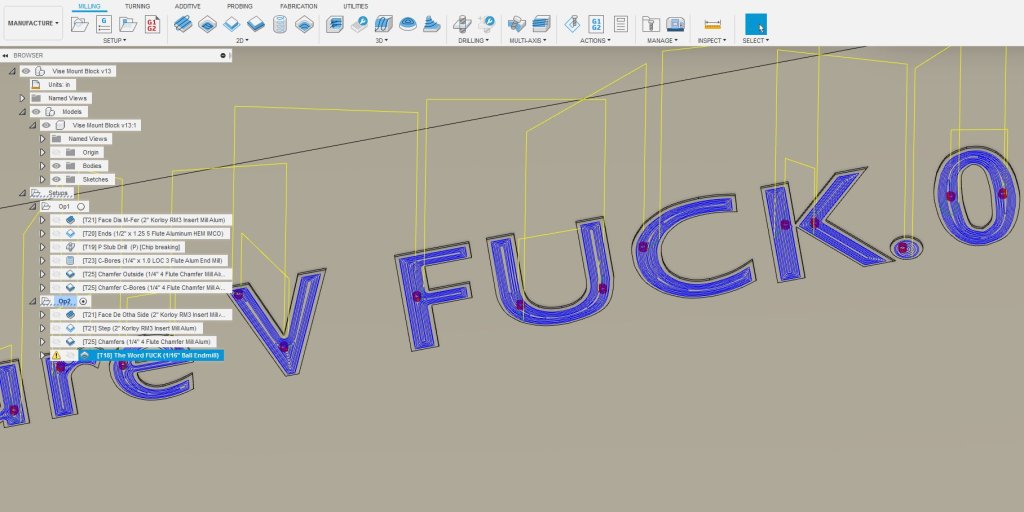
V FUCK.0 is official!
If you’re a machinist and you haven’t machined the word “FUCK” into something, are you really a machinist?
I’ll certainly update this when it actually cuts tubes! Quite excited to finally see the reality of this fixture!
What to carry when on a bike? Talk to a hundred cyclists and you’ll get OVER 100 different answers. What I take for summer, what I take for winter, what I take for long rides, short rides, hot rides, road rides, gravel rides….. Blah blah blah!
I’m not going to tell ANYBODY who has half a clue what to bring. If you go on a ride no farther than you wouldn’t mind walking home from, then bring nothing. I don’t care. But most people don’t ride within a half mile of home. I just wanted to always have 2 things in my saddle bag. A tube and a multi tool.
There are plenty of small bags for that. BUT! I wanted a bag for my Fat Bike! A 26×4″ tube is pretty huge so small bags would NEVER come close to holding the tube alone. Larger bags are either dorky or really large, padded and expensive. Outer Shell makes a drop dead gorgeous roll top bag that I use on my cyclocross bike and absolutely love! It would have most likely been a great solution except for one thing….. I have a sewing machine now!
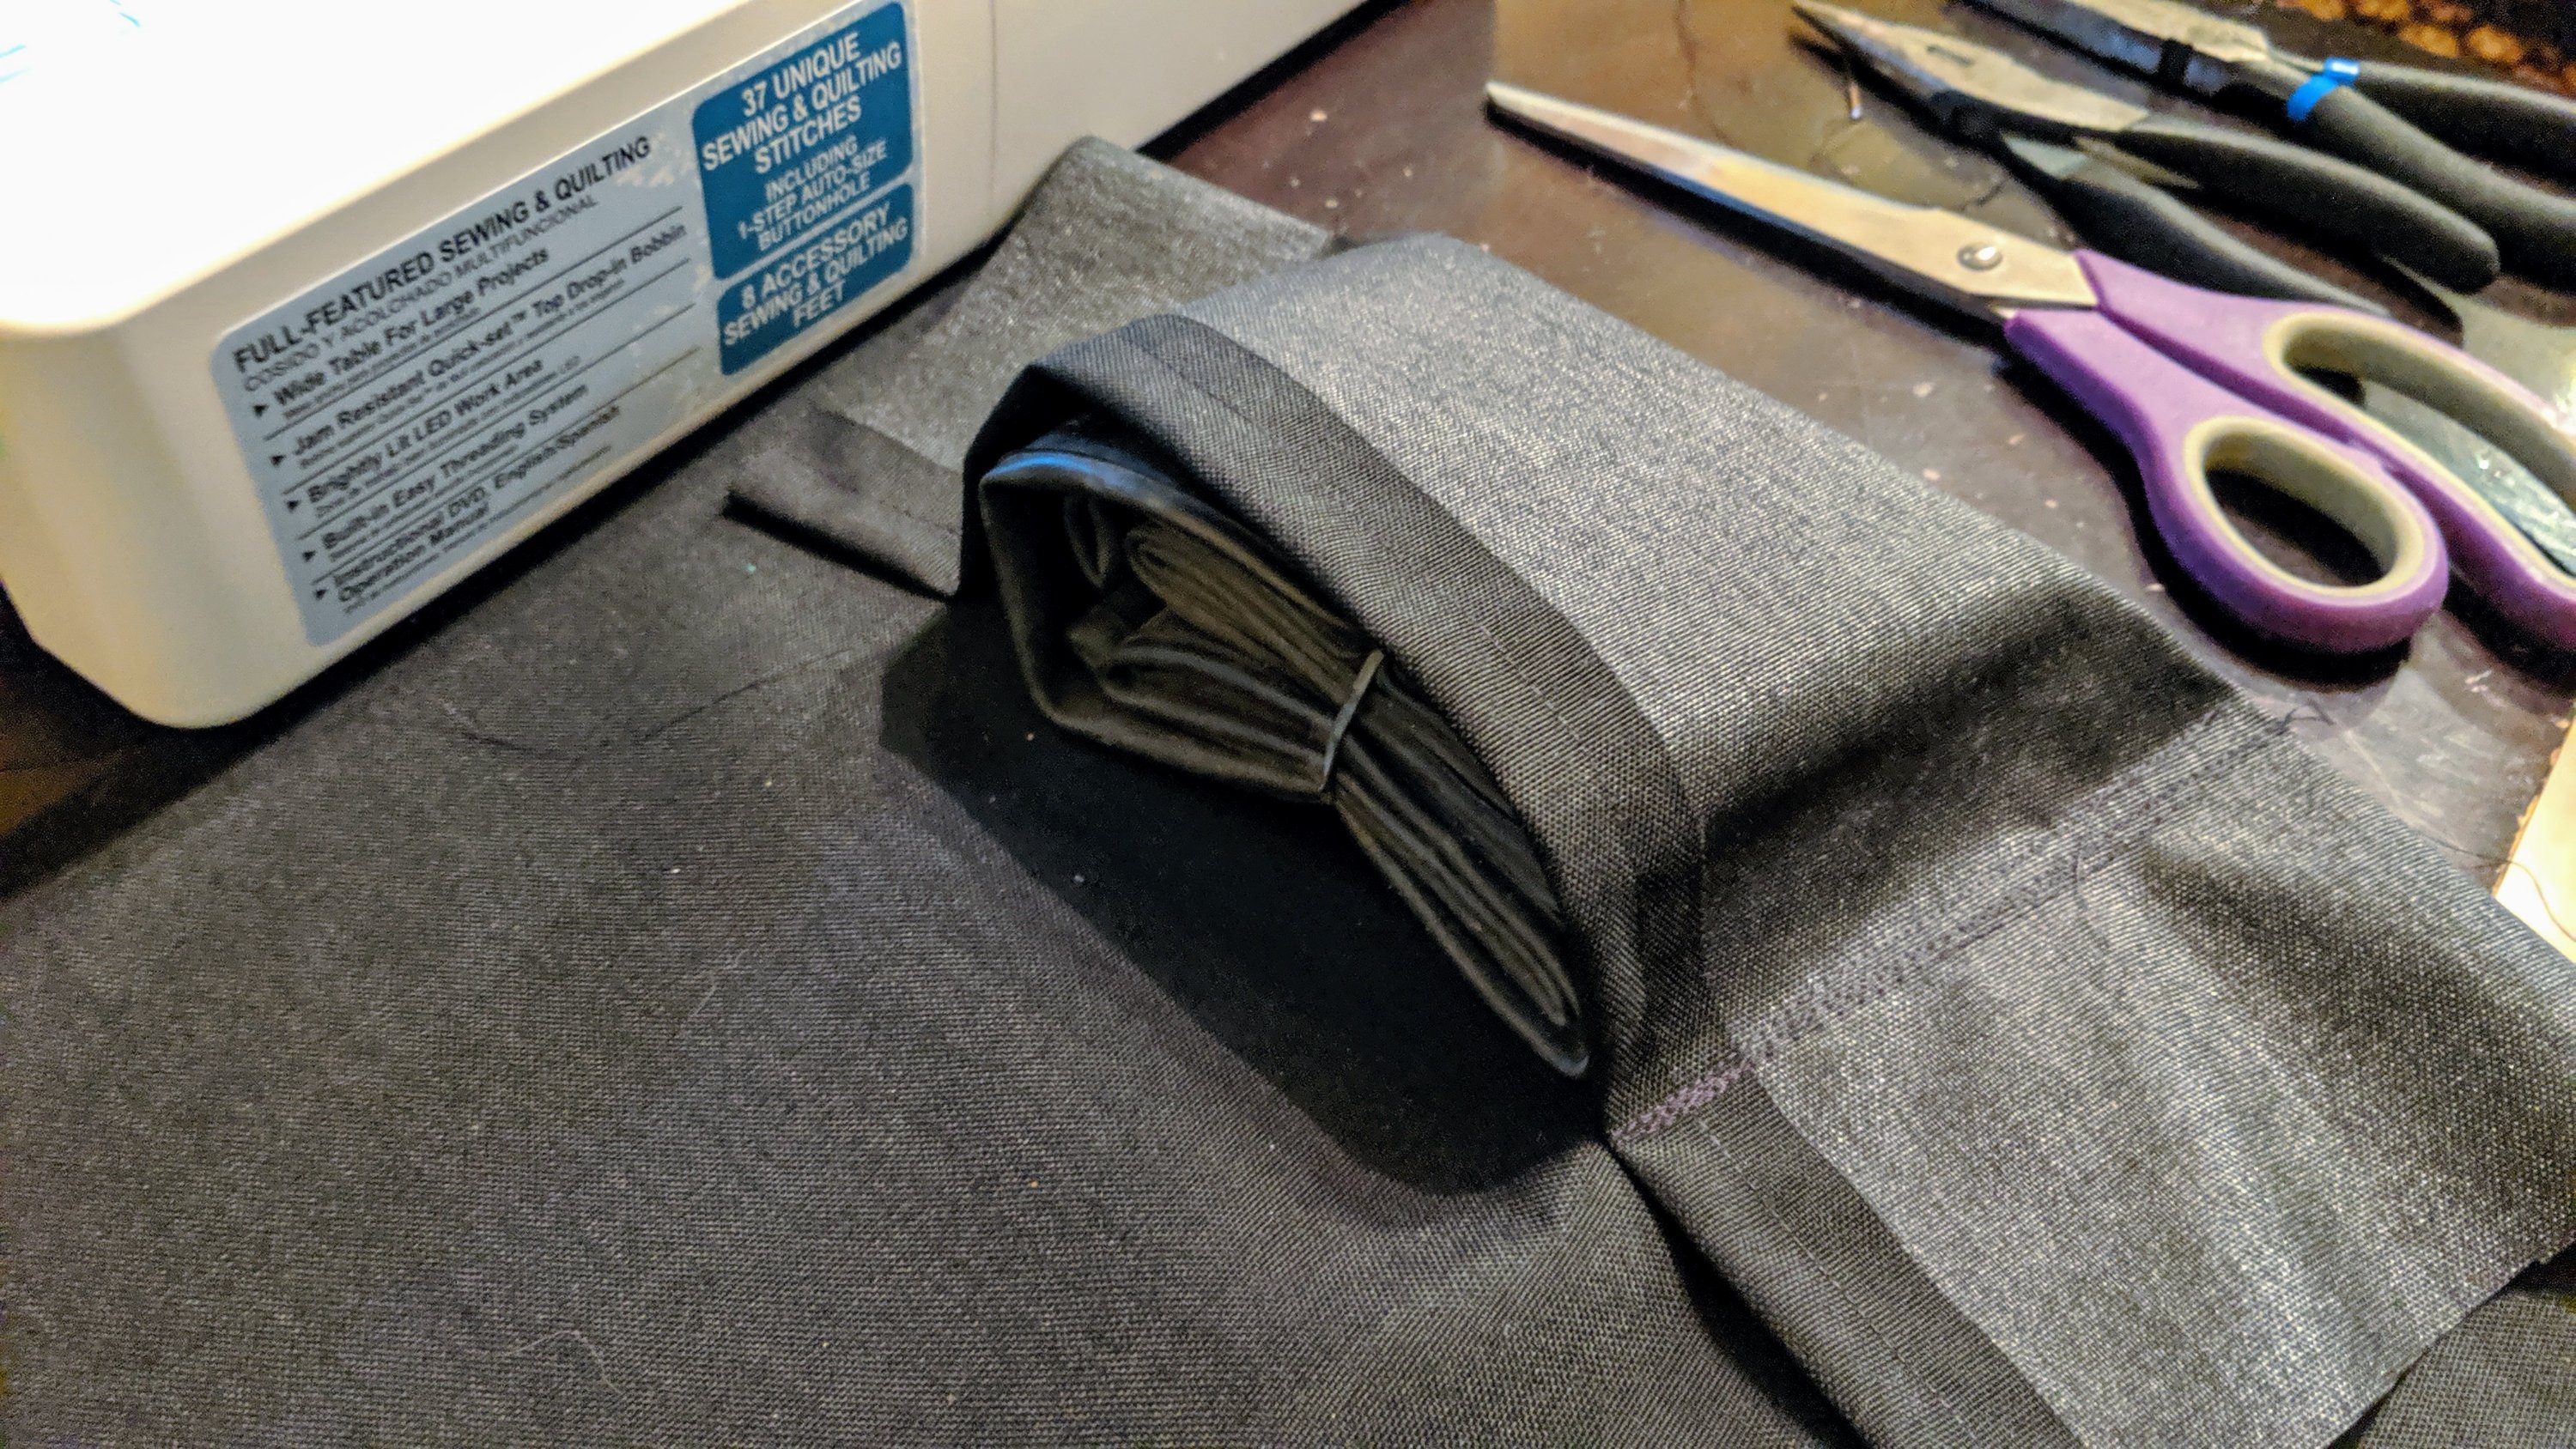
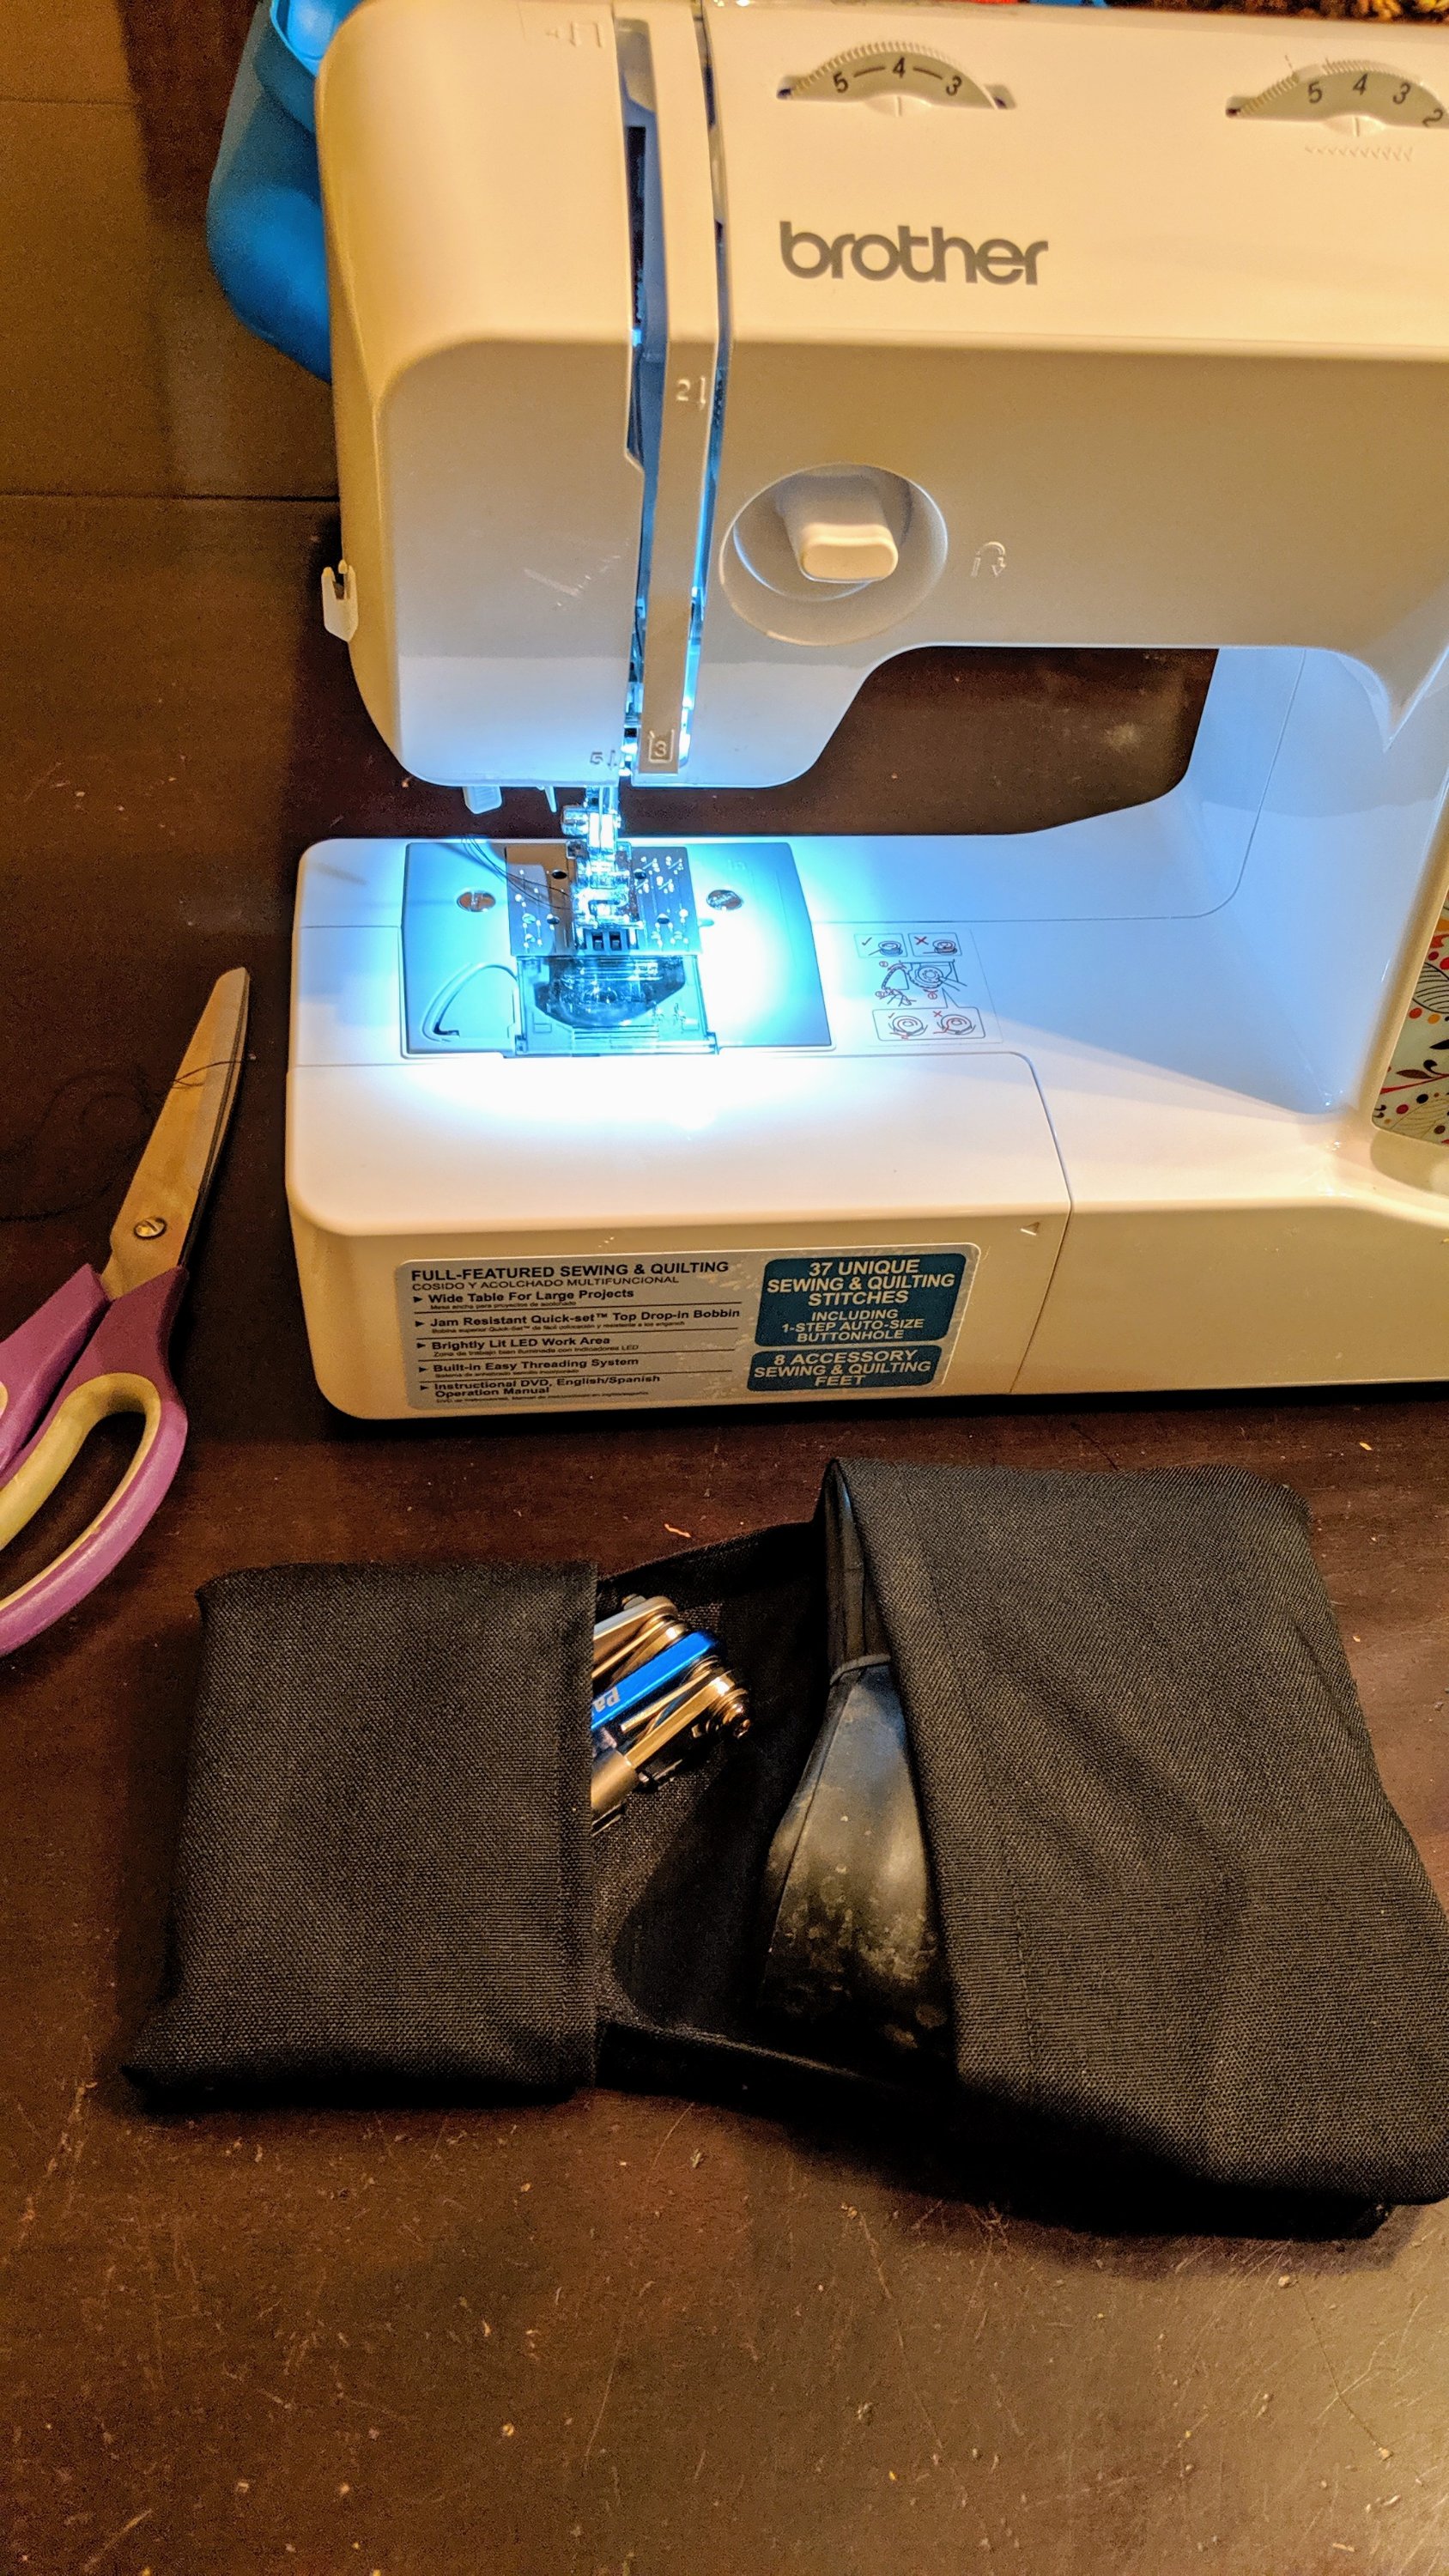
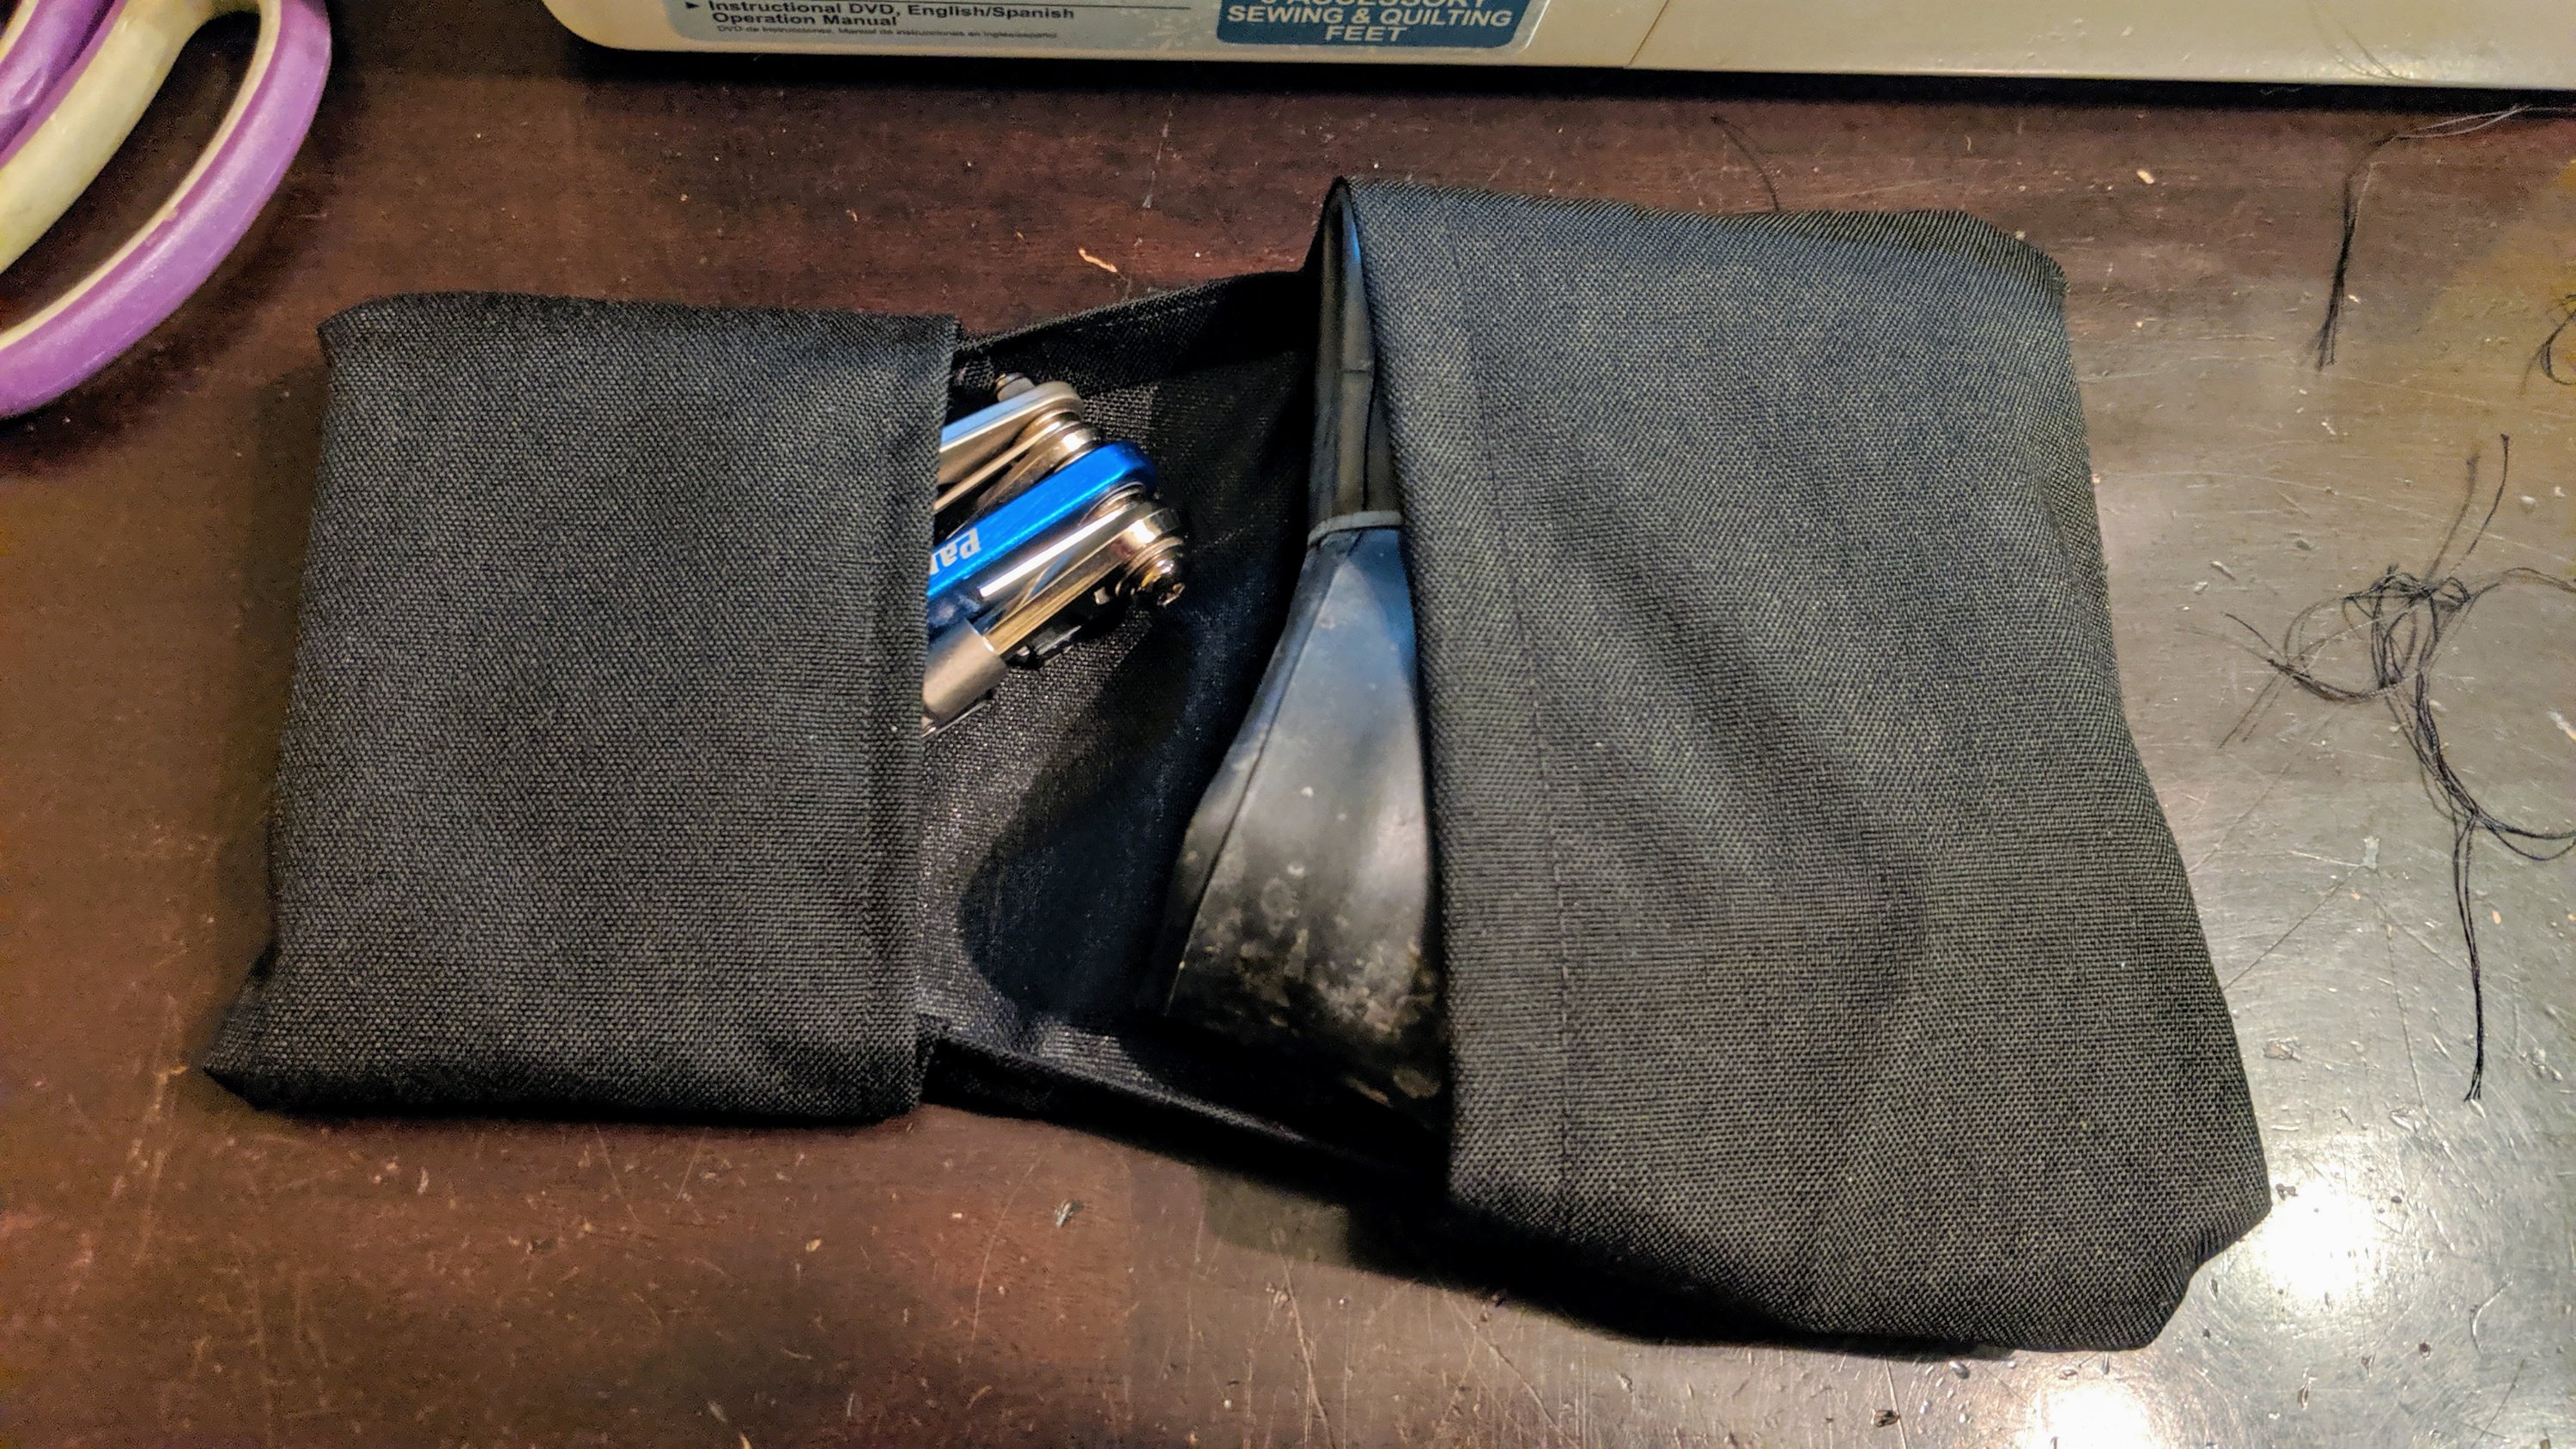
I ordered up some 500 denier Cordura and got my Brother out. (Side note, I am closet Brother fan! Mark my words, one day I will own a Brother CNC mill!) I was thinking something like a bi-fold wallet. Tube on one side, multi tool on the other. Without any real plan I cut up a chunk of fabric and put the pedal to the metal.
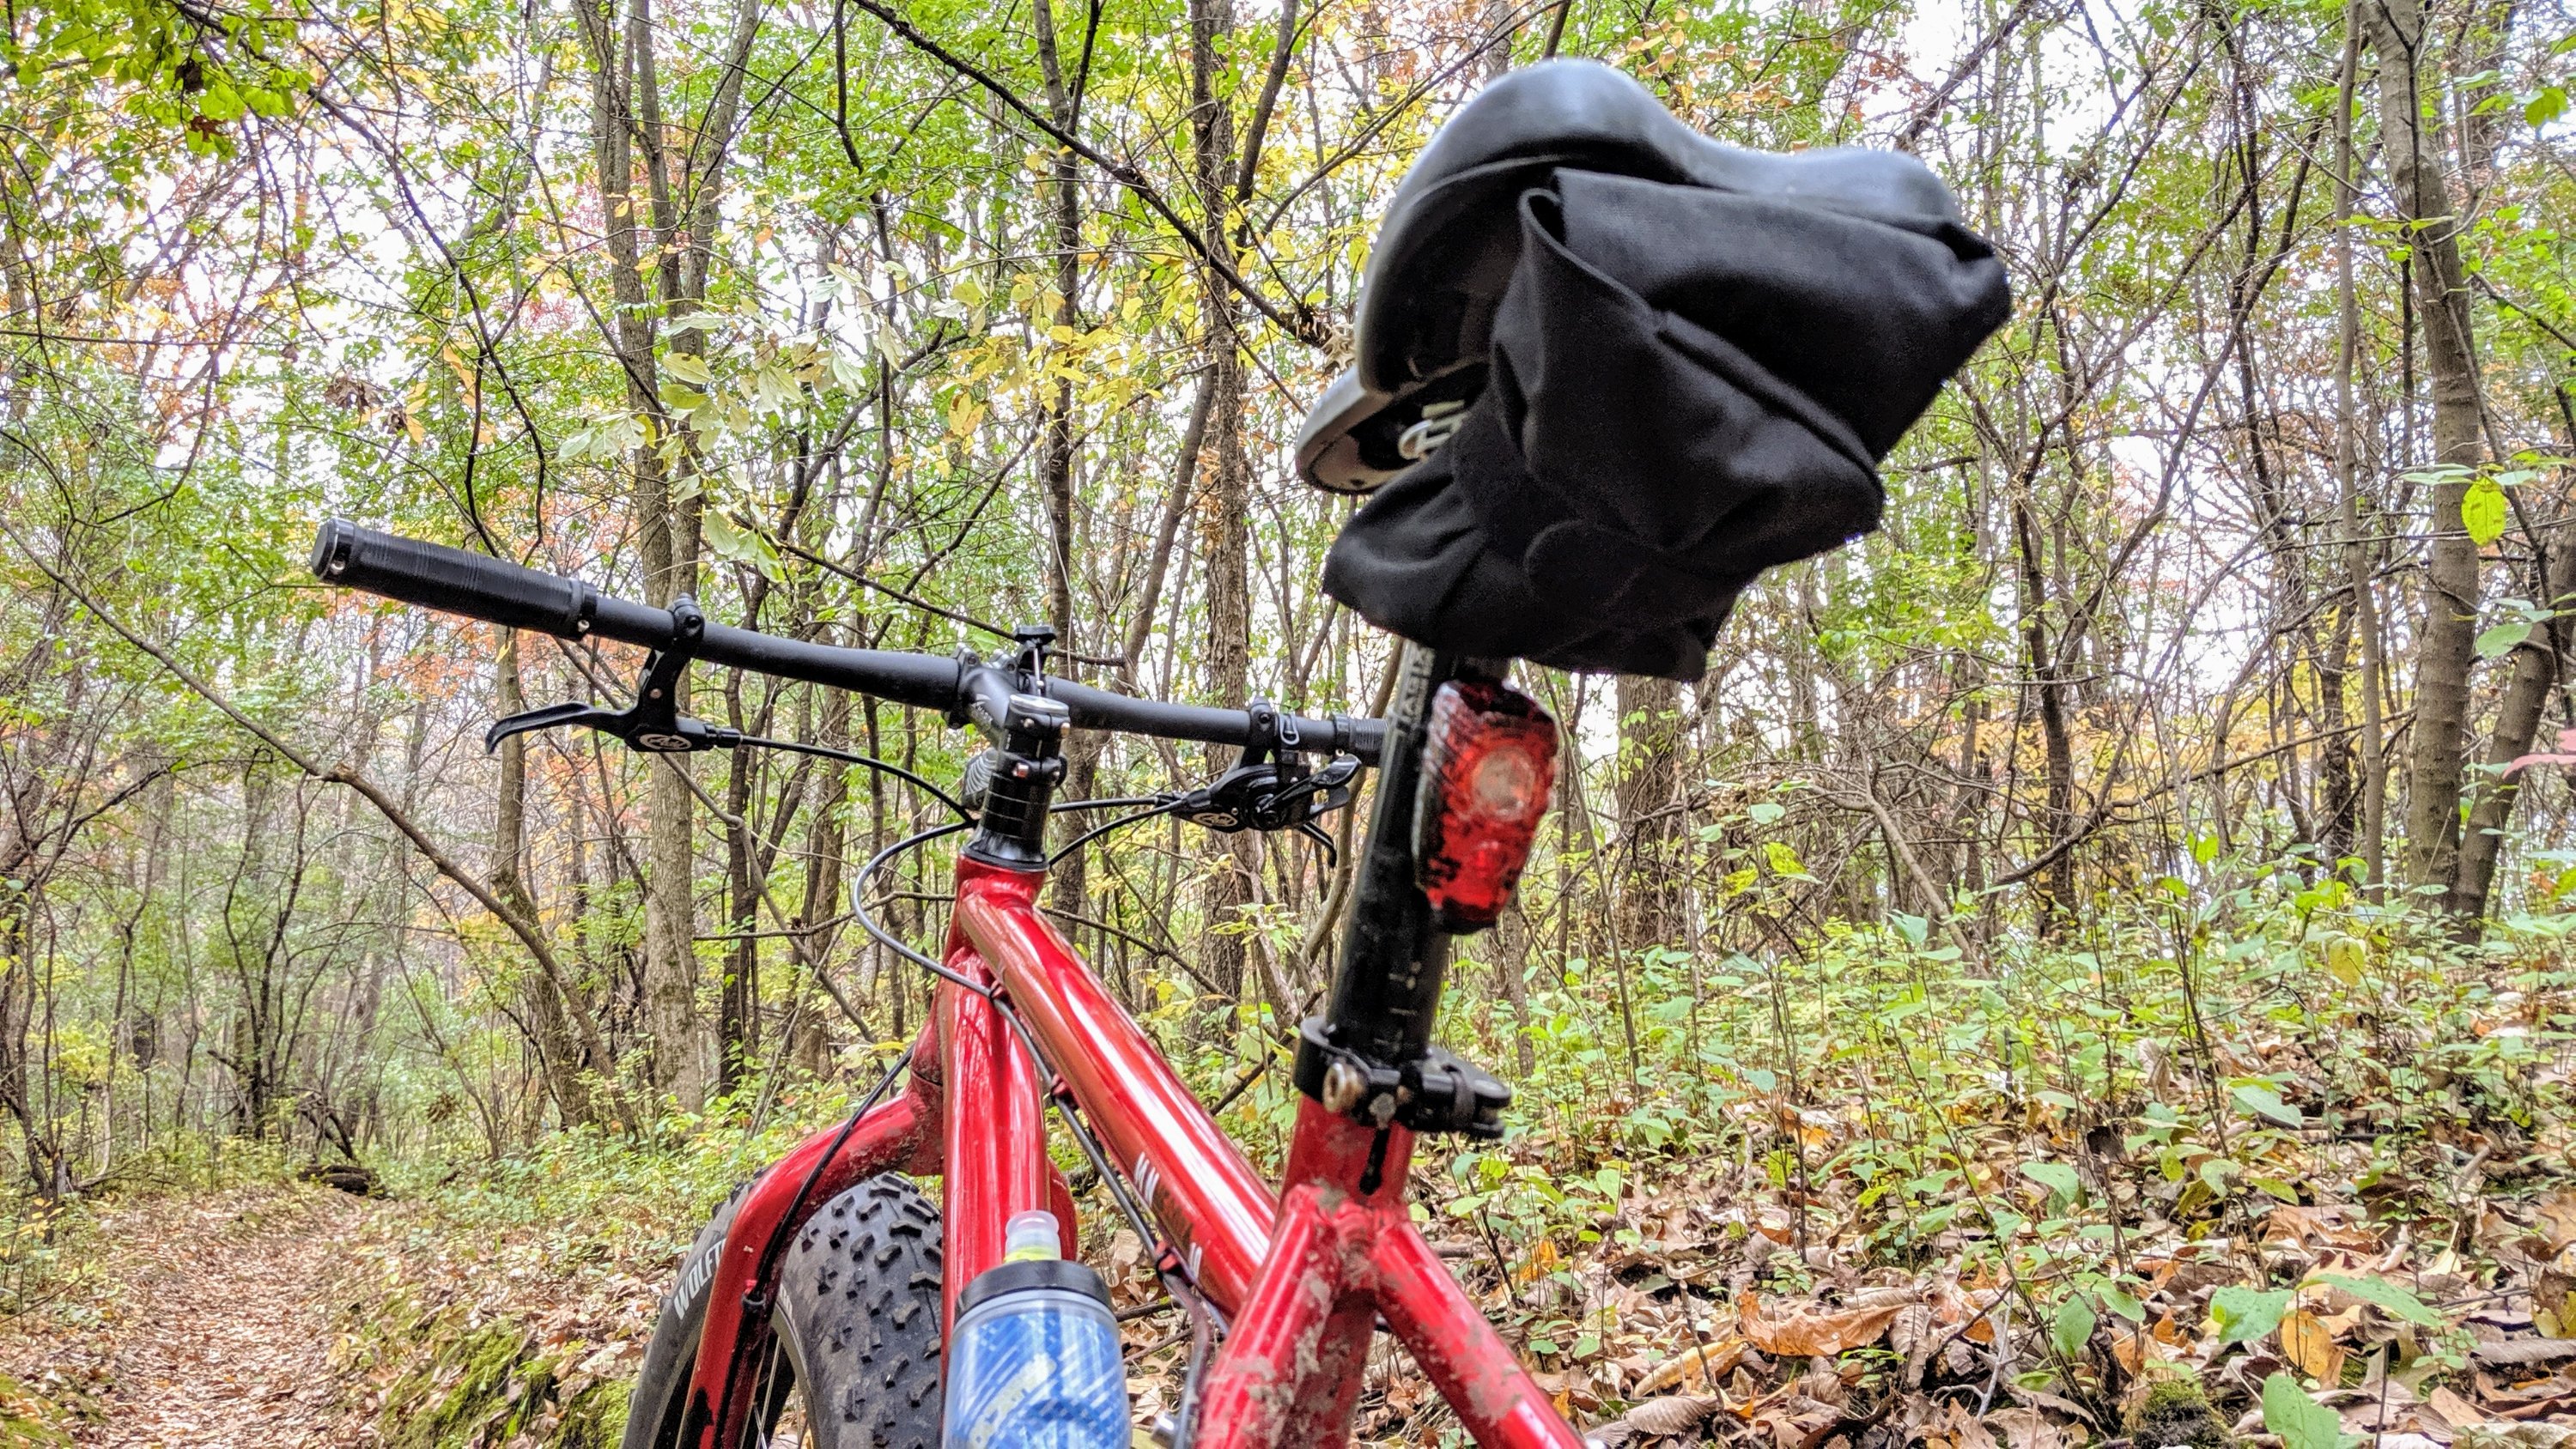
For years I have used those Velcro strips that you use to wrap a bunch of computer cables together to reinforce some of my less superior saddle bags. I figured I wouldn’t attach any straps to the bag rather keeping the minimalist theme going and just tightly cinch this velcro computer strap to the saddle rails.
Son of a bitch it worked! Not the most sexy saddle bag ever created but it may be JUST what I needed!
And you know what? If it DOESN’T work, I have like 7/8 of that yard of fabric left. I would love to get better with my sweing machine but you know, for now, this is just what I need.
Ever since I started building frames, I had dreamt about building my Dad a frame. I just never thought he would go for it. You see, he is 72 and retired. He rode his bike to work, rain, shine, snow, rain, freezing temperatures for the last several years he was working.
He has an aluminum Trek road bike with 25c tires and an aluminum fork! It’s horrifically stiff and he still rides it to lunch with his old co-workers almost daily.
So, last year I had him ride my Cyclocross bike and he seemed to enjoy the ride. He was looking into a Salsa something-or-other when I offered to build him a frame. He was excited and so was I!!!
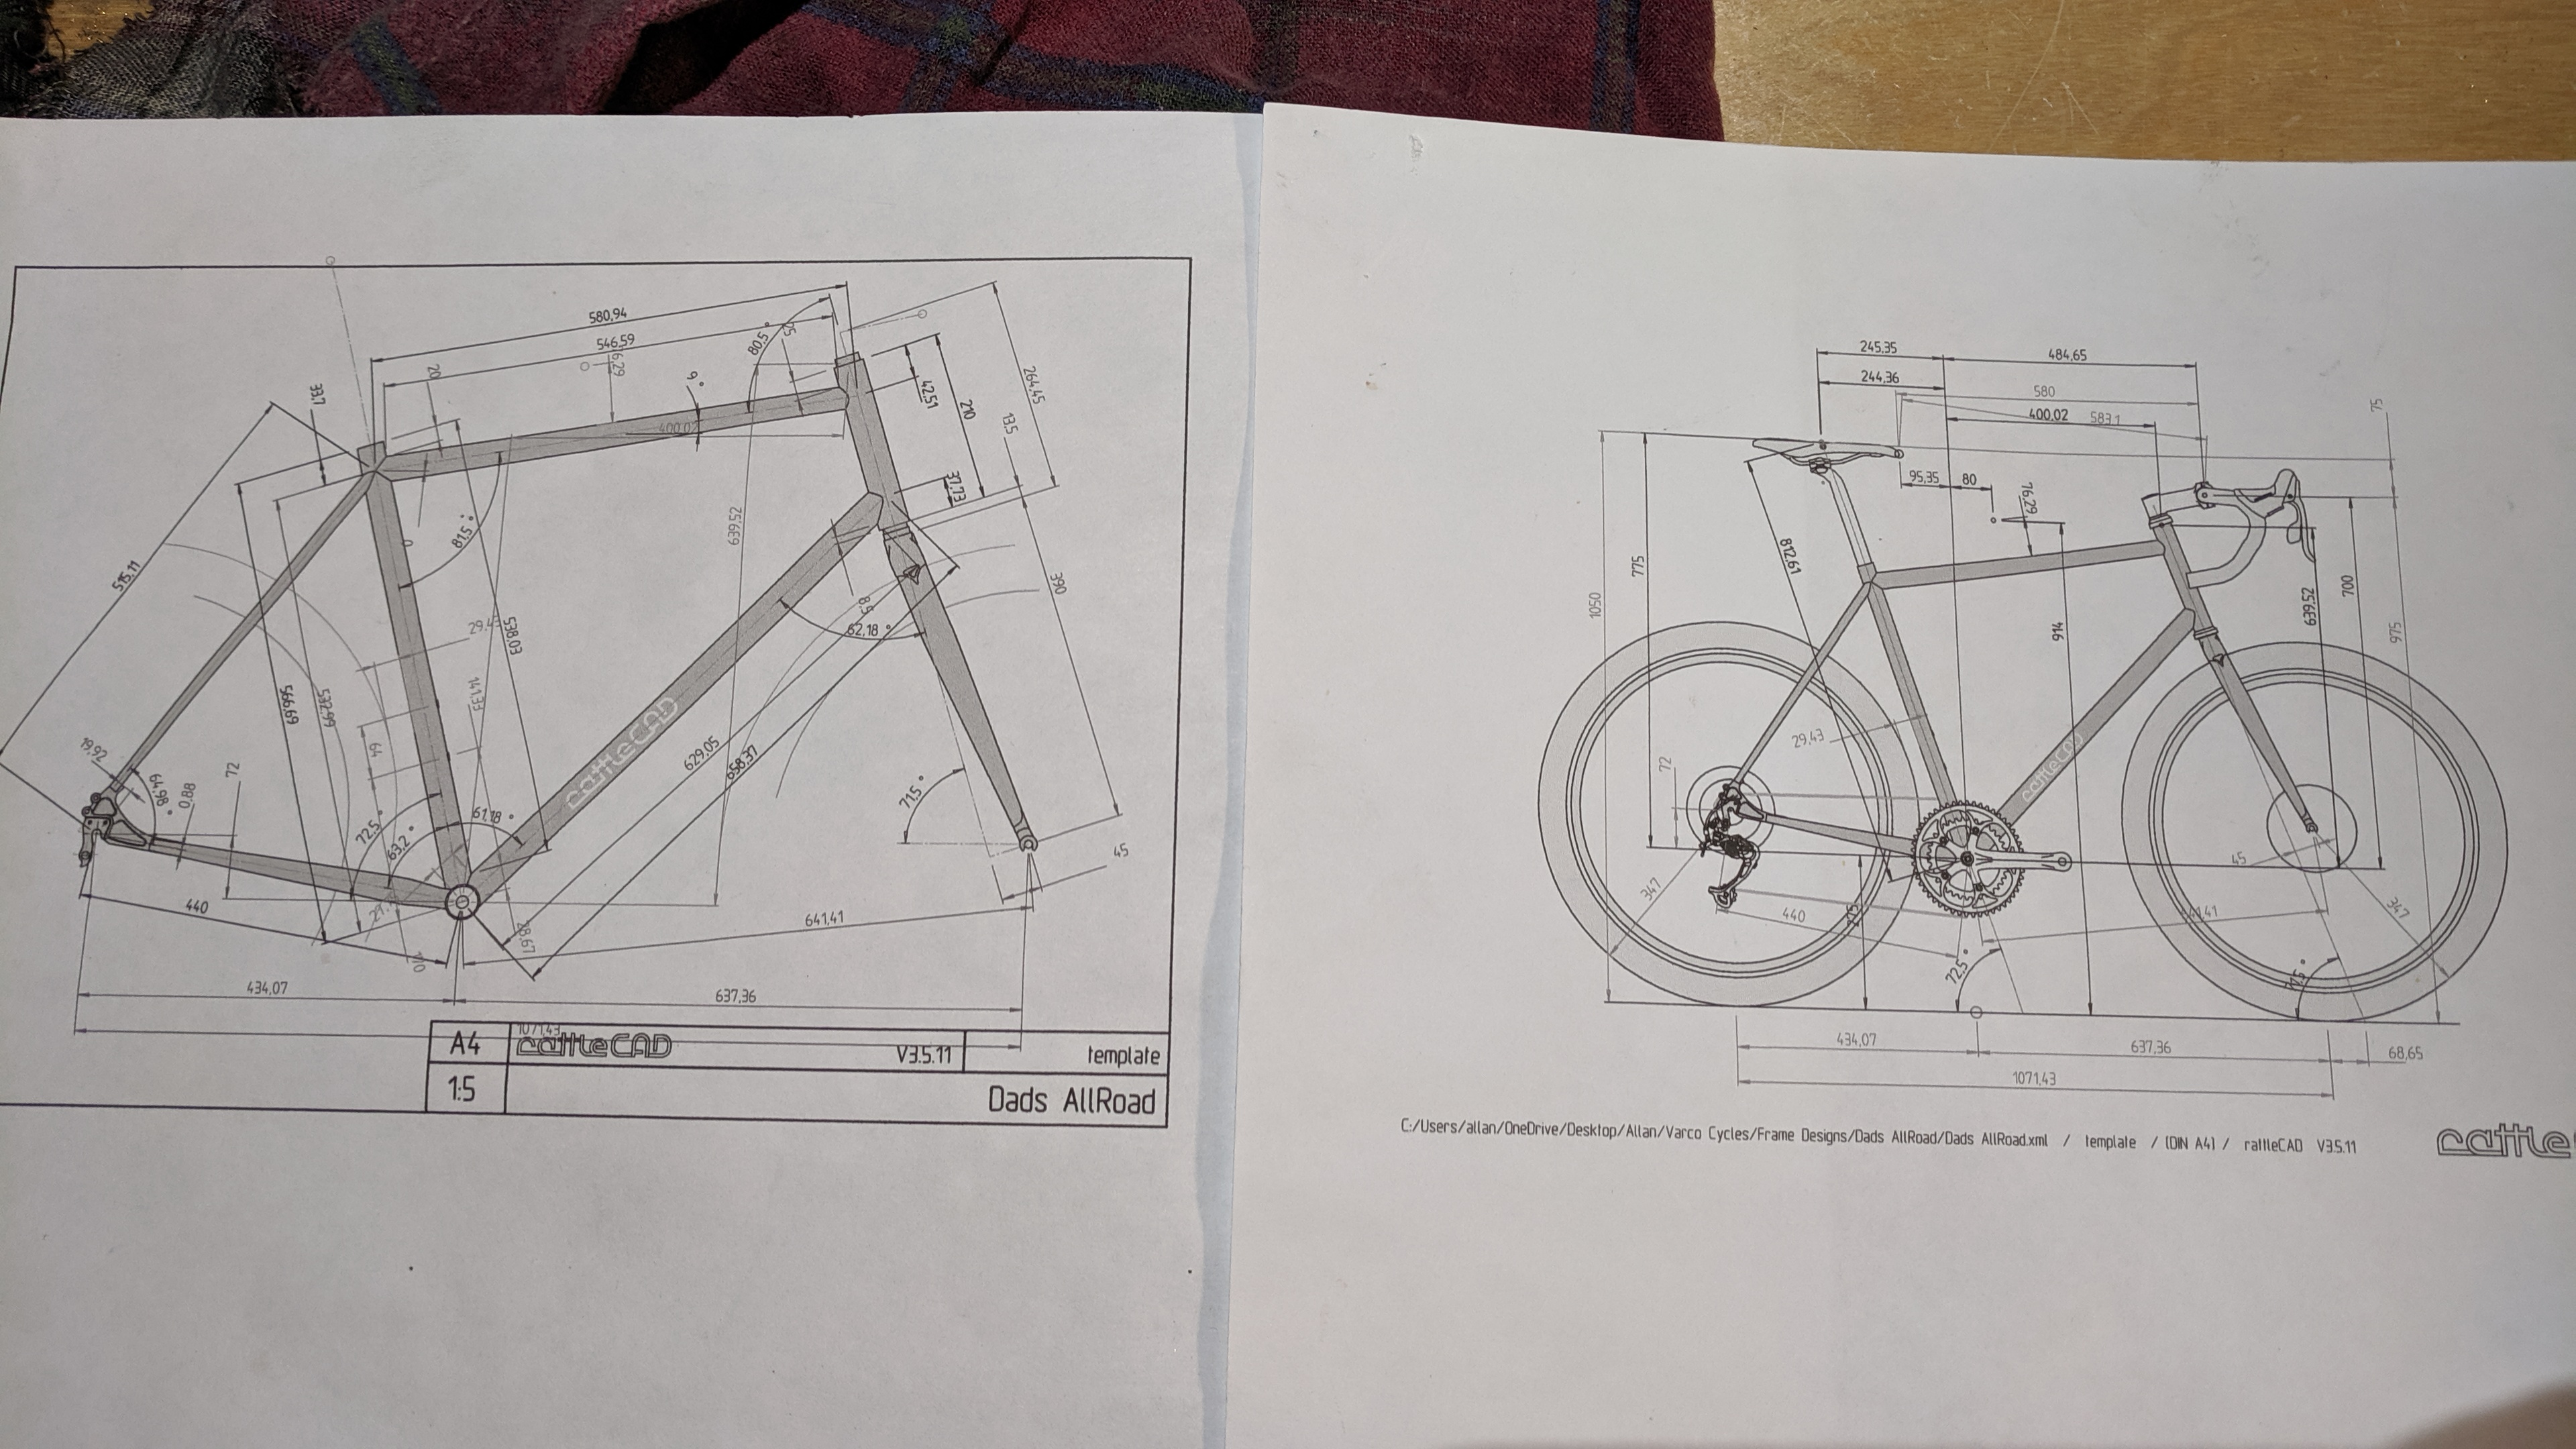
Since he lives in Albany, NY and we’re in Minneapolis, my Mom measured him up and sent me his numbers. Comfort was his #1 request so I RattleCAD’d him up something with a comfortable/upright position and a sloping top tube. Disc brakes was his #2 request followed by a 1x drivetrain with a clutched derailleur. Smart guy hu?
My #1 goal was to fillet braze as much of this frame as I could! Which meant, everything but the bottom bracket. That I used Nova’s Double Oversized Long Shin lugged shell.
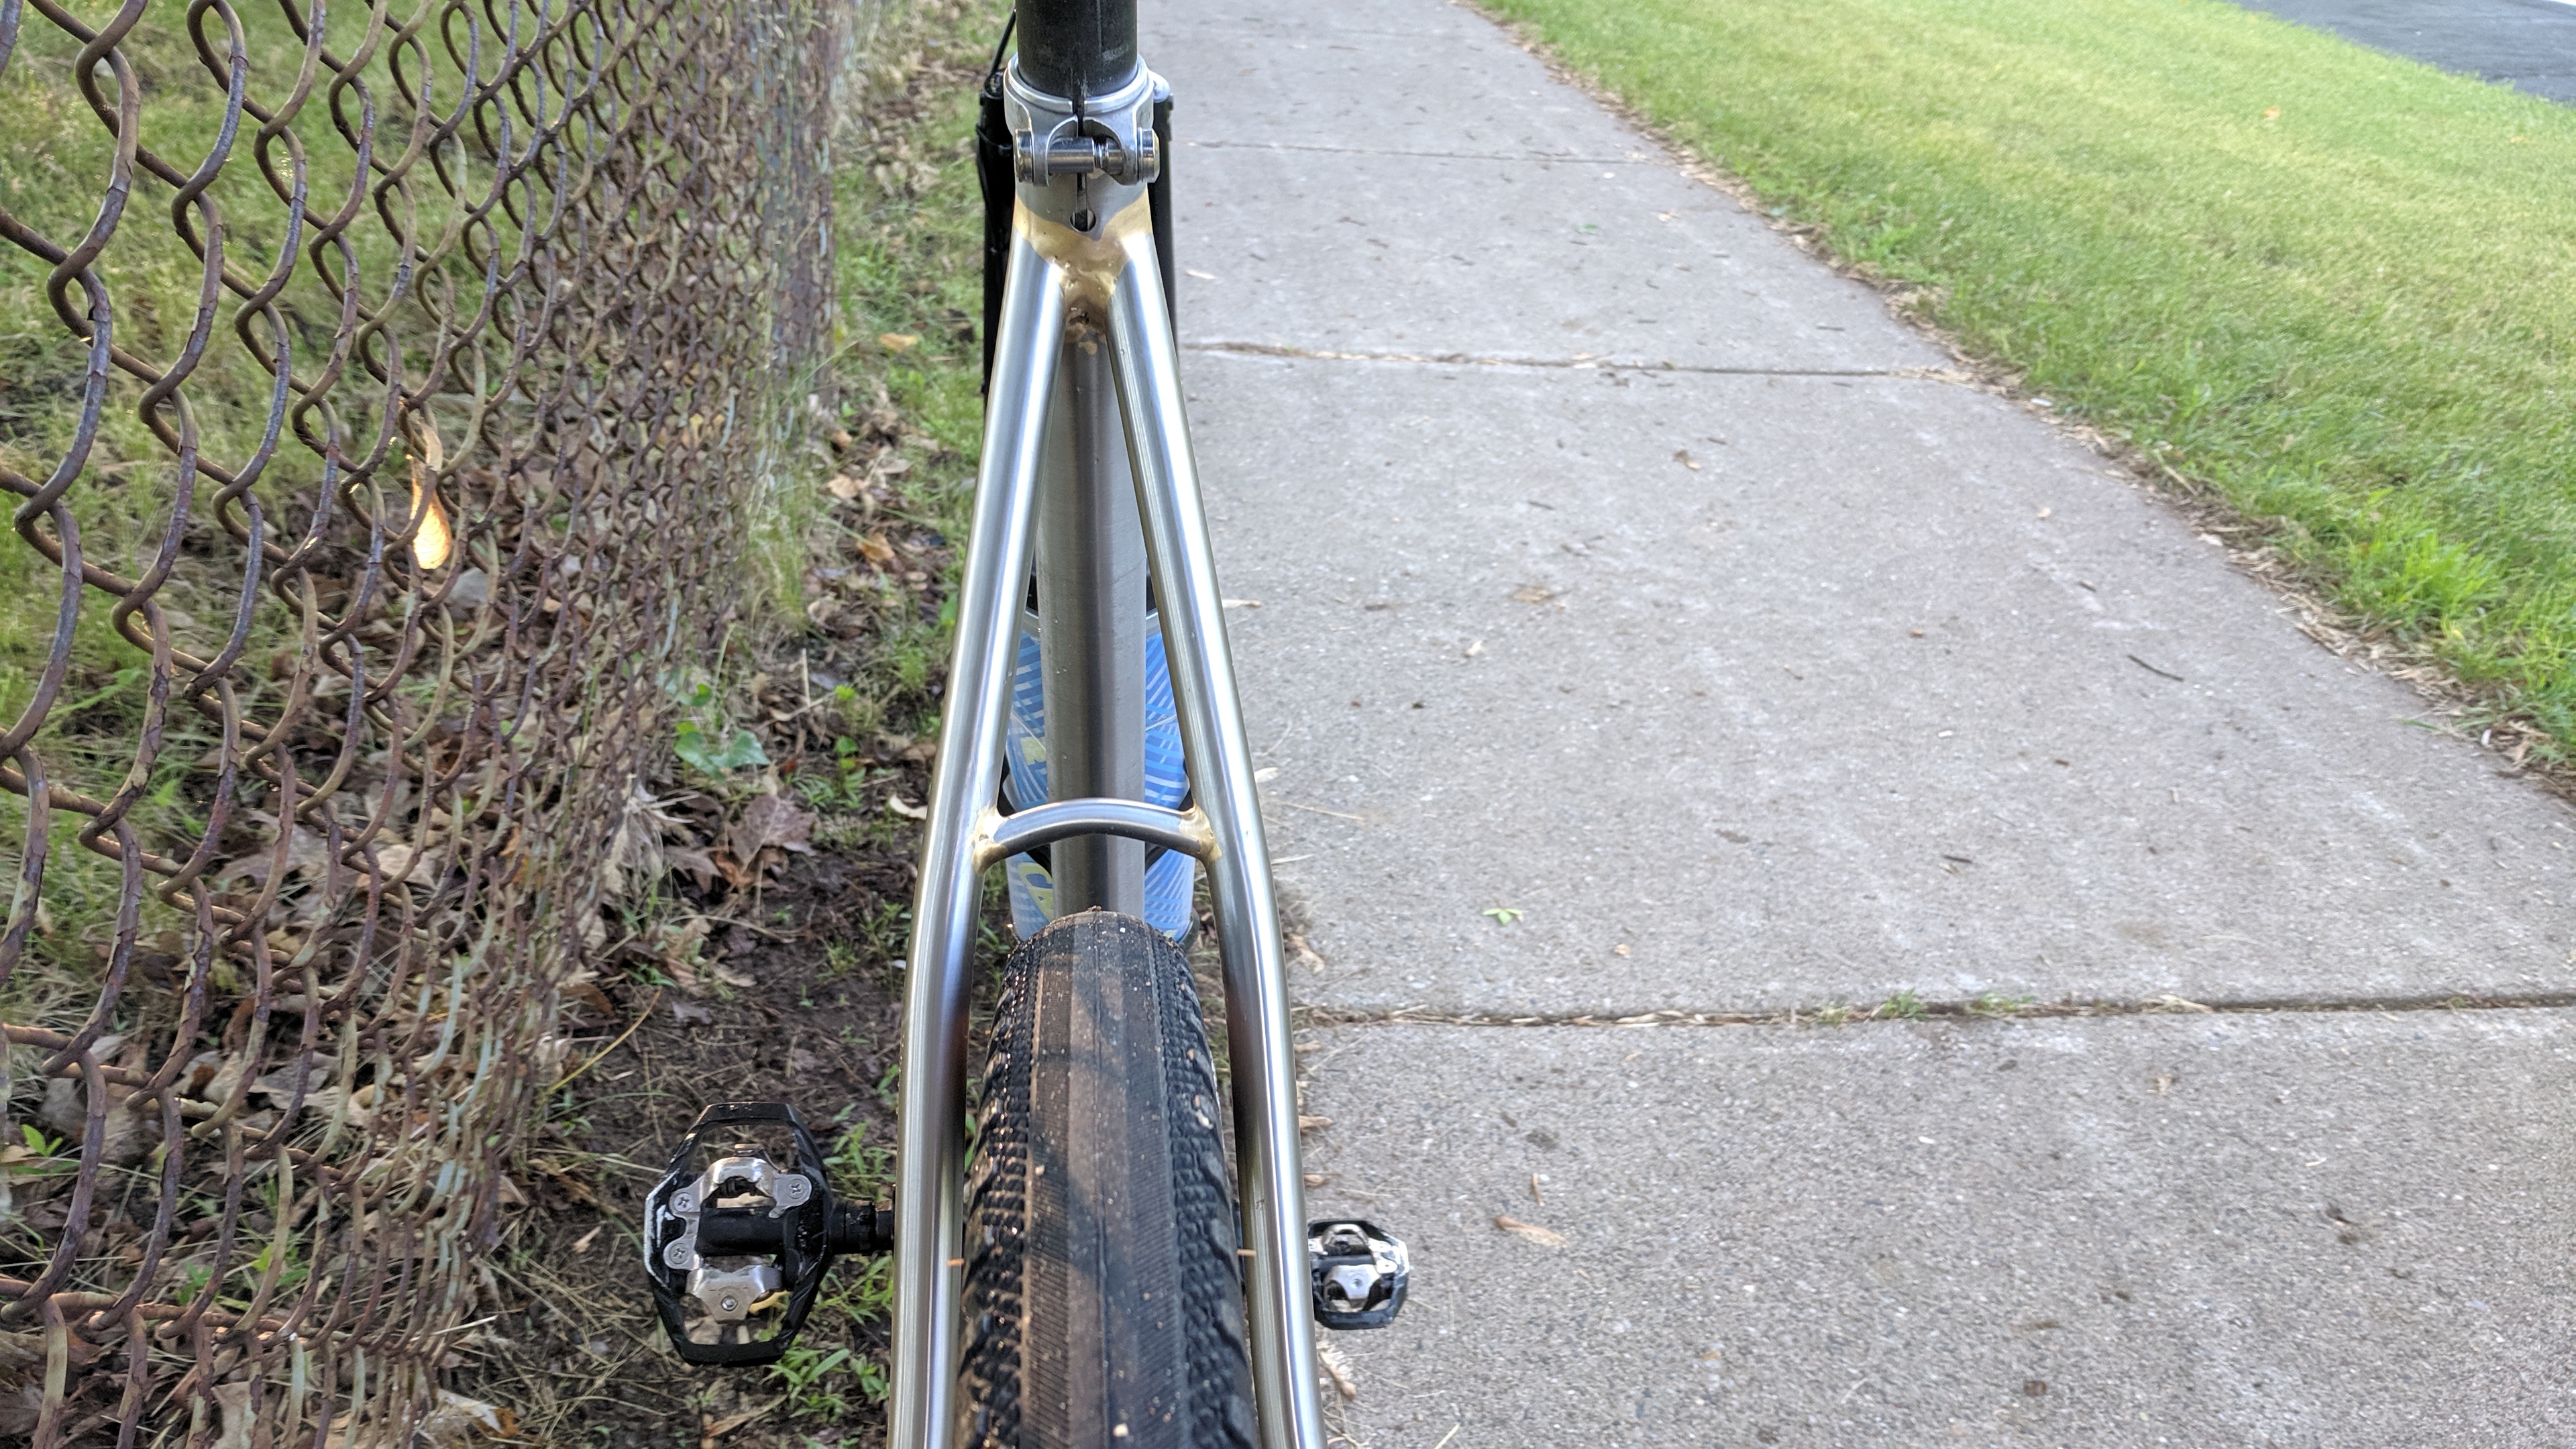
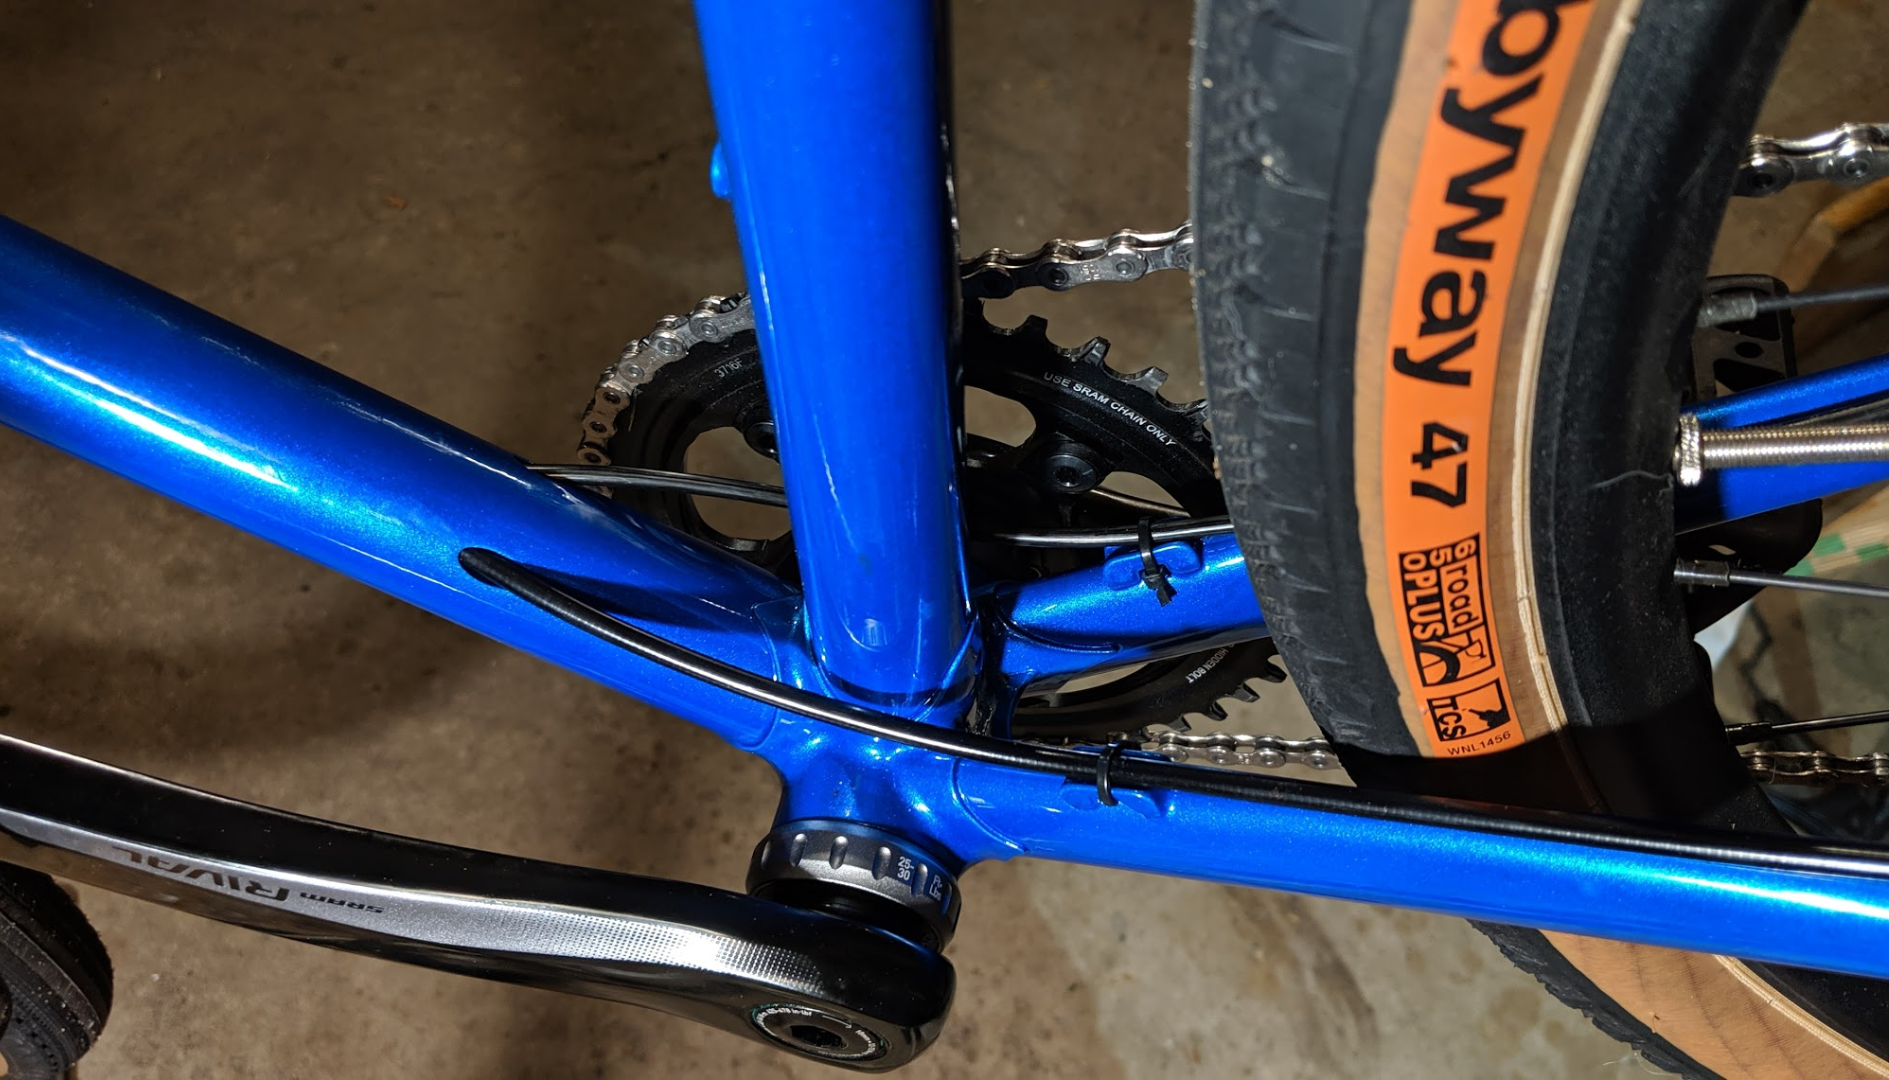
My #2 goal was to clear 650bx47 WTB Byway’s aka: S-Bent stays. Testing the limits of the chainstay sockets on the bottom bracket shell.
I ordered up some Columbus Zona main tubes and chainstays for their toughness and Spirit seatstays for their ride quality from Framebuilders Supply. I really like their service! They get me stuff quicker than anybody else and I had a chance to ride with Mike Cobb (co-owner) at NAHBS 2016. Cool cat.
I love internal cable routing. Unless it’s a track bike that you may take on the street and you may wanna switch from brakes to no brakes, I see no reason to NOT go internal. I just love the look too! Here I use 5/16 x .031 wall stainless tubes bent with a brake line bender make the cable routing.
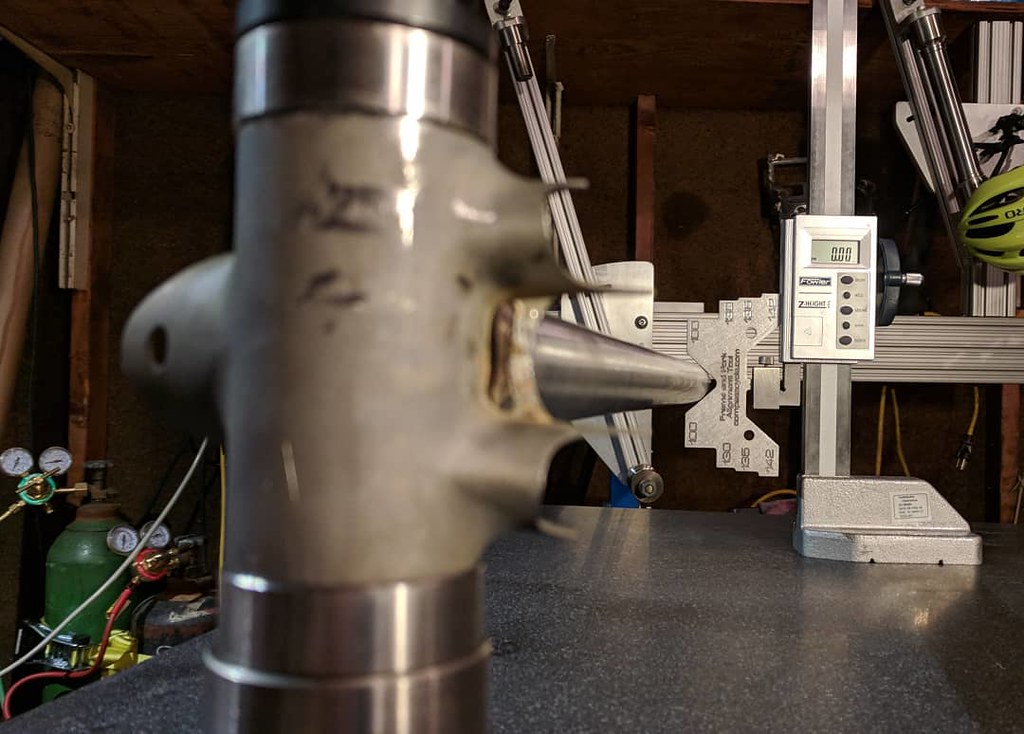
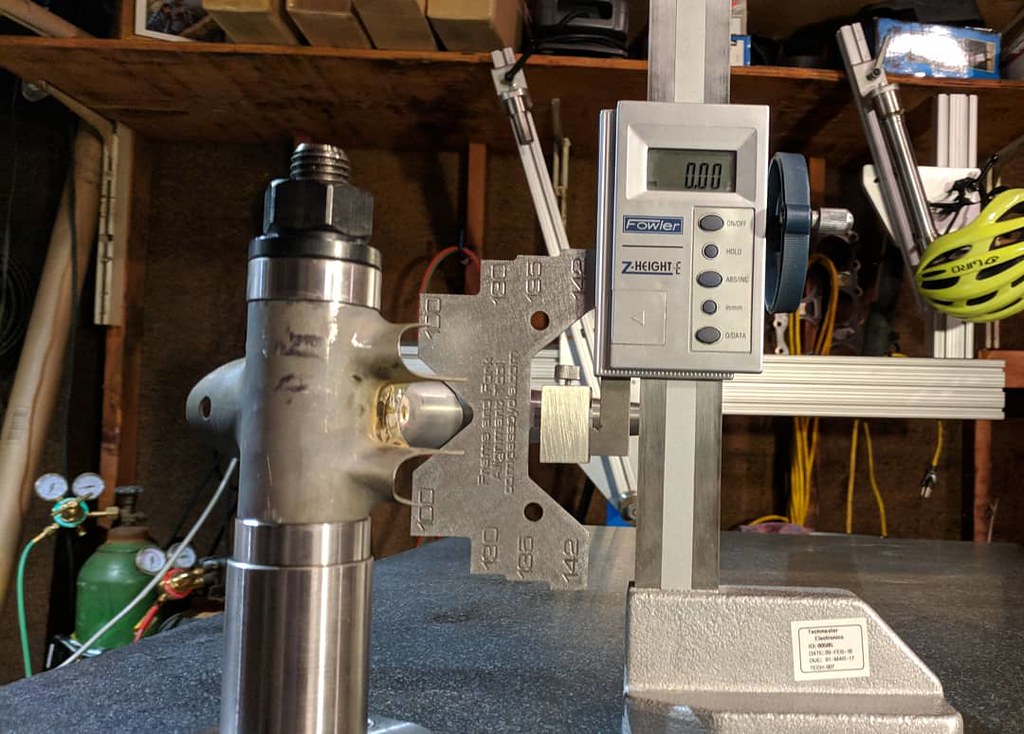
This is also the first time I’m building a frame with my own alignment surface as I got a KILLER deal on a 24×36 surface plate!
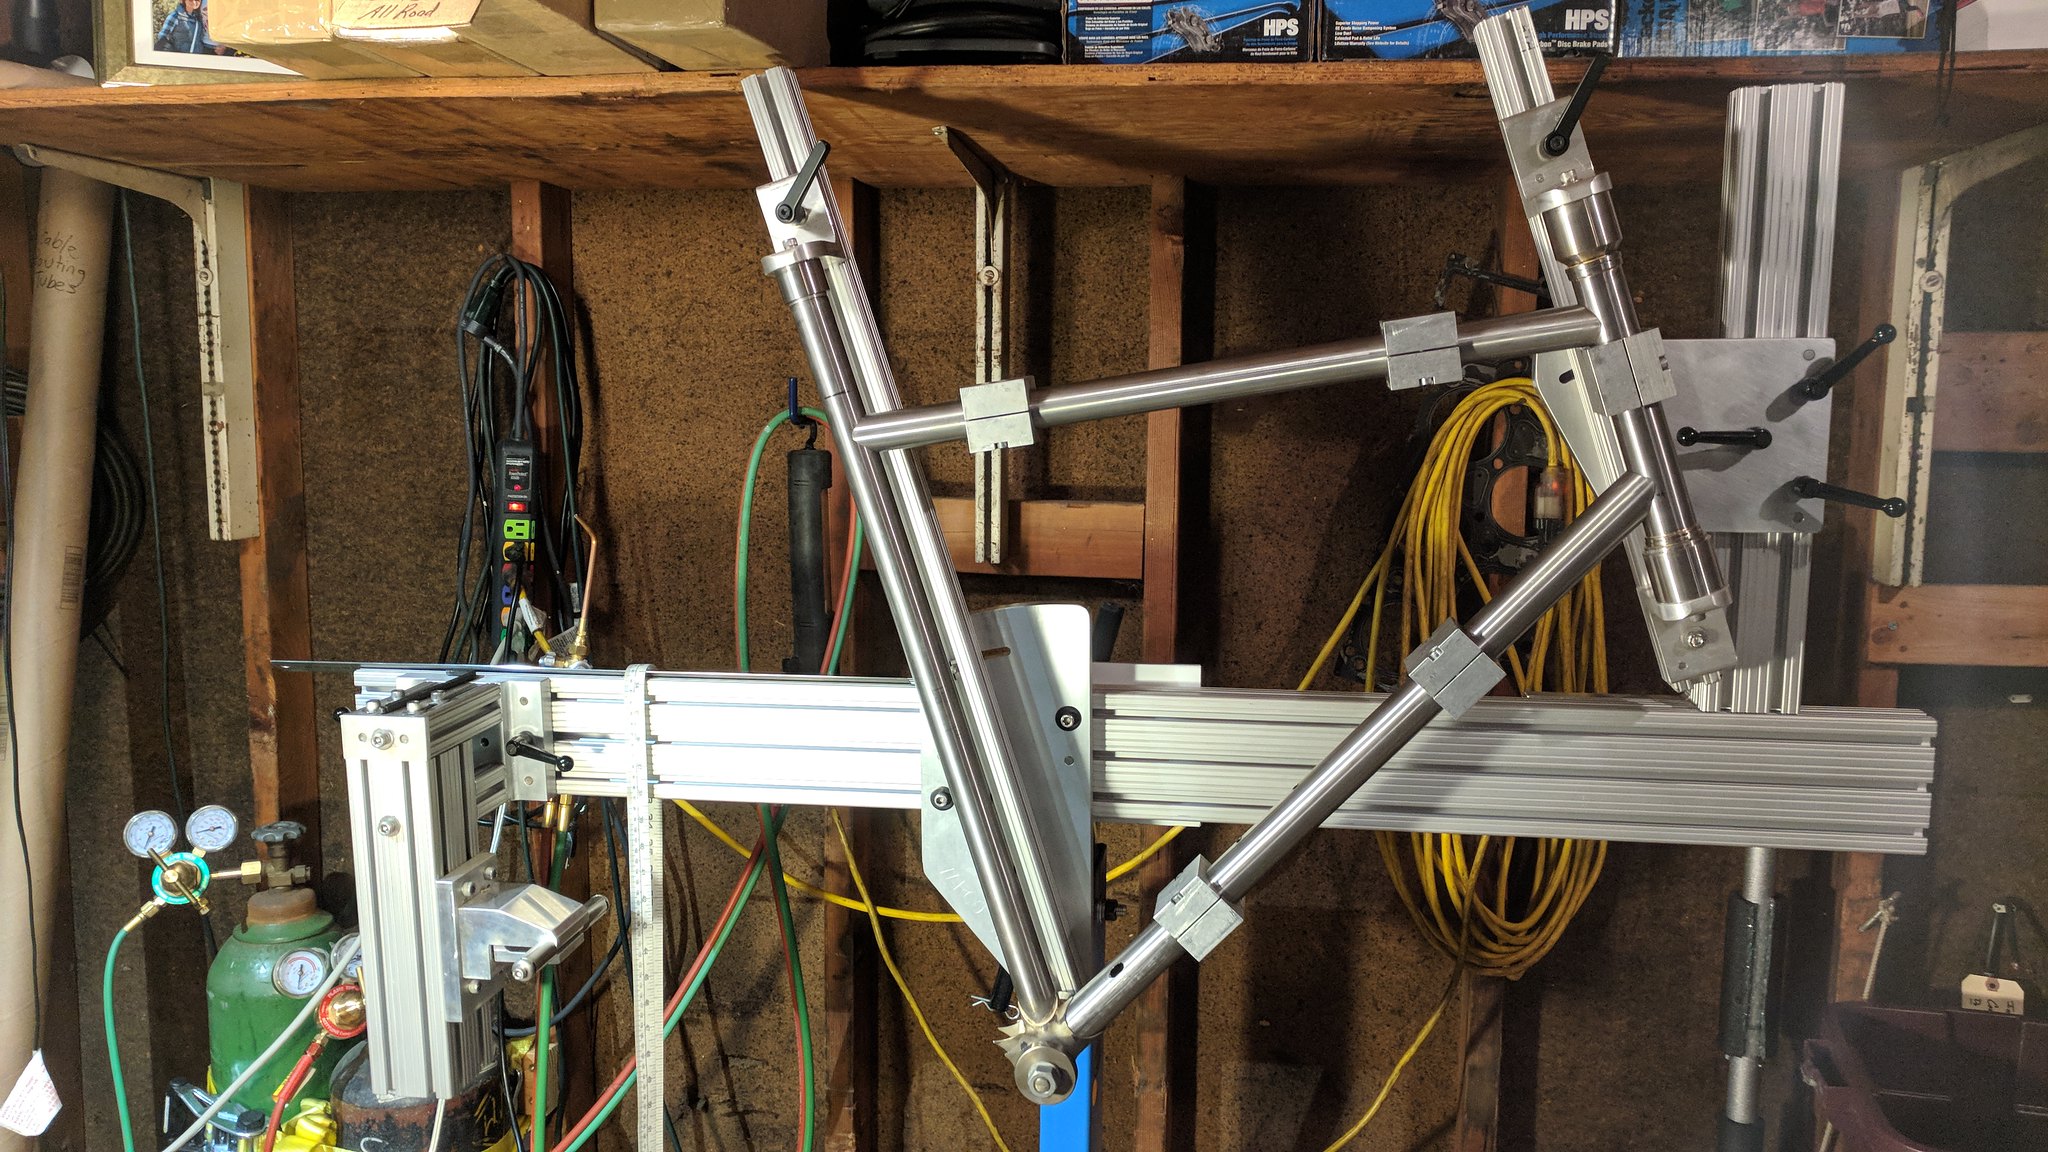
With the front tri mitered up it’s time for the big moment! I tacked them all up, checked alignment, tinned them all, checked alignment and laid down the fillets. It’s great how fast it went compared how I used to build with lugs and no frame fixture!
I felt the drive side of these Paragon Flat Mount dropouts needed an extra window like the Paragon Low Mount dropouts I used on my personal CX build. Of course the brake side stays solid to withstand the braking forces.
Slotted! ✓
Chainstays and dropouts became one.
Next was the chainstays to BB shell. I am VERY happy to say that this was the alignment right off of my frame fixture! Not dead ass on but not shabby at all in my opinion. My goal is to build with thru axles soon so I’m really happy with this!
Another chainstay note. S-Bend chainstays don’t work in lugged BB shells JUST like people told me. Haha!
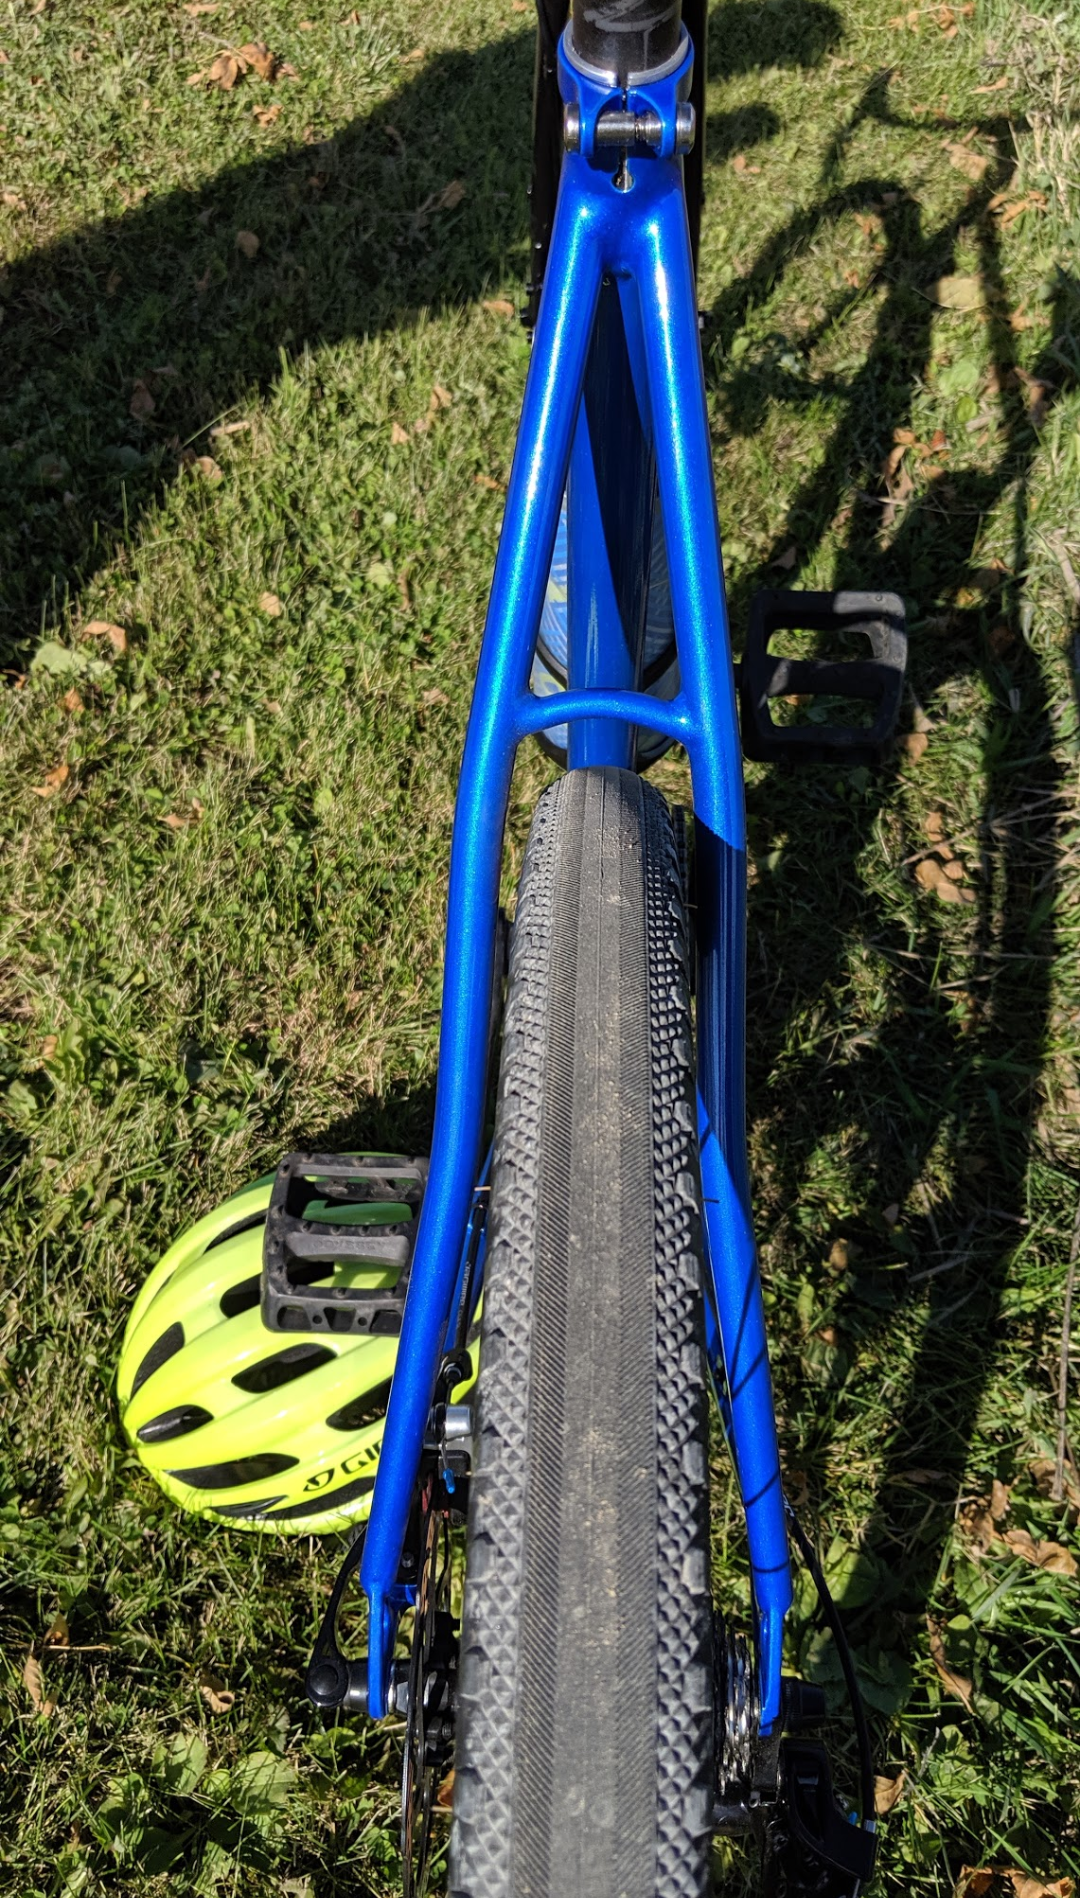
The S-Bend seatstays were SO cool to work with and I was SO happy with how they came out.
I stuck a straight seatstay bridge in there and just thought that with the curves of the stays, the bridge needed some form of curve to it as well.
Bridge mitering has always been a BITCH to me. I’ve printed out paper miter patterns and tried to free hand it with grinder and files… never really having an efficient way to get them done. Then Joe Roggenbuck suggested a little fixture like the one above. I got the angled V block and set a stop in the Bridgeport. The fixture holds a 3/8″ tube in on center so you can cut, flip and cut without moving the machine. Brilliant idea Joe!
Myth Cycles on Instagram posted a similar fixture to what Joe suggested only the bottom block has pins that locate the fixture in the while keeping the center line and a bolt to lock it down. This ought to make bridges completely pain free. The only limitation to this design is that it only works with one diameter tube. I made this one to work with 3/8″ (10mm).
Actually, I made 2 of these because I have a new friend in the framebuilding world who was having the same struggles. You see, at work we had an interesting resume come across our desks. Ben Oliver is a diversely talented guy, welder/pro team bike mechanic/machinist who was looking to gain more CNC Machining experience. He also is the lead framebuilder at Stoemper! Since Ben was similarly annoyed with SS bridges, I just made 2 side by side. He sent me a pic of him using his to miter a brake bridge. Since a brake bridge isn’t 3/8″ wide he just shimmed up the opposite side to maintain the center line.
Time for the headtube badge! I wanted this one to be a little taller than other ones I’ve made because the headtube on this bike is 210mm long. Ha!
Forgot to braze in the bottle bosses before doing the rest of the front triangle. Oops. No problem. I was basically done at this point. Great timing because my parents were going to be in town on Father’s Day. The bike wasn’t built but the frame was done!
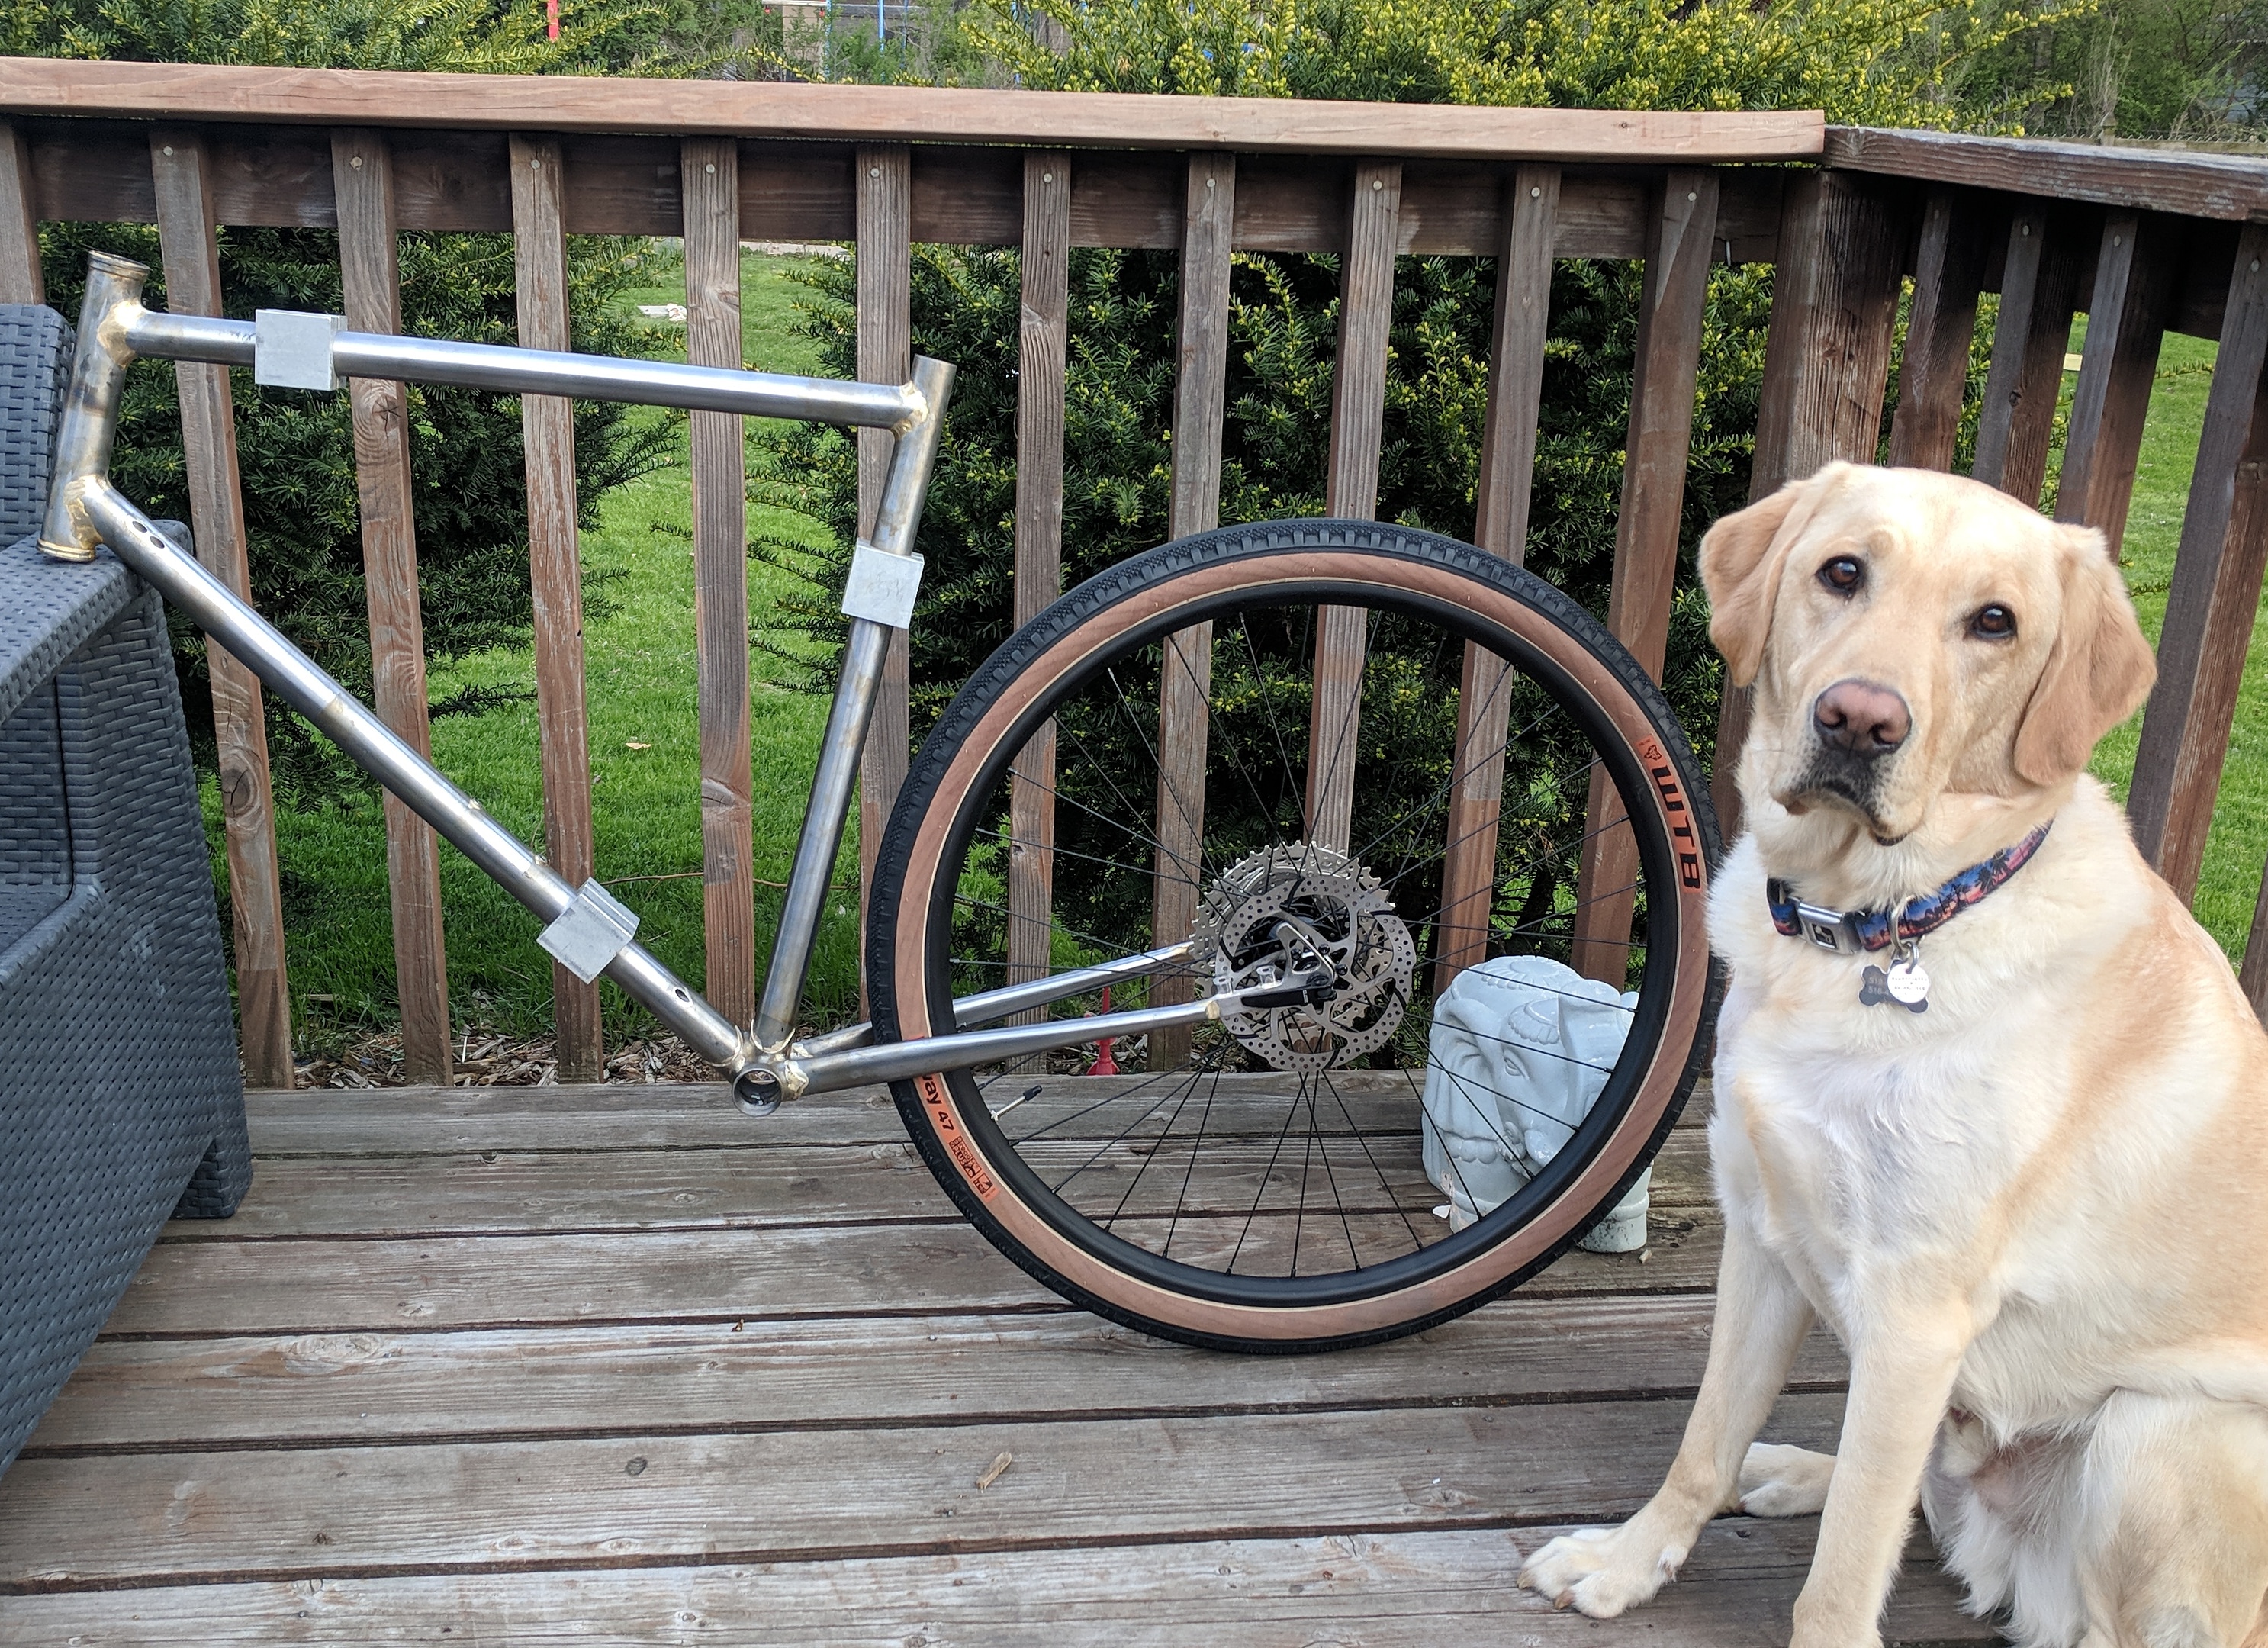
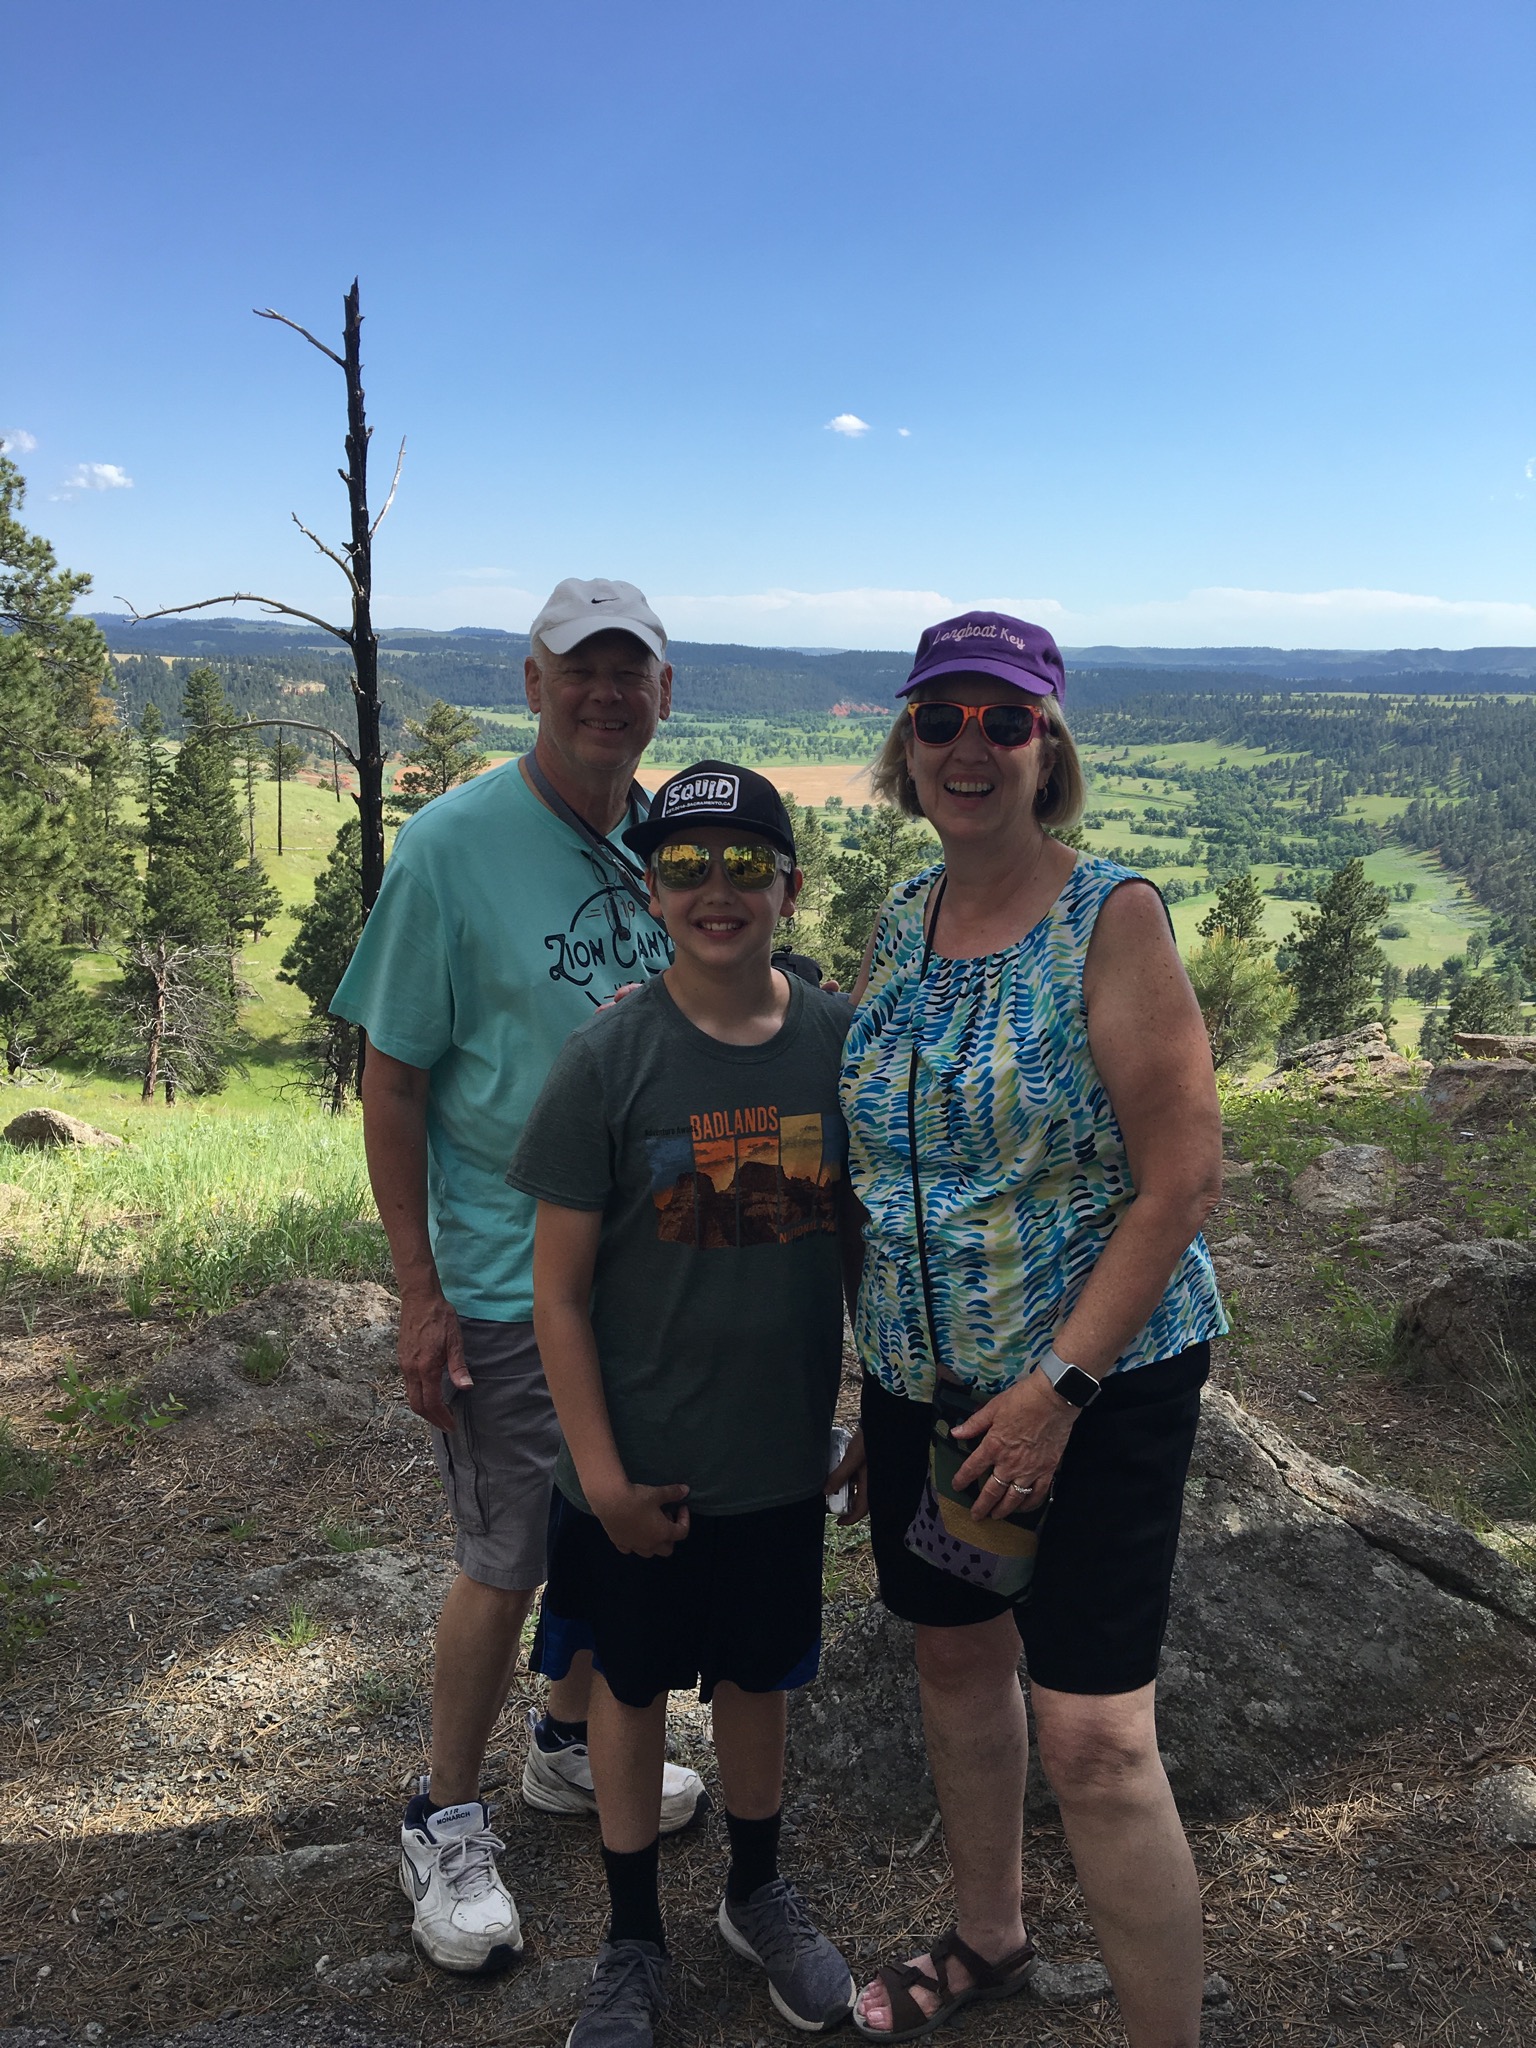
I slapped a few things on the bike to give my Dad a larger picture of the end result, he was speachless! Words couldn’t describe how satisfying it was to see him SO happy and excited with his frame! But he wouldn’t get to ride it for 2 more weeks as my Mom and him were taking our son on a 2 week trip to South Dakota.
As I was building it I was SO happy with how the brake cable routing came out I had to take a pic!
All done! I took it out for a little ride and was thrilled with how comfortable of a ride it was! These tires are amazing! At 30 psi front and 35 rear they were smooth and seemed have a lot of grip in corners. Kinda felt like they could go 5 psi lower each. The bike is very comfortable to cruze on at just about any pace. Sprinting felt funny but with a stack height that high I wasn’t surprised.
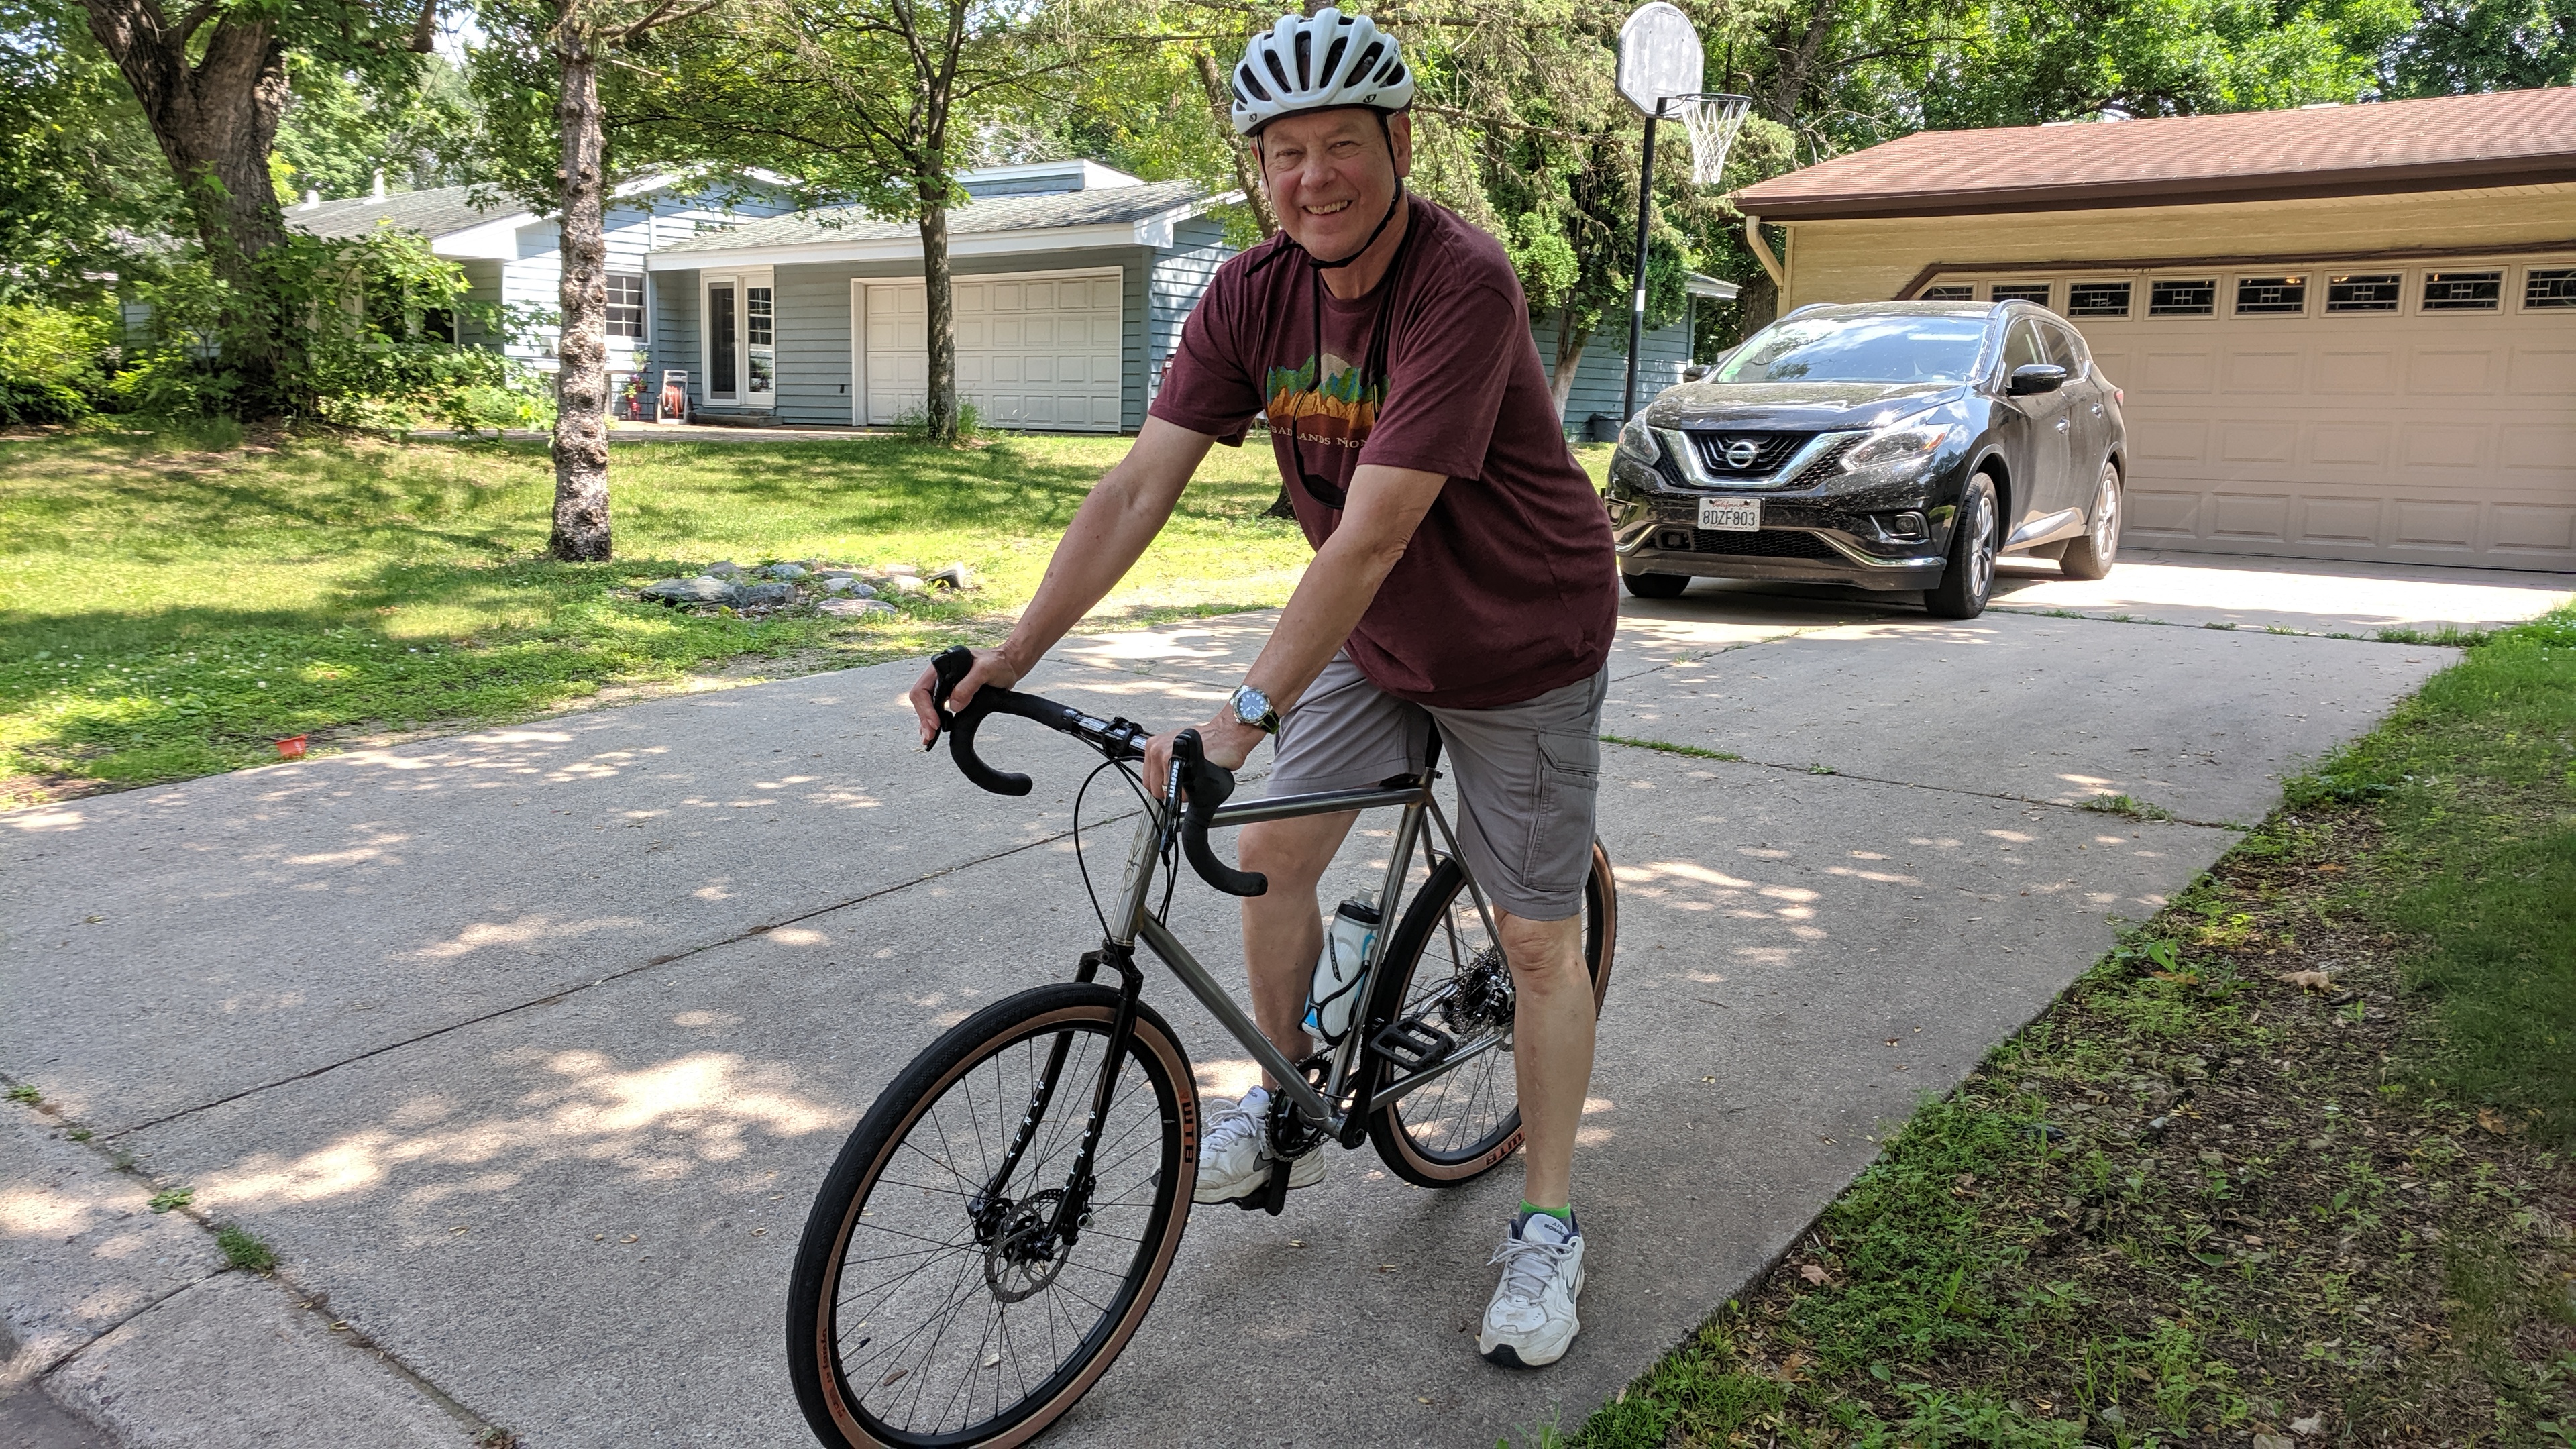
Fast forward to next Friday, time for his first ride!!!! I don’t know who was more excited for this moment!
I had him hop on to show him how to use the SRAM shifter and his ear to ear smile was all I needed to see!
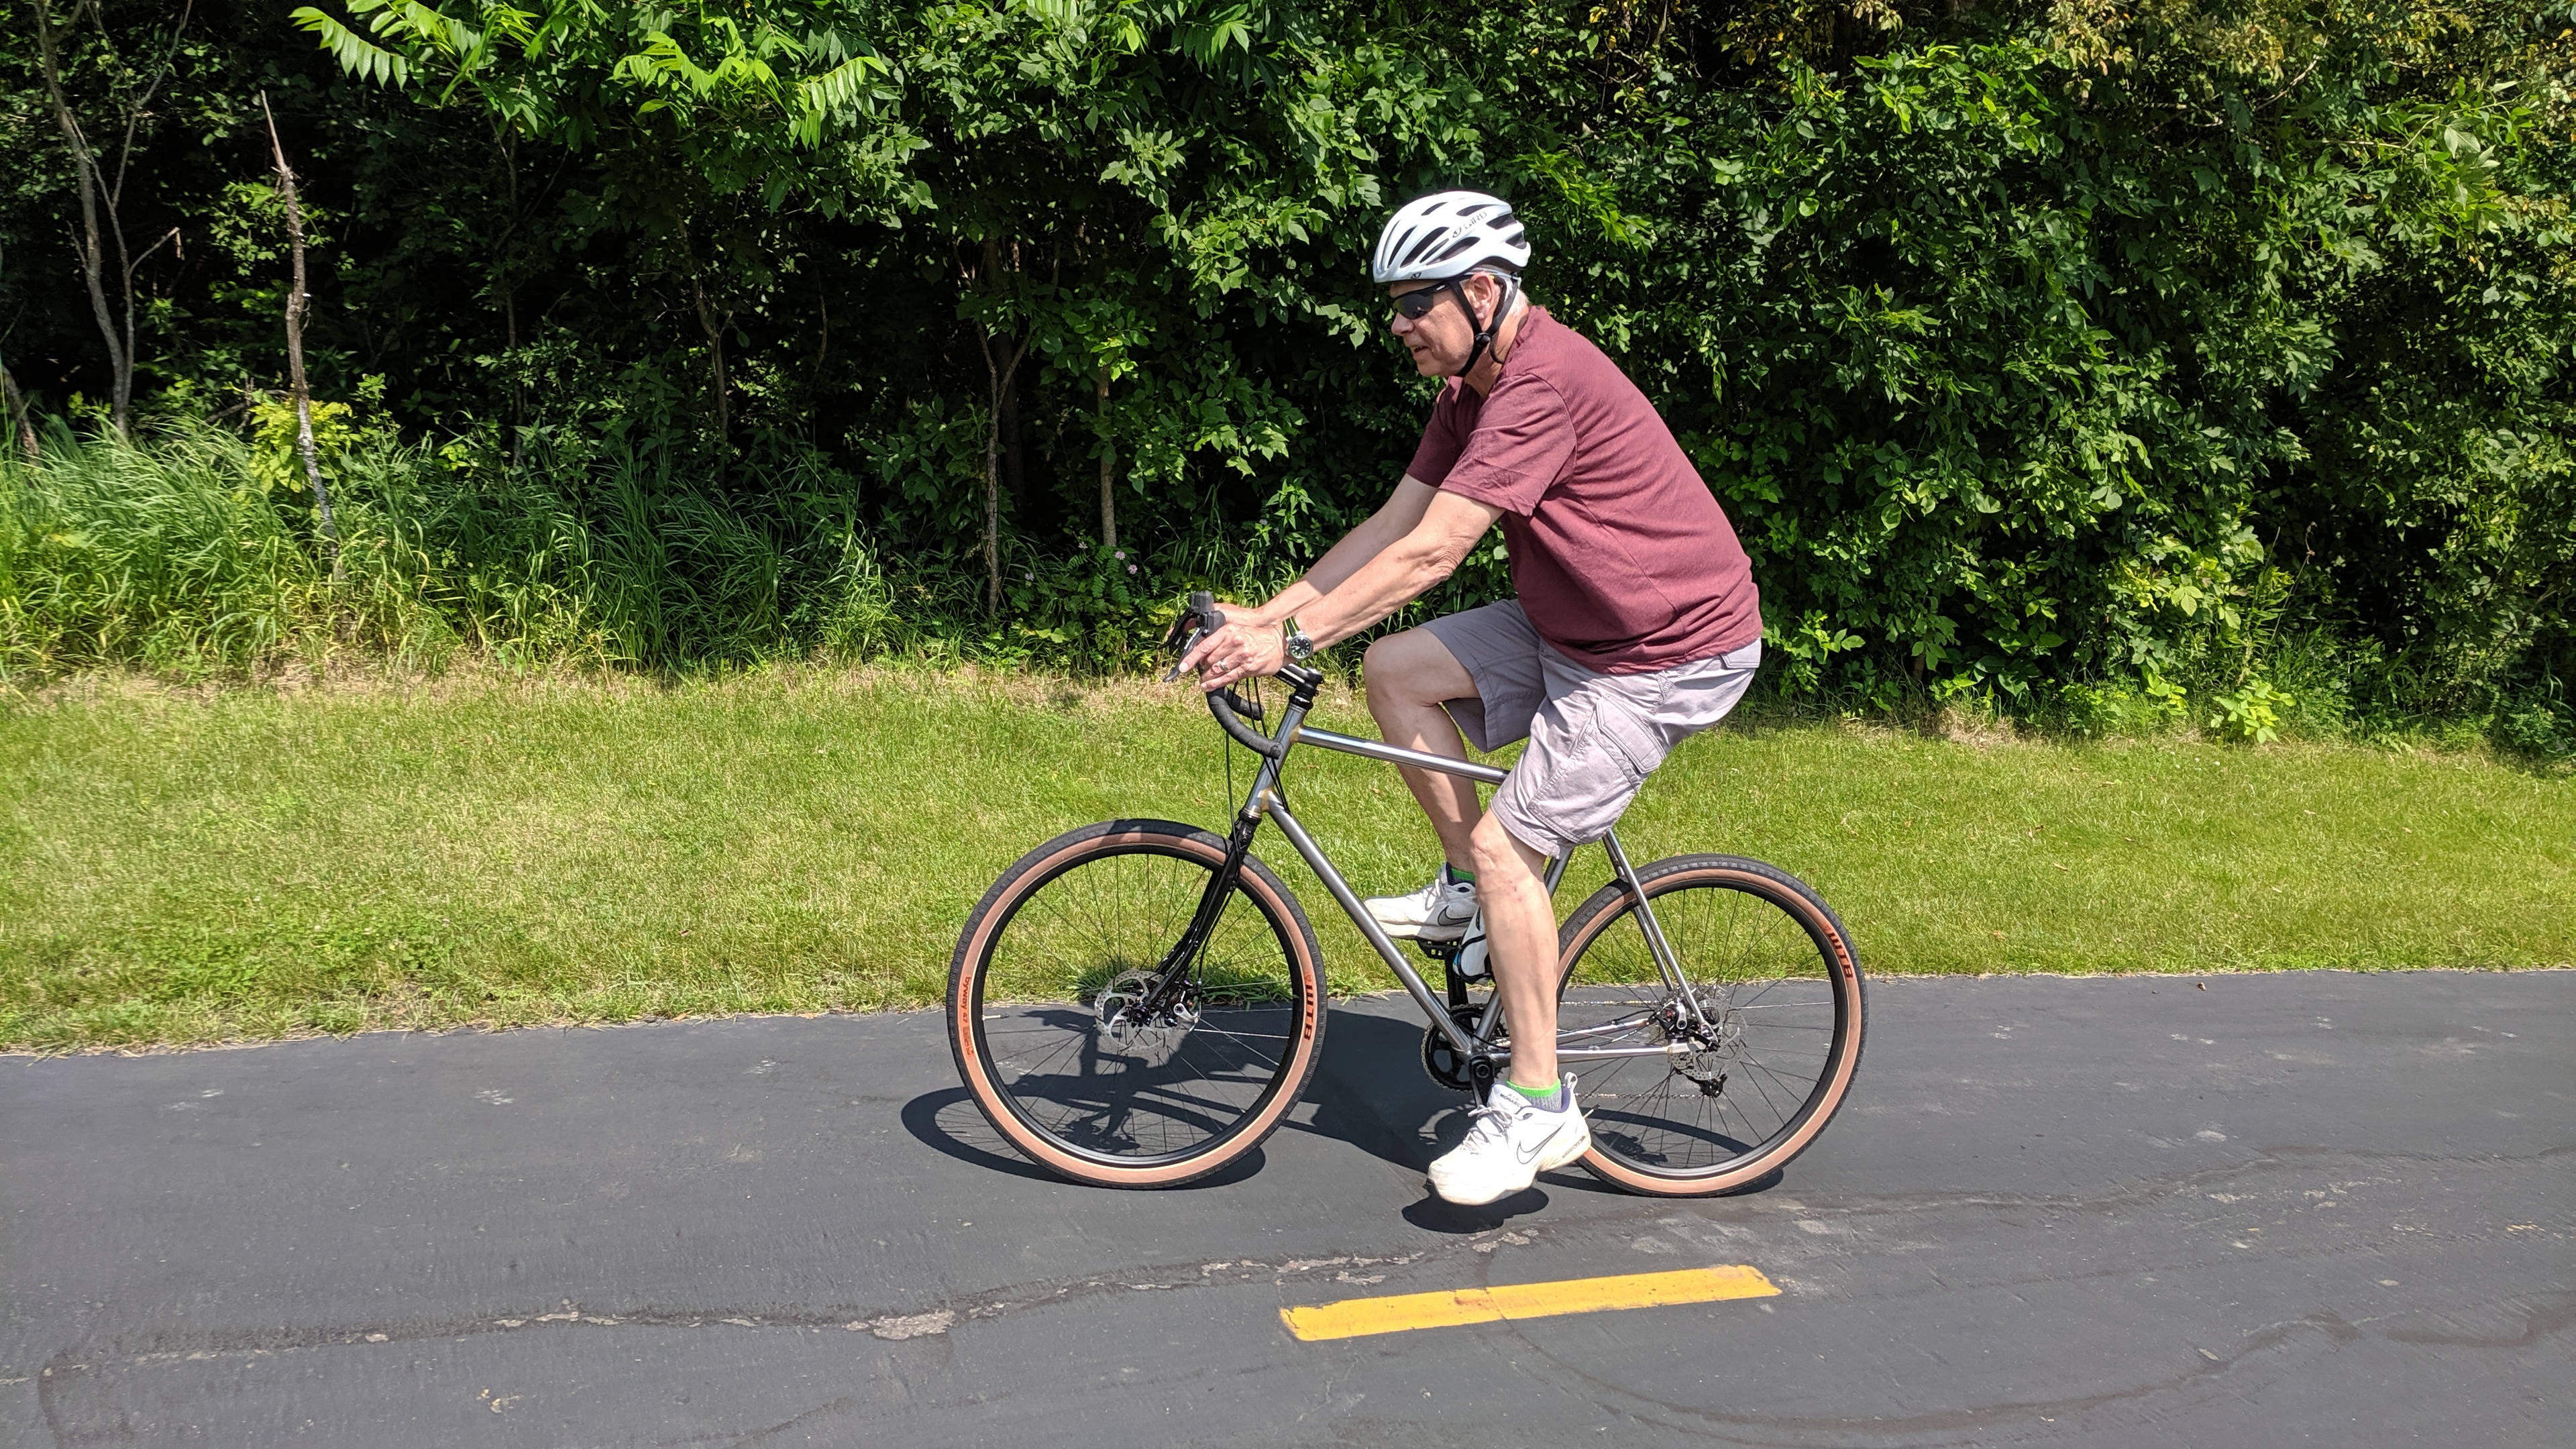
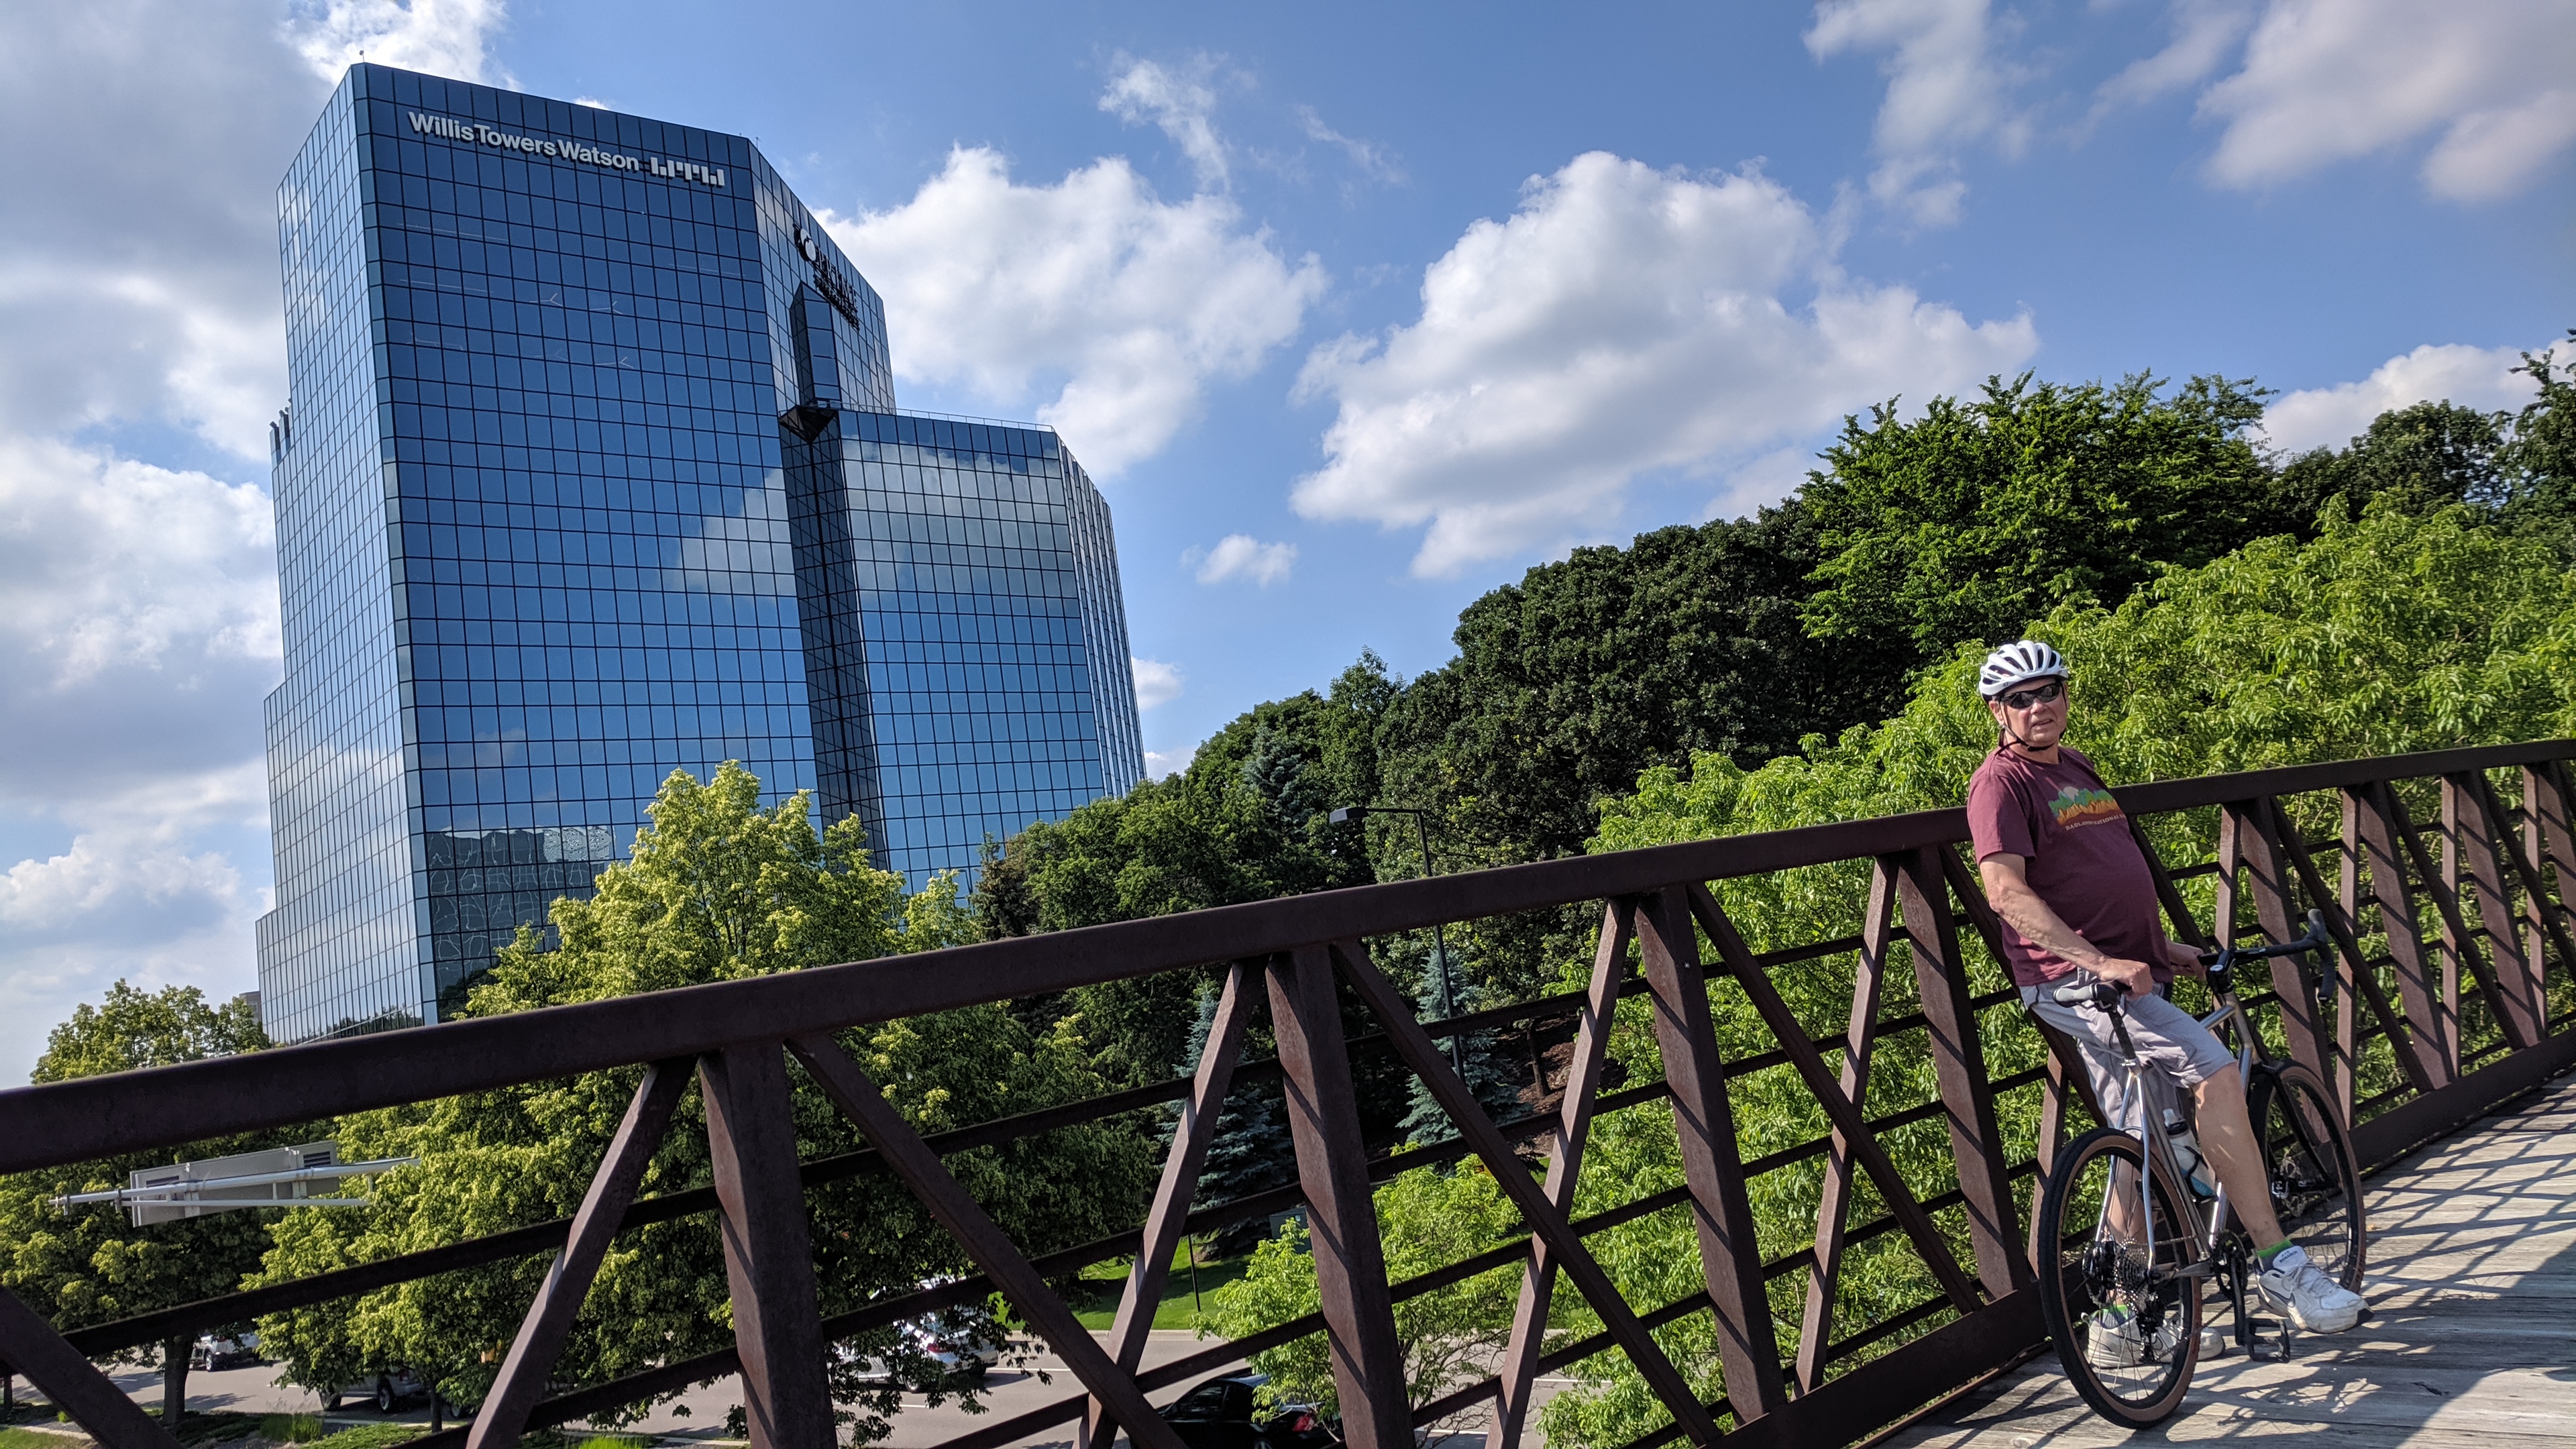
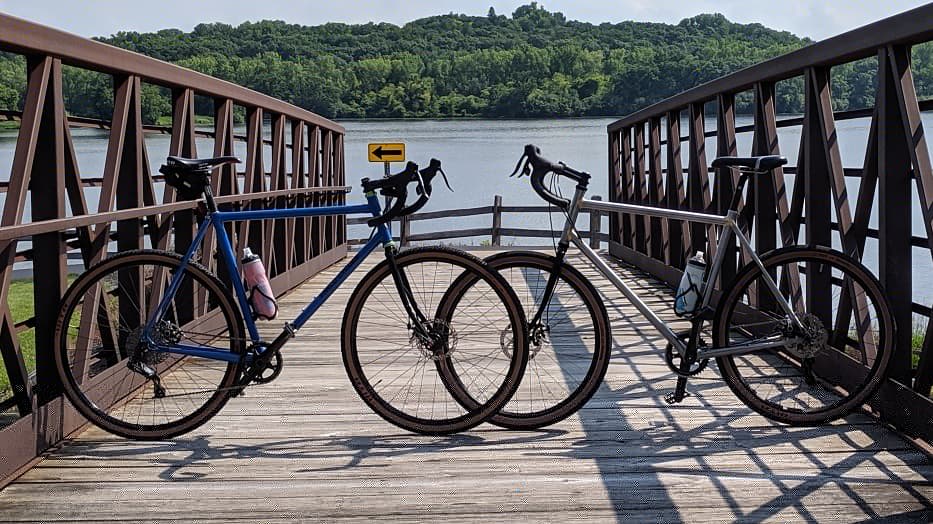
We tossed the bikes on my rack and went to Highland Park. It has a great network of paved trails and some beautiful scenery.
He did 13 miles on it and loved every second of the ride! Amazed at how the big tires and steel frame/fork absorbed the road noise and bumps compared to that older Trek. He loved the simplicity of the 1x shifting and really appreciated the 11-42 tooth cassette on the hills.
Such a bucket list item for me checked off today! ✓
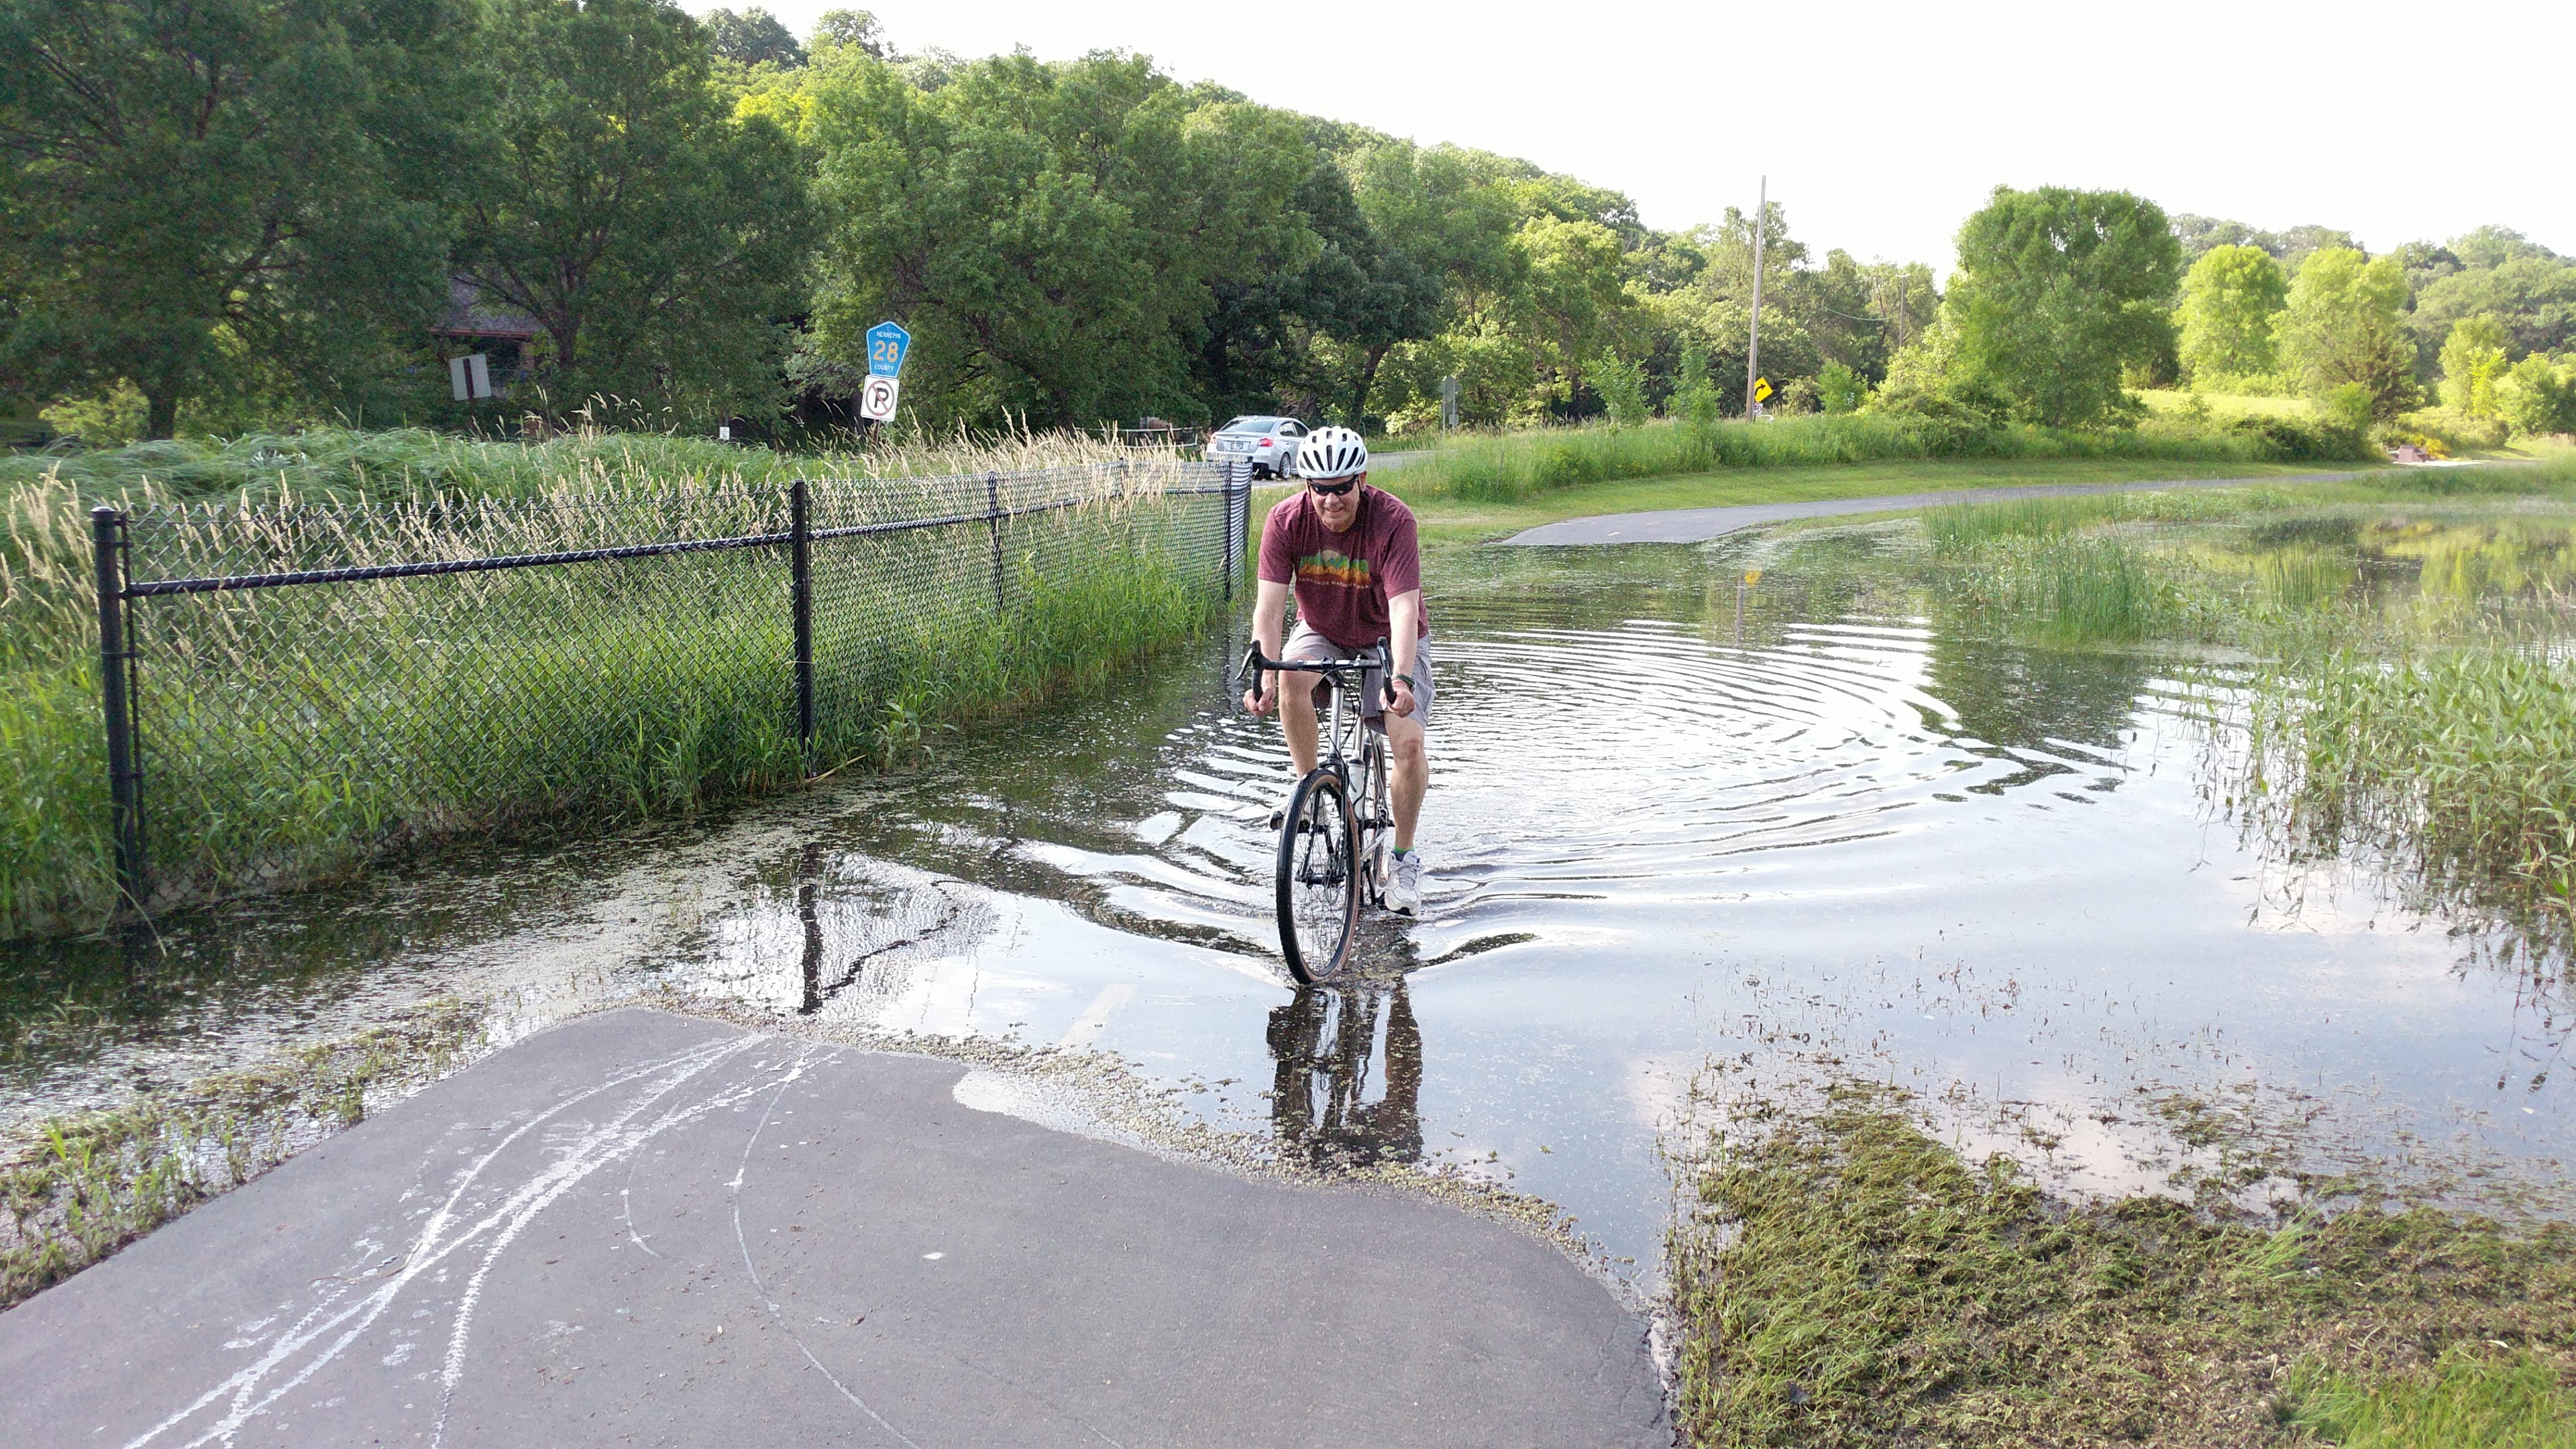
Beyond having my Dad be super happy with the bike, simply being able to share a ride with him was so special to me. It’s something we haven’t really done since I was younger. He was always there when I was racing BMX, shooting video or taking pics of my friends and I, but not on a bike. So it was just so great to be on the same plane, leaning into the same turns, riding through the same puddles, enjoying the same experiences. Like we did when I was MY sons age. Fucking CRAZY how that circle comes together hu?
It has been so awesome building a frame for the guy who built my first bike!
Now, I’m just going to fix the pin holes in my fillets and have it powder coated then Dad’s All Road will be shipped off to Albany for my Dad to enjoy for years to come! I’ll update this post when that all happens!
For now, do something you love and relish in every moment of it!
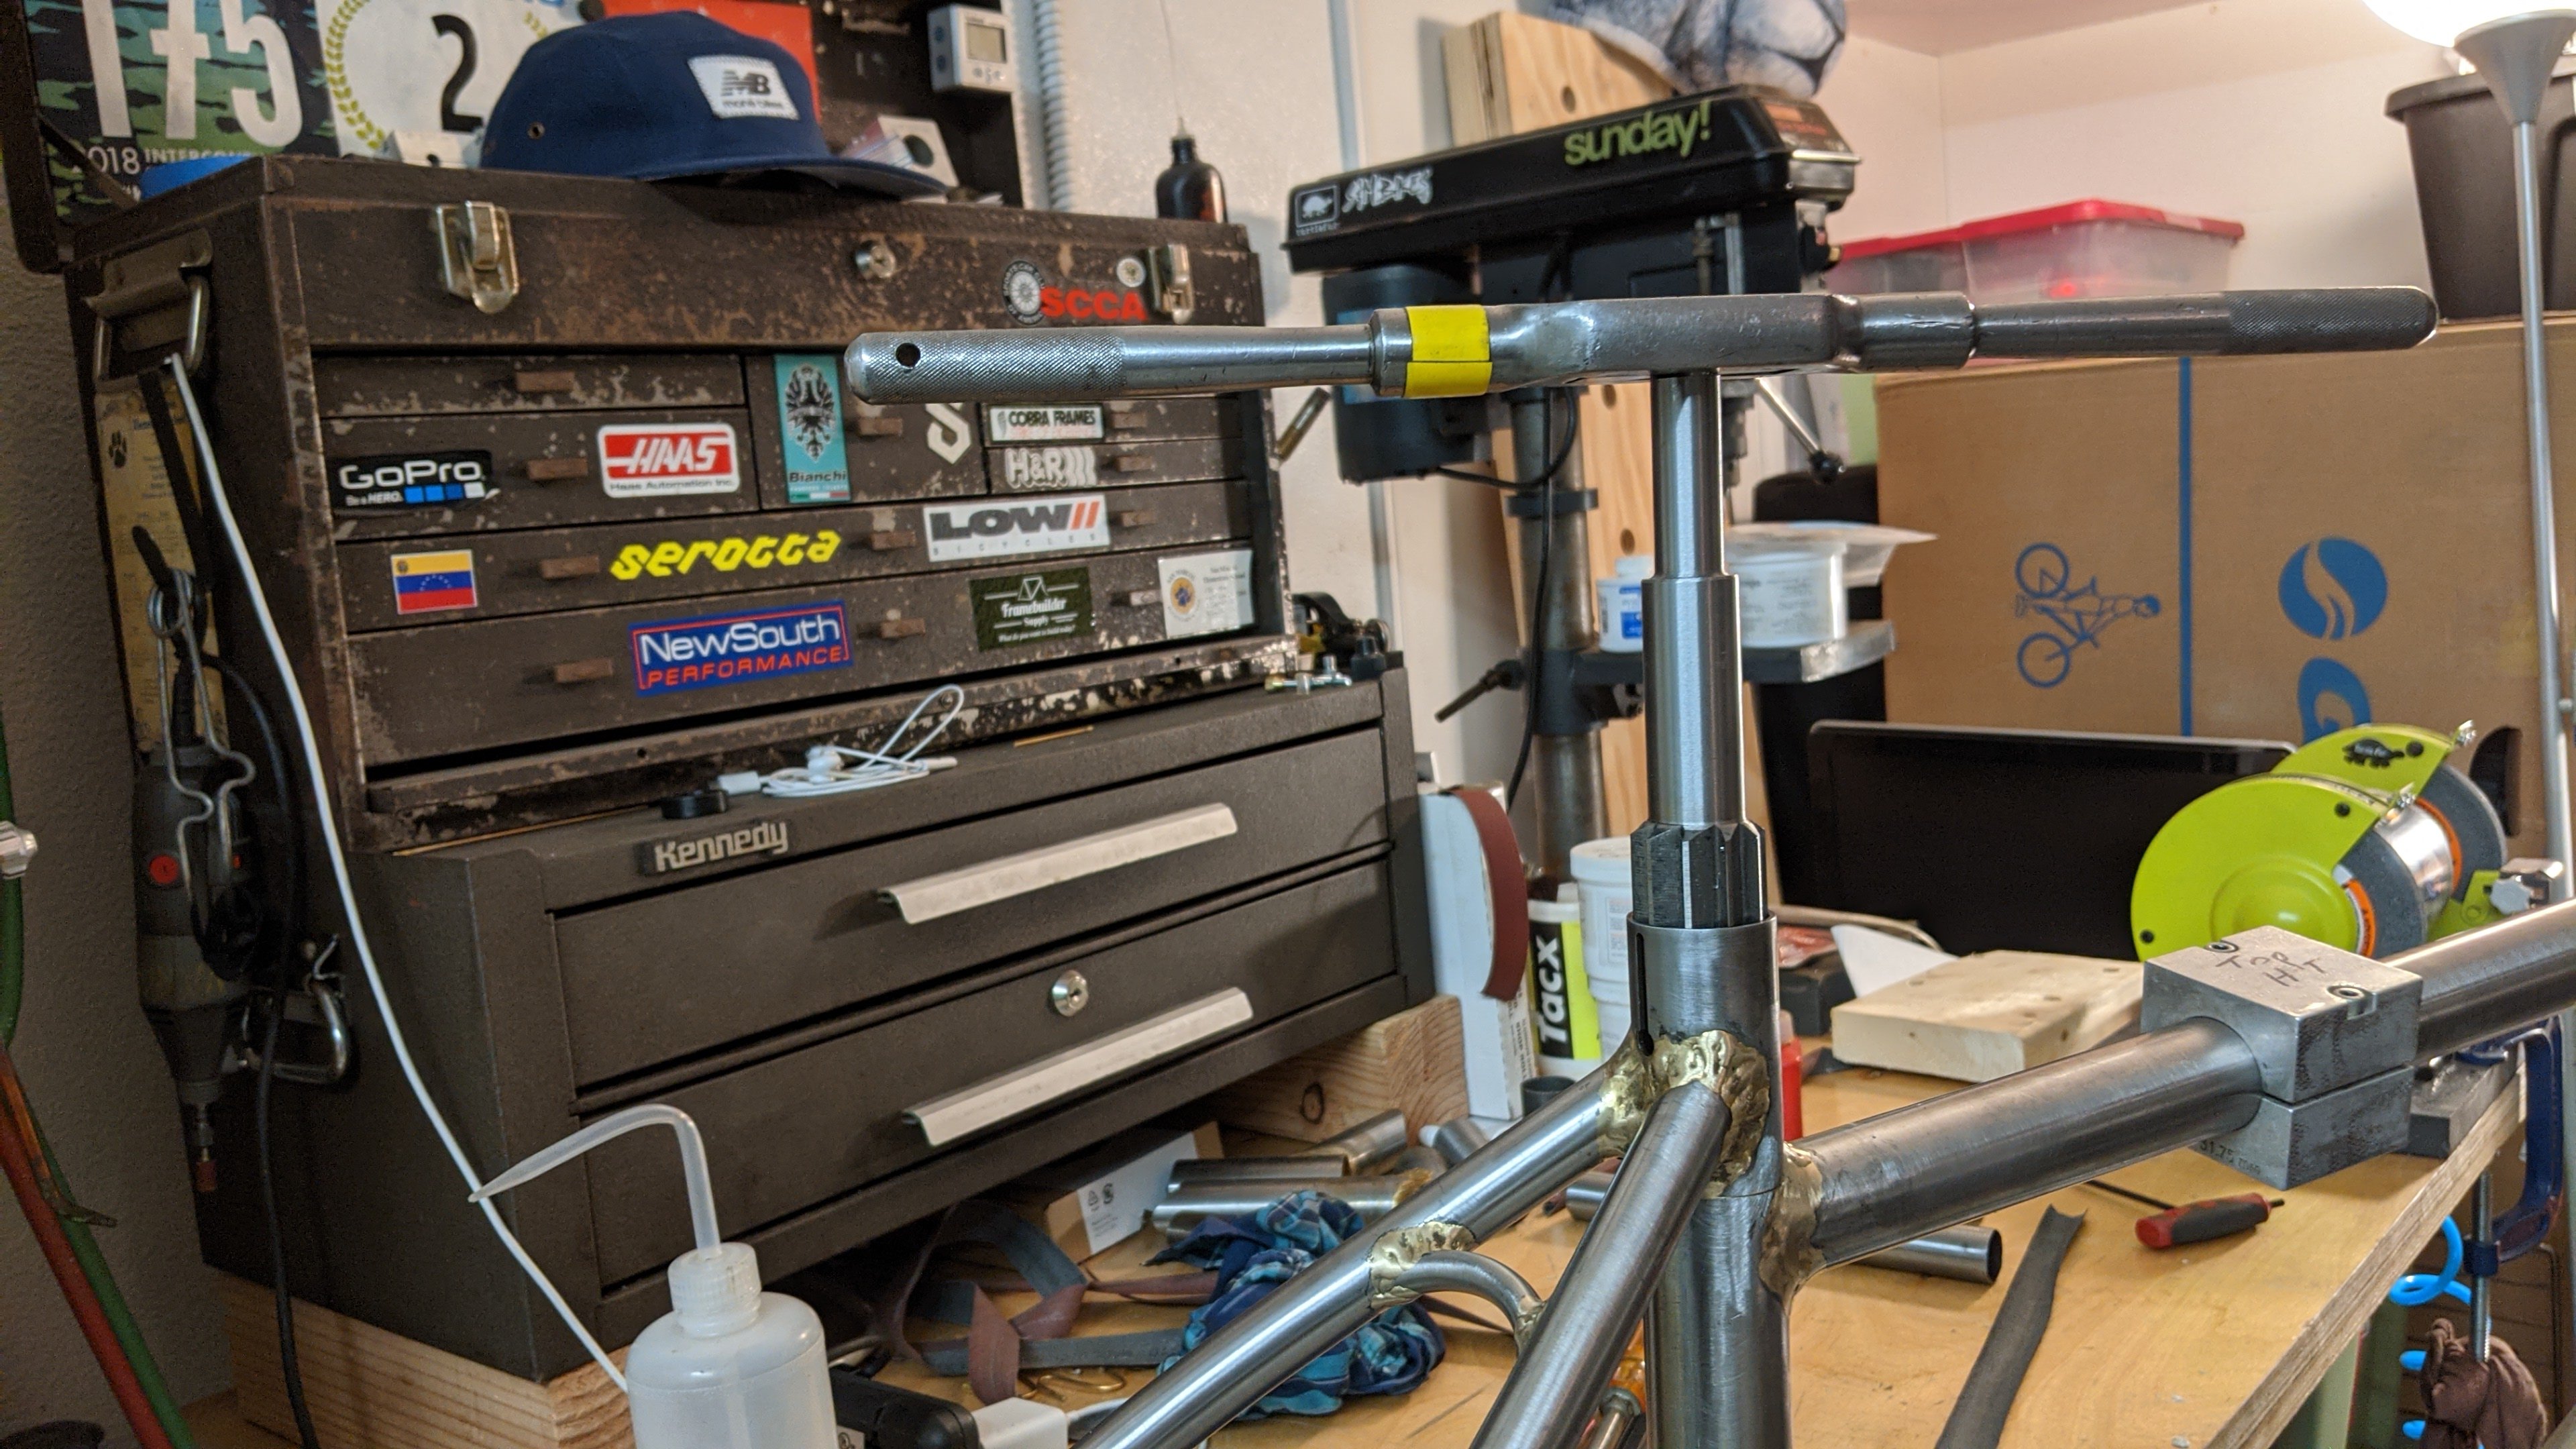
Up until now I have relied on the goodness of others to complete my frame builds. I have passed this final step on to friends and local shops. Naturally I would like to do this step myself but Park Tool’s frame finishing tools are just out of my price range for now. They do however make the best tools in the business! I’d be buying local as they are made just over the river in St Paul, Minnesota. I am psyched to be able to design my version of their tool around their cutters! Park Tools have always been great to me so I will continue to support Park Tool where I can as well.
Sure I could have gotten the Ice Toolz kit for less than half the price but even if the quality is there, they are made in China and having the taps and facers resharpened is probably not a service they offer. Made in the USA is the way to go anyways!
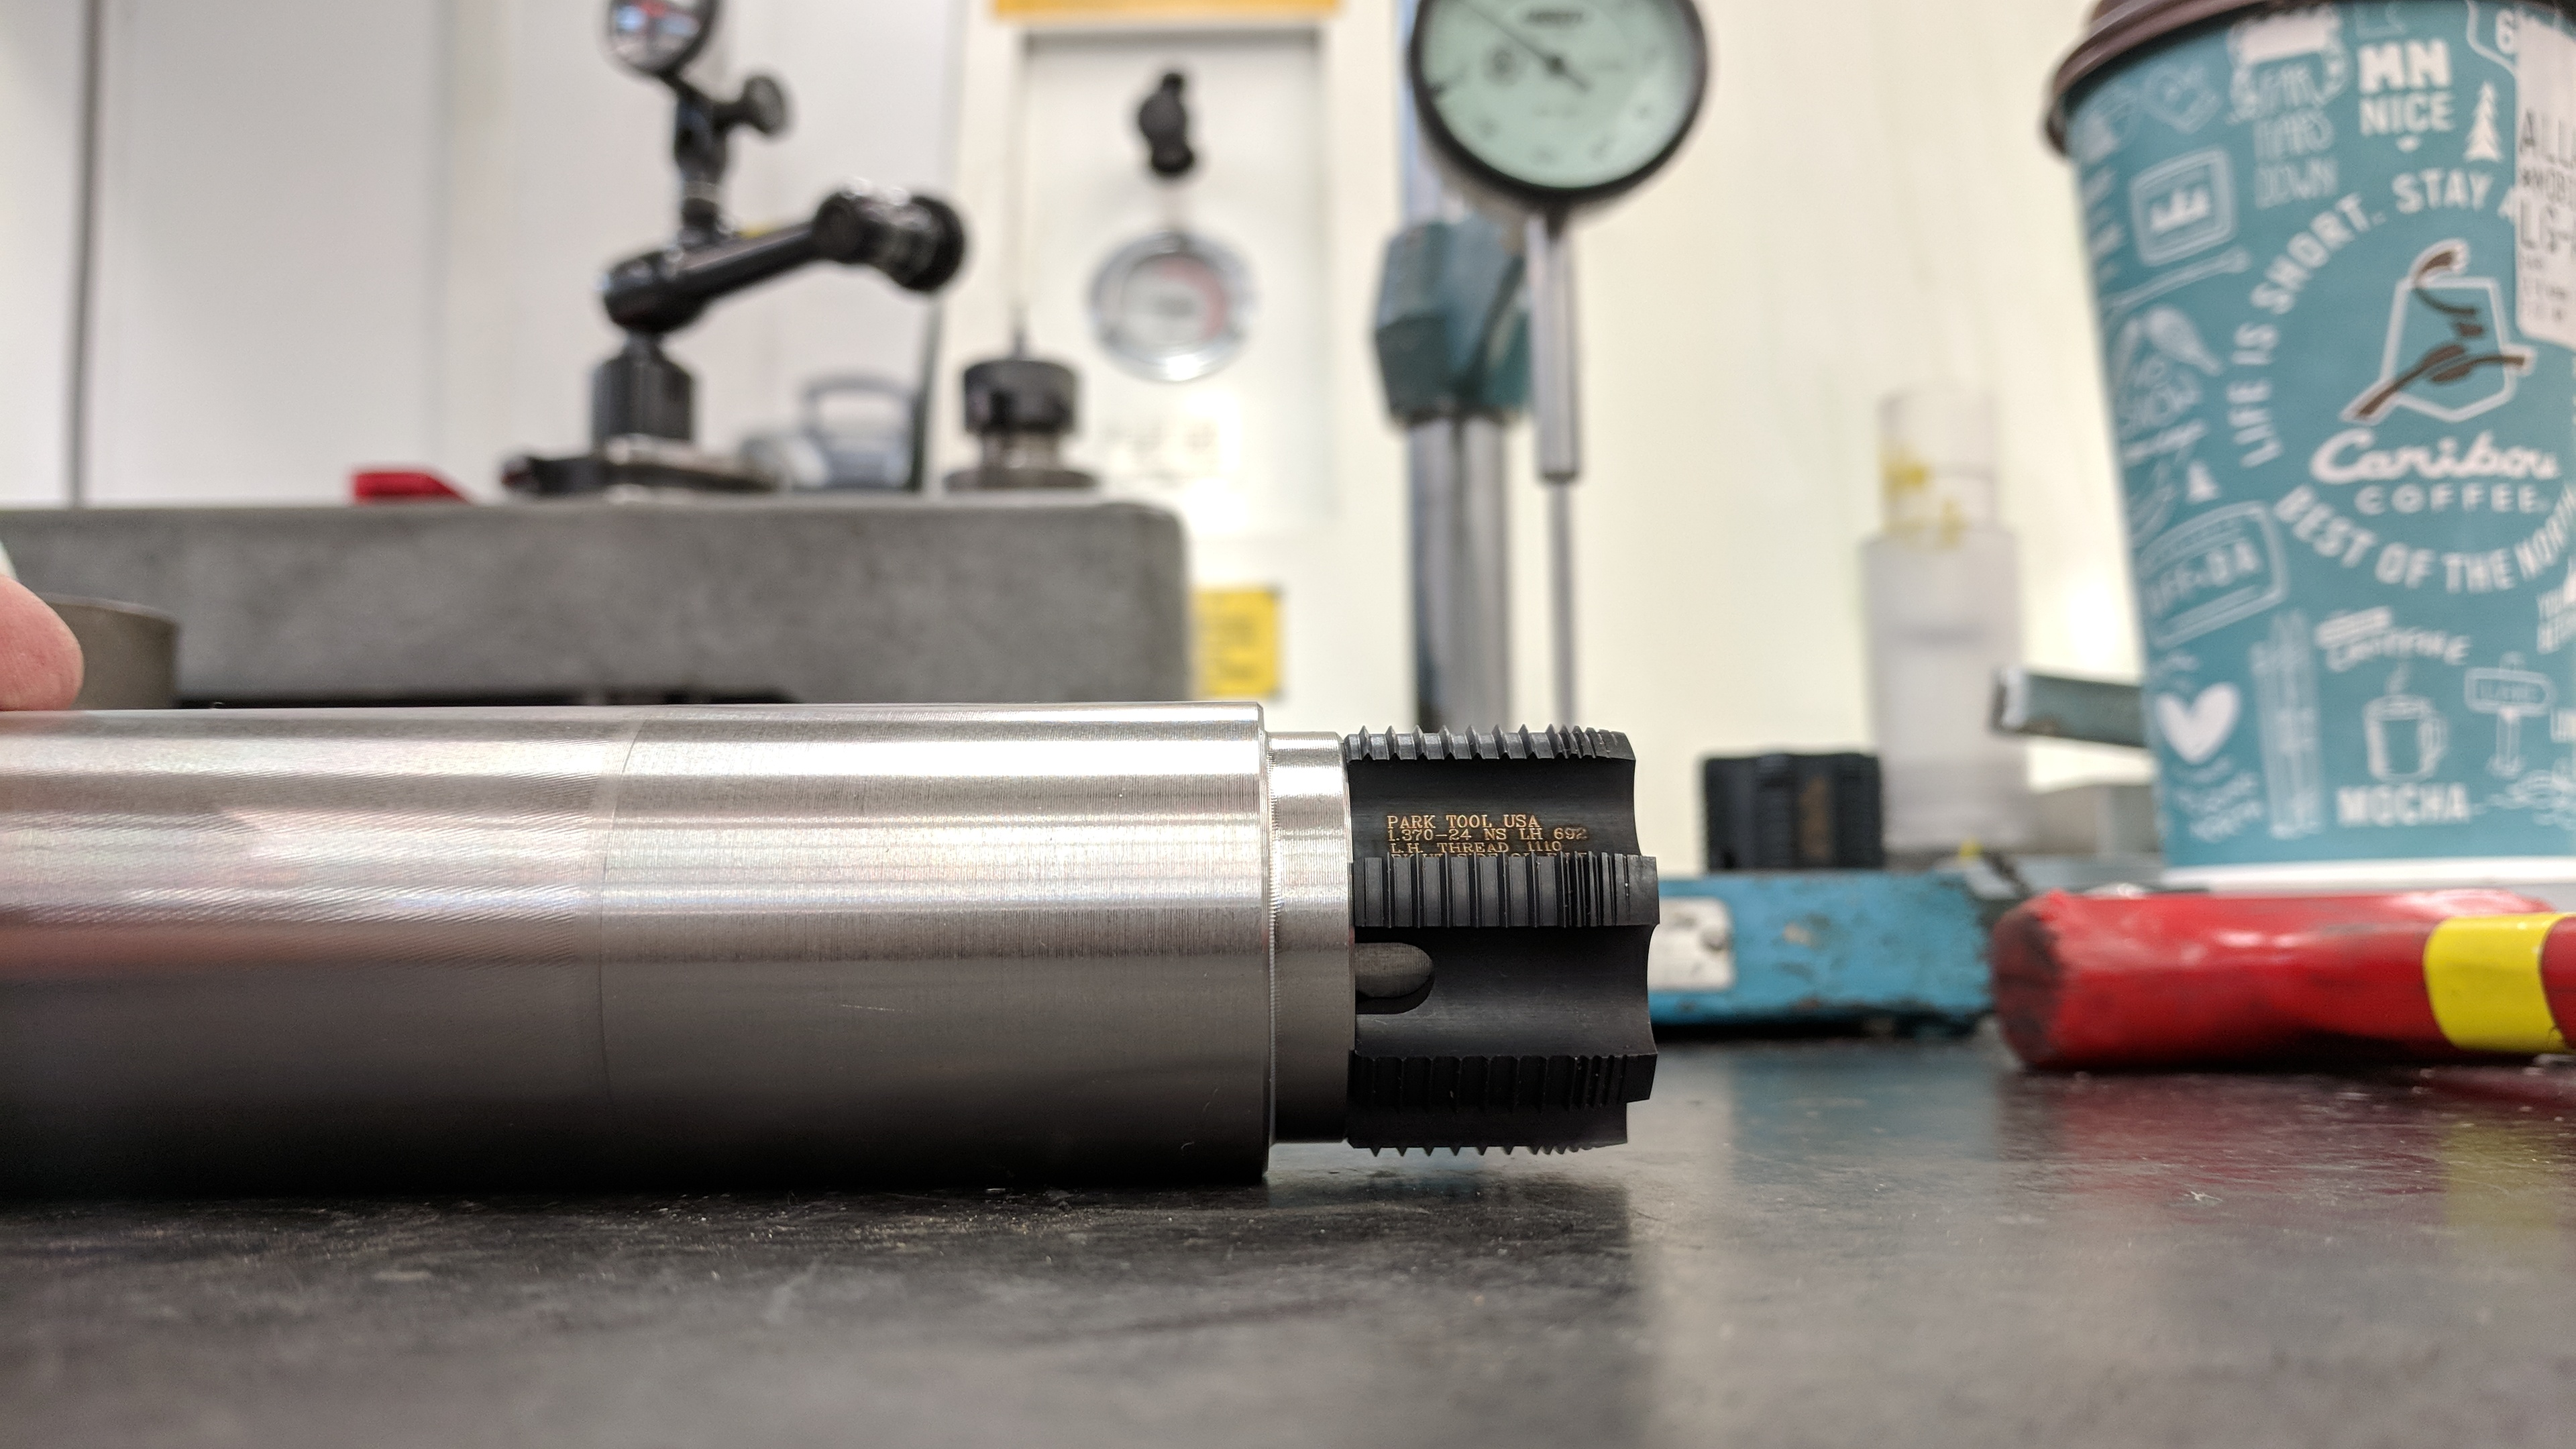
Enter the “Vark Tool” BB Chase and Face tool!
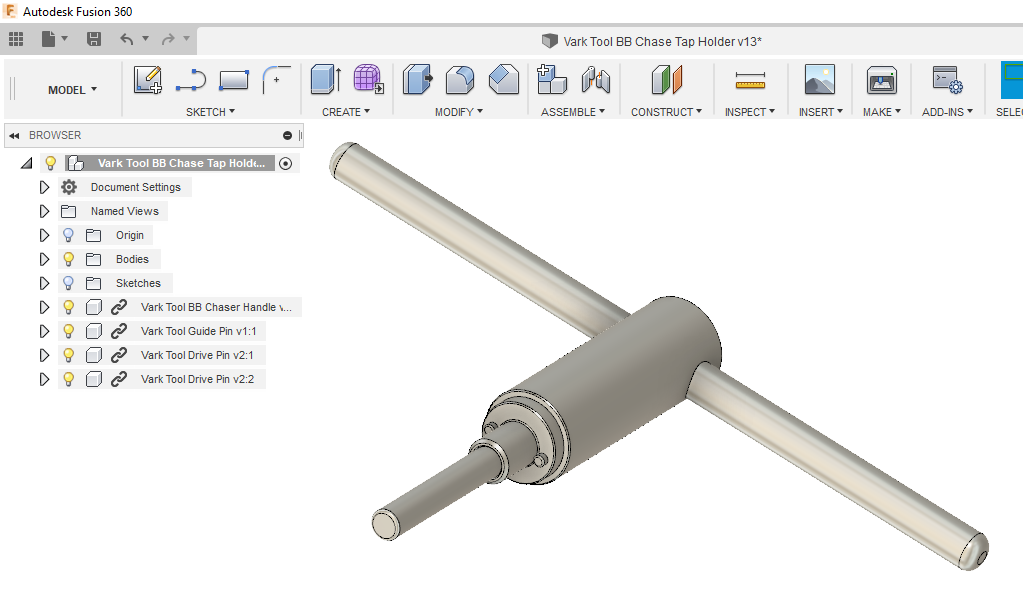
I ordered the taps and facing tool and took to Fusion 360 to design myself the handles.
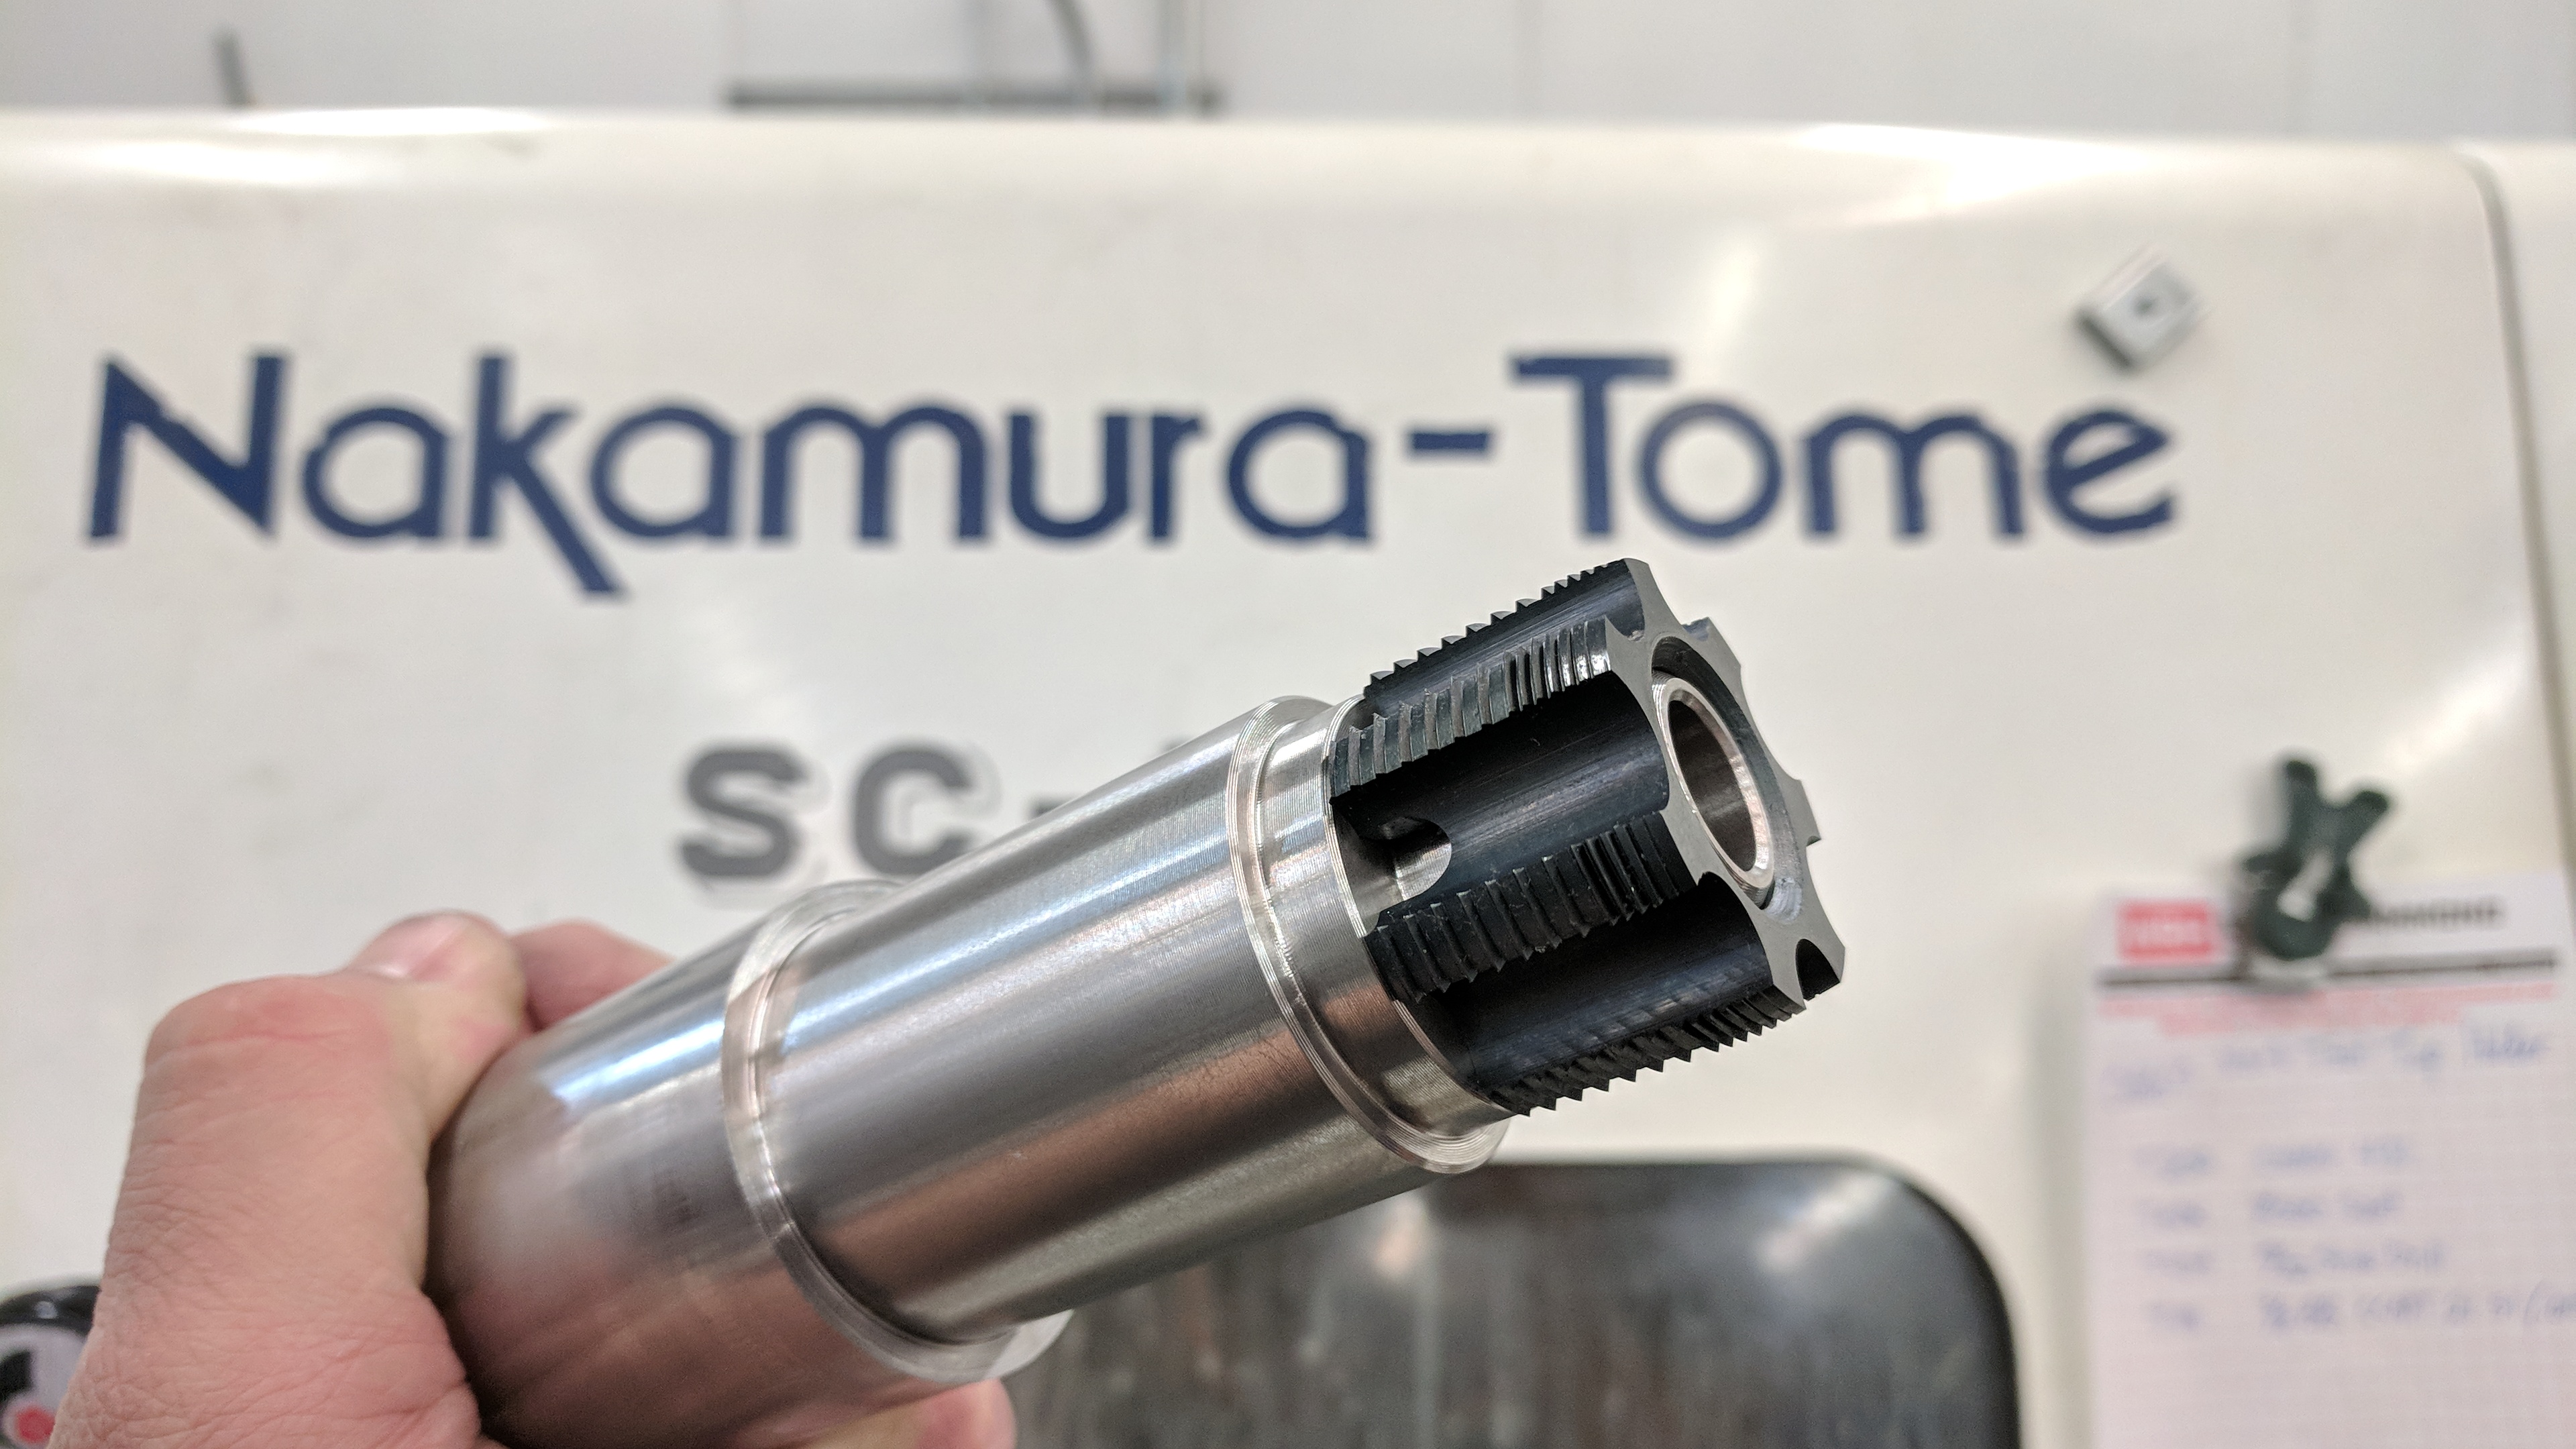
…..then waited. Waited for the right “scrap” material to show up at work. I wanted to use 303 stainless because its, well, stainless and it’s nice to machine. I also waited for the machine I wanted to use to be in between jobs on a weekend. My day job has this EXTREMELY sweet Nakamura Turning Center. It’s amazingly accurate and smooth. Below is a screen shot from Fusion 360’s Turning CAM.
I wanted the OD of the tool to be bigger than the major diameter of the taps so that when I set the tool down I’m setting it down on the body of the tool and not the tap.
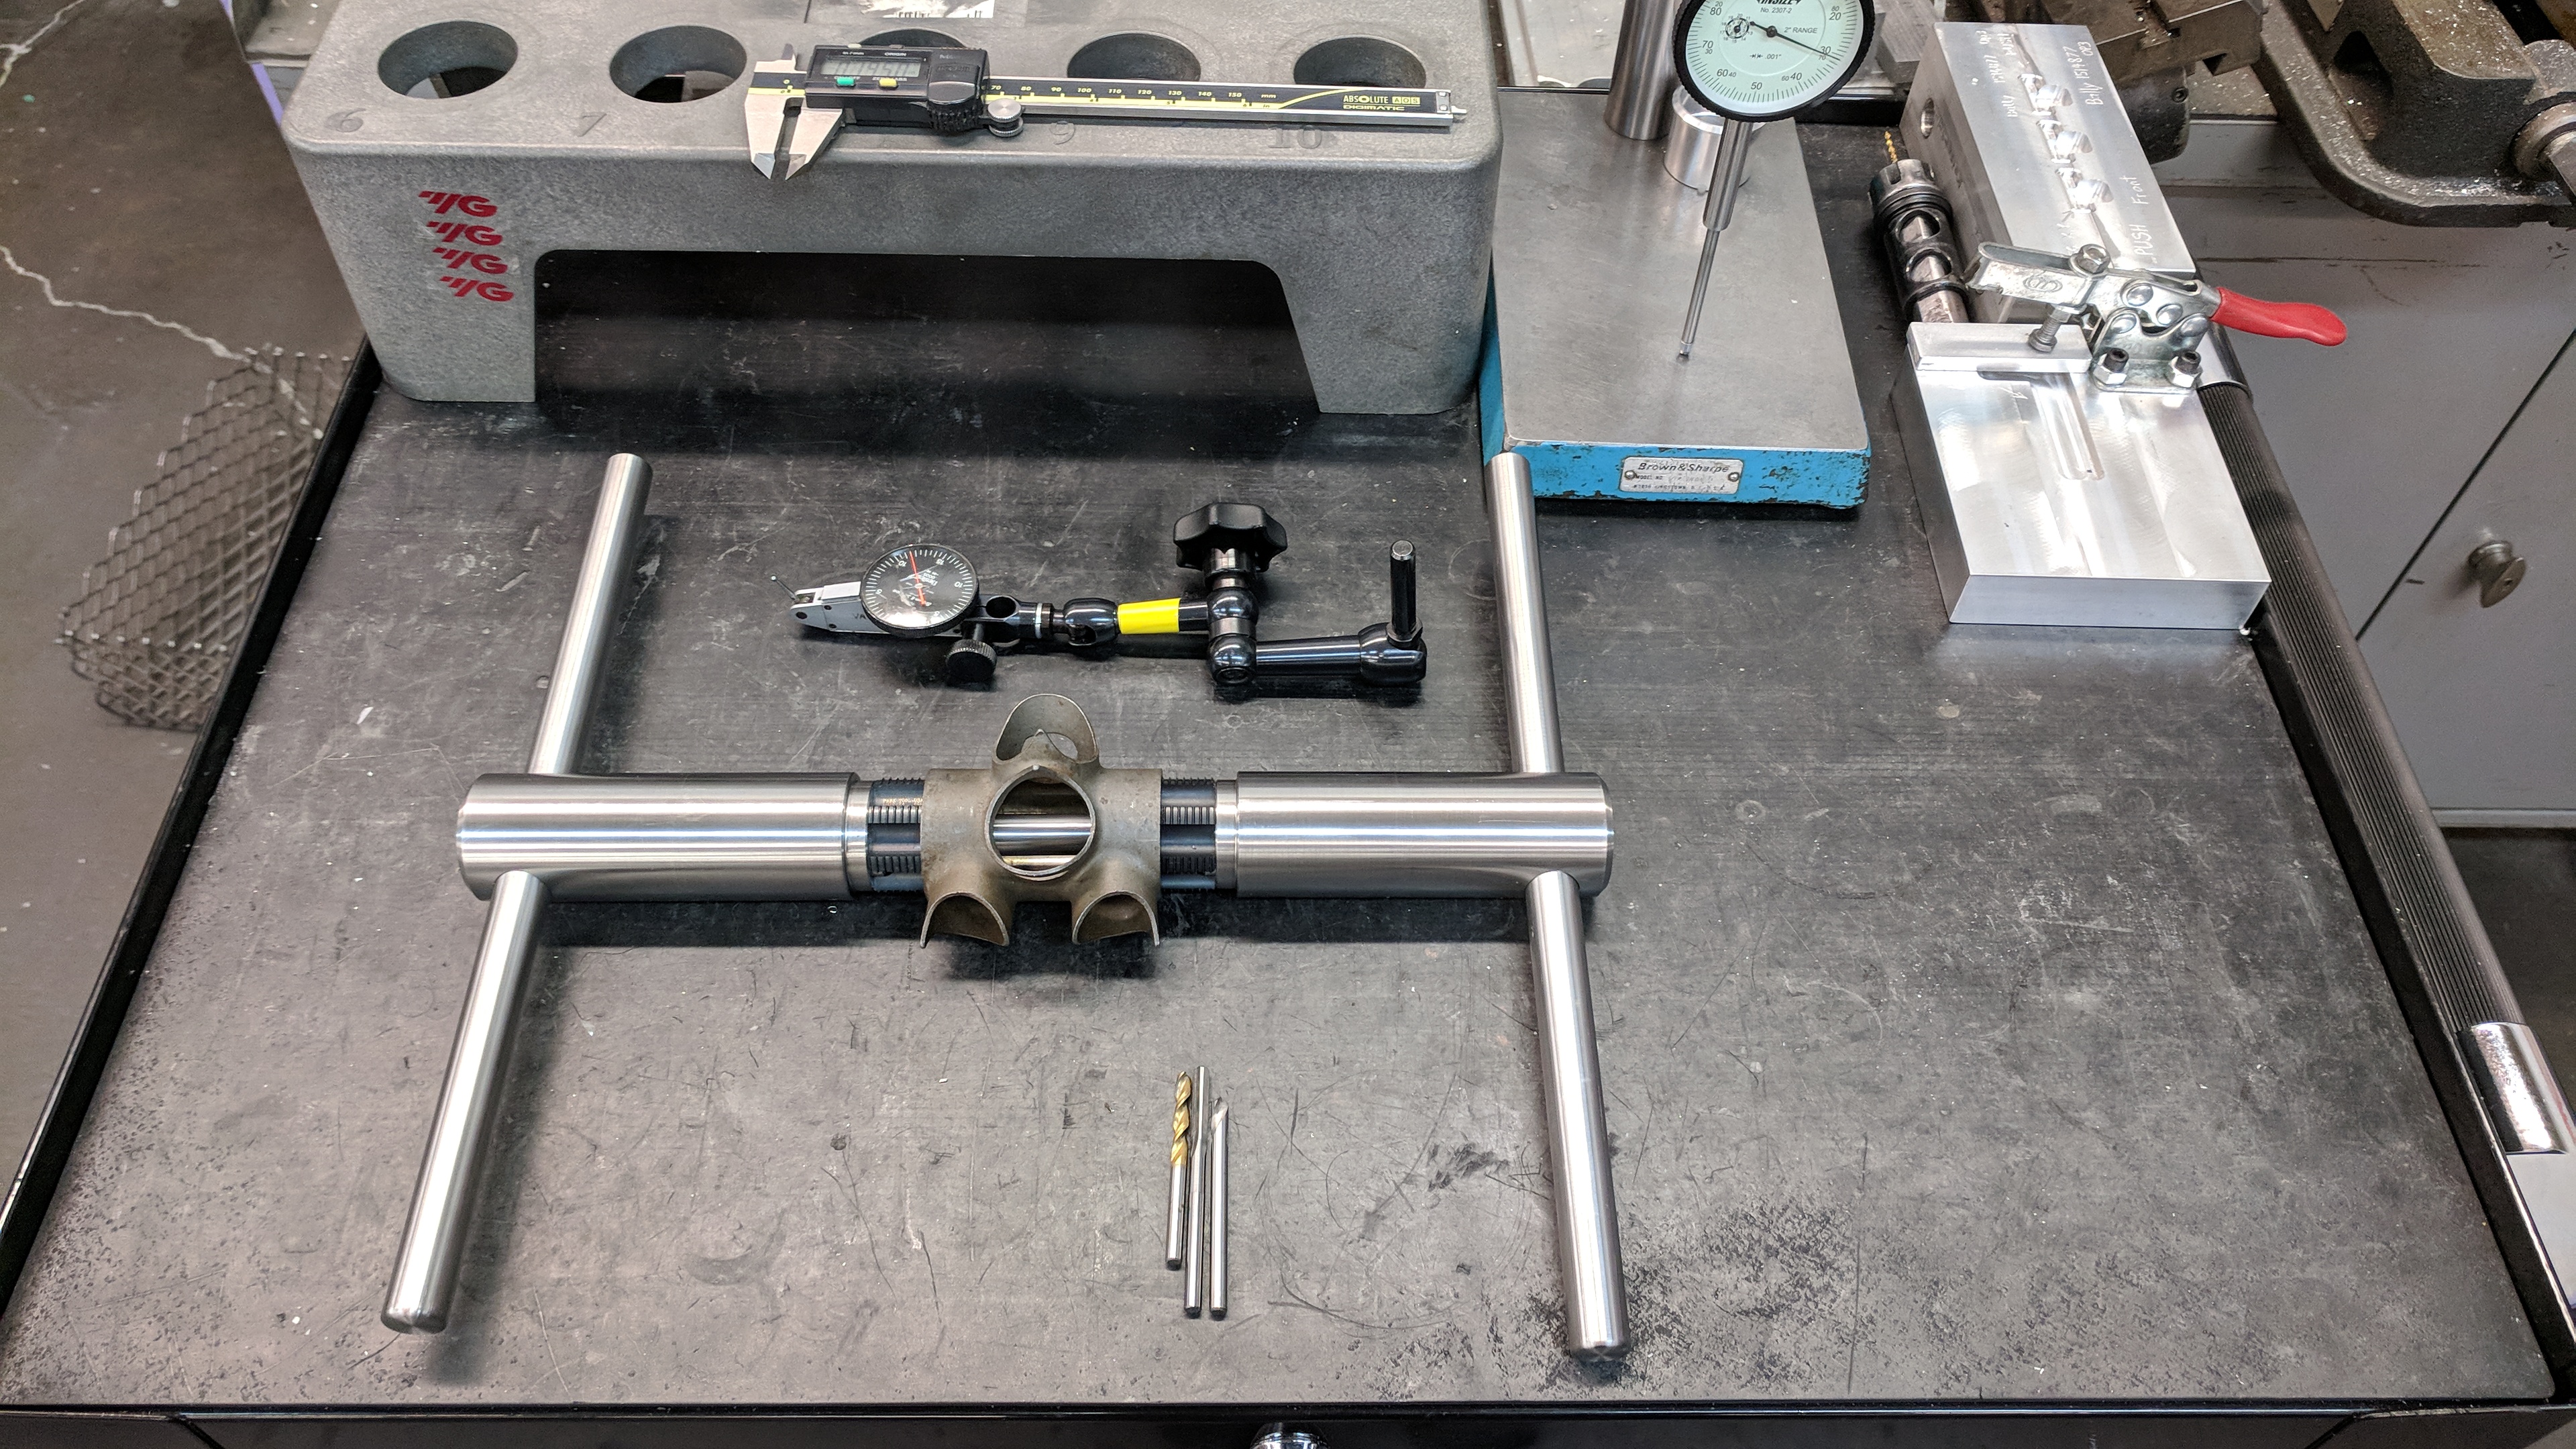
This pin goes between the two ends of the tool in order to keep the two taps centered during the chasing process.
That fit!
Next i drilled and reamed handle holes and tapped a set screw on the back to hold the handles in place. Then a couple 3/16″ dowel pins for driving the taps and facer.
Here is how the facing tool looks on there. I got the Park Tool # 690XL so I could use it to face 46mm head tubes when the time comes. Obviously some more tooling will need to be made for that to happen.
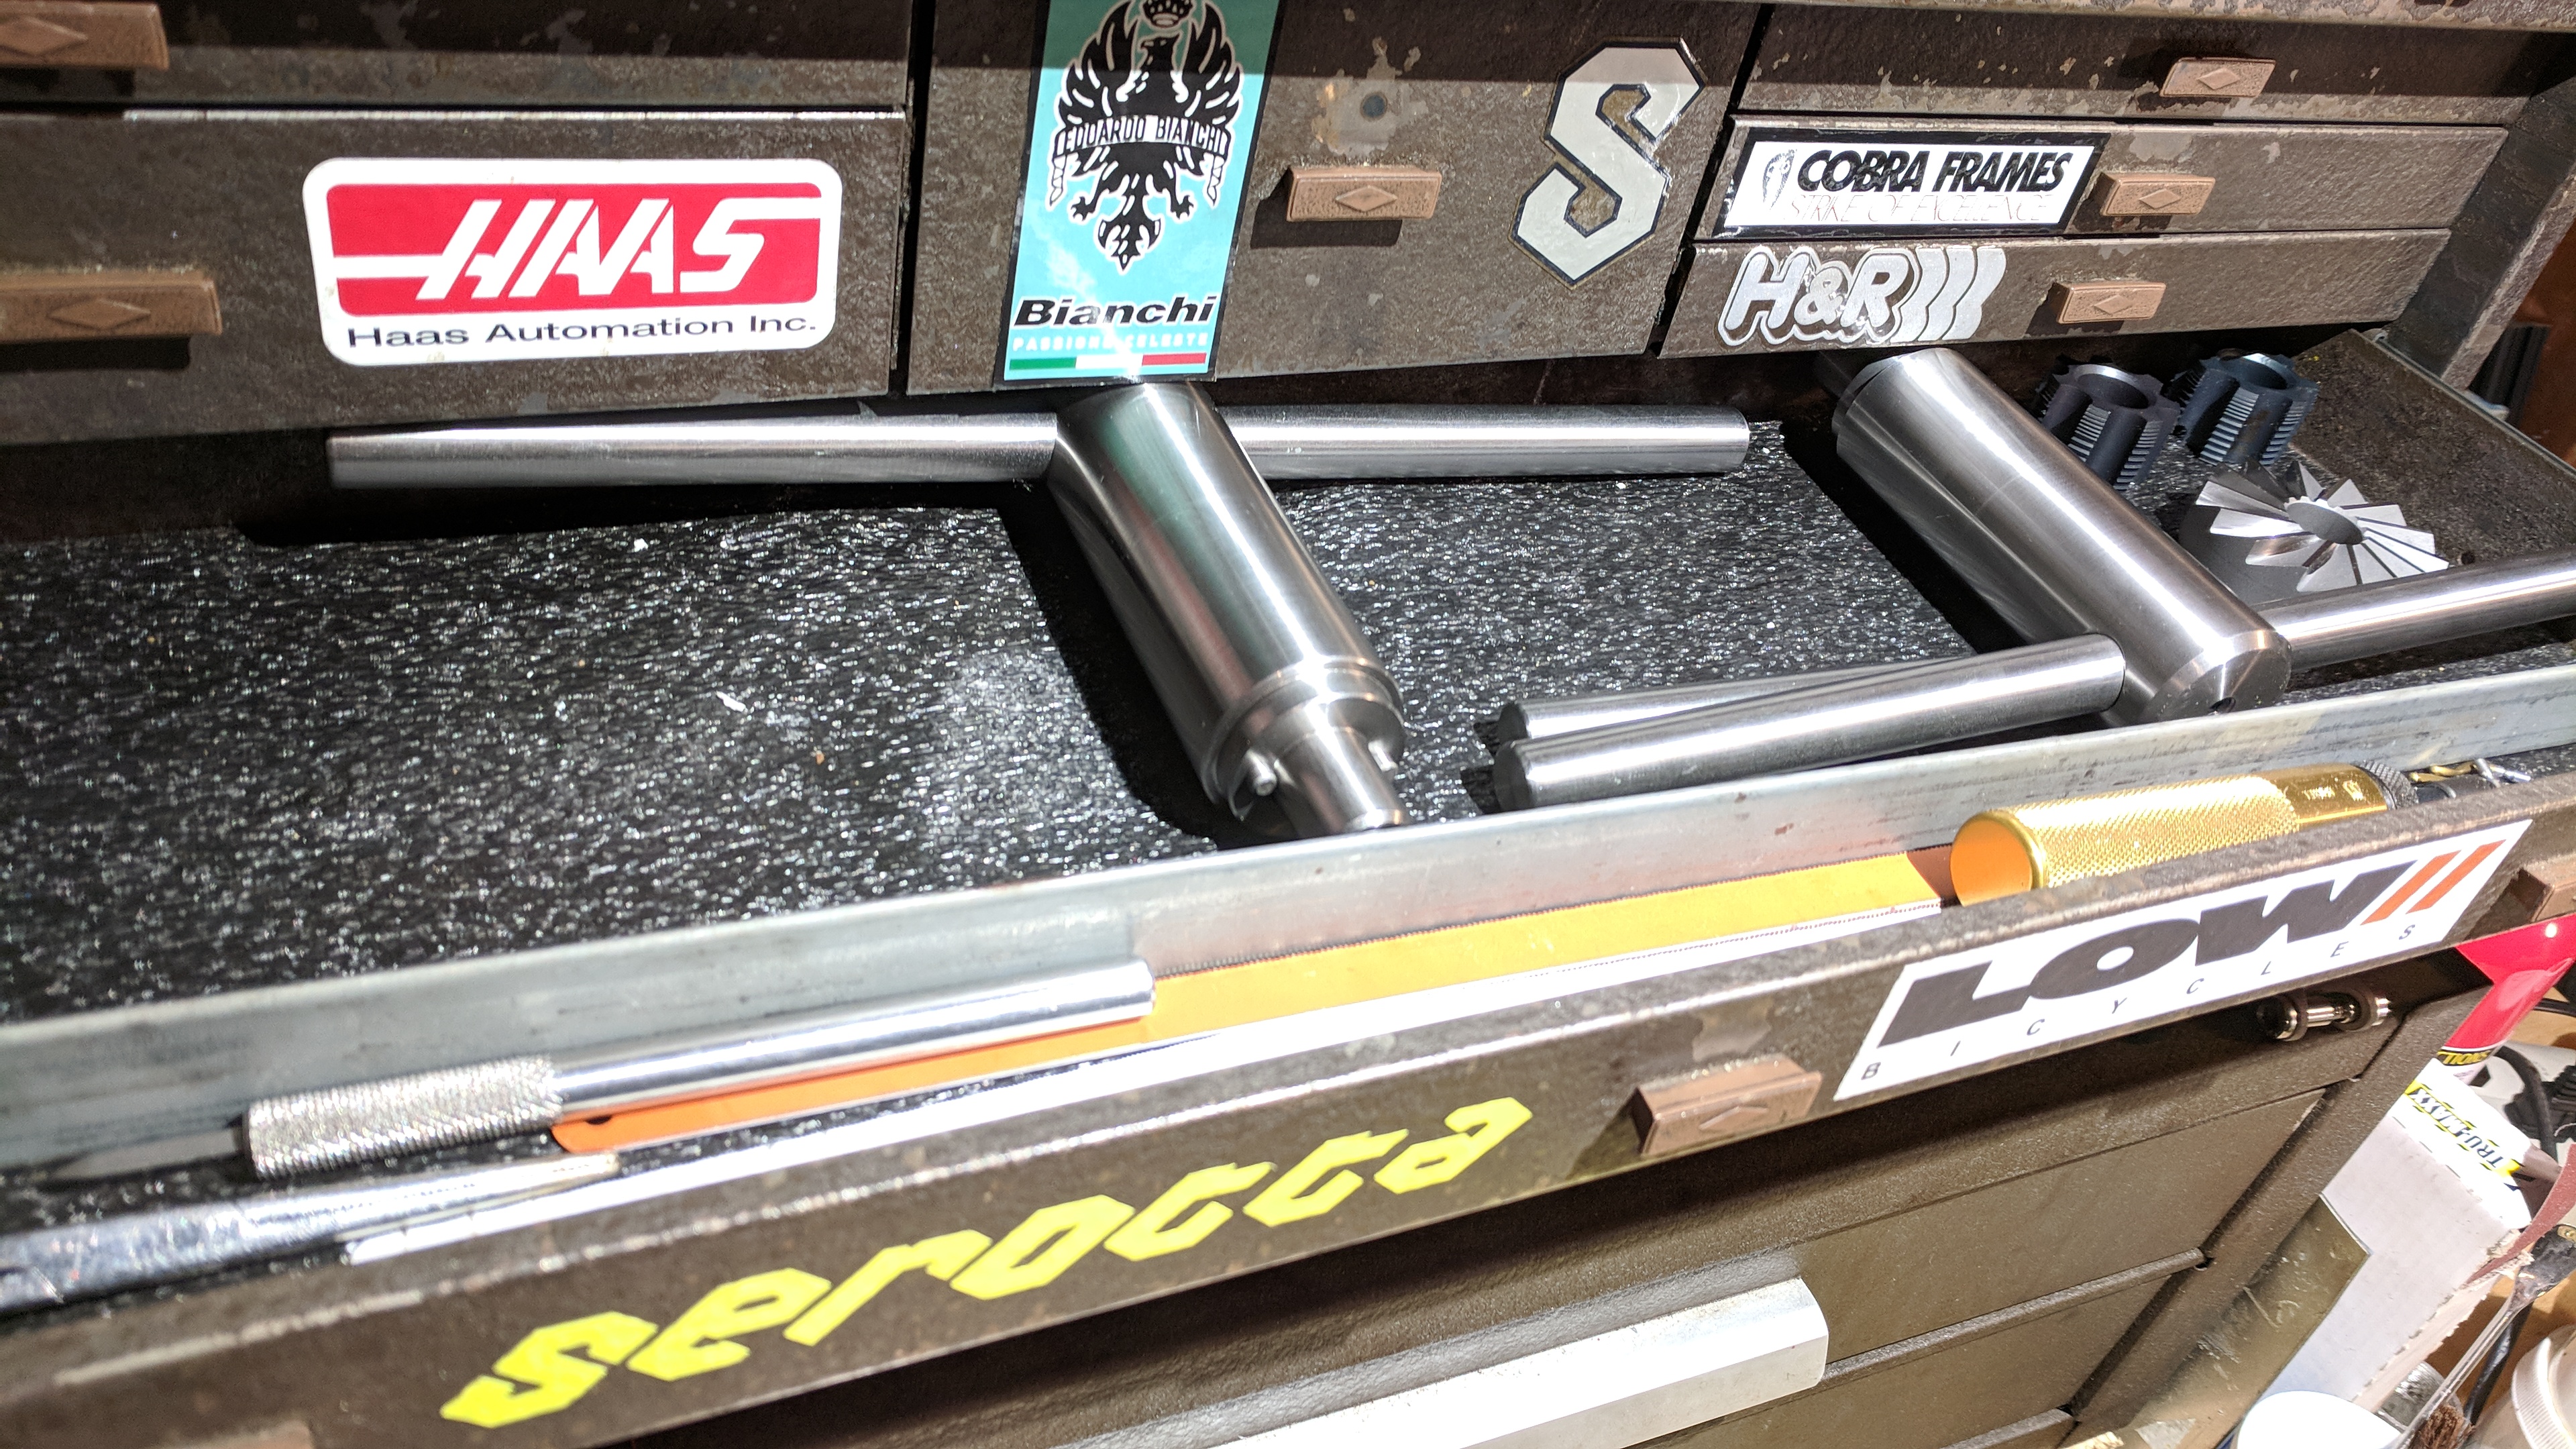
Perfect fit in my Grandpa’s old toolbox!
I am nearly (more like FINALLY) ready to use this on the All Road frame that I’m building for my Dad so I’m really excited to use this for the first time! I’ll certainly let you know how that goes!
Until then…. support Park Tool! They made this project worth doing! Now, let summer BEGIN and let’s have some friggin fun!!!! Enjoy every moment because it only happens once and we aren’t getting any younger!!!!
Allan
The adventures of a hobby Framebuilder/CNC Machinist/Family Man.